• Skip to main content
  • Skip to primary sidebar
  • Skip to secondary sidebar

Sixth Street Sundries

Emily Midgett

  • Home
  • About Me
  • Contact
  • OLO Marker Color Swatch Chart
  • Shop

alex syberia designs

Simon Says Stamp STAMPtember Collaboration: Alex Syberia Designs!

September 21, 2024

Hi friends! The STAMPtember celebration continues! I am back today with another STAMPtember collaboration. Today’s company spotlight is Alex Syberia Designs! This company is relatively new in the stamping community, but Alex’s designs are an absolute delight to work with. I’ve had the pleasure of geusting for them a few times, and the products and designs are so unique and beautiful that they are a joy to use! I used the beautiful new Alex Syberia Designs Close At Heart STAMPtember collaboration set to create a custom stamped and Copic-colored background. Let’s get started with the details!

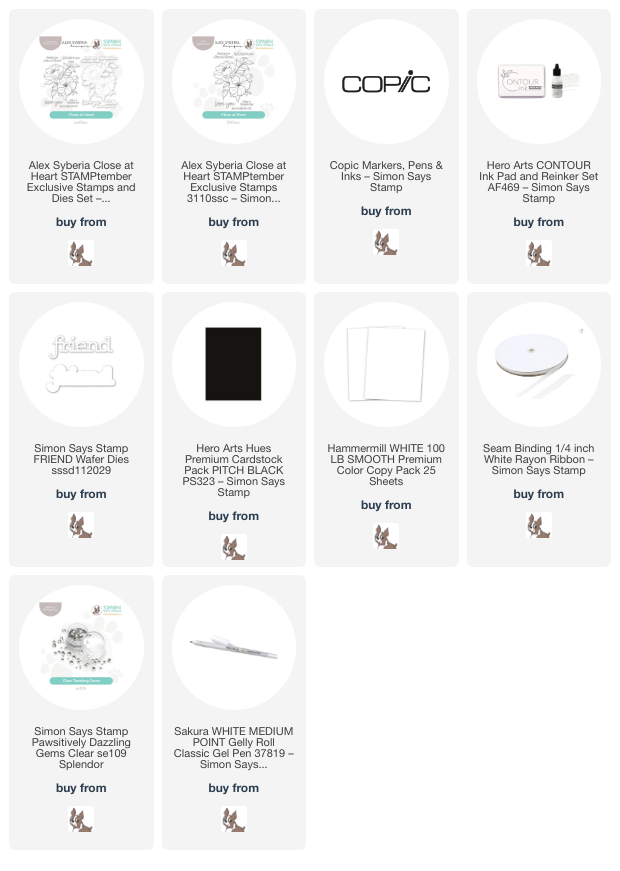
I began by stamping the large floral image from the Close At Heart set on an A2 panel of white cardstock using Contour Ink so that I could do some no-line coloring using Copic markers. I used a group of beautiful cool reds and eucalyptus greens to color the all of the images, creating a super vibrant floral patterned panel. To add a little more interest and fill in the blank spaces on the card, I used a black fine tipped pen to add delicate dots in the white spaces around the colored images. I think this is so fun and such a neat way to add interest to the background!

After I had finished the background, I turned my attention to the greeting. I heat embossed one of the sentiments from Close At Heart onto some black cardstock and used sharp scissors to cut it out. (You can use the coordinating dies to speed that process up, though!) I also die cut a delicate friend die cut from some black cardstock and vellum, layering them together with liquid adhesive. I popped them up with foam adhesive on the patterned background.

To accent the sentiment and add some extra texture, I tied a bow from some 1/4″ white ribbon and tucked it beneath the sentiment with liquid adhesive. I also accented the flower centers with some white gel pen. Finally, I added a few sparkling Clear Pawsitively Dazzling Gems for added sparkle!

Well, that’s all for today’s STAMPtember collaboration! These STAMPtember collaboration sets are limited edition and usually sell out very quickly, so if you’re on the fence, don’t wait too long! To sweeten the deal and make it even easier for you to shop, Heidi at Simon Says Stamp has offered free shipping for purchases over $25 for a limited time!!

This sweet set is sure to sell out quickly, so if you’re on the fence, don’t wait too long… these limited edition sets are gone forever once they sell out!

Thanks so much for stopping by today, and happy STAMPtember!!
Filed Under: alex syberia designs, simon says stamp Tagged With: copic coloring, copic markers, friend, no line coloring, stamptember

Alex Syberia Designs-August 2024 Blog Hop + Giveaway!

August 1, 2024

Hi friends! I am delighted to be hopping along with my friends at Alex Syberia Designs to celebrate Alex’s latest release. You should have arrived here from Emelie, and your next stop is Keisha. You can also find the full list on the Alex Syberia Designs in case you get lost! I was inspired by a dress from my closet (not an uncommon inspiration spot for me!) that I recently purchased, featuring brilliant pink and red blooms with pale sage green foliage and accented by a lacy white pattern all on a stark black background. (You can check out the dress HERE if you’re interested!) I love finding floral dresses that have lots of different colors for our family photos, because that gives me lots of different color options to tie together with my four kids and husband’s outfits. And, bonus, they provide me with lots of artistic inspiration, as well!

I was so inspired by the colors and design elements on my dress that I was able to create three different cards using the new Alex Syberia release for August 2024! I am just sharing the two cards on the left today, saving the details of the third for a later post. 😉

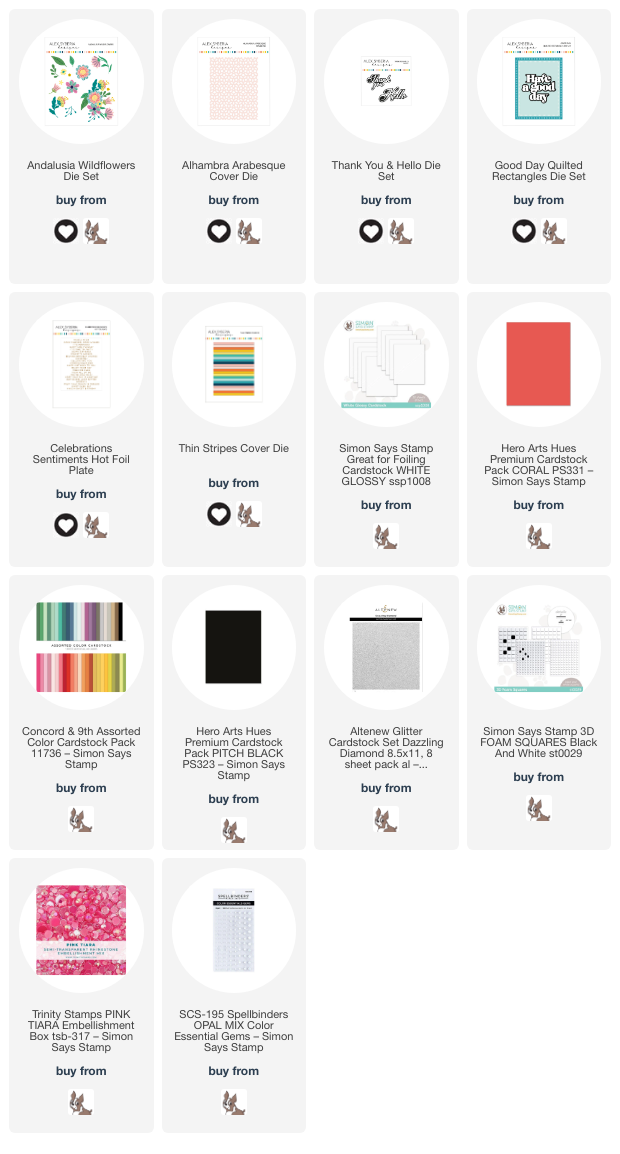
Both of my projects today feature the absolutely gorgeous blooms of the new Andalusia Flower Dies. These blooms are so bold and gorgeous and are super easy to use. I examined my cardstock collection and pulled out several colors that I thought would work nicely together: Coral from Hero Arts, several different shades of pink, red, and green from the Concord & 9th colored cardstock, as well as some Simon Says Stamp glossy white cardstock and white glitter cardstock to accent the Hero Arts Pitch Black background.

Whenever I am working with lots of cardstock colors and intricate layered dies, I always like to die cut bunches of the different elements and spend some time assembling the images. This allows me to get a good feel for the size and start formulating a layout in my head. Because I wanted to replicate those beautiful pinks and reds from my dress, I kept the color palette fairly monochromatic, mixing and matching the different layers of the new Andalusia Flower Dies with similar colors and adhering all of the elements with liquid adhesive.

After I had die cut and assembled the floral elements, I also die cut the new Alhambra Arabesque die, a lacy patterned background cover plate die that creates the most luscious and intricate pattern. I die cut the background once from a full A2 panel of glossy white cardstock, then trimmed it into two separate pieces so that I could create two backgrounds reminiscent of the pattern on my dress. I adhered the lacy patterned piece with liquid adhesive on my black background, then added some strips of white glitter cardstock and some more glossy white cardstock. For the greeting, I die cut the large scale sentiment die from the new Good Day Quilted Rectangles dies from some more white glitter cardstock, then backed it with a vellum shadow layer. I arranged the flowers around the large sentiment die cut, popping them up with multiple layers of foam adhesive, then added some sentiment strips that I had previously created using the Celebrations Sentiments hot foil plate and Thin Stripes cover die. Finally, I added a few shimmering gems for even more luxurious sparkle!

My second project uses the “leftovers” from the first project, this time flipped to a portrait orientation to keep things interesting. I used a slightly thinner portion of the Alhambra Arabesque die, adding three accent strips cut from white glitter and glossy white cardstock. After I had my dramatic black and white background, I arranged the floral die cuts, leaving space for a greeting!

I die cu the “hello” from the new Thank You and Hello dies, again from some white glitter cardstock and backed with a vellum shadow layer. I tucked another silver foiled sentiment strip beneath the die cut sentiment. I think the vivid florals and intricate background makes it perfect for an anniversary card! Finally, I added a few gems to the flower centers and around the bouquet to add lots of extra sparkle.

Well, that’s all for my projects today. I will have all of the details of the third card in the sneak peek image at the top of the post in a later post, so be sure to come back again! Now for some fun giveaway information:

Alex Syberia Designs is giving away a $50 gift certificate to 1 winner and a $15 gift card to 3 lucky winners. To play along, simply leave a comment on each stop of the hop.

Open internationally. All 4 winners will be drawn from the entrants that have played along with this Blog hop by midnight BST August 10th, 2024. Winners will be announced on the Alex Syberia Designs blog ‘Giveaway Winners’ page on August 11th, 2024.

Your next stop on the hop is Keisha. Thanks so much for stopping by today, and happy hopping!

Filed Under: alex syberia designs Tagged With: alhambra arabesque die, andalusia flower dies, anniversary card, birthday card, celebrations sentiments, die cutting, fashion inspiration, good day quilted rectangles, thank you and hello dies, thin stripes cover die

Alex Syberia Designs-Instagram Hop!

November 22, 2023

Good morning, friends! I am back with some more inspiration using the new Alex Syberia Designs November Release! In my previous release post, I shared a monochromatic homage to aqua with lots of layers and textural elements, and for today’s Instahop, I thought I’d share a pretty-in-purple project using the gorgeous new Midnight Blooms hot foil plate (ASD | SSS). Let’s get started with the details!

I began my project by hot foiling the absolutely stunning Midnight Blooms hot foil plate (ASD | SSS) using Speckled Aura hot foil onto some Hammermill white cardstock. I then used blending brushes with the Midnight Blooms Layering Stencil set (ASD | SSS) to blend Fig, Grape Soda, and Eggplant inks from Concord & 9th for the flowers, then used Tidepool, Juniper, and Peacock to blend the foliage on each bloom. (I will link all of the inks used in the link list below) I used the Midnight Blooms coordinating dies (ASD | SSS) to cut out the completed images.

After I had finished blending and die cutting, I used a blending brush to blend Fig ink in the center of a panel of white cardstock. I also splattered the panel with some shimmering iridescent purple and gold watercolor. To create a festive and interesting background, I also used the small starburst stamps from the Midnight Blooms stamp set (ASD | SSS) with Altenew’s Enchanted Gold pigment ink. It’s very subtle, but I think that extra step adds so much interest and shimmer to the background for my blended flowers!

After my background was complete and dried, I arranged the two floral stems on the card front and adhered them with foam adhesive to add extra dimension. I also added a twinkling gold twine bow for extra texture. For the greeting, I heat embossed a sentiment from the Midnight Blooms stamp set (ASD | SSS) using Hero Arts Iridescent Gold embossing powder, then die cut it with the coordinating die included in the Midnight Blooms coordinating dies (ASD | SSS). (Absolutely love when companies incldude dies for the sentiments!) A few sparkling amethyst gems added one final touch of sparkle!

Well, that’s all for my project today. I am taking part in a fabulous Instagram Hop today, and there are tons of prizes and a wealth of inspiration to be had amongst the participants using the wonderful projects from the Alex Syberia Designs November 2023 Release, so I hope you’ll hop over and take a peek! Thanks so much for stopping by today, and have a marvelous day!

Filed Under: alex syberia designs Tagged With: happy new year, hot foiling, layered stencils, midnight blooms

Alex Syberia Designs November Collection Blog Hop & Giveaway

November 20, 2023

Hi there! Today, I am so excited to be hopping along with Alex Syberia to celebrate her newest release for November 2023. You should have arrived here from Emelie, and your next stop is Erica. You can also find the full hop list at the Alex Syberia Designs Blog. This month’s release is filled with beautiful holiday designs, both traditional and a bit non-traditional, and they’re absolutely scrumptious! (You can check it out HERE at Simon Says Stamp, as well!) I have two monochromatic holiday cards today that fit that non-traditional description, but I think they’re so elegant and super festive. Let’s get started with the details!

Both of my projects feature a unique blend of different shades of aqua. I have come to think of aqua as basically a neutral that can work as a supporting actor to lots of different colors, but sometimes aqua is so gorgeous that I want it to shine all on its own. I particularly love Juniper and Tidepool shades from Concord and 9th; they’re two different intensities of the same shade of serene aqua, with more green than blue, and today I’ve paired them with Peacock ink from Concord and 9th to help brighten them up and bring out the undertones of blue.

For my first card, I blended some Peacock ink around the edges of a Juniper cardstock panel, then splattered some shimmering glitter watercolors to add some beautiful texture and shimmer to the background of my card. I then die cut the incredibly beautiful new Snowflake Petals cover plate die (ASD | SSS) from the Alex Syberia Designs November 2023 release using a new addition to my craft room: Holographic Aqua Mirror cardstock from Simon Says Stamp. You can see how incredible the shine is on this cardstock in the photos, but paired with the stunning greens of the card front panel… chef’s kiss!! I adhered the delicate Snowflake Petals cover plate die cut using some liquid adhesive.

For the greeting, I blended Tidepool and Juniper ink on some Tide Pool cardstock using the bow and sentiment stencils in the Holiday Wreath Branch Stencil & Die set (ASD | SSS). I also die cut some glittering aqua foliage using the foliage dies from the new Joyful Poinsettia die set (ASD | SSS) and some gorgeous glitter paper from Altenew. My best tip for creating monochromatic cards like this is to be creative with the textures; if you want to keep the viewer’s eye busy and interested in the project, having multiple textures in similar shades of the same color helps prevent your recipient from being bored! I arranged the foliage in a little swag tied together with the stenciled bow, then popped up the greeting with some foam adhesive. I added a few seafoam gems for some more sparkle.

My second card features the Juniper, Tidepool, and Peacock ink again, this time blended to create a monochromatic ombré background. After blending my card front with these inks and blending brushes, I again splattered the vivid background with some more sparkling handmade glitter watercolors. This extra step adds subtle-but-beautiful texture and shine to the background! To coordinate with the background, I die cut the different layers of the Joyful Poinsettia die set (ASD|SSS) from coordinating colored cardstock, blending on the edges of the die cut layers with the coordinating shades of ink. This added blending helps to bring out the beautiful embossed details on the die cuts, as well. I die cut some more foliage using the foliage dies from the Joyful Poinsettia die set (ASD|SSS) using the same glitter paper from Altenew used on the first card.

After I had die cut my focal point, I die cut the detail layer of the Noel die (ASD | SSS) using some more Holographic Aqua Mirror cardstock and the background bubble layer using some thin vellum. I adhered the two layers together using liquid adhesive, then began arranging my flower and foliage, I placed the poinsettia in the center of the blended background, offsetting it slightly to the left and popping it up with foam adhesive. I adhered the foliage behind the flower, arranging the die cut pieces so that it was almost radiating out from the flower. I popped up the greeting die cut with some more foam adhesive, then added a few more gems in coordinating colors for some more sparkle!

Well, that’s all for my projects today. Now for some fun giveaway information!

Alex Syberia Designs is giving away a £85 ($100) gift certificate to 1 lucky winner and a £15 ($18) gift card to 5 winners. 
Open internationally. All 6 winners will be drawn from the entrants that have played along with this Blog hop by midnight BST November 26th, 2023. Winners will be announced on the Alex Syberia Designs blog ‘Giveaway Winners’ page on November 27th, 2023.

Your next stop on the hop is Erica. Thanks so much for stopping by today, and happy hopping!

Filed Under: alex syberia designs Tagged With: christmas card, holiday card, holiday wreath branch stencil, joyful poinsettia

STAMPtember with Alex Syberia Designs!

September 8, 2023

Hi friends! I am so excited to share the STAMPtember Alex Syberia Designs collaboration set for September 8, 2023! Alex Syberia is a new company for me, but you know me and my flower obsession, and I couldn’t resist this gorgeous floral set. Alex Syberia’s floral designs are always gorgeous (you can check out more of her stamp sets in the Simon Says Stamp store HERE), and this limited edition collaboration Alex Syberia STAMPtember set is no exception! Let’s get started with all of the details on my project.

To start, I stamped the floral images from the Alex Syberia Designs STAMPtember set onto some watercolor paper using Brass embossing powder from Hero Arts. I taped my embossed panel down to my watercolor board, then used Daniel Smith watercolor tubes to add lots of pretty pink and jewel green to my embossed images. I knew that I wanted to put these flowers on a super color saturated background, so I added some subtle pink washes around the watercolored images, right up to the edge of the embossed image. After I’d finished watercoloring, I used some super sharp scissors to fussy cut the images. (I didn’t receive the dies in time to create this project, but you can absolutely purchase the Stamp and Die Set to save yourself some time and your hands some work!)

For the background, I wanted to highlight those gorgeous, vivid magenta tones on the flowers, so I trimmed down a panel of Simon Says Stamp’s Doll Pink cardstock and ran it through my die cutting machine with the Magnolia Branches embossing folder. After I had created this gorgeous textured background, I gently swiped the Enchanted Gold pigment ink from Altenew over the raised areas, creating some super subtle “gilding.” I also used blending brushes to lightly blend Amethyst Pawsitively Saturated ink around the edges of the embossed panel. I think this tone-on-tone ink blending adds a level of richness and luxuriousness to the card front! To make the background even more luxe, I splattered some super sparkly gold watercolors on the background. So many beautiful little additions to make the card sing!

After I had finished the background, I heat embossed a couple of the sentiments included in the STAMPtember Alex Syberia Designs collaboration set using the same Brass embossing powder, then trimmed them down to sentiment strips. I arranged the flowers in a small bouquet on my embossed, blended card front, then used foam adhesive to pop them up. I added the sentiment strips with a double layer of foam adhesive to make sure that they didn’t get lost on the monochromatic background. The final touch was to add a few shimmering gems to add extra sparkle!

Well, that’s all for today’s project! If you love these STAMPtember collaboration sets, don’t wait on them, because they’re limited edition, and once they sell out, they’re gone for good! To make your shopping experience even sweeter, you can use code FRSHP for free shipping on any US order over $25 or enter code 799 to get a $7.99 discount on international shipping! So awesome of Simon Says Stamp to do this for their shoppers!

Thanks so much for stopping by today, and have a marvelous day!

Filed Under: alex syberia designs, simon says stamp Tagged With: Daniel Smith, embossing folder, magnolia embossing folder, stamptember, watercolor

  • Page 1
  • Page 2
  • Go to Next Page »

Primary Sidebar

  • Facebook
  • Instagram
  • Pinterest
  • YouTube

Favorite Shops

Secondary Sidebar

Subscribe

Enter your email address to subscribe to this blog and receive notifications of new posts by email.

Instagram
Something is wrong.
Instagram token error.
Follow
Load More

Archives

Tags

3D embossing folder alcohol markers better press birthday birthday card blog hop card kit christmas christmas card christmas tag colored pencil copic copic coloring Daniel Smith die cutting embossing folder embroidery felt giveaway holiday holiday card hot foil ink blending karin brushmarker pro layered stencil masculine my monthly hero new release no line coloring no line watercolor OLO marker olo markers original illustration pawsitively saturated rainbow shaker card slimline stamping stamptember stencil thank you thinking of you valentine's day video watercolor

Popular Posts

Simon Says Stamp Sending Cheer Blog Hop- Day 2 + Freebie + Giveaway!
Joyful Snowman with New Simon Says Stamp Sending Cheer Release!
Simon Says Stamp Sending Cheer Release: Now Available!
Altenew October 2026 Release Blog Hop + Giveaway!
Special Release: Simon Says Stamp Limited Edition STAMPtember Christmas Card Kit!
February 2018 My Monthly Hero Blog Hop!
Altenew March 2020 Release Blog Hop+Giveaway!
Simon Says Stamp Cozy & Bright Inspiration, Part Two!
Essentials By Ellen September Blog Hop!
Waffleflower December Release Blog Hop!

Disclosure

Some affiliate links are used in my posts. This means that, should you click on one of my links and purchase something from that company, I will receive a small portion of the sale at no extra cost to you. I use the money earned from these sales to help maintain my blog. I so appreciate you visiting and, if you do choose to use one of my affiliate links, thank you so much for your support!
Copyright © 2026 ·Brunch Pro Theme · Genesis Framework by StudioPress · WordPress · Log in
Loading Comments...