• Skip to main content
  • Skip to primary sidebar
  • Skip to secondary sidebar

Sixth Street Sundries

Emily Midgett

  • Home
  • About Me
  • Contact
  • OLO Marker Color Swatch Chart
  • Shop

Concord and 9th

Concord and 9th Guest Post- Window Shoppe!

March 13, 2023

Hi there! I am so thrilled to be a guest for Concord and 9th for their March release! I have gotten into a bit of a groove working with the same companies each month, and they keep me so busy that I am not able to really “make” time to play with the other companies that I love, which breaks my heart a little. Having the opportunity to guest for one of my favorite companies gave me the excuse that I needed to be able to pull out so many of the goodies that I’ve been hoarding, ahem, I mean hiding, in my “to be used” bins in my craft room!

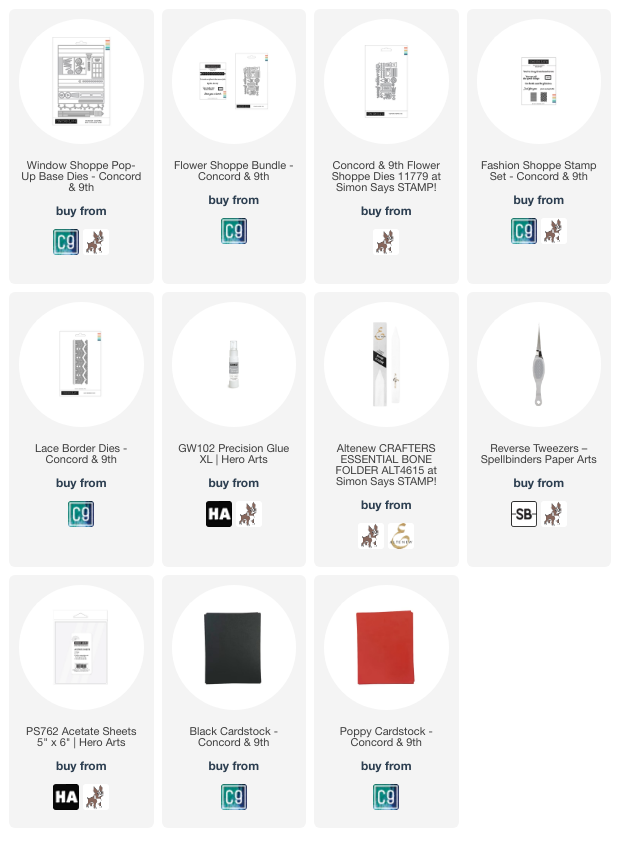
The new March Release is absolutely spectacular, featuring so many unique and fun products… but today’s focus is about the new Window Shoppe Pop Up Base dies. Let me preface this post (and the subsequent posts, hehe) with this: I am not a “pop up” kinda girl. I leave that to the clever and creative professional-types, like Jennifer McGuire, who are so good with the fun folds and interactive, clever cards. My jam is coloring, mainly. However, and that’s a biiiiig however, the new Window Shoppe Pop Up Base dies are truly user-friendly. I was able to figure these dies out so quickly; I was utterly shocked at how easily I was able to make all of the components work together. I will say that fine-tip reverse tweezers (I love THESE), good liquid glue (I like THIS glue), and a bone folder (I love THIS ONE) are going to be your best friends when assembling these die cuts.

My card for today’s post is inspired by one of the cute boutiques residing in my town’s square. It features a chic black and white color scheme, complete with twinkly lights!

For this first card, I wanted to keep things fairly simple, so I kept the color scheme fairly simple and began by die cutting all of the main components for the Window Shoppe Pop Up Base from white cardstock. I knew that I wanted black accents, so I die cut several elements included in the Window Shoppe Pop Up Base from Black cardstock from C9. I assembled the main portion of the shop quickly, using some heavyweight Acetate from Hero Arts to back my windows and door, which adds some stability to the shop front so that you can add your door and any accessories or decor to the interior of your shop. I also added a matte gold foil door knob and mail slot for a bit of extra textural interest.

For the “extras,” I wanted to keep things relatively simple, both in design and color, adding just a few pops of color. I die cut the cherry red bicycle (included in the Window Shoppe set) from some Poppy cardstock (that shade of red is simply divine), as well as some of the flowers, bushes, and cart from the Flower Shoppe set. I had purchased the Lace Border dies a long time ago, and thought they looked like the perfect crocheted lace curtains!

For the awning, I couldn’t resist giving it some black and white stripes, so I used my gridded mat to lay down some 1/2″ masking tape at intervals on my awning die cut. I then used a blending brush to blend some black ink and carefully removed the masking tape strips. I had to add the twinkly lights; I think that is such a unique little addition to the set, and makes the shoppes so trendy and chic! I cut the wire from black cardstock, then die cut the lights from some iridescent white cardstock from my stash, adding another touch of textural interest. I adhered everything with liquid glue, adding a sentiment strip that was stamped using a greeting from the Fashion Shoppe stamp set, popped up using foam adhesive, and accented with some bright red blooms.

When I tell you how in love with these dies I am, I’m absolutely not lying. They. Are. So. Much. Fun. And bonus, they lie flat in your A2 envelope, so you don’t even need to have a larger envelope! They might cost a touch more, as there is a lot of cardstock involved, but I’ve not weighed them to see if they are beneath the 1 oz mark. I can’t wait to share the other projects that I’ve made with you using this marvelous new series! Be sure to check back throughout the week to see more inspiration using the Window Shoppe Pop Up Base. Thanks so much for stopping by today, and have a marvelous day!
Filed Under: Concord and 9th Tagged With: pop up card, window shoppe

Welcome Baby- A Baby Shower Blog Hop!

June 27, 2020

Hi there! Today, I have the pleasure of helping to celebrate a fellow Ellen Hutson teammate (and darling friend) having a sweet baby boy! Carly Minner (who you will know from many different design teams) is not only a talented cardmaker, but she is also the super organized and incredibly sweet Design Team Coordinator for Ellen Hutson! Today, I am thrilled to be taking part in a blog hop to welcome her baby boy!

When I think of Carly, I think of crisp white space with pops of fun colors (and lots of glitter!). Instead of a super cutesy critter card, I thought I’d create a more graphic card with darling baby boy colors and some fun word dies. Let’s get started with the details!

I began by stamping some random polka dots/confetti on the top and bottom of a crisp white card panel using the classic Bokeh Builder from Essentials By Ellen, one of my all-time favorite stamp sets from the Essentials By Ellen line. It’s so versatile and so much fun to just sit and stamp a fun polka dotted pattern! I used Mint, Sky Blue, Misty Coast, and Metropolis inks from Pinkfresh Studio to stamp my pattern, stamping the Metropolis ink off once on scratch paper to achieve a slightly more subtle gray for the tiniest dots.

Next, I die cut “welcome” twice from white card stock using Concord and 9th’s Tall Type dies, adhering the die cuts together to add a bit of extra height to the die cuts, making them a bit more visible when added to the bright white background. I also die cut Honey Bee Stamps’s Baby Honey Cuts, again twice from white cardstock to create a more dimensional die cut.

I trimmed the polka dotted panel down, added some strips of minty-turquoise foil to the top and bottom, then mounted it on a minty-aqua A2 panel of cardstock, adding the dimensional sentiment die cuts using liquid adhesive.

Well, that’s all for my project today! I am so incredibly thrilled for Carly and her husband as they embark on this amazing, exhausting, wonderful journey of parenthood! Wishing them all the congratulations and lots of love for their new little fella!

Now, here’s the full hop list in case you get lost:

  1. Ellen Hutson
  2. Lisa
  3. Julie
  4. Sandy
  5. Jessica
  6. Michele
  7. Carissa
  8. Carolyn
  9. Emily Mydlowski 
  10. Therese
  11. Emily Midgett
  12. Ashlea

Thanks so much for stopping by today, and have a marvelous day!

Filed Under: Concord and 9th, Ellen Hutson, Honey Bee Stamps Tagged With: baby card, baby honeycuts, baby shower, bokeh, tall type, welcome baby

Concord and 9th Feature Friday!

September 27, 2019

Hi there! Today is the last Friday of September, which unfortunately means this is the final Feature Friday for my guest designing with Concord and 9th. It’s always an honor to work with one of my favorite companies promoting their beautiful products, and this month has been so much fun working with their gorgeous holiday release! Today’s projects are a bit more traditionally colored…. I couldn’t let the month go by without a little red and green! Today, we are focusing on the Holly Berry Turnabout and Stocking Stuffers.

Today’s projects are a bit more traditionally colored…. I couldn’t let the month go by without a little red and green! Today, we are focusing on the Holly Berry Turnabout and Stocking Stuffers.

For my first project, I created a little mantel scene the gorgeous, detailed Stocking Stuffers stamps and dies and Shiplap Sentiments stamp set. I first stamped the stockings and their stuffers using Intense-ified Black ink on some Copic-friendly cardstock.

After I’d colored the stockings, I used the Shiplap Sentiments to stamp some light gray lines on an A2 card base. I also used a light gray Copic marker to add some shadows beneath the lines to add a bit of a 3D effect. I adhered the stockings and their stuffers on the card front using some foam tape.

I heat embossed a greeting from Stocking Stuffers on some olive green cardstock and added it to the bottom of the card using some more foam adhesive.

For my second project, I used the same raspberry and olive color scheme with the Holly Berry Turnabout. I stamped it on a white A2 panel, then trimmed down the panel and mounted it on a piece of A2 gold foil cardstock from the Neutrals Foil Paper Pack.

Next, I used the Holly Berry Dies to die cut a greeting using some olive green cardstock, which I backed with some heavyweight vellum. The busy background overshadowed the detailed sentiment die cut, and the vellum helps to soften the pattern and allow the greeting to be more visible. I mounted it in the center of the patterned panel for an easily mailed flat holiday card.

Well, that’s all for me today! I hope you’ve enjoyed my projects featuring Concord and 9th’s Holiday Release this month. I know that I’ve had a blast creating with these beautiful products! Thanks so much for stopping by today, and have a marvelous weekend!

Filed Under: christmas card, Concord and 9th, holiday card Tagged With: concord and 9th feature friday, copic coloring, holly berry, stocking stuffers

Concord and 9th-Feature Friday #2!

September 20, 2019

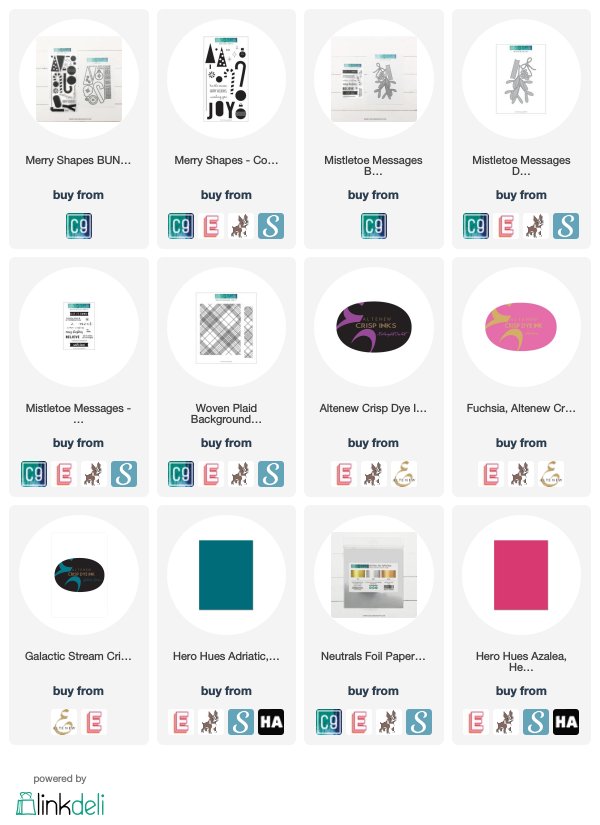
Hi there! Today, I have the pleasure of continuing my month of guest designing for Concord and 9th, helping to introduce their 2019 Holiday release! Today, we are focusing on Merry Shapes and Mistletoe Messages! I have two projects today, so let’s get started with the details!

For my first project, I used Mistletoe Messages. It’s been so very warm here lately that it’s been a bit challenging to get myself in a traditional “holiday” mood, so I have been enjoying applying jewel tones to these holiday projects. I used a pretty plum, teal, and silver color combination for both projects today. I began by stamping a plaid background using some bright plum ink and the Woven Plaid background, then trimming it down and mounting it on an A2 panel of teal cardstock.

I die cut two mistletoe branches from the Mistletoe Messages dies using some more teal cardstock. I trimmed down a panel of vellum and mounted the branches and some glittery berries on the vellum. (The vellum helps to soften the bright, busy pattern in the background.) I also die cut a silver foil bow using the Neutrals Foil Paper Pack and added it to the top of the little botanical cluster.

I also die cut a banner and stamped a “noel” from the Mistletoe Messages and mounted it on the very front of the mistletoe. I hid the foam adhesive behind the leaves of the mistletoe and mounted it on the plaid panel.

For my second project, I used similar jewel tones, with the addition of some bright pink to create a fun, whimsical background using the Merry Shapes stamps. To stamp a patterned background, I start with the largest image, then the medium image, then the smallest image is used to fill in the gaps.

After stamping the background, I used a blender brush to blend some more of the plum purple in the center of the stamped background panel. I then die cut the Jolly dies, which is the freebie for this month with any purchase over $60! I mounted it in the center of the blended area using foam adhesive for extra dimension.

I trimmed the very edges of the patterned panel down and mounted it on an A2 panel of bright pink cardstock. The final touch was to add some sparkling jewels in shades of pink, purple, and teal to add even more sparkle (and to fill in any holes that might be left).

Well, that’s all for my projects today! I hope you don’t mind my non-traditional color combinations. Sometimes, a little change can be fun, don’t you think? Be sure to check out the Concord and 9th blog to see the inspiration from the other two fabulous guests for this month!

Filed Under: Concord and 9th Tagged With: concord and 9th feature friday, holiday, holiday card, merry shapes, mistletoe, mistletoe messages, woven plaid

Concord and 9th Feature Friday!

September 13, 2019

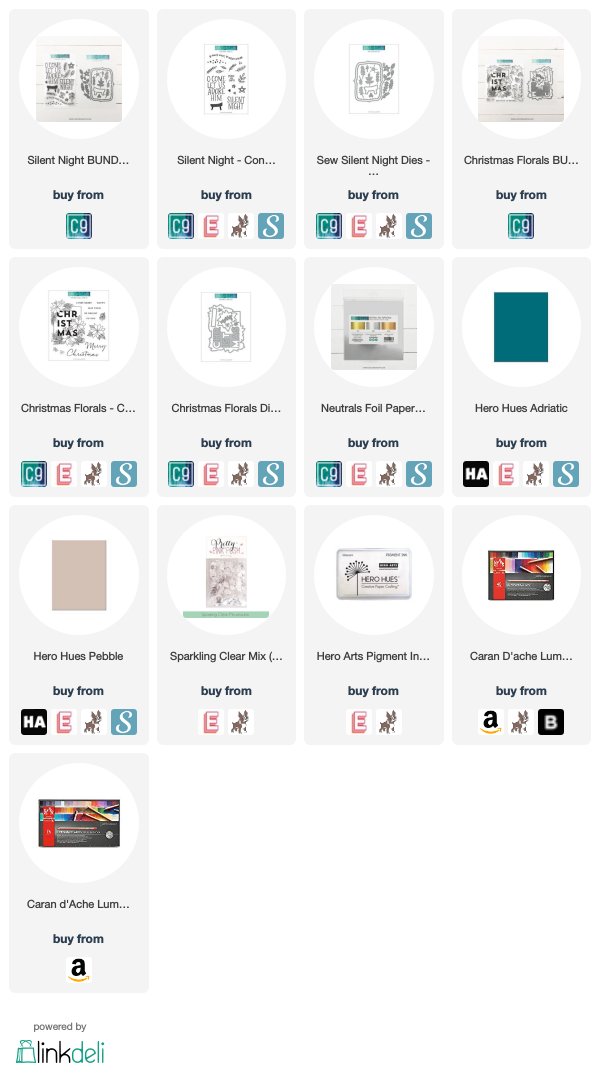
Good morning! I’m super excited to announce that I’m one of Concord and 9th’s guest designers the month of September! This month’s release featured all things holiday, and there were SO many amazing stamp sets and dies, as well as some gorgeous new foil papers! Each Friday this month, I and the other guest designers will have inspiration using the latest products from Concord and 9th. I have two projects today, featuring the Silent Night stamps and dies, as well as the Christmas Florals stamps and dies. Let’s get started with the details!

For my projects today, I kept things a bit non-traditional with a teal, gray, and silver color scheme, hoping to highlight some of that lovely new foil in the Neutrals Foil Paper Pack. While red and green are perfectly lovely Christmas colors, I do love using non-traditional colors.

For my first project today, I focused on the stamps in the Silent Night bundle. I began by stamping the large “O come let us adore him” greeting on an A2 panel of gray cardstock using deep teal ink, then used a variety of teals, grays, and white inks to stamp the foliage around the greeting. I wanted to create a shaker panel in which the foliage was peeking around the edges of the shaker window!

I die cut the large top note from the Silent Night die set from a panel of teal cardstock, then backed it with some acetate to create my shaker window. I filled the shaker with some pretty, shiny sequins!

For my second project, I wanted to do some no-line coloring with the gorgeous florals from the Christmas Florals stamp and die set. I stamped the main image using white pigment ink on some deep teal cardstock, then used my C’aran D’Ache Luminance pencils to do some no-line coloring.

After I’d finished coloring the images, I used the new Neutrals Foil Paper Pack to die cut the Christmas from silver foil. I adhered it to the card front using liquid adhesive.

I white embossed the rest of the greeting on some strips of teal cardstock, then used some foam adhesive to adhere them to the card front!

Well, that’s all for me today! I hope you’ll check out the Concord and 9th blog to see the rest of the inspiration from the other guest designers! Thanks so much for stopping by today, and have a marvelous day!

Filed Under: Concord and 9th, holiday card Tagged With: christmas florals, colored pencil, holiday card, luminance, silent night

  • « Go to Previous Page
  • Page 1
  • Page 2
  • Page 3
  • Page 4
  • Page 5
  • Interim pages omitted …
  • Page 14
  • Go to Next Page »

Primary Sidebar

  • Facebook
  • Instagram
  • Pinterest
  • YouTube

Favorite Shops

Secondary Sidebar

Subscribe

Enter your email address to subscribe to this blog and receive notifications of new posts by email.

Instagram
Something is wrong.
Instagram token error.
Follow
Load More

Archives

Tags

3D embossing folder alcohol markers better press birthday birthday card blog hop card kit christmas christmas card christmas tag colored pencil copic copic coloring Daniel Smith die cutting embossing folder embroidery felt giveaway holiday holiday card hot foil ink blending karin brushmarker pro layered stencil masculine my monthly hero new release no line coloring no line watercolor OLO marker olo markers original illustration pawsitively saturated rainbow shaker card slimline stamping stamptember stencil thank you thinking of you valentine's day video watercolor

Popular Posts

Simon Says Stamp Sending Cheer Blog Hop- Day 2 + Freebie + Giveaway!
Altenew October 2026 Release Blog Hop + Giveaway!
Simon Says Stamp Sending Cheer Release: Now Available!
Simon Says Stamp October 2026 Card Kit of the Month: Homespun Gratitude!
A Double Leftovers Card Set with New Simon Says Stamp Stencils and Dies!
Simon Says Stamp November 2025 Card Kit: Give Thanks!
Joyful Snowman with New Simon Says Stamp Sending Cheer Release!
Hero Arts Partners Blog Hop: Lawn Fawn!
Altenew February 2020 Stamp+Die+Watercolor Blog Hop+Giveaway!
Altenew Standalone Die Blog Hop+Giveaway!

Disclosure

Some affiliate links are used in my posts. This means that, should you click on one of my links and purchase something from that company, I will receive a small portion of the sale at no extra cost to you. I use the money earned from these sales to help maintain my blog. I so appreciate you visiting and, if you do choose to use one of my affiliate links, thank you so much for your support!
Copyright © 2026 ·Brunch Pro Theme · Genesis Framework by StudioPress · WordPress · Log in
Loading Comments...