• Skip to main content
  • Skip to primary sidebar
  • Skip to secondary sidebar

Sixth Street Sundries

Emily Midgett

  • Home
  • About Me
  • Contact
  • OLO Marker Color Swatch Chart
  • Shop

ink on 3

Simon Says Stamp STAMPtember Collaboration Set with InkOn3!

September 23, 2026

Hi friends! The new InkOn3 Witch Cat Collaboration Set (click HERE to see all of the details!) for STAMPtember is now available, and it’s so dang cute…. I can never resist a cute kitty! I was first introduced to InkOn3 a long time ago when they released their Fadeout Ink (click HERE), which is absolutely perfect for no-line watercoloring and alcohol marker coloring with your stamps. It makes it super easy to look like you can draw as well as color beautifully! I’ve tried other brands of no-line coloring ink and I always come back to the original. (The full sized pad is currently sold out, but the cube and re-inker are still in stock!) This sweet Witch Cat collaboration set features a huge kitty with a sassy witch’s hat and semi-spooky moon. Here’s a peek at this exclusive, limited edition set:

I just love the style of the kitty, with a storybook illustrative style that makes no-line coloring super fun. I created a magical all-purpose card with my OLO Markers and some sparkling additions, so let’s get started with the details on my project!

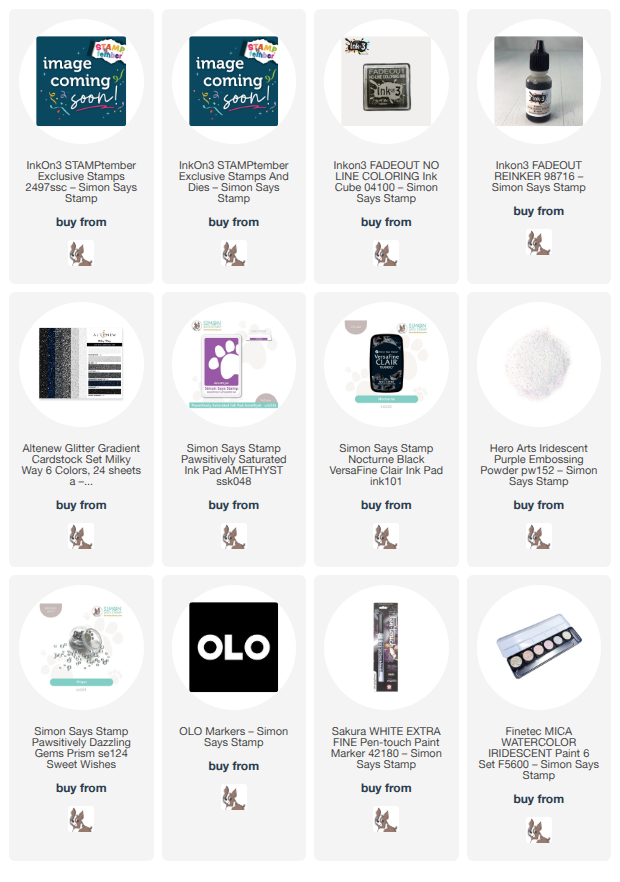
I began by stamping the Witch Cat image on some plain white cardstock using InkOn3’s Fadeout Ink. This ink fades beautifully into the background when alcohol marker is applied to the image, making it look as though you have some serious artistic skills! I used my OLO Markers to add vibrant color to the pumpkins and moon, then decided to go completely classic Halloween and create a black kitty. I kept true to the illustration, using the “fluff lines” as a guide for where to put my shadows and highlights. I added some white paint pen to the jade green eyes, nose, and whiskers, as well as a bit of sparkling silver watercolor to the buckle on the witch hat for some special details! Once I had completed the coloring process, I used the coordinating die to cut out the generously-sized image.

After I had finished coloring and die cutting the stamped image, I wanted to keep the color palette as seamless as possible between elements. I had selected a lavender card front for the background, blended with Amethyst Pawsitively Saturated Ink in the corner, so I selected a coordinating shade of purple OLO Marker from my stash and colored around the edges of the entire die cut image. It looks much lighter in the photo, for some reason, but in reality that die cut edge matches quite nicely with the background!

Before assembling the card, I splattered that blended corner with some sparkling iridescent watercolors to add to the magical aesthetic. I love how the water spots and the watercolors add such texture and interest to the background! For the greeting, I stamped the “you’re simply magical” sentiment from Witch Cat onto some more lavender cardstock using Nocturne ink, then added some Iridescent Purple Embossing Powder over the top, creating a fabulous iridescent embossed sentiment. I used the coordinating die to cut out the greeting, then began assembling the elements of the card. I cut down some shimmering iridescent gray glitter cardstock into a flagged strip, layering it behind the kitty die cut on the splattered background. I added the sentiment over the top with some more foam adhesive squares, finally finishing everything off with some Prism Pawsitively Dazzling Gems!

Well, that’s all for my project today! Remember: these STAMPtember Collaboration sets are exclusive to Simon Says Stamp and Limited Edition, so don’t wait. All of the collaboration sets have sold out thus far, so you won’t want to miss out on this adorable kitty! Thanks so much for stopping by today, and Happy STAMPtember!
Filed Under: ink on 3, simon says stamp, Uncategorized Tagged With: die cutting, halloween card, ink blending, no line coloring, OLO marker, olo markers, stamptember, witch cat

STAMPtember Collaboration Two-fer: Memory Box and Ink On 3!

September 20, 2025

Hi friends! Today, the Simon Says Stamp STAMPtember exclusive, limited edition STAMPtember release is a two-fer: Memory Box and Ink On 3! The two stamp sets are completely different in style, but oh so fabulous in their own rights! I have a project featuring each stamp set to share with you so let’s get started with the details!

f you are new to STAMPtember from Simon Says Stamp, throughout the month of September, Simon Says Stamp will have exclusive collaborations with some of our favorite stamping companies, releasing an exclusive, limited edition stamp set designed in collaboration with a different company nearly every day! (Click HERE to see the Collaboration Sets page, and be sure to bookmark it!) 

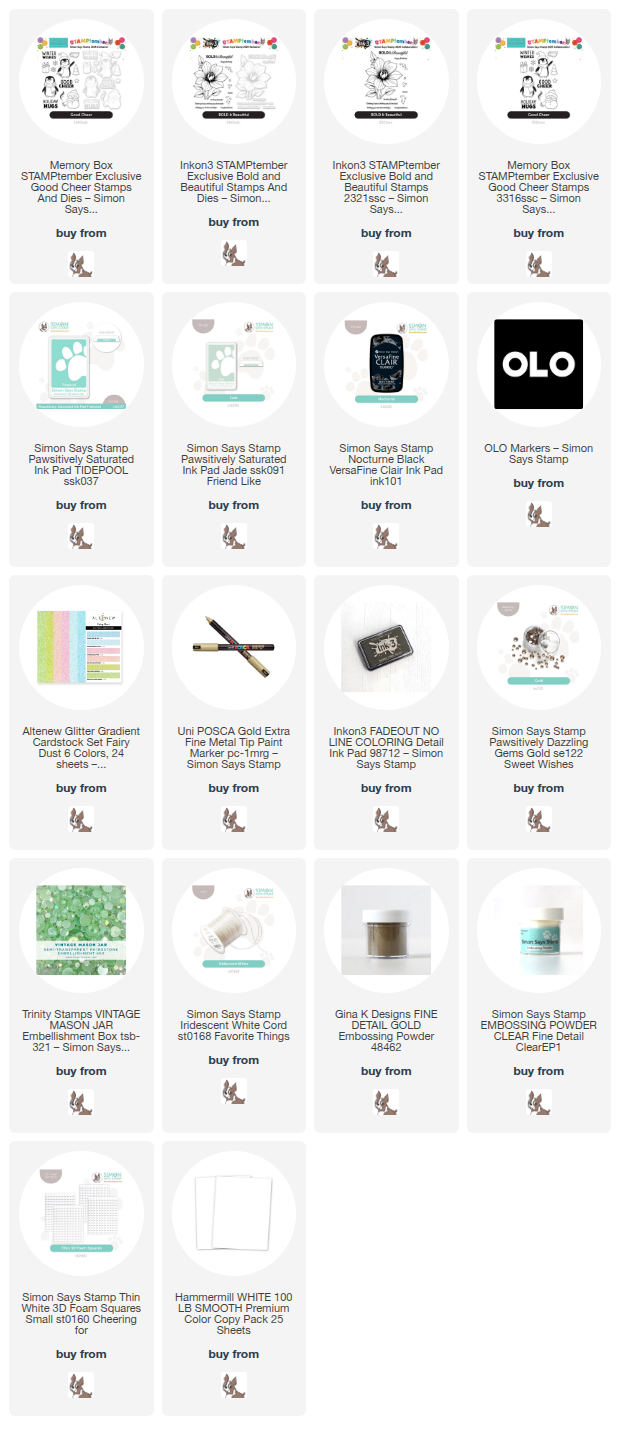
The darling, exclusive, limited edition Good Cheer stamp set (click HERE to see the set in full!) from Memory Box features several little winter time critters, complete with holiday accessories and sweet sentiments! I chose to stamp the penguin with his little cup of cheer, a gift, and the “good cheer” sentiment using Nocturne ink, then added clear embossing powder over the top to make the black lines as crisp as possible. I used OLO Markers to color the images in a vibrant cherry red and mint green color palette, then used the coordinating dies to die cut the finished images.

For the card front, I trimmed down a panel of white cardstock by 1/8″ on all sides, then blended Tidepool and Jade inks in the center of the white panel to create a minty halo behind my penguin, upon which I also stamped some snowflakes and added some iridescent glitter watercolor splatters. I matted this panel on a full size A2 Sea Glass card base, creating a pretty minty frame around my blended background. I trimmed down a block of shimmering, minty glitter cardstock and tucked it next to my penguin to give a little extra interest to the sentiment, which I adhered to the glitter strip. I stamped a few individual snowflakes and die cut them with their coordinating dies, popping them up around the penguin with some foam adhesive. I added smattering of shimmering mint colored gems, then tucked an iridescent white bow beneath the sentiment for one last touch of sparkle!

For my second project, I used the stunning, limited edition Bold and Beautiful STAMPtember set (click HERE to view the entire 6×8 set!) with my OLO Markers. I was first introduced to Ink On 3 through their Fadeout Ink, which is perfect for no-line coloring, so I thought it would be apropos for me to do some vibrant no-line coloring using their unique Fadeout Ink! I stamped the large image on a panel of Hammermill cardstock using Fadeout Ink, then used my OLO Markers in vibrant, intense shades of autumn rose, adding lots of deep shadows in the nooks and crannies to make sure that the contrast was as maximized as possble. I die cut the finished colored image with it’s super detailed coordinating die.

To the flower center, I added dots of gold paint pen and white gel pen to create the flower stamens. I popped up the generously-sized bloom on a plain white A2 card front with thin foam adhesive squares. In order to pull in those gold accents from the flower center, I heat embossed a sentiment from the Bold and Beautiful stamp set using gold embossing powder and die cut it with it’s coordinating die, then popped it up on the card front with a double layer of foam adhesive to help it pop from the vibrant flower. Finally, I added some Gold Pawsitively Dazzling Gems for added sparkle!

Well, that’s all for my projects today!

If you love the STAMPtember Collaboration Sets, don’t wait to purchase them, because these limited edition sets will NOT be restocked. Once they’re gone, they’re gone! (Click HERE to see the Collaboration Sets page, and be sure to bookmark it!) Each day holds new surprises, so be sure to check out the Simon Says Stamp social media at noon ET every day throughout STAMPtember so that you don’t miss out. Thanks so much for stopping by today, and happy STAMPtember!!!

Filed Under: ink on 3, memory box co, simon says stamp Tagged With: bold and beautiful, christmas card, collab, die cutting, good cheer, holiday card, ink blending, no line coloring, olo markers, penguins, stamptember

Giant Blooms and a New Exploring with Emily Video!

July 18, 2019

Hi there! Today, I’m sharing the latest installment of the Exploring with Emily series with Ellen Hutson. This month, I am working with the new Hero Hues Reactive Inks. These inks debuted during the Hero Arts 45th Anniversary catalog release, and they are absolutely fantastic. They blend beautifully, and in the video I show how easily and perfectly they work as watercolors. You can watch it below or here on the Ellen Hutson YouTube channel:

The stamp used in the video is from a new-to-me stamp company: Colorado Craft Company. They have a beautiful group of Big and Bold stamps that feature some utterly massive blooms: Hydrangea, Peony, and Rose (that I used in the video above). I created two more watercolored projects using the Hydrangea and Peony stamps and my Daniel Smith watercolors.

For my first project, I used the beautiful Get Well Hydrangea stamp, first stamping it with Versafine Onyx ink and heat embossing it with White Satin Pearl embossing powder on some Arches Cold Press watercolor paper. The combination of the black embossing powder and the pearlescent powder creates a pretty pearlescent charcoal!

I wanted to create a light pink, antiqued hydrangea, one with many different highlights and lowlights and variations in color, as real hydrangeas do. I tend to saturate images with color to start, adding layer after layer of color until the light image that I’d envisioned in my head is no more. In order to keep the hydrangea light, I began by saturating the area around the flower with bright blue and turquoise watercolors. I found that the contrast of the vibrant background helped to keep my hand light on the flowers themselves. I tried to add lots of variations of color, keeping the petals on the top the lightest with very diluted color, the petals beneath quite dark with very concentrated color, and adding a few touches of very pale yellow to indicate sunshine hitting the bloom

After I’d finished watercoloring the bloom, I needed to add a sentiment, but didn’t want to cover up too much of my meticulously-watercolored panel. My favorite way to add subtle sentiments is to heat emboss a greeting on a piece of heavyweight vellum, which allows the background to still shine through, though slightly muted. I white embossed the greeting from Get Well Hydrangea on a rectangle of heavyweight vellum, then added tiny dots of adhesive behind the embossing to hide the adhesive and not ruin the overall look of the vellum.

For my second project, I focused on the gorgeous, massive peony, but I wanted to do some no-line watercoloring. I began by stamping the image Arches Cold Press using Ink On 3’s Fadeout Ink and my Misti.

I can never get enough pink peonies, so I watercolored the gorgeous flower using my Daniel Smith watercolors in shades of pink, lavender, adding some shadows of deep purple and highlights of pale yellow, again to add variation where the sunlight would hit the petals.

I used the same idea for the greeting as I did for the previous project; I silver embossed the sentiment from Missing You Peony on a strip of vellum, then hid tiny dots of liquid adhesive on the back of the embossed sentiment strip. An effective way to add a subtle greeting to your detailed card front, no?

Well, that’s all for me today! I hope you’ve enjoyed my first explorations into these beautiful blooms from Colorado Craft Company. They have many darling stamps, including some huge stamps of various sweets that I’m dying to play with. I hope you’ll check them out! Thanks so much for stopping by, and have a marvelous day!

Filed Under: colorado craft company, Ellen Hutson, ink on 3, watercolor Tagged With: big and bold, exploring with emily, fadeout ink, get well hydrangea, hydrangea, missing you peony, no line watercolor, peony, rose, watercolor

The Stamp Market Insta Hop-Some Kind of Wonderful!

June 6, 2019

Good morning! I had the honor of being asked to participate in an Instagram hop to celebrate one of the prettiest stamps from The Stamp Market’s newest release with some of my closest friends (and fellow flower lovers): Jessica Frost-Ballas and Caly Person! The Stamp Market debuted an absolutely jaw-dropping floral stamp yesterday called Some Kind of Wonderful (SM|EH), and I am so honored that I got to play with it and share my project with you! We had a little Instagram hop with prizes, and Amy has also generously given me (and Jessica and Caly) a Some Kind of Wonderful (SM|EH) stamp set to give away to one lucky blog reader, so read all the way to the end to find out how to enter the giveaway!

The main floral image in the Some Kind of Wonderful (SM|EH) stamp set is really quite large, so I wanted to take advantage of that generous sizing by creating an equally generously-sized card!! This whopper is 6×6! I did some creative masking and stamping on this project, so let’s get started with the details.

I began by using my T-square and a pencil to lightly trace a square in the center of my 5.75″ squared panel of watercolor paper. I then heat embossed the greeting from Some Kind of Wonderful (SM|EH) in the bottom left corner of the square using Platinum embossing powder. After determining my sentiment placement, I decided to have one large, full bloom hanging over into the square, so I erased some of the square, then stamped one full bloom using Ink On 3’s Fadeout Ink. I then used Post It notes to mask the rest of the square (covering some of the stamped bloom, as well), stamping a pattern around the edge at varied angles.

I wanted to do some monochromatic watercoloring in peaches and rosy pinks, so I used some very heavily diluted Quinacridone Coral to do a light wash in the background of the floral pattern, leaving the center square free of color, then used a combination of Quinacridone Pink and Rose of Ultramarine for the petals, with touches of New Gamboge at the edges of the petals for some sunkissed contrast.

For the flower centers, I added a concentrated section of Neutral Tint to one side of the center, then after it had dried, I used the very tip of my paintbrush to stipple some concentrated Neutral Tint, keeping the stippling more concentrated where the color was deeper, and tapering off where the color lightened. I used a similar technique for the foliage, adding color to the leaves themselves (Phthalo Turquoise) and blending it out with clean water, allowing it to dry, then using the very tip of my brush and some concentrated color to add the veins. Allowing the first layer of watercoloring to dry before adding the detail layer prevents the concentrated color from bleeding on the wet watercoloring.

After all of my watercoloring had dried, I mounted the painting on a 6×6 panel of pink glitter card stock.

Well, that’s all for this project! This is going to be a hard stamp set to put down… I am eagerly awaiting the next Daily Marker 30 Day challenge so that I can play with this set even more! Amy from The Stamp Market has generously donated a Some Kind of Wonderful stamp set for me to give away to one of my loyal followers! All you have to do is leave me a comment telling me what your favorite coloring medium is. I’d love it if you were also a subscriber, either via email or otherwise, but it’s not required. I’m getting ready to go on vacation, so I will leave the giveaway open until I get back on 6/15!

I also highly encourage you to check out the beautiful projects made by my dear friends, Jessica Frost-Ballas and Caly Person! You can see more details on this stamp set on The Stamp Market blog, as well! Thanks so much for stopping by today, and have a marvelous day!

Filed Under: ink on 3, the stamp market, watercolor Tagged With: giveaway, no line watercolor, watercolor

Ink On 3’s Heels To You!

April 15, 2019

Good morning! Happy Monday! This week is going to be a busy one. Honey Bee Stamps is celebrating their 4th Anniversary, and I have projects from the most recent Ellen Hutson release to share with you, but today, I wanted to share a project that I worked on to help celebrate the newest Ink On 3 release- Heels To You! I shared this project on the Ink On 3 blog last week, but I thought I’d share it here, as well. Let’s get started with the details!

I began by stamping the lovely flowered shoe from Ink On 3’s Heels to You (I3|SSS) stamp set using their Fadeout Ink on some watercolor paper. I then watercolored the image using the no-line coloring technique and my Daniel Smith watercolors: Quinacridone Fuchsia, Wisteria, Cobalt Green Pale, and Graphite Gray. I added some Liquid Pixie Dust (I3|SSS|EH) over the top of the watercolored shoe to make it really sparkle!

For the card base, I used some light pink ink to stamp the individual flowers from the Heels to You (I3|SSS) stamp set on a white A2 card base, then used blending brushes to blend the same shade of pink ink in the corner to create a bit of a halo. I stamped the greeting from the Heels to You stamp set and die cut the “beautiful” from the coordinating die set using Hero Hues Plum card stock. I added the greeting and a few jewels from Pretty Pink Posh to add some more sparkle!

Well, that’s all for my project today. I hope you’ll check out the new release from Ink On 3. These new stamps are perfect for Mother’s Day crafting! So much fun to color in any medium, as well. Thanks so much for stopping, and have a marvelous day!

Filed Under: ink on 3, watercolor Tagged With: mother's day, no line watercolor, watercolor

Primary Sidebar

  • Facebook
  • Instagram
  • Pinterest
  • YouTube

Favorite Shops

Secondary Sidebar

Subscribe

Enter your email address to subscribe to this blog and receive notifications of new posts by email.

Instagram
Something is wrong.
Instagram token error.
Follow
Load More

Archives

Tags

3D embossing folder alcohol markers better press birthday birthday card blog hop card kit christmas christmas card christmas tag colored pencil copic copic coloring Daniel Smith die cutting embossing folder embroidery felt giveaway holiday holiday card hot foil ink blending karin brushmarker pro layered stencil masculine my monthly hero new release no line coloring no line watercolor OLO marker olo markers original illustration pawsitively saturated rainbow shaker card slimline stamping stamptember stencil thank you thinking of you valentine's day video watercolor

Popular Posts

Simon Says Stamp Sending Cheer Blog Hop- Day 2 + Freebie + Giveaway!
Altenew October 2026 Release Blog Hop + Giveaway!
Rustic Monochromatic Stars for Christmas with Rainbow Splash!
Waffleflower July Release Blog Hop!
Hero Arts Partners Blog Hop: Lawn Fawn!
March 2020 Essentials By Ellen Blog Hop+Giveaway!
December 2018 My Monthly Hero Blog Hop + Giveaway!
The Ton Stamps Summer Release: Day 1
The Ton Anniversary Release: Day 1!
Altenew Paint A Flower: Carnation Blog Hop+Giveaway!

Disclosure

Some affiliate links are used in my posts. This means that, should you click on one of my links and purchase something from that company, I will receive a small portion of the sale at no extra cost to you. I use the money earned from these sales to help maintain my blog. I so appreciate you visiting and, if you do choose to use one of my affiliate links, thank you so much for your support!
Copyright © 2026 ·Brunch Pro Theme · Genesis Framework by StudioPress · WordPress · Log in
Loading Comments...