• Skip to main content
  • Skip to primary sidebar
  • Skip to secondary sidebar

Sixth Street Sundries

Emily Midgett

  • Home
  • About Me
  • Contact
  • OLO Marker Color Swatch Chart
  • Shop

simon says stamp

Simon Says Stamp Sending Cheer Release: Now Available!

October 8, 2026

This post was sponsored by Simon Says Stamp. Thanks, Simon! *I have gathered links to all of the products used at the bottom of the post for your convenience, using affiliate links at no extra cost to you. Thank you for shopping with my links! I truly appreciate your support for my work!*

Hi friends! The gorgeous new Sending Cheer release from Simon Says Stamp is available on the Simon Says Stamp website (click HERE to see everything!) and it’s absolutely filled with gorgeous goodies for all kinds of occasions: florals, fall, Christmas, even some glorious new cardstock colors! We are entering my favorite crafty time of year; I can never get enough of autumn and Christmas (maybe not Halloween so much…) but gorgeous, saturated colors, cozy themes, a little whimsy, a little magic, and some elegant imagery makes this time of year so very enjoyable as a creator. For my first card using goodies from the new release, I paired lots of different autumnal products with some metallic inks, colored pencils, and some colored cardstock to create this warm and cozy fall card. Let’s get started with the details on my project!

Whenever I am faced with the choice of colored cardstock or white cardstock, I will almost always choose colored cardstock. So when I saw the lush new colors included with this release, the rainbow wheels inside my head immediately started turning! I pulled out the new Espresso cardstock to create this saturated project, pairing the deep chocolatey brown with the new Sweater Weather stamp set. This 3×4 inch set packs a lovely punch for such a petite product, with a lovely (and fairly substantial) sweater illustration and cozy sentiments. I stamped the sweater on the Espresso cardstock using Simon Says Stamp’s White Pigment Ink, then used colored pencils to color the sweater in a lovely autumnal color palette of burnt orange, peach, and a deep pumpkin orange, accented with some white paint pen dots and swipes for added detail! I die cut the finished sweater with it’s coordinating die.

Once I had completed the sweater, I used the new Leafy Arch Wreath embossing folder to emboss an A2 panel of Espresso cardstock. To help accent some of the beautiful embossed details on the panel, I swiped a metallic bronze ink pad directly onto the raised areas, creating a gorgeous gilded effect. I also die cut several leaves from the new Fab Fall Leaves die set, cutting them from coordinating shades of orange and peachy yellow. I added some alcohol marker shading to the center of the leaves just for a bit of extra depth and dimension.

Before assembling all of the components, I heat embossed the greeting from Sweater Weather onto some more Espresso cardstock, stamping the sentiment first with white pigment ink and adding white embossing powder. The combination creates an incredibly crisp and visible greeting on the deep brown cardstock! I die cut it with it’s coordinating die, as well, then began arranging the die cuts on the gilded, embossed background. I popped up the sweater and sentiment, then tucked the leaves behind them, adhering everything with foam squares. Finally, I added some Peachy Pawsitively Dazzling Gems for additional sparkle and texture!

Well, that’s all for me today! I have so many more projects to share with you using this marvelous new release, and the Simon Says Stamp is hosting a 2-day blog hop this weekend chock full of inspiration using the new Sending Cheer release (click HERE to see everything!). Thanks so much for stopping by today, and have a marvelous day!
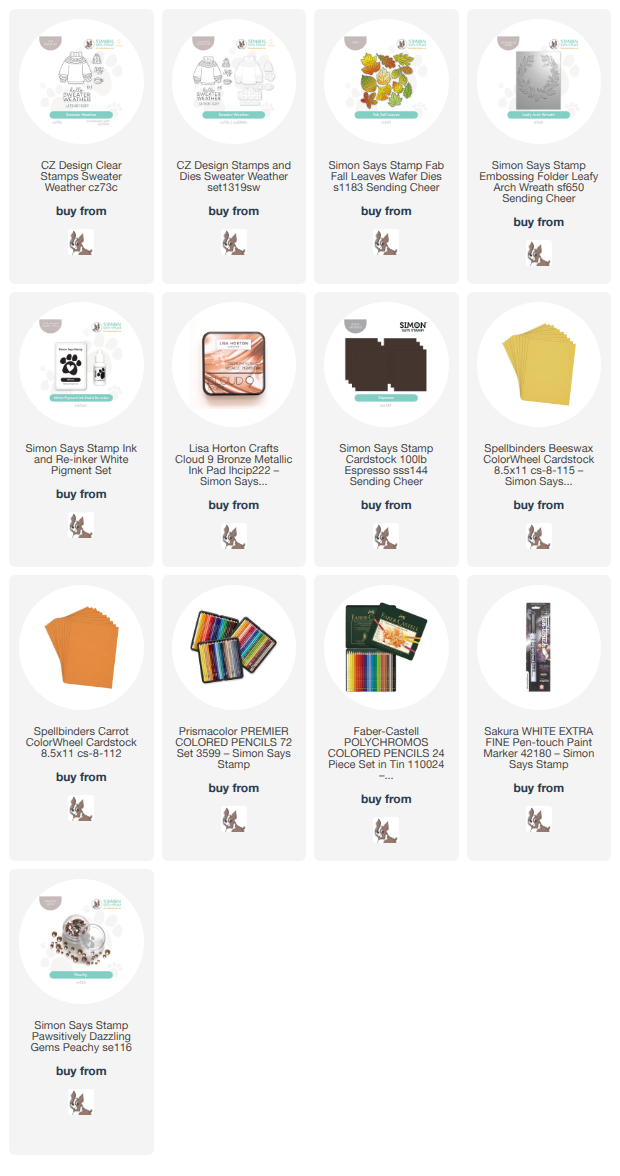
Filed Under: simon says stamp Tagged With: 3D embossing folder, colored cardstock, colored pencil, die cutting, embossing folder, fab fall leaves, leafy arch wreath, no line coloring, sending cheer, sweater, sweater weather

Felted Gourd Wall Hanging with Simon Says Stamp!

October 6, 2026

This post was sponsored by Simon Says Stamp. Thanks, Simon! *I have gathered links to all of the products used at the bottom of the post for your convenience, using affiliate links at no extra cost to you. Thank you for shopping with my links! I truly appreciate your support for my work!*

Hi friends! I am back with another little home decor piece, this time working in a new-ish medium for me: felt! I love the homey warmth that the texture of felt provides, making it exceptionally perfect for use with autumnal and winter images. I love the idea of using papercrafting supplies to create a little door hanger, something easily switched out with each new season and easily customized to match your personal aesthetic. I think that the new Harvest Heirloom die set has lovely clean lines that work beautifully with felt, while also being so elegant. I created this pretty door hanger in some unique fall colors to mimic the end of summer/early autumn colors that we are seeing outside. Let’s get started with the details on my project!

To begin, I wanted to create the canvas upon which I would arrange my die cut images, I cut a warm blue felt background using the new A7 Notched Rectangles. I also die cut another notched rectangle in the same size using heavyweight cardstock, which adds a sturdy back to my door hanger without adding weight to the project! I used felt glue to adhere the pieces together, generously applying glue to the entire piece of felt and then placing the pieces beneath a heavy book to dry. This ensures that the cardstock would dry flat, which was a concern when using such abundance of liquid glue.

While I waited for the base to dry, I die cut the various pieces of the Harvest Heirloom die set, cutting the gourd from peachy felt and the greenery from lime green, pine green, and some metallic copper felt from my stash. When working with delicate images like the greenery, I like to use 100% wool felt, rather than a felt blend, because I find the 100% wool fibers stay intact better than the blends. After the base had dried completely, I began arranging the gourd and greenery on the notched rectangle background, adhering the pieces with liquid felt glue, snipping greenery here and tucking it there to create a custom arrangement. I also added some beautifully iridescent Sunset Tiny Flower Embellishments to fill in some of the bare spots on my arrangement.

Once I had completed the arrangement and allowed it to dry sufficiently, again placing the entire piece beneath that heavy book, I created the hanger using ribbon and Simon Says Stamp’s Antique Brass Eyelets. I used my Crop-A-Dile hole punch to cut holes in the top corners, then added the eyelets, which will keep the holes intact even if the ribbon is handled roughly! I threaded a pretty ribbon through the eyelets and tied it so that it could be hung easily from a door handle or a hook.

Well, that’s all for my project today! I love how warm textures are having such a moment in home decor, and it’s so lovely to be able to follow home trends without having to do invasive (or expensive!) updates. Thanks so much for stopping by today, and have a marvelous day!

Filed Under: simon says stamp Tagged With: autumn, die cutting, eyelets, fall, gourd, harvest heirloom, home decor, notched A7 rectangles, pumpkin, wall hanging

Sunflower Home Decor with Simon Says Stamp!

October 5, 2026

This post was sponsored by Simon Says Stamp. Thanks, Simon! *I have gathered links to all of the products used at the bottom of the post for your convenience, using affiliate links at no extra cost to you. Thank you for shopping with my links! I truly appreciate your support for my work!*

Hi friends! I am back to start a brand new week with some transitional fall decor using gorgeous new dies from Simon Says Stamp’s mega STAMPtember release. (Remember way back at the beginning of September? That feels like years ago, lol!) You can check out all of those fabulous goodies (that will be restocked if and when they sell out) by clicking HERE. I am so enjoying finding ways to incorporate my cardmaking skills into creating home decor pieces that can be held onto a bit longer than a card, and the utterly lovely new Sunflower Basket die set was just begging to be made into an adornment for a desk or mantle. Let’s get started with the details on my project!

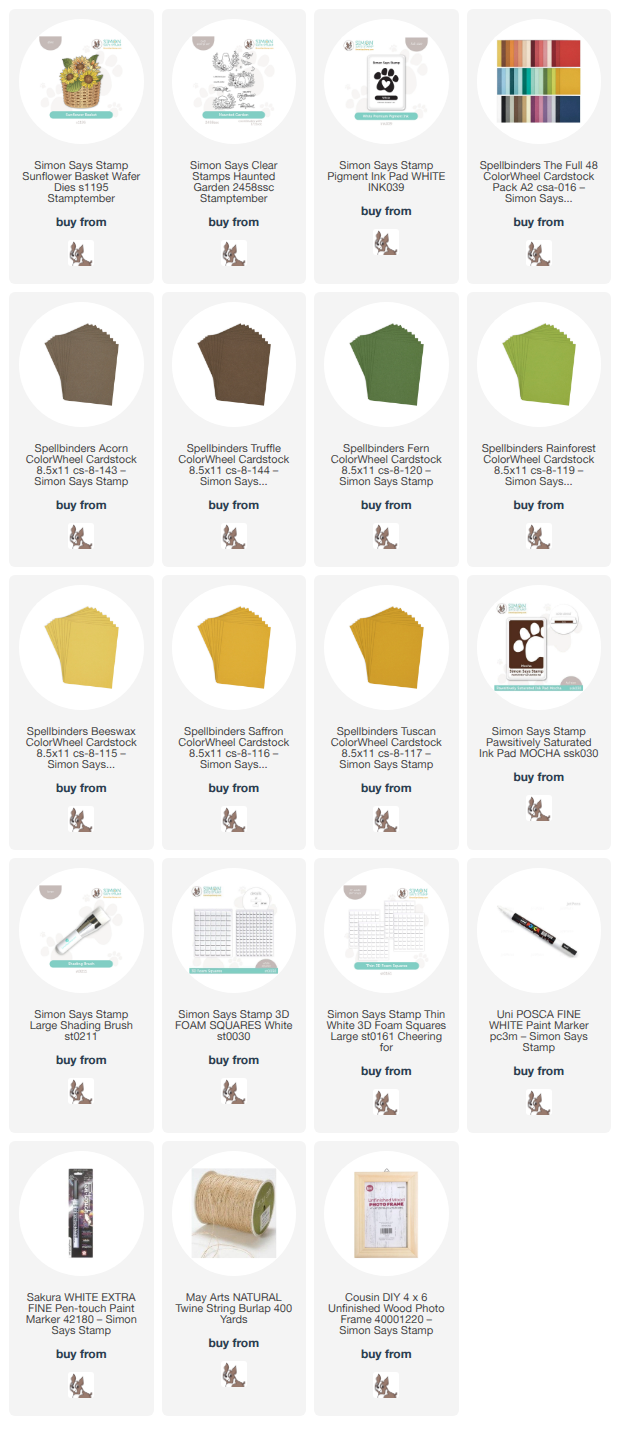
The utterly luscious Sunflower Basket die set comes complete with a variety of foliage options, different angles of layered sunflower blooms, and a super detailed, layered basket in which to arrange your flowers and foliage! I used Spellbinders Colorwheel cardstock for my project today, as the color families come in a lovely coordinated gradient that are perfect for layered dies such as these. I die cut several sunflowers, even a few more than are pictured in the handy-dandy graphic on the packaging, cutting them in three different shades of yellow cardstock to create variety and a lush, full bouquet. I also cut an abundance of greenery, making sure that I had plenty of options to fill my basket. I assembled the layered floral die cuts with liquid adhesive and set them aside.

For the basket, I die cut the solid base layer from a deeper shade of chocolate brown, then die cut the detailed top layer from a lighter shade of brown. I added some additional shape and shadow to the top layer with some blending on the edges with Simon Says Stamp’s Mocha Pawsitively Saturated Ink. I assembled the basket with liquid adhesive, but didn’t begin arranging my bouquet quite yet!

After I had all of the die cut components ready to use, I stamped one of the beautifully scripty sentiments from Haunted Garden onto my chalkboard frame. (I like to peruse the craft aisles at the dollar store to see what kind of goodies I can take to the next level with my papercrafting goodies!) I left the frame unpainted, as I thought that the rustic wood grain worked beautifully with the rustic sunflower bouquet in my head. I stamped the greeting from Haunted Garden using Simon Says Stamp’s White Pigment Ink, then went over the letters with a white paint pen to make those letters crisp and vibrant.

Now it was time to arrange my flowers! I first adhered the basket with a *triple* layer of foam adhesive squares, then began arranging the flowers, adhering them with single, double, and triple layers of foam squares as well! Once my flowers were all securely adhered to the frame, I began filling the rest of the bouquet with the abundance of leaves, tucking some behind, some in front, some with liquid adhesive, some with multiple levels of foam squares… tons of dimension on this one, and why not since it’s not being mailed? The final touch: a double twine bow tucked amongst the blooms!

Well, that’s all for my project today! I love combining papercrafting goodies with fun, non-paper finds to create truly unique pieces that can be displayed around the house or on my desk. Thanks so much for stopping by today, and have a marvelous day!

Filed Under: simon says stamp Tagged With: die cutting, haunted garden, home decor, sunflower basket

Simon Says Stamp Cozy & Bright Inspiration, Part Two!

October 2, 2026

This post was sponsored by Simon Says Stamp. Thanks, Simon! *I have gathered links to all of the products used at the bottom of the post for your convenience, using affiliate links at no extra cost to you. Thank you for shopping with my links! I truly appreciate your support for my work!*

Hi friends! I am back a day later than expected…. my kiddos shared some germs with me, and I was pretty puny yesterday. But I’m back today to share more inspiration using the gorgeous new products from the Cozy & Bright kit, which is sadly sold out, but luckily the folks at Simon Says Stamp give us the option to purchase individual elements even after the kits sell out! I created another pair of cards using a completely different colorway from the previous projects; red and gold are the ultimate festive color palette, in my opinion! Let’s get started with the details on my projects.

I love the absolute ease with which you can create cards using ephemera packs. Simple Stories has some truly exquisite ephemera packs (click HERE to see them all!), chock full of traditional and whimsical imagery and with a huge amount and variety of pieces to make an insane amount of projects.

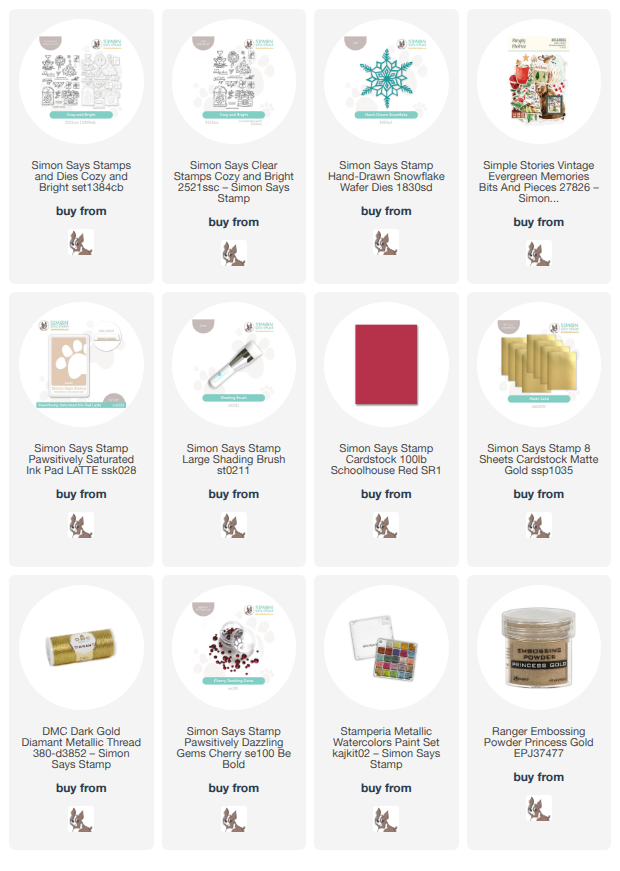
To begin my first card, I pulled out some of my favorite botanical die cuts from the Vintage Evergreen Memories ephemera pack to create a lush holiday swag, from which I could hang the coordinating baubles included with the pack, as well! Before arranging and adhering the pieces, however, I splattered some sparkling gold watercolor on the top left corner of my horizontal Lipstick Red A2 card front. I then layered the ephemera die cuts with a variety of heights of thin and thick foam adhesive.

For the greeting, I gold embossed a sentiment from the beautiful new Cozy & Bright stamp set, again using Lipstick Red cardstock, then used the detailed coordinating die to cut the sentiment out. I tucked the greeting amongst the baubles and foliage with some foam adhesive squares, then added a gold thread bow for added shimmer and texture. Finally, I wanted to add a little more interest the semi-bare area at the very bottom of the card front, so I trimmed a 1/4″ strip of Matte Gold Metallic cardstock and adhered it about 1/4″ from the bottom of the card front. The last step was a few shimmering Cherry Pawsitively Dazzling Gems!

For the next project, I kept the color palette simple and super festive with vibrant red and shiny gold. I stamped the champagne coupe tower and a sentiment from Cozy & Bright on more Lipstick Red cardstock with embossing ink and added gold embossing powder. I used the coordinating dies for the stamp set to cut both elements out, then used those same sparkling gold watercolors to add some shimmer to the cocktails within the champagne coupes!

For the background, I kept things simple, making this card one that could easily be mass-produced for the holidays. I trimmed 1/4″ of of each of the long sides of my A2 Lipstick Red card front, then blended Latte Pawsitively Saturated Ink along the long edges. While the Latte ink is a medium beige shade, it does add an “antique” element to the card, creating almost a vignette effect. I lightly splattered the blended edges with some more gold watercolors then adhered a few golden Hand-Drawn Snowflake die cuts along the edges, trimming off the excess. I popped up the two embossed die cuts with some foam adhesive in the center of the embellished card front, then placed the 3.75″ x 5.5″ card front in the center of a full size A2 Matte Gold Metallic card front, allowing strips of gold to peek out from each of the long sides. Finally, I added a few more Cherry Pawsitively Dazzling Gems for even more shimmer and shine!

Well, that’s all for my projects today! I am so excited to start delving into Christmas projects now. It’s the most wonderful time of the year! Thanks so much for stopping by today, and have a marvelous day!
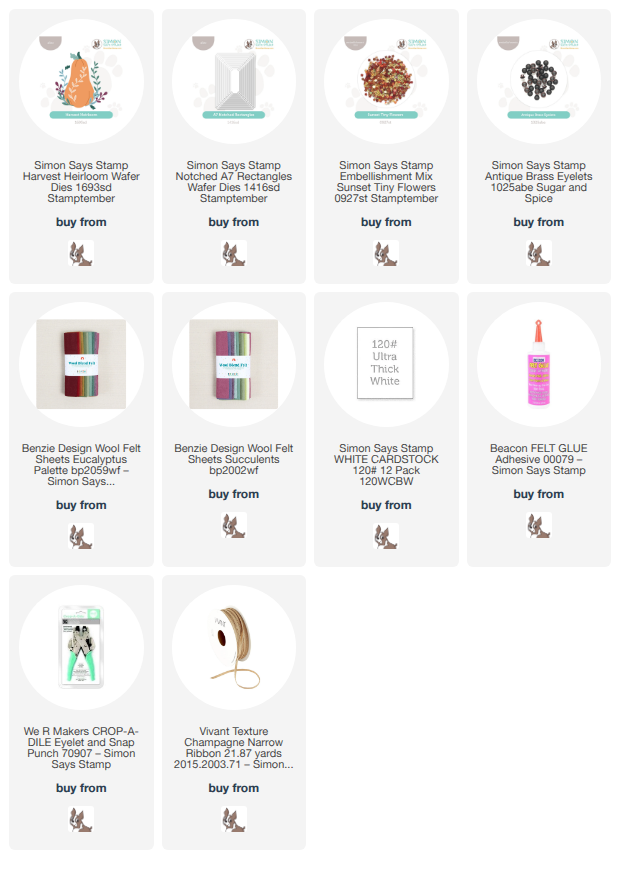
Filed Under: simon says stamp Tagged With: christmas card, cozy and bright, ephemera, hand-drawn snowflake, heat embossing, holiday card, simple stories

Special Release: Simon Says Stamp Limited Edition STAMPtember Christmas Card Kit!

September 30, 2026

This post was sponsored by Simon Says Stamp. Thanks, Simon! *I have gathered links to all of the products used at the bottom of the post for your convenience, using affiliate links at no extra cost to you. Thank you for shopping with my links! I truly appreciate your support for my work!*

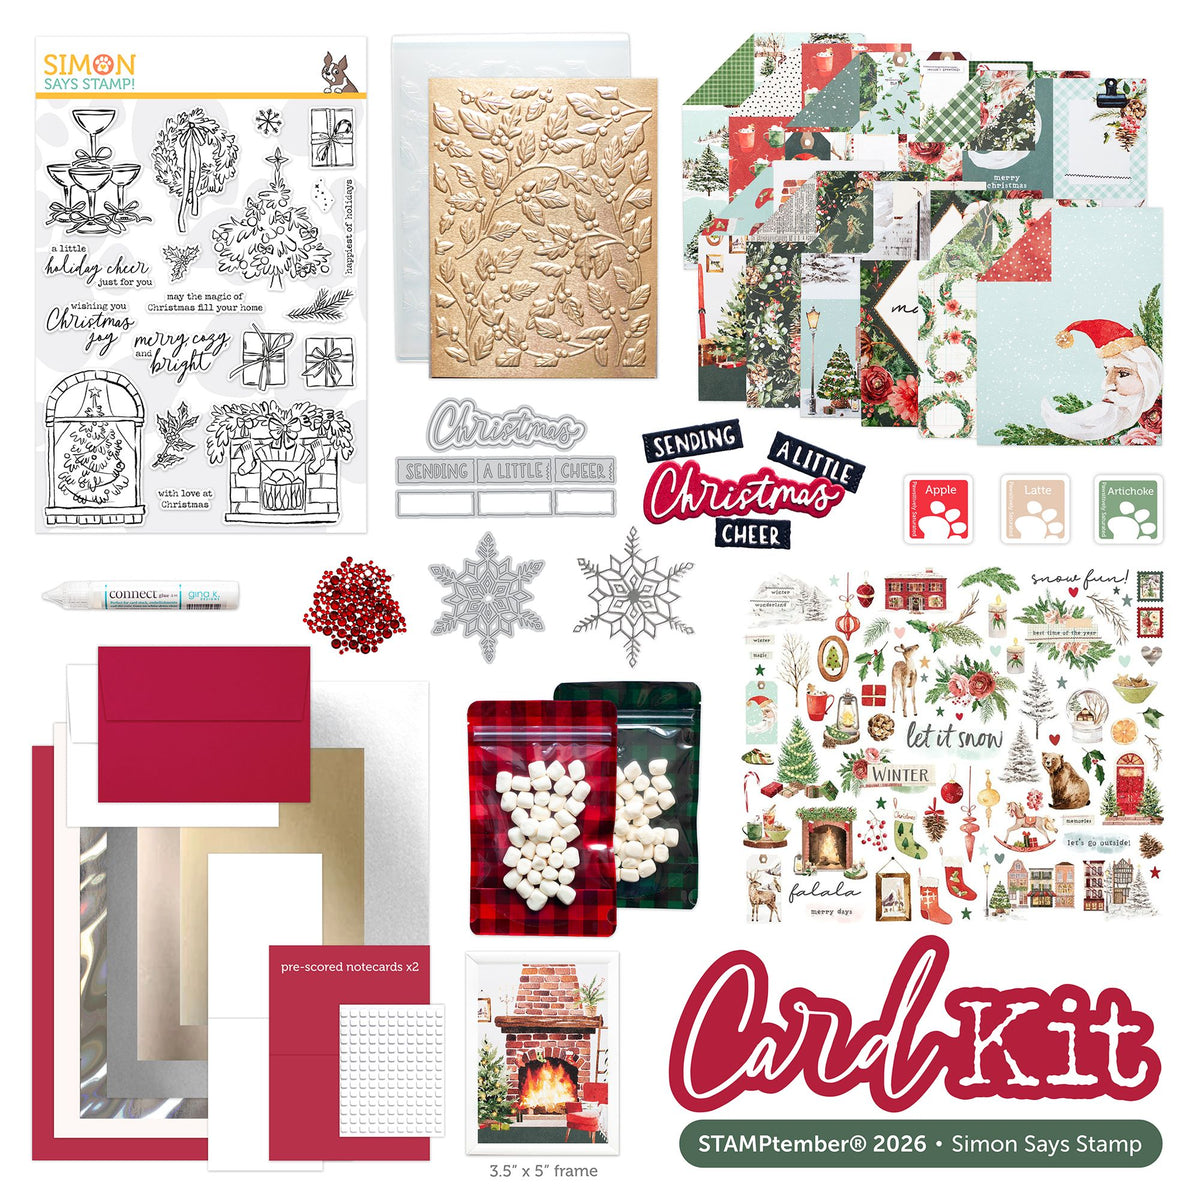
Hi friends! Boy do I have some fun projects to share with you! Simon Says Stamp is ringing in the end of STAMPtember 2026 with an absolute banger of a holiday card kit! (Click HERE to check out the entire collection!) Throughout the month, we’ve seen fabulous limited edition collaboration sets from so many of our favorite companies, celebrating this wonderful hobby and all of the joy that it brings us. In addition to those limited edition sets, Simon has also given us super fun surprises and flash sales, a fun Boo Bundle release, and now an absolutely gorgeous holiday card kit that contains so many exquisite components and has a superb value. Here’s a peek at the contents of the Limited Edition Cozy & Bright STAMPtember Holiday Card Kit:

A large stamp set, sentiment die set, snowflake die, embossing folder, embellishments, specialty papers and ephemera, even a photo frame… everything that you could possibly need to jumpstart your holiday crafting! And the value is incredible: over $100 of products for $69.99! I went to town with the contents of this kit and created two separate project suites in different color ways using components from the kit.

For today, I kept the color palette for today’s projects somewhat muted and elegant, with beautiful sage green, gold, and lots of sparkle, taking advantage of the specialty papers in the kit and using those as my inspiration. Let’s get started with the details on my projects!

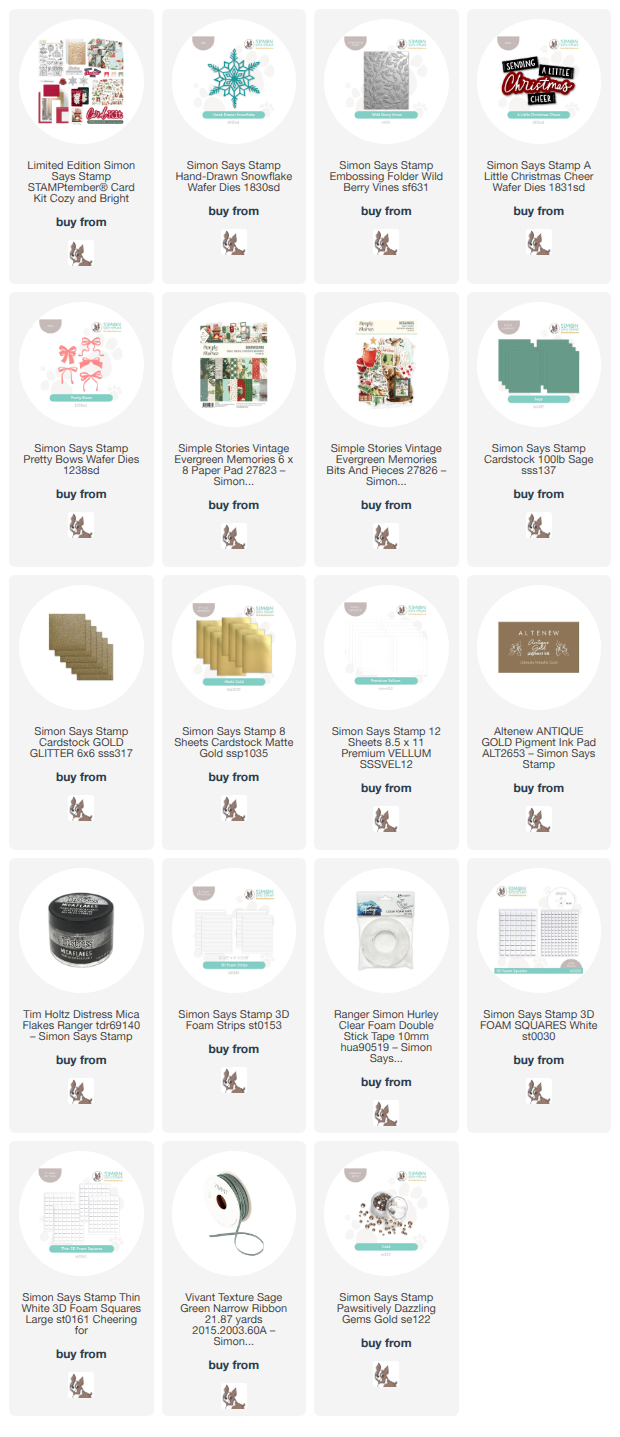
For my first project, I used the absolutely gorgeous Wild Berry Vines embossing folder to create some elegant “wrapping paper.” I began by embossing an A2 panel of Sage cardstock using the new embossing folder, then swiping glitzy gold metallic ink directly over the raised areas. I think it looks remarkably similar to elegant luxury wrapping paper! Once I had finished the backdrop itself, I decided to add some sparkling “ribbons” to my gift packaging. I trimmed two strips of gold glitter cardstock as well as two thinner strips of Matte Gold Metallic cardstock from the Cozy & Bright Kit, layering the thinner strip atop the glitter strip and adhering them to my “wrapping paper” at a diagonal. I also die cut some bows using the previously-released Pretty Bows die set, layering two bows together to create a nice, fluffy bow for my elegant gift package!

For the greeting, I die cut the detail layers of the new Sending A Little Christmas Cheer die, included with the Cozy & Bright kit, from more of the Matte Gold Metallic cardstock. I backed the sentiment strips with the solid layer cut from more Sage cardstock, then die cut the shadow for the scripty Christmas die cut from heavyweight vellum cardstock. I adhered all of the layers together using liquid adhesive, then popped them up on the gift package using foam adhesive squares and clear foam adhesive for the vellum piece. Finally, I added some sparkling Gold Pawsitively Dazzling Gems for one last touch of sparkle!

I am absolutely loving the idea of creating home decor using my papercrafting supplies, so I was thrilled to see the addition of the 3″x5″ frame included with the Cozy & Bright kit! I decided to make a flat “snow globe” using some of the beautiful printed papers and ephemera included with the kit. I selected the serene deer, some snowy trees, and a snowy background from the printed papers included with the kit, arranging the trees and deer with foam adhesive squares. I added some gold snowflakes cut using the Hand-Drawn Snowflake die, included with the Cozy & Bright kit, trimming the edges with my trimmer to allow them to hang off the edges a bit.

To create the height needed for my shaker, I placed the glass in the frame, then added foam adhesive strips around the edge of the glass to create space between the glass and the finished image. I filled the space at the bottom of my finished scene with Ranger Mica Flakes, which move beautifully in the frame when shaken but provide gorgeous, snowy sparkle when sitting still, then placed the glass over the top of the finished background, sealing in the sparkling flakes. After I replaced the back of the frame, I used my hot glue gun to attach some coordinating ephemera to the front of the frame, along with a coordinating sage ribbon bow. I just love the way this frame came out, and I think it’s such a fun way to get more from our papercrafting supplies!

Well, that’s all for my projects today! I have another project suite to share with you using a completely different color way, so be sure to come back tomorrow for more holiday inspiration using this exquisite Cozy & Bright Kit! (Click HERE to check out the entire collection!)
Remember: the curated kit itself (and the value price) is limited edition, so if you want to lock in that fantastic price and all of the pieces, be sure to move quickly!
The individual components will be available even after the kit sells out, but who can say no to such amazing value! They sure sent STAMPtember out with a bang!!

Thanks so much for stopping by today, and Happy STAMPtember!

Filed Under: simon says stamp Tagged With: christmas card, christmas decor, cozy & bright, embossing folder, hand drawn snowflake, holiday card, limited edition, pretty bows, sending a little christmas cheer, stamptember, wild berry vines

  • « Go to Previous Page
  • Page 1
  • Page 2
  • Page 3
  • Page 4
  • Interim pages omitted …
  • Page 143
  • Go to Next Page »

Primary Sidebar

  • Facebook
  • Instagram
  • Pinterest
  • YouTube

Favorite Shops

Secondary Sidebar

Subscribe

Enter your email address to subscribe to this blog and receive notifications of new posts by email.

Instagram
Something is wrong.
Instagram token error.
Follow
Load More

Archives

Tags

3D embossing folder alcohol markers better press birthday birthday card blog hop card kit christmas christmas card christmas tag colored pencil copic copic coloring Daniel Smith die cutting embossing folder embroidery felt giveaway holiday holiday card hot foil ink blending karin brushmarker pro layered stencil masculine my monthly hero new release no line coloring no line watercolor OLO marker olo markers original illustration pawsitively saturated rainbow shaker card slimline stamping stamptember stencil thank you thinking of you valentine's day video watercolor

Popular Posts

Shaped Holiday Shaker Card with New Simon Says Stamp Jolly Season Card Kit of the Month!
Simon Says Stamp Card Kit November 2026: Jolly Season!
More Inspiration Using the Warm Hearts Christmas Card Kit for Simon Says Stamp!
Altenew Whimsical Wonder Stamps/Dies/Stencils/Embossing Folders Collection Release Blog Hop + Giveaway
Simon Says Stamp Sending Cheer Blog Hop- Day 2 + Freebie + Giveaway!
Altenew 9th Anniversary Blog Hop Day 1 + Giveaway (over $2,200 in Total Prizes)
Pinkfresh Studio Create & Connect: Holiday!
Altenew March 2020 Release Blog Hop+Giveaway!
Tonic Studios Garden Party Blog Hop!
Hero Arts My Monthly Hero May 2022 Blog Hop+Giveaway!

Disclosure

Some affiliate links are used in my posts. This means that, should you click on one of my links and purchase something from that company, I will receive a small portion of the sale at no extra cost to you. I use the money earned from these sales to help maintain my blog. I so appreciate you visiting and, if you do choose to use one of my affiliate links, thank you so much for your support!
Copyright © 2026 ·Brunch Pro Theme · Genesis Framework by StudioPress · WordPress · Log in
Loading Comments...