• Skip to main content
  • Skip to primary sidebar
  • Skip to secondary sidebar

Sixth Street Sundries

Emily Midgett

  • Home
  • About Me
  • Contact
  • OLO Marker Color Swatch Chart
  • Shop

Trinity Stamps

STAMPtember Collaboration 9/4/25: Trinity Stamps!

September 4, 2025

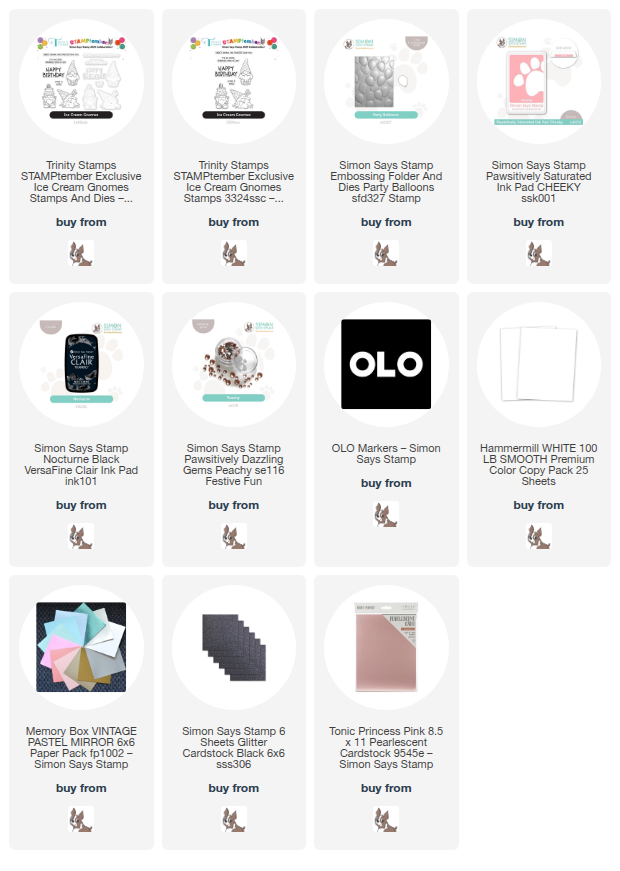
Hi friends! Happy STAMPtember! If you are new to STAMPtember from Simon Says Stamp, throughout the month of September, Simon Says Stamp will have exclusive collaborations with some of our favorite stamping companies, releasing a limited edition stamp set designed in collaboration with a different company nearly every day! (Click HERE to see the Collaboration Sets page, and be sure to bookmark it!) We are kicking the super special, limited edition Collaboration sets off with a favorite company of mine: Trinity Stamps! Taniesa, the owner, is just about one of the sweetest people you could meet, and her stamp sets combine whimsy and classic imagery to create darling products for your craft room. For today’s project, I paired one of the sweet gnomes from the exclusive, limited edition Ice Cream Gnomes STAMPtember set with some goodies from Simon Says Stamp. Let’s get started on the details for my project!

I began by stamping the gnome from Ice Cream Gnomes with his cute little birthday cake hat and two different happy birthday sentiments onto some white cardstock using Simon Says Stamp Nocturne black pigment ink, then added clear embossing powder over the top to make the lines extra crisp and bold. I then used OLO Markers to add some simple coloring to the gnome, keeping the colors to a red, brown, and peach color palette. I die cut the finished image and sentiments with their coordinating dies.

For the background, I began by using a blending brush to lightly blend Pawsitively Saturated Cheeky Ink in the center of a white card base, concentrating the color in the center and slackening the pressure towards the edges to create a smooth fade. I ran this blended panel through my die cutting machine using the Party Balloons Embossing Folder from Simon Says Stamp and trimmed 1″ off of the bottom. I splattered the blended area with some metallic watercolors to add some fun, sparkling texture. Once the watercolor splatters had dried, I added a very thin strip of black glitter cardstock peeking out from the bottom of the embossed panel, then added that to a pearlescent pink A2 card front.

After I had completed the card front, I added the colored and die cut gnome and sentiments, popping a few blush balloons die cut using the coordinating die from the Party Balloons Embossing Folder and embossed using the embossing folder for extra dimension and shape. I added some strings with a black pigment pen, then finished everything off with some Peachy Pawsitively Dazzling Gems for added sparkle!

Well, that’s all for this project. If you love the STAMPtember Collaboration Sets, don’t wait to purchase them, because these limited edition sets will NOT be restocked. Once they’re gone, they’re gone! (Click HERE to see the Collaboration Sets page, and be sure to bookmark it!) Each day holds new surprises, so be sure to check out the Simon Says Stamp social media at noon ET every day throughout STAMPtember so that you don’t miss out. Thanks so much for stopping by today, and happy STAMPtember!!!
Filed Under: simon says stamp, Trinity Stamps Tagged With: 3D embossing folder, birthday card, embossing folder, olo markers, party balloons, stamptember, STAMPtember collaboration

Simon Says Stamp STAMPtember Collaboration: Altenew and Trinity Stamps!

September 24, 2024

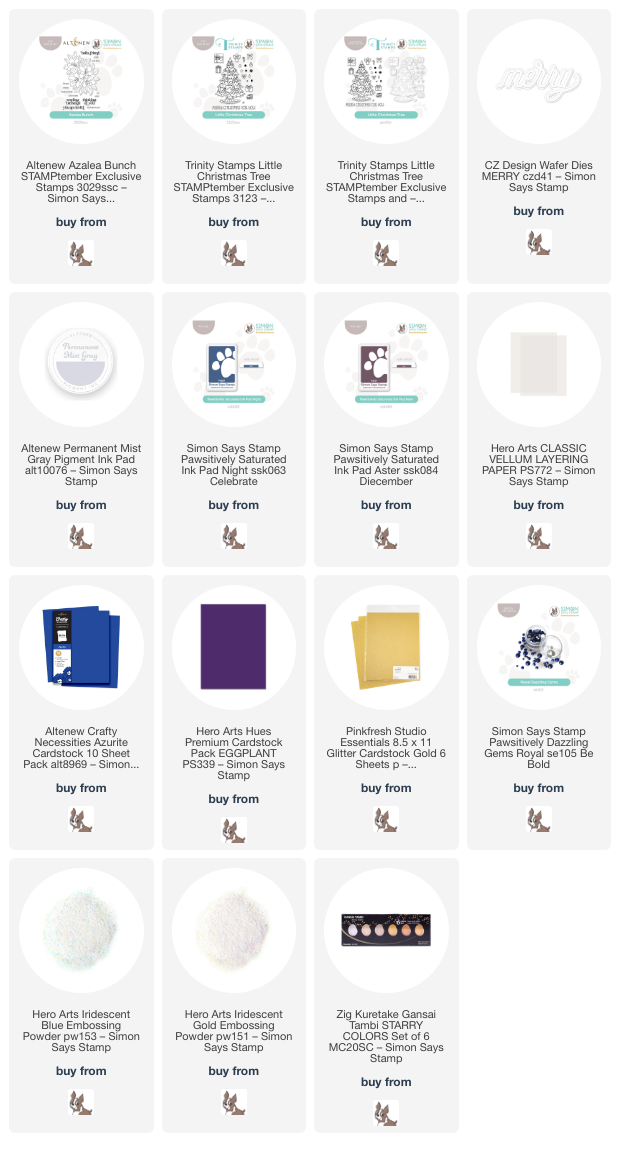
Hi friends! I am back today with some more inspiration using the lovely collaboration stamp sets from two lovely companies: Altenew and Trinity Stamps! Altenew created the exclusive Azalea Bunch stamp set just for the STAMPtember celebration, and Trinity created the festive Little Christmas Tree. I have created a pair of unique projects to share with you today, so let’s get started on the details!

*I have linked all of the products used at the bottom of the post for your convenience using affiliate links. Thank you for shopping with my links! I truly appreciate your support for my work!*

For my project using the beautiful Azalea Bunch, I first stamped the image once on white cardstock using no-line coloring ink, then again on vellum with sticky embossing ink. I heat embossed the vellum with white embossing powder and used my Copic markers to do some simple coloring on the white panel. I had intended to try to do a tri-fold card, but my vellum cracked when I scored it (don’t press too hard with vellum!) so I had to improvise a bit. I used my sharp scissors to fussy cut the vellum image in order to place it directly over the top of the colored image!

To adhere my vellum image cleanly, I created some greeting components behind which I could hide my adhesive. I stamped two of the sentiments from Azalea Bunch onto some white cardstock using deep navy ink, then stamped directly over the top using sticky embossing ink and added iridescent blue embossing powder. I used my sharp scissors to cut the larger greeting out and added it to the vellum floral piece with foam adhesive. I also added a Royal Pawsitively Dazzling Gem and a pretty white silk bow, then flipped the vellum piece over and added dots of liquid adhesive, finally placing the vellum piece directly over the top of my colored bouquet.

I trimmed the white panel down 1/4″ on each side, then mounted it to a panel of Altenew’s new Crafty Necessities Azurite cardstock and added a few more Royal gems for added sparkle. I have never tried this technique before, but I am loving the vellum overlay so much!

For my second card, I used the exclusive, limited edition Little Christmas Tree from Trinity Stamps to create this unique, dramatic eggplant-and-gold card. I started by heat embossing the large tree image in the center of an Eggplant card front using Iridescent Gold embossing powder. I then blended Pawsitively Saturated Aster ink around the edges and carefully splattered some gold watercolor around the tree, making sure not to splatter any on the tree itself. I also used the same gold watercolors to add extra details to the garland on the tree!

For the greeting, I die cut the detail layer of the CZ Designs Merry die from gold glitter cardstock and the shadow from some more Eggplant cardstock, layering them together with liquid adhesive and popping the sentiment up directly on top of the tree with some foam adhesive. Finally, I added a a bit more luxe to this dramatic card by adding some shimmering gems from my stash. Such a striking, non-traditional color palette for a holiday card, but no less festive for it!!

Well, that’s all for my projects today. These STAMPtember collaboration sets are limited edition and usually sell out very quickly, so if you’re on the fence, don’t wait too long! To sweeten the deal and make it even easier for you to shop, Heidi at Simon Says Stamp has offered free shipping for purchases over $25 for a limited time!!

These beautiful sets are sure to sell out quickly, so if you’re on the fence, don’t wait too long… these limited edition sets are gone forever once they sell out!

Thanks so much for stopping by today, and happy STAMPtember!!

Filed Under: altenew, simon says stamp, Trinity Stamps Tagged With: christmas card, copic coloring, die cutting, holiday card, ink blending, merry, no line coloring, stamptember

Trinity Stamps February 2024 Release!

February 13, 2024

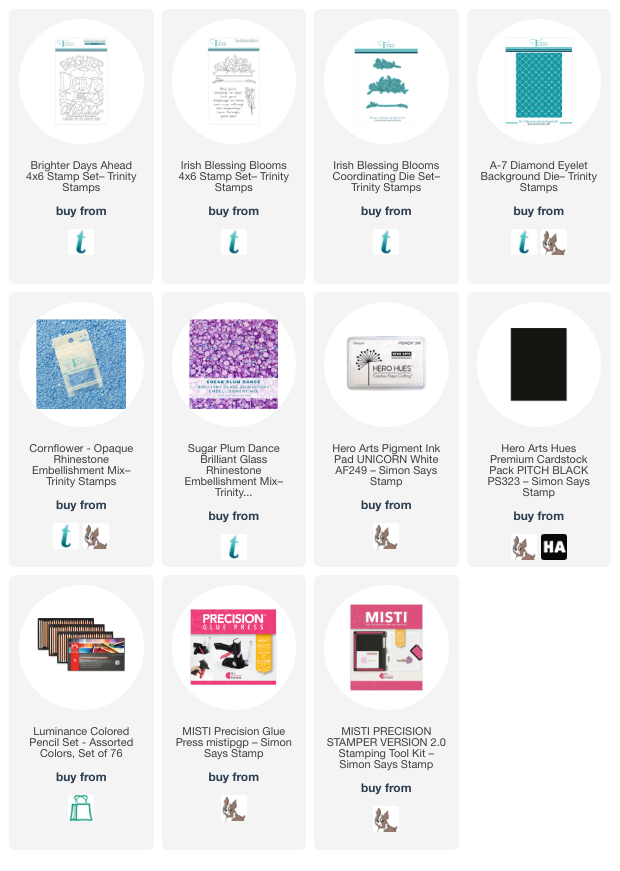
Hi friends! I am happy to be joining my friends at Trinity Stamps as a guest for this month’s release! The images in the February 2024 release are chock full of lovely springtime images, beautiful typography, and sweet dies. I was especially enamored of the Brighter Days Ahead stamp set and the Irish Blessing Blooms stamps and coordinating dies. I have been reminded of how much I love my colored pencils recently, and so thought that these two sets would look fabulous with a chalkboard effect using my Caran D’Ache Luminance colored pencils. Let’s get started with the details!

For both of my cards, I stamped the images to be colored onto black cardstock using white pigment ink. This is my favorite ink to use to do no-line coloring with my colored pencils on colored cardstock. Because the ink sits atop the cardstock rather than seeping down into it, I find that it blends very nicely in withe colored pencils without leaving any lines leftover on the finished image. I used Caran D’Ache Luminance colored pencils for both projects, making sure to have extra sharp point on my pencils especially for the edges of my images so that the exterior lines were nice and crisp.

My first card is a completely flat, one layer card using the new Brighter Days Ahead stamp set. I stamped the large focal point image using white pigment ink on the center of my A2 black cardstock panel, then selected some colored pencils to use to create a hand-drawn chalkboard effect. I kept the color palette minimal, using light blues for the lettering to allow it to stand out nicely. I almost always do a double layer of colored pencils when working with super intense colored cardstock like this black cardstock, which helps to ensure even, full coverage on all of the images.

After I had finished coloring the image, I didn’t want to cover it up with any die cuts or additional embellishment, so I simply added a few coordinating blue gems from the Cornflower Opaque Embellishment Mix. I could easily have left them off to make this card super easy to mail! I am absolutely obsessed with how vibrant these colored pencils look on this image.

My second card is another chalkboard look, this time featuring the Irish Blessing Blooms stamps and coordinating dies. I stamped the floral accents from the Irish Blessing Blooms stamp set on black cardstock, again using white pigment ink. I used the Caran D’Ache Luminance colored pencils to add some delicate, springy color to these images, making extra sure to keep the points on the pencils sharpened to a very fine point so as to keep the edges distinct and crisp.

Once I had finished coloring, I die cut the floral images using their coordinating dies. I also heat embossed the lovely greeting onto some more black cardstock using white embossing powder, trimming the embossed piece down with my trimmer and softening the piece by rounding the corners with a corner rounding punch. I also cut a smaller-than-A2 panel of more black cardstock and ran it through my die cutting machine using the A7 Diamond Eyelet cover plate. This cover plate adds a delicate pattern, made even more subtle by layering the piece on another piece of black cardstock to create a tone-on-tone background. I popped up the sentiment focal point with foam adhesive and accented it with the two floral die cuts. The final touch was to add a few Sugar Plum Dance Glass Rhinestones beneath the bottom floral embellishment. (Side note-I am absolutely smitten with the stunning glass rhinestones from Trinity’s December release. I use them on almost every project! Check them out HERE.)

Well, that’s all for my projects today! I encourage you to check out the darling new release from Trinity Stamps. So many adorable new goodies, perfect for getting you into a sunny springtime mood. Check out the full release HERE. Thanks so much for stopping by today, and have a marvelous day!


Filed Under: Trinity Stamps Tagged With: A7 Diamond Eyelet, brighter days ahead, caran d'ache, colored pencil, irish blessing, luminance colored pencils, no line coloring

Hot Foil on Coated Papers with Trinity Stamps- More Christmas Cards!

December 29, 2023

Hi friends! Can you believe that it’s almost 2024? I am in shock at how quickly the year has flown by us. My little boys are in that toddler stage where they don’t develop new skills as rapidly and don’t have enormous growth spurts like when they were babies, so it feels sometimes like time drags a little… but then it’s like good grief, where did the time go and who are these giant kids in my house?? Anyway, I have some final holiday cards to share with you using some holiday goodies that I purchased from my friends over at Trinity Stamps. They came out with some really marvelous holiday hot foil plates and dies this year, and I couldn’t resist pairing them with some of the fabulous coated papers that I’ve been collecting.

Using coated papers with your hot foil plates either works totally brilliantly or it doesn’t work at all. It’s a risk that I’ve been willing to take, because more often than not, the combination of the smooth coated papers and the shining hot foil works so beautifully that I want to hot foil every single one of my coated cardstocks. When I say “coated,” I mean those “fancy” cardstocks that you might be inclined to hoard (not that I know about hoarding cardstocks… wink, wink…) Think pearlescent and mirror cardstocks; the ones that have the specialty coatings on them to create beautiful texture and shine.

For my first project, I paired some absolutely spectacular pale blush pearlescent cardstock with the Frosty Foiled Flakes Hot Foil Plates and Dies (TS | SSS) and blush foil to create an impeccable tone-on-tone snowflake background. I arranged the different snowflake hot foil plates (love that they’re separated, so that you can use as many or as few as you like!) on my panel of pearlescent blush cardstock and used Blush foil from Spellbinders (SB | SSS) to foil them onto the cardstock. The amount of detail that you can pick up when using the coated papers with these super detailed hot foil plates is unreal. These snowflakes are small and delicate and every single detail worked beautifully with this foil and paper combination! I hot foiled a few extras on a scrap of the pearlescent cardstock so that I could die cut them, as well.

For the greeting, I used the Simply Sentimental Merry (TS | SSS) and Simply Sentimental Christmas (TS | SSS), cutting the detail layer from some shimmering rose gold glitter cardstock and the background from some heavyweight vellum. The vellum layer adds a little stability to these super delicate die cut letters without adding any extra bulk or color to this limited-palette card!

To assemble the card, I trimmed down the background panel slightly, leaving 1/4″ on each side of my pale blush A2 cardstock base. I added the greeting die cuts with some foam adhesive, then popped up some of the individual hot foiled and die cut snowflakes around the sentiment using more foam adhesive. The final touch was a smattering of Ethereal Stones Brilliant Glass Rhinestones for some more texture and sparkle!

My second card features the stunning Retro Baubles Hot Foil Plate (TS | SSS). I used Champagne Satin hot foil (SB | SSS) to foil these beautiful retro Christmas ornament images onto a panel of vivid magenta mirror cardstock. You could always hot foil this onto regular cardstock and use your favorite medium to add a more colorful feel to the background; I was simply so delighted with the look of the matte metallic hot foil on the mirror cardstock that I didn’t think it needed any further color! I trimmed the panel down on top and bottom and added some sparkling champagne glitter cardstock (PFS | SSS) to each section and mounted them to an A2 card base.

For the greeting, I used the Simply Sentimental Merry (TS | SSS) and Simply Sentimental Christmas (TS | SSS), cutting the detail layer from some coordinating deep magenta cardstock and the background from some more of the champagne glitter cardstock (PFS | SSS). I love the juxtaposition of the elegant script “merry” with the simple serif “Christmas.”

After I had popped the greeting die cuts up on the card front using foam adhesive, I used the Trinity Pickup Stick (TS | SSS) to add the gorgeous new Treasure Chest Brilliant Glass Rhinestones to some of the patterns on the individual baubles. The Trinity Pickup Stick (TS | SSS) to precisely add the baubles to the ornaments!

I just love how these cards came out; I think that they would be fairly easy to mass produce since there’s no coloring or ink blending on them. I hope you don’t mind my sharing a few final holiday cards even though it’s technically after Christmas. I am leaving my tree up at least until Epiphany. I just love the glow of the pretty lights!

Well, that’s all for my projects today! Thanks so much for stopping by today, and have a marvelous day!

Filed Under: Trinity Stamps Tagged With: christmas card, frosty foiled flakes, hot foil, merry christmas, retro baubles, simply sentimental

Belated Songs of the Season: Have Yourself a Merry Little Christmas

November 28, 2023

This post was sponsored by Simon Says Stamp. Thanks, Simon!

Hi friends! I know that I am a couple of days late for this month’s installment of Songs of the Season, but Thanksgiving and all of the family festivities surrounding it made me lose track of the date! This month, I’ve created a project using one of my all-time favorite holiday songs as inspiration: “Have Yourself A Merry Little Christmas” from Meet Me In St. Louis. As someone who grew up 20 minutes outside of St. Louis, this movie has always been dear to my heart. It follows the Smith family right at the turn of the 20th century, when, and I quote, St. Louis was “the center of the entire universe!” for the 1904 World’s Fair. The movie takes place over the course of a full year, but somehow, I feel like it is a Christmas movie. The moment when John Truitt surprises Esther behind the Christmas tree at the ball in his tuxedo and they gracefully waltz out together will never not give me butterflies. Esther’s elegant ruby red velvet dress, large silky hairbows, and touches of sparkle seemed to me to be the height of holiday elegance as a child who loved playing dress up and watching historical movies for the fashion as much as for the story.

You can watch the scene with Judy Garland’s classic version of “Have Yourself a Merry Little Christmas” above or HERE on YouTube. For my card, I tried to pull in several different textural and thematic elements present in the scene: the luxurious red velvet, the silky coat, the snowflakes, the holiday greenery adorning the house, etc.

Today’s card finally gave me an excuse to use a technique that I’ve had in my head for over a year: shiny red foiled snowflakes on Simon Says Stamp Rich Red Matte Metallic foil cardstock. I used shiny Red Glimmer foil to hot foil the Trinity Frosty Foiled Plates snowflakes onto an A2 panel of Rich Red Matte Metallic foil cardstock. The contrast between the shiny foiled snowflakes and the super smooth, brushed red foil cardstock is just enough to create a subtle texture and pattern on the background panel. I am totally in love with this technique and want to try it on everything!!

Throughout the movie, the young ladies adorn their coiffures with huge bows, as was the style in 1904. To emulate this, I die cut the Giant Gift Bow die from Pawsitively Velvet red cardstock, popping up the top layer with foam adhesive to give extra dimension and create a shadow to allow it to be more visible. I also die cut some foliage from the Berry Stems dies, arranging them behind the bow to create a festive, elegant, and traditional holiday greenery arrangement.

After I had finished arranging the bow and greenery, I heat embossed a greeting from the Graceful Holiday Greetings set onto some heavyweight vellum using white embossing powder. I popped the greeting up with clear foam adhesive, nestling it amongst the holiday foliage. Finally, I added a few sparkling red gems for one last elegant touch of sparkle!

Well, that’s all for my project for this month’s Songs of the Season. I can’t believe that Christmas is less than a month away! The Songs of the Season series won’t be going anywhere, though, because I love Christmas no matter what month it is. 🙂

Just a reminder: you can get this absolutely adorable freebie with any $25 purchase of Tim Holtz brand products. Here’s a little tag that I created using Walter:

Isn’t he just the cutest? This set is only available at Simon Says Stamp while supplies last, so don’t wait! If you’re new to Tim Holtz, I can’t recommend the Distress Inks highly enough. They are water reactive and marvelous for watercoloring, so if you’re a colorist like me, you definitely ought to check them out. The color palette is wide-ranging and so, so beautiful.

Well, that’s all for me today. Thanks so much for stopping by, and be sure to check back later this week as we dive in headfirst for DieCember! It’s going to be an amazing month! Have a marvelous day!

Filed Under: simon says stamp, Trinity Stamps Tagged With: berry stems, frosty foiled flakes, giant gift bow, graceful holiday greetings, hot foil, monochromatic, snowflakes

  • Page 1
  • Page 2
  • Go to Next Page »

Primary Sidebar

  • Facebook
  • Instagram
  • Pinterest
  • YouTube

Favorite Shops

Secondary Sidebar

Subscribe

Enter your email address to subscribe to this blog and receive notifications of new posts by email.

Instagram
Something is wrong.
Instagram token error.
Follow
Load More

Archives

Tags

3D embossing folder alcohol markers better press birthday birthday card blog hop card kit christmas christmas card christmas tag colored pencil copic copic coloring Daniel Smith die cutting embossing folder embroidery felt giveaway holiday holiday card hot foil ink blending karin brushmarker pro layered stencil masculine my monthly hero new release no line coloring no line watercolor OLO marker olo markers original illustration pawsitively saturated rainbow shaker card slimline stamping stamptember stencil thank you thinking of you valentine's day video watercolor

Popular Posts

Simon Says Stamp Sending Cheer Blog Hop- Day 2 + Freebie + Giveaway!
Altenew October 2026 Release Blog Hop + Giveaway!
Rustic Monochromatic Stars for Christmas with Rainbow Splash!
Waffleflower July Release Blog Hop!
Hero Arts Partners Blog Hop: Lawn Fawn!
March 2020 Essentials By Ellen Blog Hop+Giveaway!
December 2018 My Monthly Hero Blog Hop + Giveaway!
The Ton Stamps Summer Release: Day 1
The Ton Anniversary Release: Day 1!
Altenew Paint A Flower: Carnation Blog Hop+Giveaway!

Disclosure

Some affiliate links are used in my posts. This means that, should you click on one of my links and purchase something from that company, I will receive a small portion of the sale at no extra cost to you. I use the money earned from these sales to help maintain my blog. I so appreciate you visiting and, if you do choose to use one of my affiliate links, thank you so much for your support!
Copyright © 2026 ·Brunch Pro Theme · Genesis Framework by StudioPress · WordPress · Log in
Loading Comments...