• Skip to main content
  • Skip to primary sidebar
  • Skip to secondary sidebar

Sixth Street Sundries

Emily Midgett

  • Home
  • About Me
  • Contact
  • OLO Marker Color Swatch Chart
  • Shop

3D embossing folder

Altenew Craft Your Life Project Kit: Lush Garden Release Blog Hop + Giveaway

August 12, 2021

Hi there! I’m super excited to be helping Altenew introduce this month’s Craft Your Life Project Kit: Lush Garden! We’re celebrating with a blog hop, and you should have arrived here from Jenny Colacicco, and your next stop is LauraJane. You can also start back at the Altenew Card Blog (where I have another project using this gorgeous kit!) to get the full hop list. This month’s Craft Your Life Project Kit: Lush Garden kit is absolutely stunning. Here’s a peek at the kit’s contents:

The kit contents include the following exclusive products:

– one 6″ x 8″ clear stamp set containing 24 stamps made in the USA from high-quality photopolymer

– four coordinating dies

– one simple coloring and layering stencil which coordinates with the stamp set 

– one 6×6 3D embossing folder

– one simple coloring stencil set (3 stencils) which coordinates with the embossing folder

Note: These products are NOT sold separately.

These kits are absolutely fabulous and sell out quickly, so if you want to be guaranteed a kit of your own each month (and at a discount!), be sure to subscribe! I have three projects for you today using all of the kit’s components, so let’s get started with the details!

My projects use all of the individual pieces of the kit and work their way up in levels of difficulty and intricacy, featuring simple die cutting and 3D embossing, to simple no-line coloring and layered die cuts, to the gorgeous and intricate layered stenciled 3D embossing card. Let’s get started with the details!

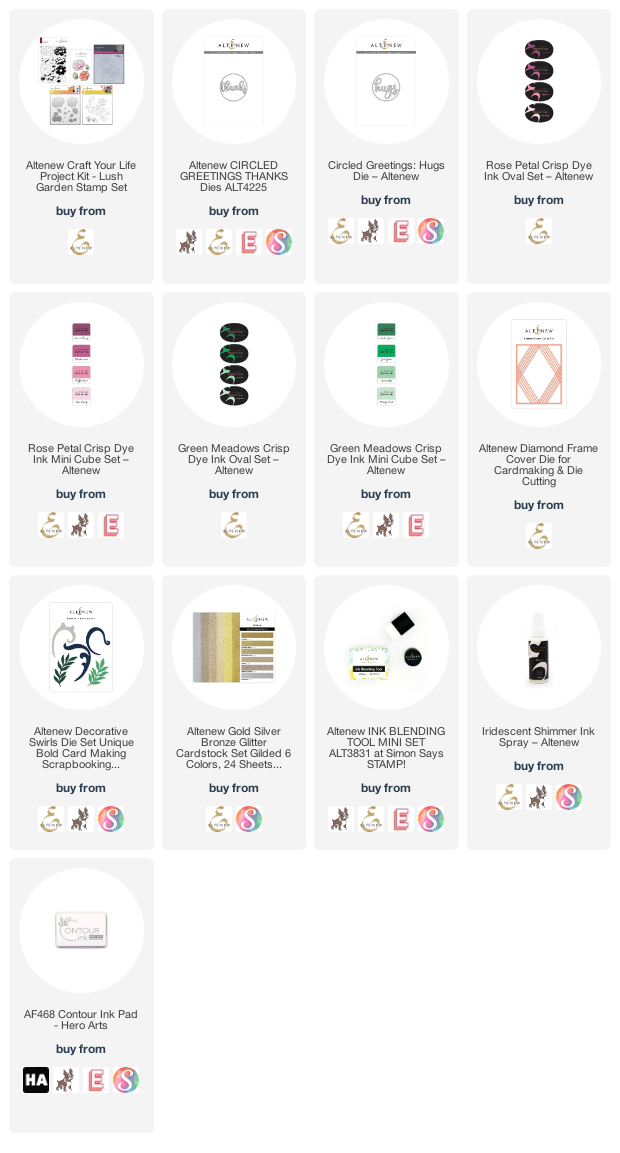
My first card is the simplest of the trio, featuring a beautiful white-on-white color scheme that allows the stunningly detailed 3D embossing folder included in the Lush Garden to really shine on its own! I simply ran an A2 panel of white cardstock through my die cut machine with the embossing folder. Totally gorgeous on it’s own!

I die cut the Circled Thanks from another panel of white cardstock, then added it over the top of the embossed panel with some Instant Dimension Foam Adhesive. I love how the super detailed 3D embossing is peeking out from behind the die cut greeting! So simple, but so elegant.

My second card features some no-line coloring using the beautiful line-drawn images in the Lush Garden stamp set. I love that you receive both the outlines as well as the layered stamps to craft however you choose! I stamped one of the flower images and some foliage using no-line coloring ink, then used my Copic markers to add some beautiful shades of mauve and mint. I die cut the finished colored images with the coordinating dies, included in the Lush Garden kit.

For the card base, I die cut the newly released Diamond Frames die from some white cardstock, then adhered it with liquid adhesive to a white A2 card base. I arranged my colored flowers and foliage on the card front, adding some white foliage die cuts (cut using the Decorative Swirls die set) to help fill it out a bit more, and adhered everything to the card front with a mixture of foam and liquid adhesive for lots of dimension. I added a Fancy Hugs greeting (cut using the Gilded Glitter Cardstock), which I added with some more foam adhesive. Finally, I added a few iridescent gems for some sparkle.

My final project features the absolutely fantastic layering stencils that are designed to work with the 3D embossing folder. How stinking cool is that?! I began by running a panel of white cardstock through my die cut machine with the 3D embossing folder included in the Lush Garden kit. I then used many different ink colors and the stencils to add color to the individual elements on the embossed panel, including the Rose Petal quartet, Green Meadows for the foliage, and Sunkissed and Peach Perfect individual inks for the flower centers and sunny little flowers on the bottom. I also blended some light green ink around the edges of the finished blended card and spritzed it with some Iridescent Shimmer Spray. I love the ethereal feel to this background with the soft, but vibrant blended colors and beautiful shimmer!

I kept the greeting simple, adding a white hugs from the Circled Greetings: Hugs die cut, trimmed away from the circle and popped up with some foam adhesive. I also added a small stamped greeting from the Lush Garden stamp set that I added with some more foam adhesive.

Well, that’s all for my projects today! If you love this kit as much as I do, don’t hesitate to order, because the last one sold out lickety split on release day (and on restock day, too!). We have some fun giveaways to celebrate this amazing new Lush Garden kit!

$300 in total prizes! To celebrate this release, Altenew is giving away a $50 gift certificate to 2 lucky winners and a $ 25 gift certificate to 8 winners! Please leave a comment on the Altenew Card Blog and/or each designer’s blog post on the blog hop list below by 08/18/2021 for a chance to win. Altenew will draw 10 random winners from the comments left on each stop of this blog hop and announce the winners on the Altenew Winners Page on 08/20/2021.

Your next stop on the hop is LauraJane. Thanks so much for stopping by today, and happy hopping!
Filed Under: altenew Tagged With: 3D embossing folder, circled greetings, circled greetings hugs, circled greetings thanks, craft your life project kit, diamond frame, ink blending, lush garden, no line coloring, no line copic coloring

Altenew Craft Your Life Project Kit: Seasonal Blooms Release Blog Hop + Giveaway

July 12, 2021

Hi there! Today, I am super stinking excited to be helping Altenew introduce their newest monthly release: Craft Your Life Project Kits! We are, of course, celebrating this new release with a blog hop full of inspiration! You should have arrived here from LauraJane, and your next stop is Tina Smith. You can also start back at the beginning at the Altenew Blog. Monthly kits are so much fun, especially when they’re chock full of products like Altenew’s new Craft Your Life Project Kits. Here’s Altenew’s description for these new kits:

Introducing our first-ever Craft Your Life Project Kit an exciting monthly package that is sure to get the creative juices flowing! Featuring a 6×8 stamp set, coordinating die set, as well as a stencil and embossing folder to fit the theme, this project kit has almost everything you need to start crafting. Just add ink and cardstock, and you’ll be good to go!

This project kit contains the following exclusive products:

– one 6″ x 8″ clear stamp set containing 13 stamps made in the USA from high-quality photopolymer
– nine coordinating dies
– one coordinating simple coloring stencil set containing 3 stencils
– one 6×6 3D embossing folder

Note: These products are NOT sold separately.

If you’re as in love with these kits as I am, you’ll definitely want to subscribe to make sure that you are guaranteed a kit each month! These products are only sold as a bundle, but they all work together so beautifully that you want to have them all! I have two projects to share with you today, so let’s get started with the details!

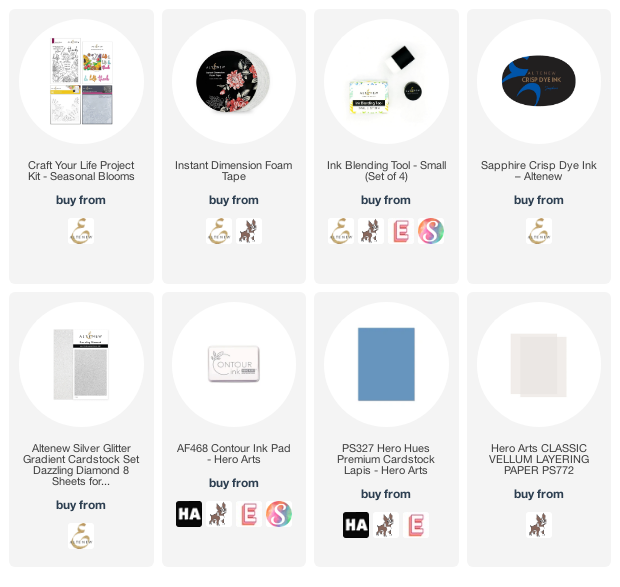
The products in the new Craft Your Life: Seasonal Blooms kit work so beautifully together or as separate pieces. One of my favorite elements in the kit is the die cut frame that you can use with the gorgeous main stamp image.

I stamped the main image using some no-line coloring ink, then colored all of the images in a colorful array of Copic markers, trying to keep the overall color palette a little on the cool side to keep things consistent, but lots of vibrant, eye-catching color. I die cut the finished image using the coordinating frame die included in the Craft Your Life: Seasonal Blooms kit.

Next, I heat embossed the greeting from the Craft Your Life: Seasonal Blooms kit (one of my absolute favorite quotes from Winnie-the-Pooh!! So excited to have this in stamp form.) using white embossing powder onto a rectangle of heavyweight vellum.

I added the floral frame to a vibrant pink A2 card base using Instant Dimension Foam Tape, then added the vellum sentiment panel with some clear dimensional adhesive. The final touch was to add some sparkling pink gems! I love the super saturated color on this one… so fun and happy!

My second card is much more simplistic, but so elegant, with so much texture! I am basically obsessed with the 3D embossing folders, and the folder included in the Craft Your Life: Seasonal Blooms kit is totally stunning in it’s incredible detail. It makes for such a simple, quick, sophisticated card.

I placed an A2 panel of lovely blue cardstock in the included embossing folder and ran it through my die cut machine. I then blended Sapphire ink along the edges using a small blending tool. I think this makes the flowers almost glow! I also splattered some white gouache on the panel to add even more texture and interest to the clean area of the background.

I die cut a “thanks” sentiment and its coordinating halo die from some of the newly released Dazzling Diamond glitter cardstock (which I believe is currently out of stock, but will be restocked soon, so be sure to sign up for email notifications when it returns to the Altenew store!) and some more heavyweight vellum. I adhered it to the embossed card front, then added a few iridescent gems to the card front for added sparkle!

Well, that’s all for my projects today. Altenew has some fun giveaways to celebrate this release!

$300 in total prizes! To celebrate this release, Altenew is giving away a $50 gift certificate to 2 lucky winners and a $25 gift certificate to 8 winners! Please leave a comment on the Altenew Card Blog and/or each designer’s blog post on the blog hop list below by 07/18/2021 for a chance to win. Altenew will draw 10 random winners from the comments left on each stop of this blog hop and announce the winners on the Altenew Winners Page on 07/20/2021.

Your next stop is Tina Smith. Thanks so much for stopping by today, and happy hopping!

Filed Under: altenew Tagged With: 3D embossing folder, copic coloring, craft your life, no line copic coloring, project kit, seasonal blooms

Altenew Eclectic Vibes Stamps/Dies/Stencils/Embossing Folders Collection Release Blog Hop + Giveaway

July 5, 2021

Good morning! I’m popping in quickly from vacation again to share my projects for the July Altenew Eclectic Vibes release! You should have arrived here from Verity Biddlecombe, and your next stop is Jenny Colacicco. You can also start back at the Altenew Blog if you get lost! I have three projects for you today, so let’s get started with the details.

For my first project, I created a muted happy birthday card with lots of texture using the new Gardenia Duo and Just A Number die set paired with the older Deck Planks 3D embossing folder. I heat embossed the Gardenia Duo onto some watercolor paper, then watercolored the images using the Artists’ Watercolor 24 Pan set.

I embossed a gray background using the Deck Planks 3D embossing folder, then blended some Lava Rock ink around the edges to give it a really weathered look. I adhered the watercolored magnolias using Instant Dimension Foam Tape, as well as the greeting die cut from Just A Number die set from black and white card stock. Finally, I added some iridescent white pearls for some extra texture!

My next project features a sympathy card with a chalkboard look using the new Pressed Flowers 3D embossing folder. I began by running an A2 panel of black cardstock through my die cutting machine using the Pressed Flowers 3D embossing folder. I then used a foam blender to brush some white pigment ink over the raised areas on the embossed panel. I love the subtle chalkboard effect it creates! I also splattered some white paint for added texture.

I cut the Fancy Peace die twice from white cardstock and adhered them together to create a dimensional die cut. I also white embossed a greeting from Thinking Of You onto a strip of black cardstock, then popped it up with some more Instant Dimension Foam Tape. A few more white iridescent pearls finished it off.

My final project continues the black and white color scheme, but with a pop of vivid pink using the new Watercolor Extravaganza stamps. I stamped a variety of blooms using the pink inks from the Spring Bouquet ink set, then die cut them with their coordinating dies. I also die cut the new Thank You For Being My Friend die from black and white cardstocks, layering them together with liquid adhesive.

For the background, I die cut a white Layered Plaid B die cut, then cut a circle from the center using the Create A Wreath die set. I also die cut a plain wreath using the same die so that I could inlay the circle frame within the plaid. I added the flowers and sentiment die cut using Instant Dimension Foam Tape, then added a few hot pink gems for sparkle!

Well, that’s all for my projects today! Now, as always, Altenew has some wonderful giveaways to celebrate this latest release!

$300 in total prizes! To celebrate this release, Altenew is giving away a $50 gift certificate to 2 lucky winners and a $25 gift certificate to 8 winners! Please leave a comment on the Altenew Card Blog and/or each designer’s blog post on the blog hop list below by 07/11/2021 for a chance to win. Altenew will draw 10 random winners from the comments left on each stop of this blog hop and announce the winners on the Altenew Winners Page on 07/13/2021.

Your next stop is Jenny Colacicco. Thanks so much for stopping by today, and happy hopping!

Filed Under: altenew Tagged With: 3D embossing folder, artists 24 pan watercolors, birthday, create a wreath, deck planks, eclectic vibes, fancy peace, gardenia duo, just a number, layered plaid, pressed flowers, thank you for being my friend, watercolor, watercolor extravaganza

Altenew Adventures Ahead Stamps/Dies/Stencils/More Collection Release Blog Hop + Giveaway

June 4, 2021

Hi there! Today is Altenew’s June 2021 Stamp and Die release, and we have so many fun new designs plus a bunch of extra goodies for you! You should have arrived here from Verity Biddlecombe, and your next stop is Raquel Bowman. (You can also start back at the beginning at the Altenew Blog.) I have three projects for you today, so let’s get started with the details!

All three of my projects today have a bit of a patriotic color scheme to them… but it’s a bit non-traditional with the different shades of blue and coral. I saw a bag on the Kate Spade website that had a color blocked sky behind a hot air balloon, and it immediately inspired me when I saw the new Up, Up, and Away stamp set released today! The color scheme for that card ended up being the basis for my trio of cards today using the new Inky Bouquet and Whimsical Bouquet 3D Embossing Folder.

To create the background for my hot air balloon from the Up, Up, and Away stamp set, I cut three different shades of blue cardstock in strips of various widths. I covered a panel of cardstock with some strong adhesive tape, then layered the cardstock strips to create a color blocked sky. I trimmed the panel down slightly and mounted it on a white A2 panel.

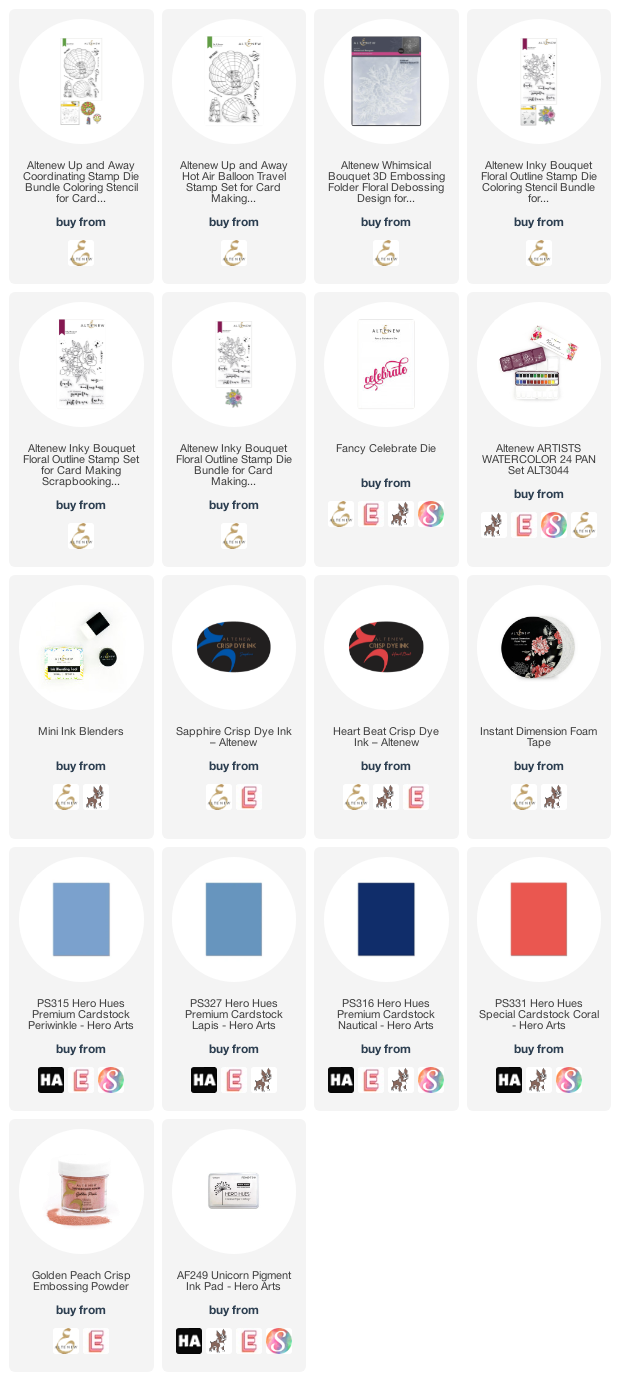
Next, I stamped and die cut one of the balloons from Up, Up, and Away and colored it using Copic markers in shades of coral and blue. I adhered it to a slightly smaller panel of vellum using liquid adhesive, then added a greeting (perfect for a graduation card!) that I stamped on some strips of white cardstock and adhered to the vellum panel. I hid my Instant Dimension Foam Tape behind the die cuts so that they wouldn’t show through on the vellum, then adhered it to the color blocked card front. I added a few metallic gray gems for some sparkle.

Next, I played with the absolutely stunning new Whimsical Bouquet 3D Embossing Folder. The details on these floral 3D embossing folders is breathtaking, and this new installment to the collection is no exception. It takes very little to create an elegant card front. I simply ran the Whimsical Bouquet 3D Embossing Folder through my die cutting machine with an A2 panel of deep coral cardstock.

Now, the embossed and debossed cardstock panel is stunning enough on it’s own, but I wanted to emphasize the incredible details added from the Whimsical Bouquet 3D Embossing Folder, so I used a small sponge dauber to add subtle touches of white pigment ink to the raised areas of the embossed panel. I also used a small Blending Brush to add some Heartbeat ink around the edges, adding even more contrast to the lighter, raised portion of the card front. I added a sympathy sentiment (heat embossed in white on a strip of navy cardstock, then matted on a slightly larger strip of white cardstock) with more Instant Dimension Foam Tape, then finally added a few iridescent white pearls for some shine.

My final project uses the beautiful bouquet in the Inky Bouquet stamp set. The hydrangea in the bouquet put me in mind of a red, white, and blue summer bouquet, perhaps like something that you would see at an elegant Independence Day celebration. I heat embossed the image three times on some Altenew Watercolor Paper using Golden Peach embossing powder, then used the beautiful colors in the Altenew Artist’s 24 Pan Watercolor set to loosely watercolor the flowers.

For the card base, I blended some Sapphire ink around the edges of an A2 panel of medium blue cardstock using blending brushes, then arranged the die cut bouquets around the edge and adhered them with more Instant Dimension Foam Tape, trimming off the edges. I added a Fancy Celebrate dimensional die cut, cut once from deep blue foil cardstock and twice more from plain white cardstock, then adhered together with liquid adhesive. A few more iridescent pearls finished it off!

As always, Altenew has some wonderful prizes to celebrate this latest release!

$300 in total prizes! To celebrate this release, Altenew is giving away a $50 gift certificate to 2 lucky winners and a $25 gift certificate to 8 winners! Please leave a comment on the Altenew Card Blog and/or each designer’s blog post on the blog hop list below by 06/09/2021 for a chance to win. Altenew will draw 10 random winners from the comments left on each stop of this blog hop and announce the winners on the Altenew Winners Page on 06/11/2021.

Your next stop is Raquel Bowman. Thanks so much for stopping by today, and happy hopping!

Filed Under: altenew Tagged With: 3D embossing folder, graduation card, hot air balloon, ink blending, inky bouquet, up up and away, watercolor, whimsical bouquet

Altenew Classic Imagery Collection Release Blog Hop + Giveaway

May 18, 2021

Hi there! Today, Altenew is releasing a simply gorgeous collection of standalone dies, embossing folders, and stencils, called Classic Imagery, and of course we are celebrating with a blog hop! You should have arrived here from Jenny Colacicco, and your next stop is LauraJane. You can also start back at the Altenew Blog for the full hop list. I have two projects for you today, both an homage to gorgeous springtime flowers and fresh, springy color palettes, so let’s get started with the details!

I kept things relatively monochromatic for both projects, keeping with a pale peach and coral color scheme. I love using colored cardstock… there is something so luxurious about vibrant cardstock that I just adore.

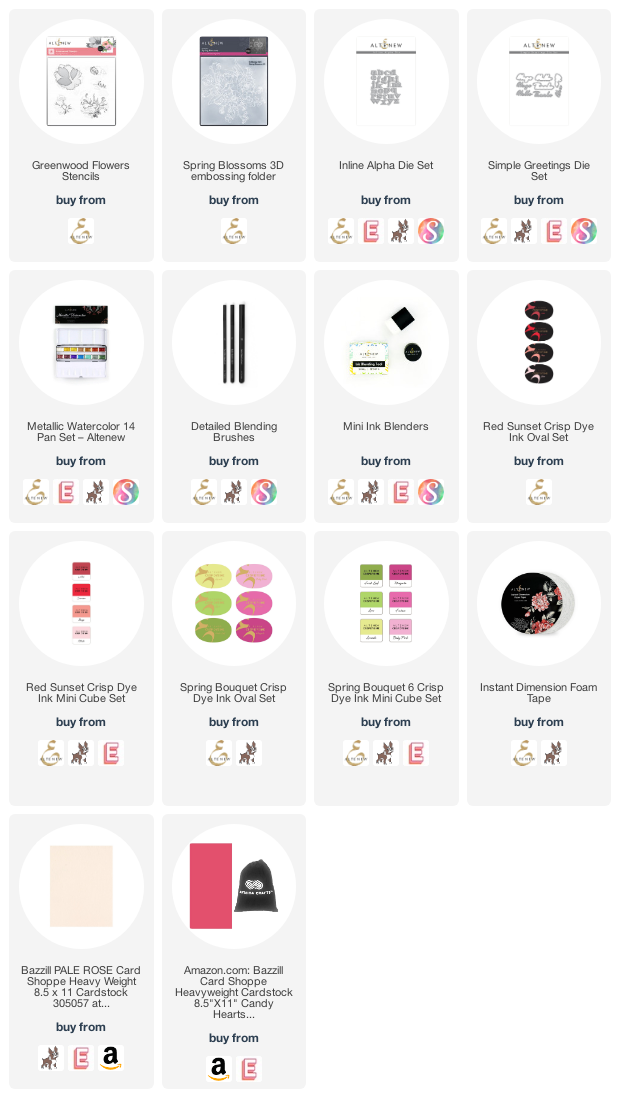
My first project is pretty simple, but a fun mini-slimline size and some popped up alphabet die cuts add a bit of extra something. I started with a super pale peach mini-slimline card base (3.5″x6″), then embossed it with the new Spring Blossoms 3D Embossing Folder. These 3D embossing folders are absolutely amazing… I can’t get enough of the sheer volume of detail that you can achieve with them so easily. I used the Detail Blending Brushes to lightly blend some coral and green inks on the appropriate spots of the floral bouquet, but the embossing really doesn’t need anything extra- it’s stunning all by itself!

After I’d added a bit of extra color with the light blending, I used the Metallic Watercolors to add some rose gold splatters to my card front. This adds some extra shine and texture to the card front.

I love using the Inline Alphabet Dies to create custom die cut sentiments. I die cut the “thanks” using some dark coral cardstock, then adhered it to the embossed card front using Instant Dimension Foam Tape in a fun stacked style, which is super popular right now in the stationery world. I used my T-square ruler to make sure that everything was nice and straight.

My second project is a bit more involved. I began by creating a custom floral background, as well as stenciling a few extras on a separate sheet of cardstock, with the new Greenwood Flowers Stencil Set, again blending on the super pale peach cardstock, which has just enough color to make an interesting background, but not enough that it muddies the green stenciled leaves!

I added some sparkling glitter paste the centers of the flowers, and fussy cut one of the extra flowers and some leaves once the glitter paste had dried. In my head, having all of the flowers blended on the same shade of cardstock helps to maintain that monochromatic color scheme, rather than have that pesky border that is a different color!

I trimmed the background panel down, then mounted it in the top left corner of an A2 panel of darker coral cardstock. I added the fussy cut stenciled flower and foliage using more Instant Dimension Foam Tape, then added a greeting from Simple Greetings Dies, cut again from the pale peach and tomato red cardstock, then popped up with a double layer of foam tape to give it some extra visibility. I added a few gems for a bit of extra texture on the background.

Well, that’s all for my projects today! Now, we have some fun giveaway information for you:

$300 in total prizes! To celebrate this release, Altenew is giving away a $50 gift certificate to 2 lucky winners and a $25 gift certificate to 8 winners! Please leave a comment on the Altenew Card Blog and/or each designer’s blog post on the blog hop list below by 05/24/2021 for a chance to win. Altenew will draw 10 random winners from the comments left on each stop of this blog hop and announce the winners on the Altenew Winners Page on 05/26/2021.

Your next blog hop stop is LauraJane. Thanks so much for stopping by today, and happy hopping!

Filed Under: altenew Tagged With: 3D embossing folder, greenwood flowers stencils, ink blending, inline alpha, metallic watercolors, simple greetings, spring blossoms 3D embossing folder

  • « Go to Previous Page
  • Page 1
  • Interim pages omitted …
  • Page 16
  • Page 17
  • Page 18

Primary Sidebar

  • Facebook
  • Instagram
  • Pinterest
  • YouTube

Favorite Shops

Secondary Sidebar

Subscribe

Enter your email address to subscribe to this blog and receive notifications of new posts by email.

Instagram
Something is wrong.
Instagram token error.
Follow
Load More

Archives

Tags

3D embossing folder alcohol markers better press birthday birthday card blog hop card kit christmas christmas card christmas tag colored pencil copic copic coloring Daniel Smith die cutting embossing folder embroidery felt giveaway holiday holiday card hot foil ink blending karin brushmarker pro layered stencil masculine my monthly hero new release no line coloring no line watercolor OLO marker olo markers original illustration pawsitively saturated rainbow shaker card slimline stamping stamptember stencil thank you thinking of you valentine's day video watercolor

Popular Posts

Simon Says Stamp October 2026 Card Kit of the Month: Homespun Gratitude!
February 2018 My Monthly Hero Blog Hop!
Altenew Craft A Flower: Poppy Blog Hop+Giveaway!
Felted Gourd Wall Hanging with Simon Says Stamp!
Sunflower Home Decor with Simon Says Stamp!
Craft Your Life Project Kit: Feathered Lilies Blog Hop+Giveaway!
Simon Says Stamp October 2025 Card Kit of the Month!
Altenew Standalone Die Blog Hop+Giveaway!
The Ton Anniversary Release- Day 2
Altenew Build A Flower Japanese Mum Blog Hop!

Disclosure

Some affiliate links are used in my posts. This means that, should you click on one of my links and purchase something from that company, I will receive a small portion of the sale at no extra cost to you. I use the money earned from these sales to help maintain my blog. I so appreciate you visiting and, if you do choose to use one of my affiliate links, thank you so much for your support!
Copyright © 2026 ·Brunch Pro Theme · Genesis Framework by StudioPress · WordPress · Log in
Loading Comments...