• Skip to main content
  • Skip to primary sidebar
  • Skip to secondary sidebar

Sixth Street Sundries

Emily Midgett

  • Home
  • About Me
  • Contact
  • OLO Marker Color Swatch Chart
  • Shop

A2 nesting frames

You Did It Rainbow Encouragement Card with Simon Says Stamp!

June 8, 2026

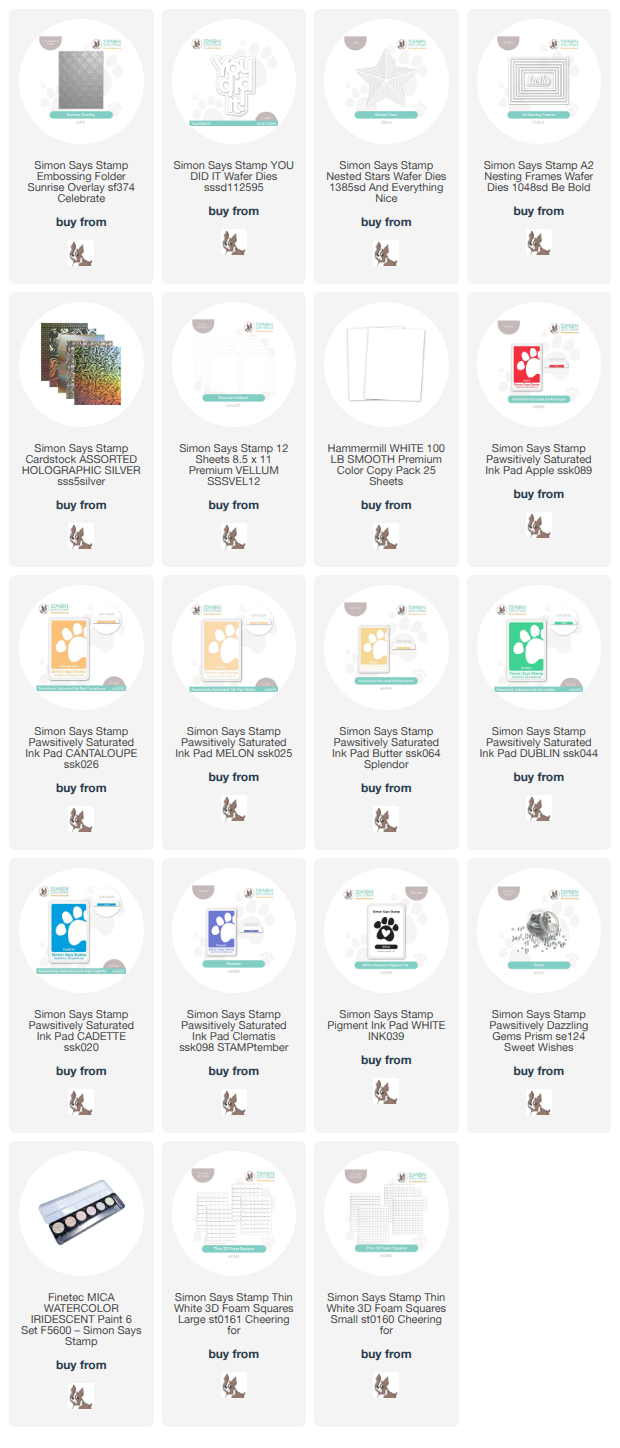
This post was sponsored by Simon Says Stamp. Thanks, Simon! *I have gathered links to all of the products used at the bottom of the post for your convenience, using affiliate links at no extra cost to you. Thank you for shopping with my links! I truly appreciate your support for my work!*

Hi friends! I have a super colorful project to share with you today, perfect for an encouragement or congratulatory card for a special friend. I initially intended this as a graduation card, but I think it would work nicely for so many different occasions. Ink blending, texture, a little sparkle… I love how fun and celebratory this project is! Let’s get started with the details.

To begin, I used blending brushes to blend Pawsitively Saturated Inks in shades of Apple, Cantaloupe, Melon, Butter, Dublin, Cadette, Clematis. I think these shades work so perfectly for a rainbow; not quite primary colors, just a few ticks off of the “expected” rainbow shades. I decided to ink blend first before using the embossing folder, because I wanted to make sure that the blend was completely clean. Sometimes, when blending over an embossed image, the color can pool a bit in the rises and skip over the divots of the embossed image, so to prevent this, I blend first and emboss second. After I had blended and embossed the panel, I ran the piece through my die cutting machine with the the Sunrise Overlay embossing folder.

After I had created the background panel, I swiped the Simon Says Stamp White Pigment Ink Pad directly over the top of the raised areas, helping to bring out the pattern a bit more and add some fun texture to the background. I also splattered the entire panel with some sparkling watercolors to add additional texture and shimmer. I also added a white frame from the A2 Nested Frames die set around the outer edge of the card front.

For the greeting, I die cut the detail layer of the You Did It! from sparkling holographic cardstock and backed it with a white shadow layer, popping up the detail layer with thin foam adhesive. I placed a vellum die cut star cut using the Nested Stars, adhering the die cut sentiment to the star with Tear-rifically Tacky Tape, then flipping it over and adding more thin foam adhesive to the back of the solid die cuts so that it would have a little more height on the colorful card front. I added a silver embossed “so proud of you” sentiment strip and finally finished the project off with some Prism Pawsitively Dazzling Gems!

Well, that’s all for my project today! I think this card would work for so many occasions and ages. Who doesn’t love a pretty rainbow? Thanks so much for stopping by today, and have a marvelous day!
Filed Under: simon says stamp Tagged With: A2 nesting frames, congratulatins, embossing folder, ink blending, nested stars, rainbow, sunrise overlay, you did it

Christmas in July Finale: Christmas Tree Trio with Simon Says Stamp + SALE!

July 25, 2025

This post was sponsored by Simon Says Stamp. Thanks, Simon!

Hi friends! For my last Christmas in July post, I thought I would share a pretty Christmas Tree Trio made using three different Christmas tree stamp sets from Simon Says Stamp! Nothing screams “Christmas” quite like a Christmas tree, right? Each of the stamp sets that I’ve chosen to use today have very different styles, and I paired them with a beautifully traditional green, gold, and white color palette to create this trio of projects that work nicely as a set or as individual pieces. Let’s get started with the details!

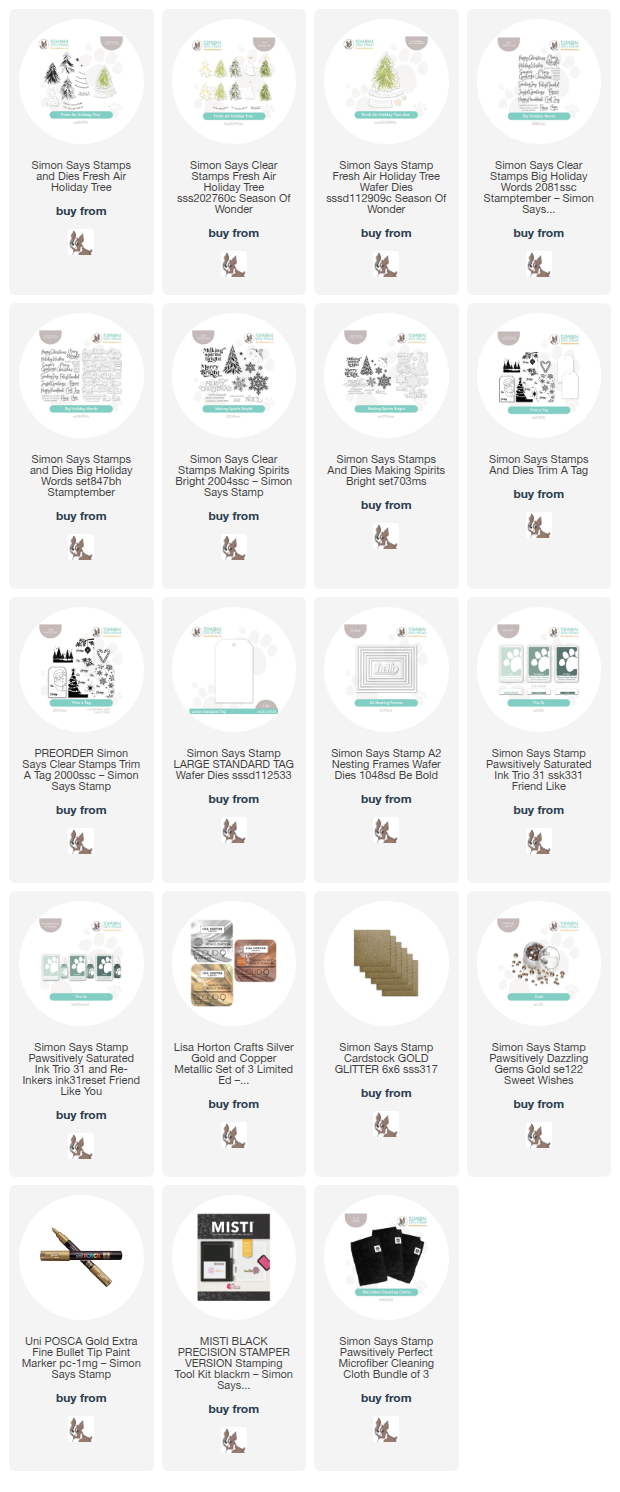
*I have gathered links to all of the products used at the bottom of the post for your convenience, using affiliate links. Thank you for shopping with my links! I truly appreciate your support for my work!*

For all of my projects today, I use the gorgeous, muted greens from the Simon Says Stamp Ink Trio 31. This trio of muted greens is utterly luscious, and they are each as beautiful alone as they are when they are all working together! I added some glitzy gold accents to each project for an elegant touch, leaving lots of crisp white to make these tags and card as clean and elegant as possible.

To begin, I stamped the Fresh Air Holiday Tree using the lovely greens in Ink Trio 31: Jade, Eucalyptus, and Juniper. I did find it easier to stamp the three layers if I used the negative space of the die cut as my guide. I simply die cut a blank panel of white cardstock using the Christmas tree die from Fresh Air Holiday Tree, then placed the negative (the area around the tree die cut) in my MISTI, and used the negative space to line up each layer perfectly! The color guide on the back of the stamp packaging was also super helpful to know which color worked best with which layer, but honestly, the sketchy, simplistic nature of the finished image is super user-friendly. The first tree that I stamped ended up not being quite right with the die, but it still looked lovely, so I fussy cut it with scissors and then created a second tree using the method that I described above. If you have difficulty lining up your dies to stamped images, sometimes it can be very helpful to die cut first and stamp after!

To add some pretty shimmering accents to the card, I die cut the A2 Nesting Frames from some gold glitter cardstock and layered one on my A2 card front. I also stamped the star and sentiment banner from Fresh Air Holiday Tree using Lisa Horton Metallic Gold Pigment Ink, die cutting them with their coordinating dies. I added some touches of gold paint pen for baubles on the tree, as well as some Gold Pawsitively Dazzling Gems. I popped up the tree in the center of the glittery gold frame using foam adhesive, then added the sentiment banner over the top and the star with a double layer of foam adhesive! A simple but oh-so-elegant holiday card that I think would be super easy to mass produce!

To create my little trio, I also decided to create two coordinating tags using two more completely different tree images from Simon Says Stamp’s holiday collection. For the first tag, I stamped the elegant stylized tree image from Making Spirits Bright using an ombré stamping method. I inked up the top part of the tree with Jade ink, tapping the edges of the inked area with my microfiber cloth to blur them a bit and make the edge a bit less harsh, stamped it with my MISTI, then again to make sure that the top of the tree had great coverage. I cleaned the top 1/3 of the tree, then inked up the middle section with Eucalyptus ink, again blurring the harsh edges with my cloth to make the transition to each color smoother. Finally, I finished inking the entirety of the image with Juniper ink. I also stamped a gold sentiment from Big Holiday Words. I die cut each image with it’s coordinating die, then added some gold paint dots and gold gems for sparkle. I popped the tree and sentiment up with foam adhesive on a white pearlescent tag, cut using the Large Standard Tag die, then added some twine for a loop and bow!

For the simpler tag, I began by die cutting the Large Standard Tag from plain white cardstock. I used Juniper ink to stamp the tree from Trim A Tag, doing some creative masking to stamp the tree in green and the to/from in gold. I also added some Jade stars in the corner, adding subtle interest behind the tree. To add some sparkle, I used the gold paint pen for the baubles and added some small Gold Pawsitively Dazzling Gems for a little extra texture and shimmer! Finally, I finished everything off with a simple twine loop.

Well, that’s all for my projects today and for my Christmas in July series. It’s such fun to be able to pull out my holiday goodies after them sitting forlornly in my bins for months!

Now for the fun sale part!! Simon Says Stamp is running an absolutely fabulous sale on tons of holiday and non-holiday goodies in their Steals and Deals category. All you have to do is add items from this category into your cart and input code DEALZ at checkout to receive 50% off everything from that catgory! I just checked, and there are so many fantastic holiday crafty items left, but things are moving quickly, so don’t hesitate if you see something that you want! You can click on the graphic to go directly to the sale page or click HERE to see what’s left!

Thanks so much for stopping by today, and have a marvelous day!

Filed Under: simon says stamp, Uncategorized Tagged With: A2 nesting frames, big holiday words, christmas card, fresh air holiday tree, holiday card, making spirits bright, pawsitively saturated ink, tag, trim a tag

Simon Says Stamp June Card Kit of the Month: Captured Joy!

May 14, 2025

This post was sponsored by Simon Says Stamp. Thanks, Simon!

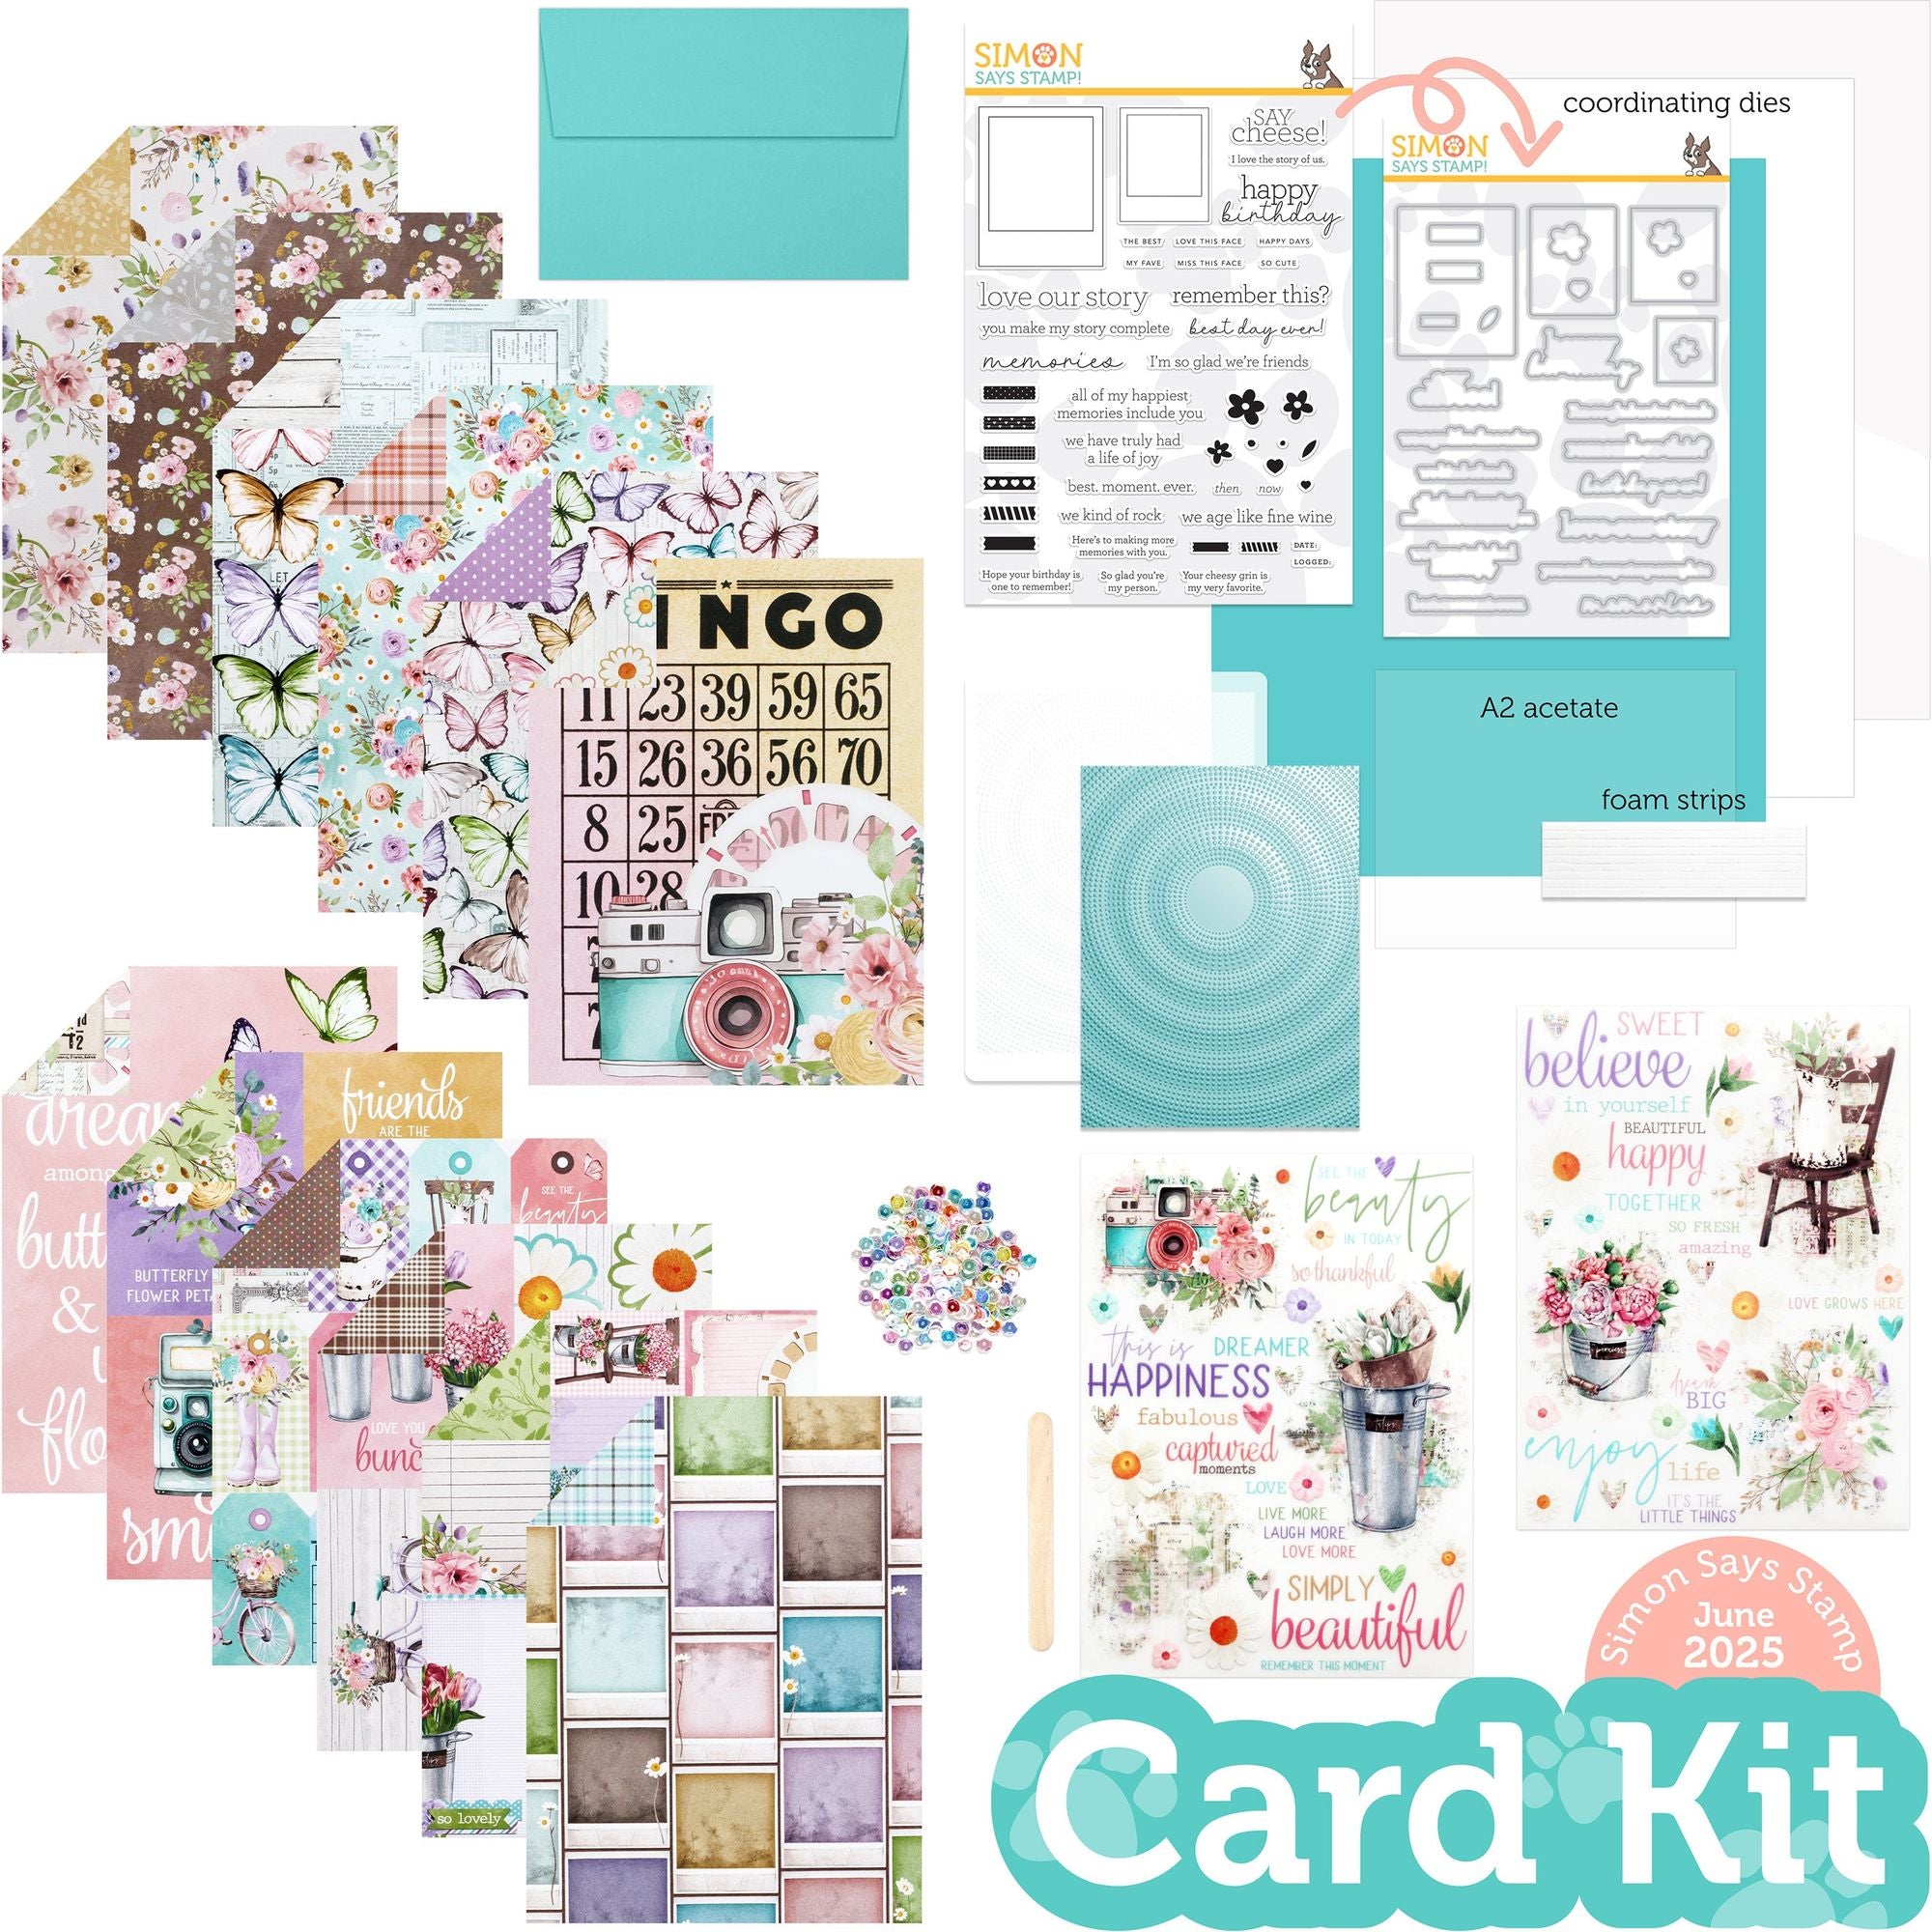
Hi friends! It’s the 14th of the month, and that means that the new Simon Says Stamp Card Kit of the Month is now available for your viewing and purchasing pleasure! This month’s kit is absolutely jam-packed with goodies, including gorgeous patterned papers, a fabulous stamp and die set (yes, dies too!), rub ons, sequins, cardstock… everything you need to make tons of gorgeous cards! Here’s a sneak peek at the new Captured Joy Kit:

I wasn’t kidding when I said jam-packed, right?? Look at that color palette and all of those amazing crafty goodies!! I have created two projects to share with you today using elements from the kit and a few goodies from my stash, so let’s get started with the details!

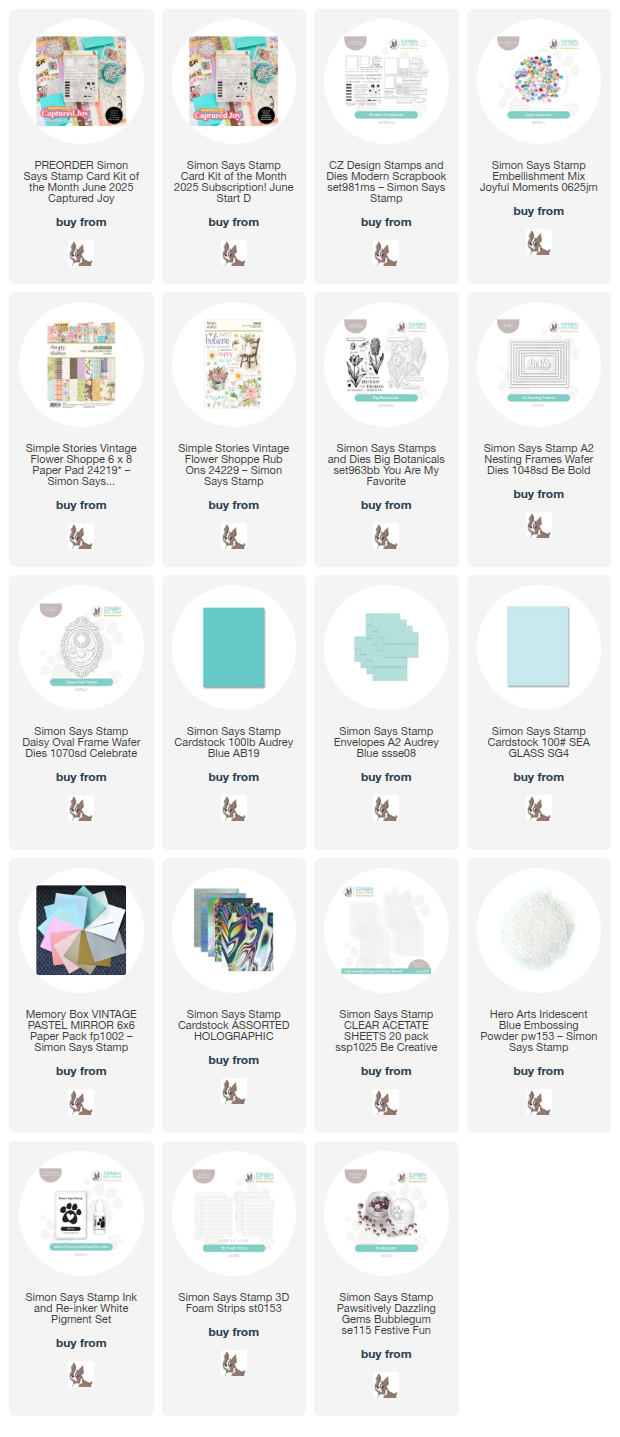
*I have gathered links to all of the products used at the bottom of the post for your convenience, using affiliate links. Thank you for shopping with my links! I truly appreciate your support for my work!*

The aqua, lilac, and bubblegum pink color palette in this month’s kit is absolutely stunning, and so I decided to just run with it, taking my cues from the colorful patterned papers included with the kit. I created this pair of coordinating cards by pulling imagery and sentiments from the patterned papers, which kept the color palette consistent enough to coordinate while also creating very unique cards with their own card designs!

My first card takes advantage of the gorgeous coordinating sequins that are included in the kid. Whenever there are sequins, you know I have to create a shaker card, right? I wanted to create a floating shaker frame, so I used my trimmer to trim down one of the gorgeous Artist Trading Card-sized panels of patterned paper and mounted it in the center of the included panel of acetate to create the card front for my shaker. I also used my sharp scissors to fussy cut some of the delicate butterflies from another panel of patterned paper, folding the wings up slightly for dimension and mounting them on the card front with liquid adhesive.

To create the frame for my card, I used a holographic rainbow frame die cut, cut using Simon Says Stamp’s Nesting A2 Rectangle Frame dies and some holographic mirror cardstock. I adhered the frame to the outer edge of my embellished panel of acetate, then adhered the included foam strips behind the solid frame die cut as well as around the edges of the rectangular ATC patterned piece in the center of the card. This created my floating shaker frame, which I filled with the sequins from the Captured Joy Kit. Adding that extra frame of foam adhesive around the edges of the center keeps the sequins inside the frame and prevents it from hiding behind the rectangle of patterned paper! I adhered the card front to an A2 panel of Audrey Blue cardstock, included with the kit. So much color and dimension on this project, perfect for sending to a little girl for a birthday or other special occasion!

My second project is a “use up your scraps” project, using leftovers from THIS pair of cards that I had lying on my desk! I trimmed down another of the beautiful ATC from the printed papers in the kit, then highlighted the printed sentiment with a leftover pearlescent white scalloped oval die cut from the Daisy Oval Frame die set.

The gorgeous aqua cardstock matched beautifully with Sea Glass cardstock from Simon Says Stamp, and I just happened to have an extra iridescent embossed hyacinth image from the Big Botanicals stamp set, so I popped the floral image up in the corner of an A2 panel of cardstock, trimming off the overhang, then layered the ATC directly over the top. I added a trio of fussy cut butterflies, created using my sharp scissors and the patterned paper, over the top of the framed piece, again lightly folding up the wings so that they were a bit more dimensional. Finally, I added a few Bubblegum Pawsitively Dazzling Gems for added sparkle and shine!

Well, that’s all for my projects today! This kit is so full of amazing products and even more amazing value; the stamps and dies alone having a higher individual value than the kit’s price! The Simon Says Stamp Card Kits are such an incredible value; the value of the individual elements of each kit equals far more than the $44.99 price tag, so you’re getting incredible bang for your buck. If you are consistently interested in the Simon Says Stamp Card Kit of the Month, you can sign up HERE to become a subscriber for an even bigger discount on these carefully curated products. As always, Simon also makes each individual element of the kits available a la carte, so that you can pick and choose what you would like to purchase if buying the entire kit isn’t really your thing. Who can say no to such incredible value though, right?

Thanks so much for stopping by today, and have a marvelous day!

Filed Under: simon says stamp Tagged With: A2 nesting frames, big botanicals, captured joy, card kit, card kit of the month, daisy oval frame, joyful moments embellishment, modern scrapbook, rub ons, shaker card

Sparkling Teal Snowflake Ornament + Card with New Simon Says Stamp DieCember!

December 9, 2024

This post was sponsored by Simon Says Stamp. Thanks, Simon!

Hi friends! I have a pair of shimmering, sparkling holiday projects to share with you today using some utterly luscious new snowflake dies from the Simon Says Stamp DieCember release! After I completed my graduate program and got married, I began crafting in earnest as a hobby, putting my Cricut to use to personalize everything with my new last name. I purchased so many different items to personalize, but of course only had 24 hours in the day and had far more than I could ever use up. After I became a twin mom, some of those things got put in storage in my craft closet, never again to see the light of day…. until now. I have been trying to expand my crafty time to create things a bit more tangible and longer-lasting, like my felt cardinal ornament (click HERE to see it!) and the felt stocking gift card holder (click HERE to see that one), and my framed snowy holiday decor (click HERE to see those!). Today’s project puts some of those long-forgotten blank wooden ornaments to use with the gorgeous new Snowflake Swirl die, then decided to create a matching card for a sparkling snowflake gift set. Let’s get started with the details on my projects!

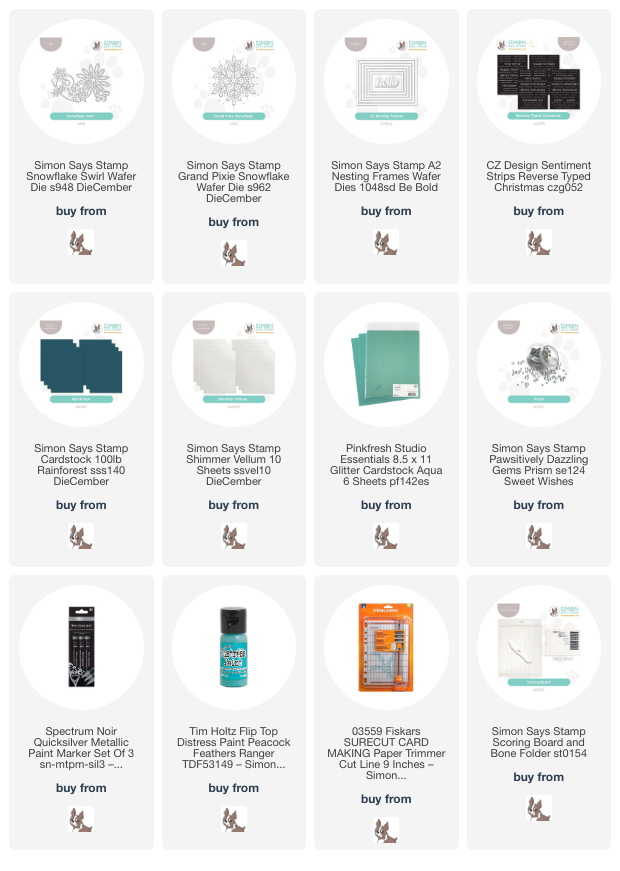
*I have gathered links to all of the products used at the bottom of the post for your convenience, using affiliate links. Thank you for shopping with my links! I truly appreciate your support for my work!*

My projects were inspired by the beautiful, intense teal of the new Simon Says Stamp Rain Forest cardstock. I can never resist any shade of teal…. teal, turquoise, pool, aqua, and all variations. Blue+green=perfection in my eyes. The new shades of cardstock that were released with the DieCember release are so deeply saturated with vibrant color and die cut beautifully; they’re all wonderful additions to your craft room! I used the beautiful (and perfectly coordinated) Peacock Feathers Distress Paint to paint my blank wooden ornament before adding any embellishments.

While I waited for my painted ornament to dry, I worked on my matching snowflake Christmas card. I began by creating a card base from some Simon Says Stamp Rain Forest cardstock, using the Simon Says Stamp Score Board and used the handy guide wire on my Fiskars trimmer to cut out a window from the center of one side of the scored card. I backed the window with some of the new Simon Says Stamp Shimmer Vellum, creating a shimmery, semi-opaque window upon which I could build my project.

After I had created my background, I die cut the new Grand Pixie Snowflake from some Pinkfresh Studio Aqua Glitter cardstock and mounted it in the center of my shimmery vellum window with liquid adhesive. To help draw the eye to the center of the card and also add another touch of shine, I added a silver holographic foil frame cut using the A2 Nesting Frames dies. After I had added a foiled Reverse Typed Christmas to the center of the snowflake with some foam adhesive, I used some liquid adhesive to add lots of Prism Pawsitively Dazzling Gems to the snowflake and the corners of the shiny foil frame. This card has so many different shimmering elements on it, which I think makes it perfect for Christmas!

After I had allowed the deep teal paint to dry completely on my blank wooden ornament, I used a silver paint pen on the top of the ornament and on the edges to make things look nice and neat. To adorn my painted ornament, I die cut the Snowflake Swirl die twice from some more Pinkfresh Studio Aqua Glitter cardstock. I adhered one of the die cuts in the center of the painted ornament with liquid adhesive, then used my sharp scissors to add small portions of the intricate die cut around the edges of the ornament, filling in any blank spots.

After I had finished gluing the sparkling snowflakes to the ornament, I added lots of super sparkly Prism Pawsitively Dazzling Gems. These Pawsitively Dazzling Gems are made of glass, and I cannot overstate how very sparkly and shiny they are! I used more liquid glue to adhere them to the snowflakes, adding a bit more texture and shimmer to the ornament. Finally, I added a fluffy bow tied with some coordinating teal ribbon and a loop of ribbon from which the ornament could be hung on the tree. I think I am going to make a bunch of these in different colors to adorn my holiday cookie gift boxes! So fun!

Well, that’s all for my projects today! Do you enjoy making handmade decor with your papercrafting supplies? I love finding lots of uses for my crafting supplies outside of their initial intended uses! Thanks so much for stopping by today, and Happy DieCember!

PS: Don’t forget that with every $25 Tim Holtz purchase, you can receive this adorable Be of Good Cheer die set set from Tim Holtz! Click HERE to check out all of the goodies eligible for the promotion! I used the Santa set to create THIS sweet little tag. The acrylic paint that I used for my ornament today is Tim Holtz and coordinates beautifully with all of the colors in the Distress line!

Filed Under: simon says stamp Tagged With: A2 nesting frames, acrylic paint, christmas card, diecember, grand pixie snowflake, holiday card, ornament, pinkfresh glitter paper, sentiment strips, sentiment strips reverse typed christmas, snowflake, snowflake swirl

Primary Sidebar

  • Facebook
  • Instagram
  • Pinterest
  • YouTube

Favorite Shops

Secondary Sidebar

Subscribe

Enter your email address to subscribe to this blog and receive notifications of new posts by email.

Instagram
Something is wrong.
Instagram token error.
Follow
Load More

Archives

Tags

3D embossing folder alcohol markers better press birthday birthday card blog hop card kit christmas christmas card christmas tag colored pencil copic copic coloring Daniel Smith die cutting embossing folder embroidery felt giveaway holiday holiday card hot foil ink blending karin brushmarker pro layered stencil masculine my monthly hero new release no line coloring no line watercolor OLO marker olo markers original illustration pawsitively saturated rainbow shaker card slimline stamping stamptember stencil thank you thinking of you valentine's day video watercolor

Popular Posts

Simon Says Stamp October 2026 Card Kit of the Month: Homespun Gratitude!
Honey Bee Stamps Cheerful Love Blog Hop!
Altenew Craft A Flower: Poppy Blog Hop+Giveaway!
Autumn Legs with Colorado Craft Company and Catherine Pooler!
Simon Says Stamp Cozy & Bright Inspiration, Part Two!
February 2018 My Monthly Hero Blog Hop!
The Ton Anniversary Release- Day 2
Sunflower Home Decor with Simon Says Stamp!
Simon Says Stamp STAMPtember Surprise: Boo Bundle Halloween Card Kit!
Hero Arts Spring 2020 Catalog Release Blog Hop+Giveaway!

Disclosure

Some affiliate links are used in my posts. This means that, should you click on one of my links and purchase something from that company, I will receive a small portion of the sale at no extra cost to you. I use the money earned from these sales to help maintain my blog. I so appreciate you visiting and, if you do choose to use one of my affiliate links, thank you so much for your support!
Copyright © 2026 ·Brunch Pro Theme · Genesis Framework by StudioPress · WordPress · Log in
Loading Comments...