• Skip to main content
  • Skip to primary sidebar
  • Skip to secondary sidebar

Sixth Street Sundries

Emily Midgett

  • Home
  • About Me
  • Contact
  • OLO Marker Color Swatch Chart
  • Shop

alphabet dies

Ahoy with New Simon Says Stamp Shine On Release!

June 25, 2026

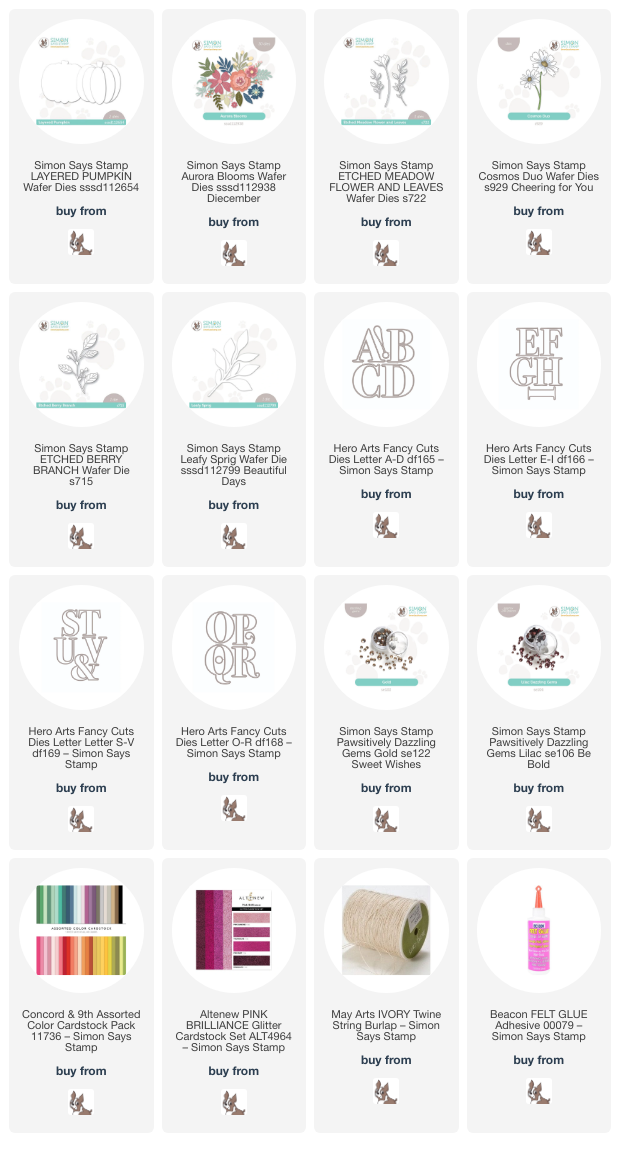
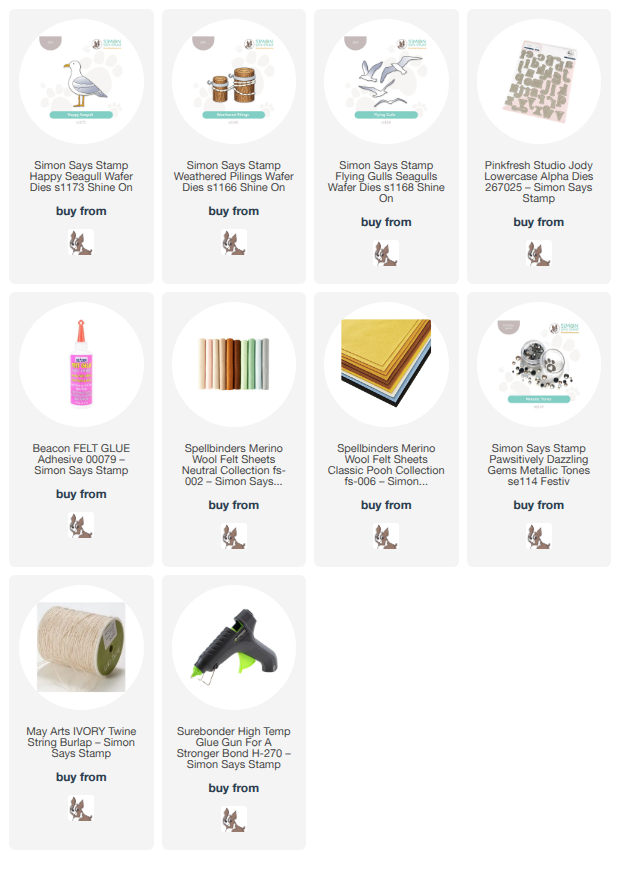
*I have gathered links to all of the products used at the bottom of the post for your convenience, using affiliate links at no extra cost to you. Thank you for shopping with my links! I truly appreciate your support for my work!*

Hi friends! Simon Says Stamp has a fabulous new release, called Shine On, and it’s available and shipping NOW! Click HERE to see the full release. It’s chock full of summertime imagery, with ocean themes, flowers, fun (and a little sassy!) sentiments, beautiful stencils…. so much crafty goodness to feast your eyes on!

I am always up for a good excuse to play with my felt and fabric, and I thought the new Happy Seagull, Weathered Pilings, and Flying Gulls dies would work so nicely together to create a cute nautical wall hanging! I pulled out a 6″ embroidery hoop, some red and white striped fabric, and my felt and got to work. Let’s get started with the details on my project!

To begin, I used a gray, white, and yellow felt to die cut the different pieces of the Happy Seagull die set, layering them together with felt glue and placing them beneath a stack of stamping blocks as they dried to ensure that the glue was distributed evenly. I also die cut the pieces for the Weathered Pilings from some light brown felt and gunmetal metallic felt. I used more felt glue to add lines of twine for “rope” around these wooden cylinders that you find on a pier or boardwalk. I also die cut a few pale gray seagull silhouettes using the new Flying Gulls die set to help finish off the scene.

Once the glue had dried on the large seagull and the pilings, I arranged the die cuts on the fabric in a dock scene, adhering them with plenty of felt glue. I also die cut a fun “ahoy” sentiment using alphabet dies to help fill in the design.

Once I had adhered all of the pieces to the hoop, I decided to add a little extra texture and interest to the scene. I added a gray gem to the eye of the large seagull, then tied a a few pieces of twine into a bow as well as a piece of silky red ribbon. I layered the two bows together and added them to the top of the hoop with my hot glue gun.

Well, that’s all for my project today! As always, the new release will be celebrated with a fabulous two day blog hop featuring tons of inspiration using these new products. You can check out the Simon Says Stamp blog to get started tomorrow morning! And you can check out the new Shine On release HERE ! Thanks so much for stopping by today, and have a marvelous day!
Filed Under: simon says stamp Tagged With: alphabet dies, decor, die cutting, embroidery hoop, felt, flying gulls, happy seagull, jody lowercase alpha

A Final Ode to Pumpkins with Simon Says Stamp!

October 31, 2024

This post was sponsored by Simon Says Stamp. Thanks, Simon!

Hi friends! I am back with my final post for the month of October, just in the nick of time, too! I will be helping my kiddos get their Halloween costumes on as soon as I’m done: Sally from Nightmare Before Christmas, Harry Potter, and two firemen! (If you’ve never checked out the Halloween costumes from Costco, they are legit! The firemen costumes are incredible and were very reasonably priced.) For my last project for the month, I thought I’d do one final “ode to a pumpkin.” I don’t do spooky, and I’m not great a cute, so pumpkins are basically my favorite imagery for autumn and Halloween. They can be fun and playful, or they can be elegant, especially when paired with foliage and florals. I have been collecting more felt and embroidery items, and so I was itching for a project on which to use them. This autumnal wall hanging was the perfect project to start my obsession! Let’s get started with the details.

*I have linked all of the products used at the bottom of the post using affiliate links for your convenience. Thank you for shopping with my links! I truly appreciate your support for my work!*

For both of my projects, I paired the Aurora Blooms, Etched Meadow Flower & Leaves, Cosmos Duo, Etched Berry Branch, Layered Pumpkin, and Leafy Sprig dies. I wanted to create some decor with felt as well as with paper, so I scoured my local dollar stores and big box craft stores for some fun “blanks” that I could decorate. I found this canvas wall hanging and little chalkboard easel, and I think they both are just perfect for embellishing with die cuts!

For the wall hanging, I began by die cutting all of the images from the die sets listed above using high-quality colored felt. I used a somewhat non-traditional color palette, pulling some deep, somewhat muted oranges together with cranberry and autumn rose, with touches of lime green and hunter green. I used some needle and thread with sequins and seed beads to adorn the center of some of the flowers, adding a touch of sparkle and additional texture to the felt images. I also die cut the word “gather” using the large-scale Hero Arts Alphabet Dies. I adore these alphabet dies; they’re perfect for creating banners and home decor (I used them to create a banner for my office Christmas tree last year!) and are such a great size.

For the pumpkin, I used some fabric glue to assemble the individual pieces from the Layered Pumpkin die set, then used a coordinating shade of orange to do a (very) simple blanket stitch around the edges of each piece of rind. This additional stitching around the edges adds some texture as well as helping to differentiate one segment from the next, so that it doesn’t look too flat.

After I had die cut and assembled the different components, I began to create my arrangement. I used a piece of ribbon to line up my letters, adhering them to the banner with some fabric glue, then began arranging my pumpkin, flowers, and foliage in a swag beneath my letters. I stitched some more sequins and seed beads to create “berries” amongst my floral arrangement, helping to fill in any gaps in the flowers. After completing the arrangement on the bottom, I felt that the area above the letters was a bit too bare, so added another, simpler arrangement above the letters as well. I think it will look so pretty hanging from my front door for Thanksgiving!

Since I haven’t been working with felt for very long, I decided to make another home decor project using my more typical cardstock, using the same color palette! I die cut the same images from the Aurora Blooms, Etched Meadow Flower & Leaves, Cosmos Duo, Etched Berry Branch, Layered Pumpkin, and Leafy Sprig die sets. I used some sparkling cranberry glitter cardstock from Altenew to create the Etched Meadow Flower & Leaves blossoms. I think this color palette is so pretty; it is definitely autumnal, but not super orange-y!

I found this little easel chalkboard at my local dollar store! They have them in both black chalkboard and white dry erase board; this black backdrop was perfect for adorning with colorful die cuts. After I had adhered all of the die cuts in a little arrangement on the front of the easel, I used a double layer of twine, wrapping it around the top of the easel multiple times, then added a fluffy bow. I used some glue to hold the bow down and prevent it from being untied.

After I had finished arranging the die cuts and adding my twine bow, I added some Gold and Lilac Pawsitively Dazzling Gems to the berry stems and flower centers, adding a touch of sparkle and texture to this piece of decor. I think this would look so sweet on a desk at work or perhaps on a piano or mantelpiece at home!!

Well, that’s all for my projects today. I am having such fun branching out from my typical cardmaking, and I hope you’re enjoying it too. It’s fun to try new things, right? Thanks so much for stopping by today, and have a marvelous day!

Filed Under: simon says stamp Tagged With: alphabet dies, aurora blooms, banner, canvas, cosmos duo, die cutting, etched berry branch, etched meadow flower and leaves, felt, home decor, home deocr, layered pumpkin, leafy sprig, wall hanging

Hero Arts My Monthly Hero April 2024 Release Blog Hop + Giveaway!

April 1, 2024

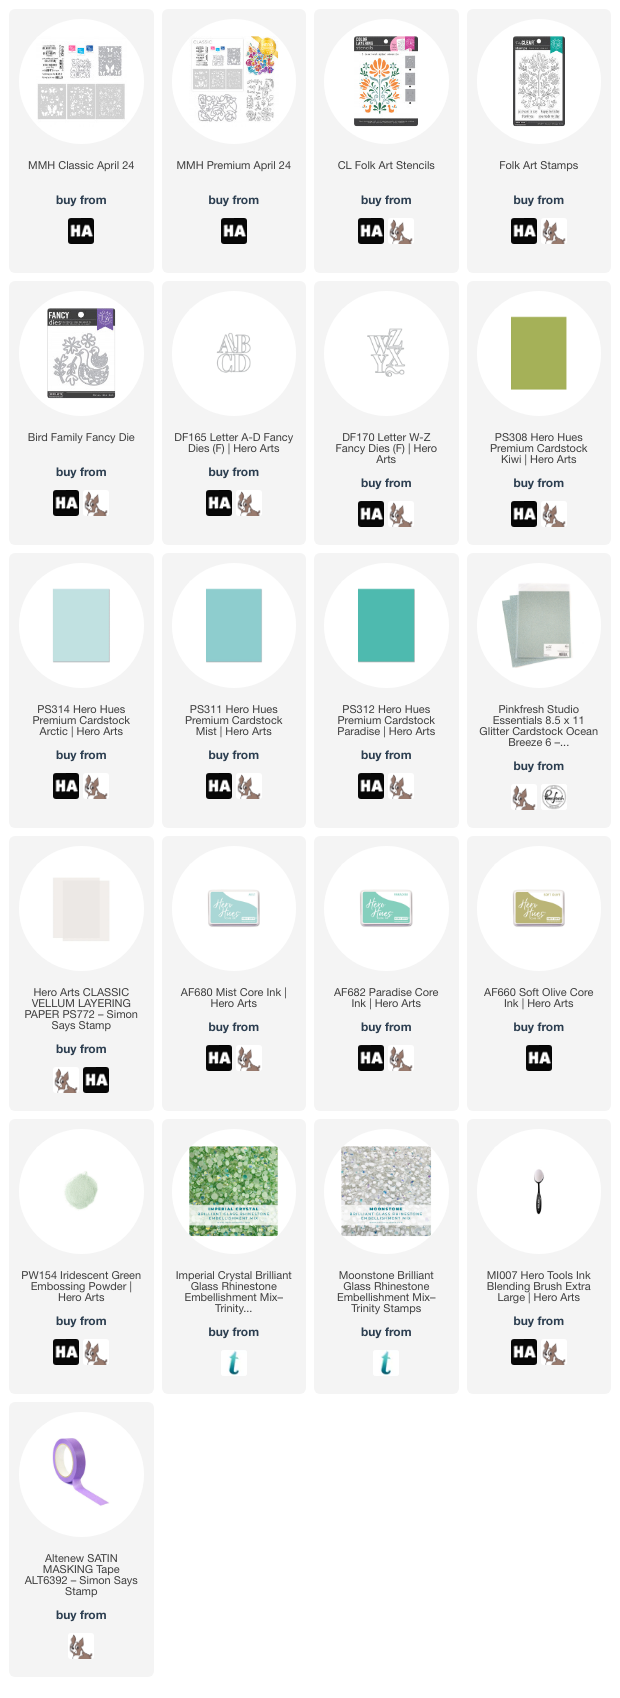
Hi friends! I am happy to be hopping along with this month’s My Monthly Hero release for my friends at Hero Arts. You can find the full hop list on the Hero Arts Blog! This month, Hero Arts has released a collection of gorgeous and unique folk-themed products that you can use for so many different occasions!! (Click HERE to see the whole release!) Here’s a peek at this month’s My Monthly Hero Classic Kit:

And here’s a peek at the My Monthly Hero Premium Kit, which contains all of the components of the Classic Kit plus a bunch of marvelous coordinating products:

I have created a trio of projects using lots of different goodies from this release, so let’s get started with the details!

If you have followed my blog at all, you’ll know that I struggle with masculine cards, preferring instead to make basically every project pretty, pink, and covered in flowers. Well, the graphic images in this month’s kit may contain flowers, but when paired with the right color combination, I think these Scandinavian-inspired images create excellent gender-neutral cards! Whenever I am starting a card set, I like to set my color palette first, so I pulled out Mist, Paradise, and Soft Olive ink and lots of different coordinating shades of cardstock and got to work!

For my first project, I paired the new My Monthly Hero Classic Kit with Mist, Paradise, and Soft Olive ink, first die cutting the intricate cover plate die, which only cuts partial outlines so that the entire piece stays intact. I then used blending brushes to blend Mist, Paradise, and Soft Olive with the included layering stencils, centering the images with their die cut outlines. So simple and so fast! I think these stencils would be so fun to use with glitter paste or even some DecoFoil gel and add some shining foil accents. Stencils are such a workhorse for your craft room!

After I had finished blending the pretty folk patterns on the die cut background, I used the standalone dies included in the Classic Kit to die cut some vellum butterflies and floral accents from colored cardstock, layering the floral accents on top of the vellum butterflies to help make them extra special and to help them be even more visible amongst the busy background. I think vellum and butterfly dies were made for each other; the semi-transparent vellum definitely conveys the lightness of fluttering butterflies! For the greeting, I stamped one of the sentiments from the Classic Kit onto some Mist cardstock using Paradise ink, then stamped it again using embossing ink and covered it with the new Iridescent Green Embossing Powder. This embossing powder adds such a beautiful, luminous shimmer to my sentiment and helps it to stand out from the Mist cardstock so well! I matted the sentiment strip on some Paradise cardstock, then popped up the greeting with some foam adhesive and added the butterflies using some tiny dots of liquid adhesive. Such a pretty kit with so many different elements that you can mix & match!

My next card uses the same shades of ink, this time paired with the new Folk Art Stamp and coordinating layering stencil. I first stamped the new Folk Art Stamp onto some white cardstock using embossing ink, then used the Iridescent Green Embossing Powder to emboss the image. Using the Iridescent Green Embossing Powder alone without any colorful ink beneath creates almost a tone-on-tone effect, very subtle, but beautiful when the light catches it just right. After embossing, I used the coordinating Folk Art layering stencil to blend Mist, Paradise, and Soft Olive inks.

After my focal point was finished, I trimmed the panel down and matted it on a slightly larger panel of Pinkfresh Studio Ocean Breeze glitter cardstock, creating a super delicate glittery border around my stenciled background. I adhered it to a full size A2 panel of Kiwi cardstock using liquid adhesive. For the greeting, I kept things super simple, heat embossing a “happy birthday” sentiment onto some more Kiwi cardstock using white embossing powder and matting the greeting with some Paradise cardstock. I popped the sentiment up with some foam adhesive, then added a few Trinity Stamps Imperial Crystal Rhinestone amongst the embossed and stenciled pattern. I love that this pattern is symmetrical, a hallmark of Scandinavian folk art. It makes my symmetrical-loving, right angled design brain happy!

For my last card, I used the adorable new Bird Family Fancy Die set to create a baby card! I stuck with the same color palette, allowing the pretty aquas to be the star of the show on this project, which I think are basically gender-neutral at this point and can be used for both boys and girls. I die cut the momma and baby bird from some iridescent white shimmer cardstock to make them extra special, then die cut the flowers and foliage from the Bird Family Fancy Die set using iridescent white mirror cardstock and some scraps of Kiwi and Paradise cardstock.

For the greeting, I used some of the recently-released A-D Alphabet dies and W-Z Alphabet Dies to create a large “BABY” word die cut. I cut these larger letters from Arctic cardstock, and because these letters are so large, they suit an A7 card beautifully! I trimmed down an A7 panel of Mist cardstock, then used some masking tape to mask the edges of one corner and blended some Paradise ink in just one corner. I also stamped and embossed an appropriate greeting from a stamp set that has sadly been discontinued. I popped all of the different die cut elements up on my blended background, using the bottom blended line as my guide for my die cut letters to keep them nice and straight. Finally, I added some Moonstone rhinestones for extra sparkle. This would be a super easy card to customize for twins or multiples! (those cards are so difficult to find; ask me how I know haha!!)

Well, that’s all for my projects today. Now for some fun giveaway information:

Hero Arts will give away a $50 gift card, drawn from the comments left across the hop. Enter by Sunday, April 7th at 11:59pm Pacific, and the winner will be announced on the Hero Arts blog the following week.

You can see the full hop list on the Hero Arts Blog. Thanks so much for stopping by today, and happy hopping!

Filed Under: Hero Arts Tagged With: alphabet dies, baby card, birthday card, folk art, gender neutral, layered stencil, masculine, my monthly hero

Pinkfresh Studio July 2021 Stamp, Die, Stencil, and Hot Foil Release

July 26, 2021

Hi friends! Happy Monday! Today, I’m super excited to be taking part in the Pinkfresh Studio July Stamp, Die, Stencil, and Hot Foil Release Blog Hop. I’m even more thrilled to be taking part in today’s hop, because I get the opportunity to help introduce two new stamp sets that I’ve designed for Pinkfresh Studio:

Just A Hello-features a pretty floral image that can be used stamped in it’s entirety, or die cut with the coordinating dies to create two floral edges that you can use in a variety of ways. The set also has coordinating layering stencils so that you can add color to the images in a variety of ways, even if coloring isn’t your favorite thing to do!

Best of Everything is a detailed floral background stamp featuring a variety of flowers-anemones, daffodil, roses, ranunculus, tulips, and several different types of foliage. This set also has coordinating layering stencils! I love that these sets offer such a variety of ways to add color. So fun!

I have three projects to share with you today using my new sets, so let’s get started with the details!

My first two projects are a pair that are an homage to pink and purple! I love vibrant, saturated color, and I wanted to showcase the Just A Hello and Best of Everything sets on super saturated, vivid colored cardstock.

For this first project, I combined the Best of Everything stamp set with the coordinating layering stencils on some shocking magenta cardstock. I began by heat embossing the main floral background image using some pearlescent white embossing powder, then used a variety of inks from Pinkfresh Studio’s line to add color to the individual images using the coordinating layering stencils. I love the subtle (if one can call a hot pink card “subtle” haha!) addition of color and shading the stencils add over the vivid cardstock base.

For the greeting, I wanted to add a stacked alphabet die cut greeting to the front without covering up the entirety of my super detailed, stenciled background, so I used the outline die cuts from the Adore Alpha Die Set, cut from some royal purple cardstock. I adhered them directly to the card front using liquid adhesive, then added a greeting from the Best of Everything stamp set that I’d white embossed on some strips of the same royal purple cardstock. I trimmed the card base down a bit, then mounted it on a full A2 panel of that deep, plummy purple cardstock using foam adhesive. The final touch was to add some sparkling Lavender jewels.

My second project features a similar color scheme, but with my new Just A Hello stamp set. I absolutely adore the look of colored pencils on colored cardstock, and the pretty flowers in the Just A Hello set were just the right size to use with my Luminance colored pencils-not too small, but big enough that you could add some fun details and shading. I stamped the main floral frame image from Just A Hello using white pigment ink on some more of that gorgeous plummy purple cardstock, then used the incredibly vibrant Caran d’Ache Luminance colored pencils to add lots of color to the floral images, berries, and foliage. I die cut the colored images using the coordinating dies, and I love that the dies cut two separate floral swags, so that you can use them together or separated! (I have a couple of fun ideas that I didn’t get time to finish, so keep your eyes open for another project or two in the coming weeks using this set!)

Once I’d finished coloring and die cutting the floral swags, I die cut the Simply Diamonds die from a full panel of the same purple cardstock, then mounted it on another A2 panel of the same purple cardstock using foam adhesive for a subtle, but dimensional and interesting, background. I heat embossed the greeting from Just A Hello on another snippet of purple cardstock (side note-the sentiments all stamp and die cut in one fell swoop, so you just stamp once, die cut once, and you have a variety of sentiments at your disposal! So freaking handy!), then added the sentiment and floral die cuts to the tone-on-tone background with even more foam tape. So much dimension to this card… I love it! A few more Lavender jewels finished it off.

My final project uses the Best of Everything set to adorn the top and bottom of a mini-slimline card. I began by gold heat embossing the main floral image on some hot press watercolor paper (the smooth surface of the hot press paper allowed the details in this image to stamp perfectly), then used my long-neglected Ph Martin’s liquid watercolors. These colors are so incredibly vibrant and mix so easily. So fun to use! Once I’d finished watercoloring the entire image, I fussy cut it using some sharp scissors.

Next, I trimmed a mini-slimline card base (3.5″x6″) from some creamy linen cardstock and die cut a mat using the Mini Slimline Essentials Dies from some more of the creamy linen cardstock. I mounted it on the card base using some foam adhesive.

I die cut a gold “friend” using the Phrase Builder Hello die set, adding the shadow die cut from some heavyweight vellum. I heat embossed one of the greetings from Best of Everything, then added the greetings to the card front. I cut the watercolored floral bouquet in half, adhering it to the card front with a double layer of foam adhesive. Finally, I added a few Espresso gems for some sparkle!

Well, that’s all for my projects today! I am so thrilled to help introduce these new sets that I’ve designed. Such a joy (and still somewhat surreal) to be designing stamps for Pinkfresh Studio!

We have some fun giveaways for you to celebrate this new release!

-We will be giving away the full release on the Pinkfresh blog & YouTube channel (there will also be a separate giveaway on the Instagram page at a later date, so keep your eyes peeled!)

-We will be giving away a total of TEN $25  gift cards along the hop. The winners will be chosen from the comments along the hop. The more comments you leave, the more chances you have to win!
The winners will be announce don on August 3 , 2021 on the GIVEAWAY PAGE. You must check that page & claim your prize within 2 weeks if your name is selected!

***To leave a comment on this post: click on the title of the blog post itself, then scroll down to the comment form! ***

You are invited to the Inlinkz link party!

Click here to enter

Filed Under: pinkfresh studio Tagged With: alphabet dies, best of everything, colored pencil, just a hello, layered stencils, liquid watercolor, mini slimline, no line coloring, original illustrations, Ph Martins, watercolor

Altenew February 2021 Love & Friendship Release Blog Hop+ Giveaway!

February 3, 2021

Good morning! Today, Altenew is releasing a brand new batch of stamps, dies, and embossing folders, and we’re celebrating with a blog hop to inspire you! You should have arrived from Kelly Griglione and your next stop is Tenia Nelson, or you can start back at the Altenew Card Blog to get the full hop list. I have two projects to share with you today, so let’s get started with the details!

Both of my projects are a “mini slimline” size (3.5″x6″) which I think are such fun, interesting dimensions, a bit different from the normal A2 size. I also am using a bright pink, charcoal, and white color scheme for both projects, though with very different techniques.

My first project uses the new Queen Anemone bundle. I began by stamping the layered florals on some plain white cardstock using the pink inks from the Spring Bouquet dye ink set, as well as some foliage. I also stamped several leaves on the mini slimline card base, as well. After I die cut the stamped images using the coordinating dies, I arranged them in a cluster on the card front, allowing the foliage stamped on the card base to peek out from behind the die cut flowers and foliage, which I adhered to the card front using foam adhesive.

I die cut the “hello” greeting from some pretty charcoal foil cardstock using the Bold Alphabet Dies. When I’m wanting to get my alphabet die cuts perfectly straight, I like to line them up on my Crafter’s Essential Cutting and Alignment Mat, then carefully lay a long piece of washi tape or Press’n’Seal over the top and pick all of the die cuts up as one piece. While they’re still in one straight line with the washi tape, I will add my adhesive of choice to the back and lay the die cuts on my card. I laid these large foil die cuts right over the top of the Queen Anemone bouquet, finally adding a few metallic gunmetal gems for some sparkle!

For my second card, I used the same color scheme and card size, this time focusing on the beautiful rose bouquet in Fresh Cut Roses. These giant rose blooms were so. much. fun to watercolor! I started by stamping the rose bouquet from Fresh Cut Roses using some no-line coloring ink, then used the Artists’ 24 Pan Watercolor Set to paint the roses a beautiful shade of bubble gum pink.

Once I’d finished watercoloring, I allowed the painting to dry completely, then added some deep pink splatters for an “artsy” look. I also heat embossed the greeting (also from Fresh Cut Roses) using Obsidian ink overlaid with some white pearl embossing powder to create a pretty pearlescent charcoal embossed greeting.

Once all of my painting and stamping had been completed, I trimmed the panel down slightly by 1/8″ on each side, then adhered it to a dark charcoal mini-slimline card base. Finally, I added a few more of the metallic gunmetal gems to round out the “rule of three” for my gunmetal accents.

Well, that’s all for my projects today! I have really been loving making these color-coordinated sets of cards with completely different supplies. Really stretches my creativity! As always, Altenew has lots of fun giveaways to celebrate the new release:

$300 in total prizes! To celebrate this release, Altenew is giving away a $50 gift certificate to 2 lucky winners and a $20 gift certificate to 10 winners! Please leave a comment on the Altenew Card Blog and/or each designer’s blog post on the blog hop list below by 02/08/2021 for a chance to win. Altenew will draw 12 random winners from the comments left on each stop of this blog hop and announce the winners on the Altenew Winners Page on 02/11/2021.

Your next stop on the hop is Tenia Nelson. Thanks so much for stopping by today, and happy hopping!

Filed Under: altenew Tagged With: alphabet dies, Altenew Artist Watercolors, artists 24 pan watercolors, fresh cut roses, mini slimline, no line watercolor, queen anemone, watercolor

  • Page 1
  • Page 2
  • Go to Next Page »

Primary Sidebar

  • Facebook
  • Instagram
  • Pinterest
  • YouTube

Favorite Shops

Secondary Sidebar

Subscribe

Enter your email address to subscribe to this blog and receive notifications of new posts by email.

Instagram
Something is wrong.
Instagram token error.
Follow
Load More

Archives

Tags

3D embossing folder alcohol markers better press birthday birthday card blog hop card kit christmas christmas card christmas tag colored pencil copic copic coloring Daniel Smith die cutting embossing folder embroidery felt giveaway holiday holiday card hot foil ink blending karin brushmarker pro layered stencil masculine my monthly hero new release no line coloring no line watercolor OLO marker olo markers original illustration pawsitively saturated rainbow shaker card slimline stamping stamptember stencil thank you thinking of you valentine's day video watercolor

Popular Posts

Simon Says Stamp Sending Cheer Release: Now Available!
Joyful Snowman with New Simon Says Stamp Sending Cheer Release!
Autumn Legs with Colorado Craft Company and Catherine Pooler!
February 2018 My Monthly Hero Blog Hop!
Altenew Paint A Flower: Carnation Blog Hop+Giveaway!
Altenew March 2020 Release Blog Hop+Giveaway!
Special Release: Simon Says Stamp Limited Edition STAMPtember Christmas Card Kit!
Pinkfresh Studio 5th Birthday!
Pinkfresh Studios June Washi and Stamp Release Blog Hop!
Honey Bee Stamps Bee Bold Release Blog Hop!

Disclosure

Some affiliate links are used in my posts. This means that, should you click on one of my links and purchase something from that company, I will receive a small portion of the sale at no extra cost to you. I use the money earned from these sales to help maintain my blog. I so appreciate you visiting and, if you do choose to use one of my affiliate links, thank you so much for your support!
Copyright © 2026 ·Brunch Pro Theme · Genesis Framework by StudioPress · WordPress · Log in
Loading Comments...