• Skip to main content
  • Skip to primary sidebar
  • Skip to secondary sidebar

Sixth Street Sundries

Emily Midgett

  • Home
  • About Me
  • Contact
  • OLO Marker Color Swatch Chart
  • Shop

anniversary

Altenew 9th Anniversary Blog Hop Day 1 + Giveaway (over $2,200 in Total Prizes)

April 5, 2023

Hi there! I am so excited to be a stop on Day 1 of the Altenew 9th Anniversary Blog Hop! You should have arrived here from the Simon Says Stamp blog, and your next stop is Mindy Eggen. You can also start at the beginning at the Altenew Card Blog. One of the best parts about the anniversary festivities each year, aside from the fabulous blog hop filled with wonderful prizes, is the special large scale Anniversary stamp set. These enormous stamp sets (seriously-enormous. 8.5″x10″!!!) are so unique and beautiful. This year’s set, called Billowing Peonies, is extra special because the large scale of the images works beautifully with the new Stampwheel! And, bonus, Tasnim has designed a set of coordinating layering stencils that are absolutely phenomenal and totally massive. So if coloring isn’t your jam, you have incredible options at your disposal with these spectacular stencils! I have two projects to share with you today using the stunning peony arrangement in Billowing Peonies, so let’s get started with the details.

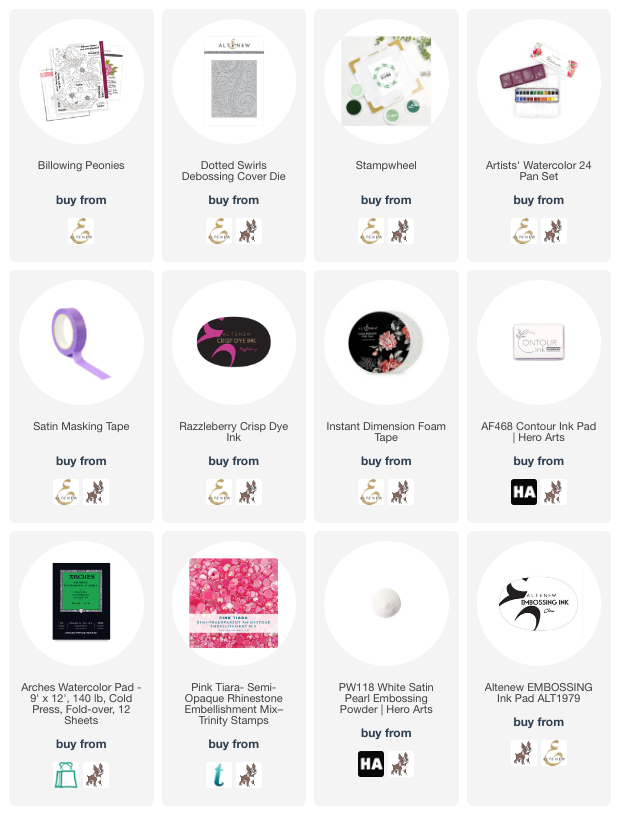
The Billowing Peonies stamp set features a pair of spectacular floral stamps that are so big and sooooo much fun to color. I find that large-scale stamps are the most fun to color, because they give you the room to really work on enhancing those details that might be too small to notice on a smaller set. I created a pair of peony projects (say that three times fast!!) using the new Billowing Peonies stamps: a slimline card and a piece of wall art, both watercolored using my favorite Artists’ Watercolor 24 Pan Set, which is hands down my favorite coloring medium in the Altenew catalog. I’ve had my set for several years and use it more than any other Altenew coloring medium. I’ve barely made a dent in the pans, so it’s a fantastic, long-lasting investment! If you are looking for an economical and good quality watercolor set, I cannot recommend the Artists’ Watercolor 24 Pan Set highly enough.

I began my slimline card by heat embossing the large peony duo from Billowing Peonies on a piece of watercolor paper that I’d trimmed down to slimline size. Even though I knew that I wanted to die cut the finished watercolored image, I started with the card size so that I could better visualize the final layout of the card. (Tip: if you don’t have the Stampwheel or are still waiting for your Stampwheel to arrive, you can use the back of your MISTI for this huge stamp. Tape the base of your MISTI to your work surface, then tape your paper next to your MISTI on your work surface. Place your large stamp on your paper, then close the *back* of your lid for your stamp positioner over your stamp. This hack gives you a bit of extra room to use those really large scale stamps, at least until you can get your hands on a Stampwheel!) I heat embossed the beautiful peony image using pearlescent white embossing powder, which I find creates a lighter, less severe aesthetic than using black stamped/embossed lines.

After I had heat embossed my image, I taped the panel down to my watercolor board with Satin Masking Tape and covered the entire panel with clean water. I then dropped in some diluted pink, green, coral, and yellow watercolors from the Artists’ Watercolor 24 Pan Set, which bloomed together beautifully on the damp watercolor paper. The wet watercolor will work with the wet watercolor paper to allow the colors to meld together beautifully and create some extra colorful interest to your floral images.

After speeding up the drying time with my heat tool, I went back in with more concentrated color to watercolor the beautiful peony images, adding depth and dimension to the flowers. The base layer of mottled color helps to create some color variation, mimicking the color variation found in nature. No real-life peony is only one color, so don’t be afraid to add touches of extra color! After it was completely dry, I went in with the coordinating dies and cut the image out. Because I had started on a slimline card base, the finished die cut image will fit perfectly on another slimline card base without needing to do any trimming.

To create the textured card base, I trimmed down a white slimline card front from some white cardstock, then used the Dotted Swirls Debossing Cover Plate Die at the top and bottom of the card front. Because the Dotted Swirls plate only pierces the cardstock and doesn’t actually cut anything, you can use it easily with a large scale card front like this! Simply line up where your plate ends with the previously-cut image to create a continuous pattern. I popped up the die cut watercolored image with Instant Dimension Foam Tape.

For the greeting, I stamped one of the chunky sentiments from the Billowing Peonies stamp set using Razzleberry ink onto some white cardstock, then while the stamp was still in place, stamped directly over the top with embossing ink. I sprinkled more pearlescent white embossing powder over the stamped greeting and heated it up, creating a pearlescent pink sentiment. I backed it with some Dazzling Diamond glitter paper so that the sparkle peeked out from the top and bottom of the sentiment panel, then layered that over the center of my watercolored peony and added a few shimmering pink gems for sparkle!

My second project using the new Billowing Peonies stamps is more of a home decor piece. I initially planned on watercoloring the entirety of the peony image, then chopping it up to create multiple card fronts, but after I had finished it… I decided I didn’t want to chop up those hours of meticulous watercoloring into something that would probably be thrown in the garbage.

I started by stamping the entirety of the image onto a 7″x7″ panel of watercolor paper using no-line coloring ink. You can see just how massive this image is; it’s even hanging over the edge of the 7″x7″ watercolor paper! I wanted to create a very pale lavender, almost white, peony (which I don’t think exist in real life, but it’s my garden so who cares, right?) so I mixed up some bright blue and purple watercolor from the Artists’ Watercolor 24 Pan Set, diluting the color with quite a bit of clean water to make it very subtle, and began adding that pale lavender to the shadowed areas of the first peony. I worked my way around the peony, keeping the wet sections separate from each other to ensure that those edges stayed nice and crisp, using the sharp point of my paintbrush to clean up any rough edges.

I used the same technique with the pink peony, this time mixing up some of my favorite bright pink with some of the purple to create a lovely shade of vibrant mauve. After I had completed the main watercolor on my peonies, I pulled out some yellows, pinks, and greens from my paint pans and diluted them on my palette so that they were the subtlest of washes. I used these subtle washes to “glaze” the edges of my petals, which is basically adding a watercolor wash over the top of an area of completely dry watercoloring. It helps to add some interest and color variation to your flowers. This technique is especially noticeable on the lavender/white peony; the white highlights on this super pale peony are picking up reflections of color from the neighboring flower as well as the foliage. I encourage you to try this technique on your next watercolor project!

Once I had finished watercoloring the flowers, I mixed some deep green and lime green watercolor to add pigment to the foliage. I like to think of each half of each leaf as it’s own unique petal, which allows me to visualize giving it the shape and shadows in the same way that I would on flower petals clustered together. After my initial painting, I mixed some black paint into the hunter/lime mixture, then enhanced the shadows on the leaves tucked behind the top layer of foliage. I matted the finished watercolored piece with some plain black cardstock, then mounted it on a panel of 8″x8″ white cardstock. It will fit perfectly in an 8″x8″ frame! Something like this would make a lovely Mother’s Day gift. 🙂

Well, that’s all for my projects today. To celebrate their 9th Anniversary, Altenew is offering some wonderful special gifts with purchase!

  • 4/5/2023-4/6/2023: Enjoy FREE U.S. shipping with code HAPPY9TH or $9 OFF shipping on international orders over $29 with code ANNIV23 at checkout and receive a FREE brand-new Playful Wildflower 3D Embossing Folder ($8.99 value) on orders over $69.
  • 4/3/2023-4/10/2023: FREE Mini Blending Brush Set(worth $26.99) with every order of the brand-new Billowing Peonies Complete Bundle.
  • Altenew: 10 x $50 Altenew Gift Certificates
  • Altenew Academy: 15 x Online Card Classes 
  • Artistry by Altenew: 5 x $25 Gift Certificate
  • Jennifer McGuire Ink: 1 Share Handmade Kindness goodies bag ($100+ value)
  • Online Card Classes: 5 x Online Card Classes
  • Gina K. Designs: $100 Gift Certificate
  • Hero Arts: $100 Gift Certificate
  • Michelle’s Cards & Stamps: $100 AUD Gift Certificate
  • Spellbinders Paper Arts: Wax Seal Starter Kit ($50 value)
  • Pinkfresh Studio: $50 Gift Certificate
  • Lawn Fawn: $50 Gift Certificate
  • Pink & Main: $50 Gift Certificate
  • Studio Katia: $50 Gift Certificate
  • Simon Says Stamp: $50 Gift Certificate
  • Krafters Cart: $50 Gift Certificate
  • Auzz Trinklets N Krafts: $50 Gift Certificate
  • A Cherry On Top: $50 Gift Certificate
  • ScrapbookPal: $50 Gift Certificate
  • MarkerPOP: $50 Gift Certificate
  • CiLi in Papers: $50 Gift Certificate
  • Scrapbook.com: $50 Gift Certificate
  • Seven Hills Crafts: £25 Gift Certificate
  • Bumbleberry Papercrafts: £25 Gift Certificate
  • Frantic Stamper: $25 Gift Certificate

Here’s the full hop list:

You are invited to the Inlinkz link party!

Click here to enter

It’s such an honor to be part of the Altenew Design Team. Working with beautiful flower stamps is the closest I will ever come to having a garden, and Altenew’s floral designs are truly unique and such a pleasure to color. Thank you so much for stopping by today, and happy 9th Anniversary to Altenew!
Filed Under: altenew Tagged With: anniversary, artists 24 pan watercolors, billowing peonies, slimline, stampwheel, watercolor

Altenew 8th Anniversary Blog Hop Day 3 + Giveaway (over $2,000 in Total Prizes)

April 6, 2022

Good morning! We’re hopping along again today to celebrate the Altenew Anniversary. You should have arrived here from Michelle’s Cards & Stamps, and your next stop is Michelle Short. You can also start back at the beginning at the Altenew Blog. How long have you loved Altenew’s innovative and utterly gorgeous products? Well, I have loved them almost since the very beginning of their journey eight years ago, which is what we’re celebrating this week! Altenew is turning 8, and it’s so exciting to see how much they’ve grown, introducing new lines of supplies and coloring mediums, to the stunning 3D embossing folders that have breathed new life into an older tool, to the marvelous monthly kits and subscriptions featuring unique and beautiful new flowers to enjoy each month, to the incredible floral stamps and dies that we come to expect from Altenew at each release. I am so proud to have been part of the Altenew Card Design Team since January 2021, and it’s such a joy to work with these beautiful products. Here are a few of my favorite projects from the past year:

2021 was an unbelievable year in the industry, and Altenew’s new releases each month did not disappoint! Such beautiful new kits, subscriptions, and innovative products!

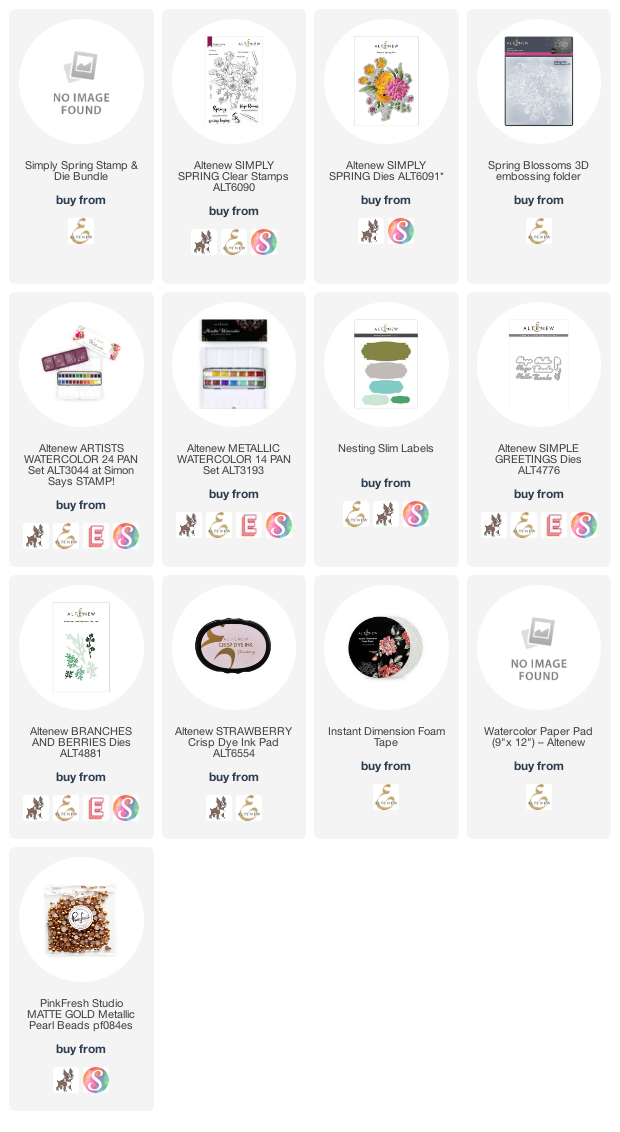
You know how some people love mac’n’cheese or mashed potatoes when they’re stressed or just need a warm hug in the form of some gooey, cheesy comfort food? Well, watercoloring is my crafty “comfort food.” I always can turn to watercoloring when I’m feeling low or stressed, and the floral stamps from Altenew have provided countless hours of watercolored “comfort food” for my psyche. Paired with their beautiful Artists’ 24 Pan Watercolors, it turns stress into pleasure. For today’s project, I created a pair of mini-slimline cards using one watercolored floral image from Simply Spring. Let’s get started with the details!

I began by heat embossing the massive image from Simply Spring onto some watercolor paper with gold embossing powder. I then used the Artists’ 24 Pan Watercolors to add lots of color to this beautiful floral arrangement. I am trying to do more color mixing to create completely custom colors from within the 24 shades included in the watercolor palette, and I love the slightly muted color palette that I was able to create with these incredibly vibrant shades. Once the image had completely dried, I splattered some gold metallic watercolor on the entirety of the image using a couple of shades of metallic watercolor from the Metallic Watercolor 14 Pan set. I die cut the entire image when it had dried completely, then ruthlessly cut the image right down the center using my trimmer.

Because I had cut the image down the center, I was able to create two cards using the two halves! I cut down two white mini slimline card bases (3.5″x6″), then die cut a Nesting Slim Labels die cut from some heavyweight vellum. After approximately arranging my florals and where I wanted them and determining the placement for my sentiment and vellum label, I trimmed the vellum die cut in half.

I blended some Strawberry ink on both card bases behind where I wanted the floral pieces to land, then splattered them with some more metallic watercolor. While the watercolor was drying, I die cut a couple of greetings from Simple Greetings using some matte gold foil cardstock. I find this matte gold foil complements the gold embossing and golden metallic splatters quite nicely. I also die cut a few sparkling gold glitter sprigs cut using the Branches and Berries die set.

Once I had die cut all of the components, I began to assemble the various die cut pieces on the card fronts. I used lots of Instant Dimension Foam Tape to adhered the floral die cuts, while adhering the glittering sprigs using liquid adhesive for lots of dimension.

I adhered the matte gold die cut greetings to the two halves of the vellum labels, then added those to the card fronts, hiding the clear foam adhesive behind the solid die cut words. The final step was to add one more touch of metallic gold with some matte gold pearls. I love the mixture of different forms of gold on these cards-shiny gold embossing powder, matte gold sentiments and pearls, shimmery gold metallic watercolors, and sparkling gold glitter paper. The different gold elements really add a level of richness and luxury to the cards!

Well, that’s all for my projects today. To celebrate their 8th anniversary, Altenew has compiled some utterly incredible prizes to give away during the blog hop!

Over $2,000 in total prizes! Altenew is giving away a $80 Gift Certificate to 5 lucky winners and one Altenew Academy Online Class($8.95 value) to 15 lucky winners. There are also 26 awesome companies/crafty friends who are celebrating with us, and they are offering the following prizes:

  • Altenew: 5 x $80 Altenew Gift Certificate
  • Altenew Academy: 15 x Online Monthly Class Spot
  • Jennifer McGuire Ink: Share Handmade Kindness Goodie Bag 
  • A Cherry on Top: $50 Gift Certificate
  • Auzz Trinklets N Krafts: $50 Gift Certificate 
  • Avery Elle: $50 Gift Certificate
  • Bumbleberry Papercrafts:  £25 Gift Certificate
  • Butterfly Reflections Ink: $25 Gift Certificate
  • CiLi in Papers: €75 Gift Certificate
  • Concord & 9th: 1 $50 Gift Certificate & 1 Eclectic Garden Bundle ($38 Value)
  • Craft Stash: $100 Gift Certificate
  • Dare 2B Artzy: $30 Gift Certificate
  • Ellen Hutson LLC: $25 Gift Certificate
  • Gina K. Designs: $50 Gift Certificate
  • Hero Arts: $50 Gift Certificate
  • Lawn Fawn: $25 Gift Certificate
  • MarkerPop: 4 x $40 Gift Certificate
  • Michelle’s Cards & Stamps: AUD$100 Gift Certificate
  • My Little Attic: $50 Gift Certificate 
  • My Sweet Petunia: $50 Gift Certificate
  • Online Card Classes: 3 Online Class Spots to 1 Winner
  • Pink and Main: $50 Gift Certificate
  • Pinkfresh Studio: $50 Gift Certificate
  • Scrapbook & Cards Today: $50 Gift Certificate
  • Scrapbook.com: $50 certificate
  • Simon Says Stamp: $50 Gift Certificate
  • Studio Katia: $50 Gift Certificate
  • Waffle Flower: $25 Gift Certificate

Your next stop on the hop is Michelle Short. Thanks so very much for stopping by today, and happy hopping! Happy Anniversary to Altenew, and may these first eight years be the start of a very long and creative presence within our industry! I can’t wait to see what incredible products you bring to us this year!

Filed Under: altenew Tagged With: anniversary, mini slimline, simply spring, watercolor

Hero Arts 45th Anniversary Blog Hop+Giveaway, Day 1!

May 22, 2019

Hi there! Hero Arts is turning 45 this year, and we are celebrating with a giant, three day blog hop chock full of fantastic inspiration using new and old catalog products, and masses of prizes from so many sponsors… you’re not going to want to miss anything! You should have arrived here from Ellen Hutson LLC, and your next stop is Ilina Crouse. I have a project to share with you today (the project you see in the banner above! Eek!)

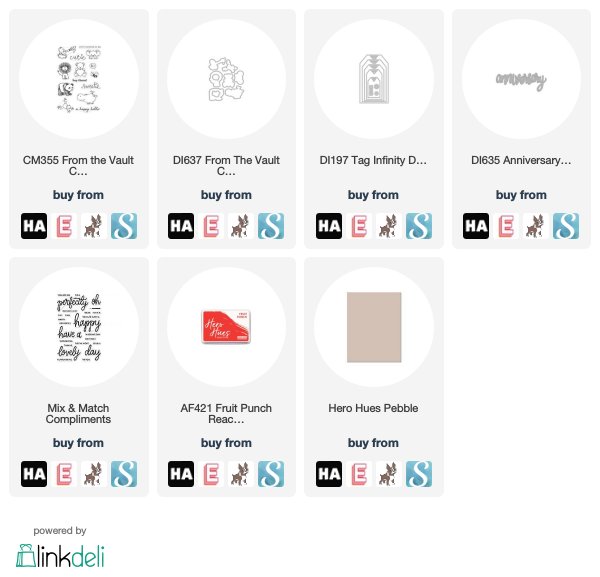
To celebrate their 45th anniversary, Hero Arts released several “new” stamp sets that contain compilations of images from their older releases. There is such a wide variety of styles and images in this catalog…. it’s fun to see how styles have changed over 45 years in the crafting business! My project today is an anniversary card using the darling little bear from From the Vault Cute Animals and a new anniversary die, along with some ink blending using some of the new Reactive Inks (seriously, these inks are SO fun.) Let’s get started with all of the details on how I created my project!

To start, I stamped the adorable little teddy bear from From the Vault Cute Animals on some white card stock using Intense Black ink, then colored it with my Copic markers and die cut it with the coordinating frame cuts. I also die cut a white tag and stamped a greeting on it from Mix and Match Compliments at a slight angle.

Next, I used the new Fruit Punch Reactive Ink to create some custom colored paper. I wanted a coral-red shade of card stock to match the cheerful, almost hibiscus red of the teddy bear’s heart, so I blended the Fruit Punch Reactive Ink on some plain white card stock using a blending tool (this stuff blends like butter… so smooth), then used that panel of custom card stock to do some die cutting. I first die cut the new anniversary die, then did a partial cut of the Heart Confetti cover plate die to create some little hearts that perfectly matched my color scheme. (Yes, I’m crazy enough to care about such things.)

I then layered all of the die cuts on an A2 Pebble card base in keeping with my gray, white, and bright red color scheme. I first adhered the white tag with foam adhesive after I’d added a red twine bow to the top of the tag. I added the teddy and the die cut anniversary with some more foam tape, adding a few little accents of the matching red hearts, some sequins, and some white Nuvo drops for added textural difference.

Well, that’s all for my project today! Now, this gigantic blog hop has been generously sponsored by some of our favorite crafting companies, including:

(Side note: isn’t it absolutely amazing how all of these companies have come together to celebrate each other’s successes? The kindness and camaraderie amongst the companies are some of my favorite elements of this industry!) Here’s a full list of the prizes up for grabs:

  • Hero Arts: 3 $145 Gift Certificates, 3 $45 Gift Certificates
  • Altenew: $50 Gift Certificate
  • Art Impressions: $25 Gift Certificate
  • Ellen Hutson LLC: $50 Gift Certificate
  • Gina K: $100 Gift Certificate
  • Jennifer McGuire Ink: $100 Hero Arts Gift Certificate, 5 Share Handmade Kindness goodie bags
  • Laurie Willison: 2 Card Hanger Dies
  • Lawn Fawn: $50 Gift Certificate
  • My Sweet Petunia: 1 Prize Bundle (Original MISTI, a set of Creative Corners, a Cut-Align, and a bar magnet)
  • Online Card Classes: 5 spots in the Stamp Happy In Good Company: Hero Arts class
  • Pink Fresh Studio: $45 Gift Certificate
  • Scrapbook & Cards Today: 3 copies of Scrapbook & Cards Today Summer 2019 Issue
  • Scrapbook.com: $50 Gift Certificate
  • Simon Says Stamp: $50 Gift Certificate

To win, simply leave comments on the stops of the hop! The more comments you leave, the greater chance you have to win! Comment by Sunday, June 2 at 11:59pm PST, and we will announce the winners on the Hero Arts blog the following week.

Your next stop on the hop is Ilina Crouse, or you can head back to the Hero Arts blog to get the full blog hop list. Congratulations to Hero Arts on 45 years!! Cheers to the next 45 years! Thanks so much for stopping by, and happy hopping!

Filed Under: giveaway, Hero Arts Tagged With: anniversary, blog hop, copic, giveaway, ink blending

Picket Fence Studios 1st Anniversary Celebration!

May 7, 2019

Good morning!! Today, I am so excited to be helping Picket Fence Studios celebrate their 1st Anniversary! They have a month of celebrations, giveaways, and discounts lined up, and I am so honored to be one of the guests during this celebration. They’ve generously provided me with a 20% discount code for your shopping pleasure. I’ve created two projects to help celebrate their Anniversary, so let’s get started with the details!

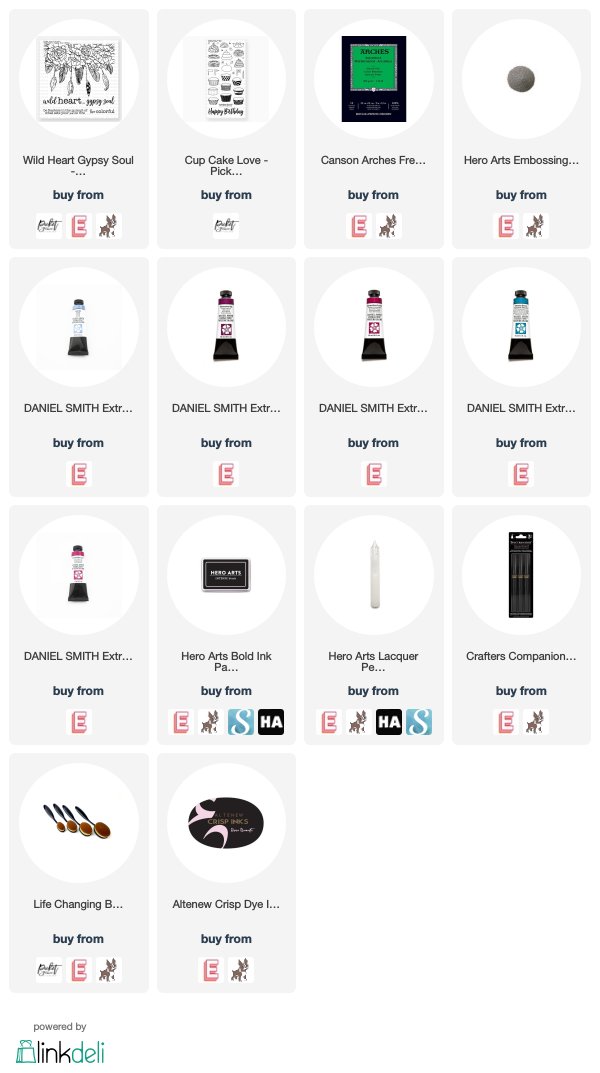
For my first project, I created a little cupcake collage using Picket Fence Studio’s Cup Cake Love stamp set. I stamped a variety of cupcakes on the card base, then colored them in a cheerful array of pink, purple, green, and blue Copic markers. I also added some shimmer pen to the frosting and some Crystal Lacquer to give some shine.

After the lacquer had dried, I stamped the greeting (with which I totally agree, by the way), then used the Life Changing Blender Brushes to add a soft pink halo around the edges. These blending brushes are truly life-changing; if you haven’t tried them yet, I highly, highly encourage you to at least get the smaller pack (and you can use the discount code at the end of the post! 😉 ) to try them out. You’ll be hooked once you give them a try!

For my second project today, I wanted to do some watercoloring (and when I say watercoloring, I mean relaxing) with the Wild Heart Gypsy Soul. I began by heat embossing the beautiful Boho-style stamp from Wild Heart Gypsy Soul onto some Arches Cold Press watercolor paper, then watercolored it using my Daniel Smith watercolors in a lovely springy color palette.

I added a greeting on a thin strip of white card stock, adhering it with some foam tape for some added dimension.

Now, to celebrate Picket Fence Studio’s One Year Anniversary, Nicole and Matt have generously provided a 20% off code for my blog readers! Simply use code PFS20 at checkout at the Picket Fence Studios store to take 20% off of your entire purchase from 5/7/19-5/10/19.

And…. Picket Fence has generously sponsored a giveaway, which I will announce on my Instagram. (I’m @eamidgett) Simply look for the post with the projects shown in this post! Thanks so much for stopping by today, and Happy 1st Anniversary to Picket Fence Studios!

Filed Under: picket fence studios, watercolor Tagged With: anniversary, ink blending, life changing blender brushes, watercolor, wild heart gypsy soul

Primary Sidebar

  • Facebook
  • Instagram
  • Pinterest
  • YouTube

Favorite Shops

Secondary Sidebar

Subscribe

Enter your email address to subscribe to this blog and receive notifications of new posts by email.

Instagram
Something is wrong.
Instagram token error.
Follow
Load More

Archives

Tags

3D embossing folder alcohol markers better press birthday birthday card blog hop card kit christmas christmas card christmas tag colored pencil copic copic coloring Daniel Smith die cutting embossing folder embroidery felt giveaway holiday holiday card hot foil ink blending karin brushmarker pro layered stencil masculine my monthly hero new release no line coloring no line watercolor OLO marker olo markers original illustration pawsitively saturated rainbow shaker card slimline stamping stamptember stencil thank you thinking of you valentine's day video watercolor

Popular Posts

Simon Says Stamp Sending Cheer Blog Hop- Day 2 + Freebie + Giveaway!
Altenew October 2026 Release Blog Hop + Giveaway!
Altenew Build A Flower Sweet Violet+Giveaway!
Floral Follies on Canvas with New Simon Says Stamp STAMPtember!
Simon Says Stamp STAMPtember Tim Holtz Collaboration: Festive Holidays!
Altenew Paint A Flower: Carnation Blog Hop+Giveaway!
Autumn Legs with Colorado Craft Company and Catherine Pooler!
Hero Arts Partners Blog Hop: Lawn Fawn!
Rustic Monochromatic Stars for Christmas with Rainbow Splash!
Altenew March 2020 Release Blog Hop+Giveaway!

Disclosure

Some affiliate links are used in my posts. This means that, should you click on one of my links and purchase something from that company, I will receive a small portion of the sale at no extra cost to you. I use the money earned from these sales to help maintain my blog. I so appreciate you visiting and, if you do choose to use one of my affiliate links, thank you so much for your support!
Copyright © 2026 ·Brunch Pro Theme · Genesis Framework by StudioPress · WordPress · Log in
Loading Comments...