• Skip to main content
  • Skip to primary sidebar
  • Skip to secondary sidebar

Sixth Street Sundries

Emily Midgett

  • Home
  • About Me
  • Contact
  • OLO Marker Color Swatch Chart
  • Shop

balloon background

The Sweetest Birthday with Simon Says Stamp!

August 29, 2024

This post was sponsored by Simon Says Stamp. Thanks, Simon!

Hi friends! I have a pair of softly colorful birthday cards to share with you today featuring a newer set with some scrumptious treats and the loveliest birthday sentiments: Sweet Birthday. One of my favorite parts of my birthday is the “excuse” to have some delicious treats that I wouldn’t normally eat, so food is always a big part of what I look forward to on my birthday! I used to say that my favorite food was dessert, which thankfully has expanded a bit as I’ve aged (not by much, though, ha!), so these sweet treats to celebrate a birthday were right up my alley. Let’s get started with the details on my projects!

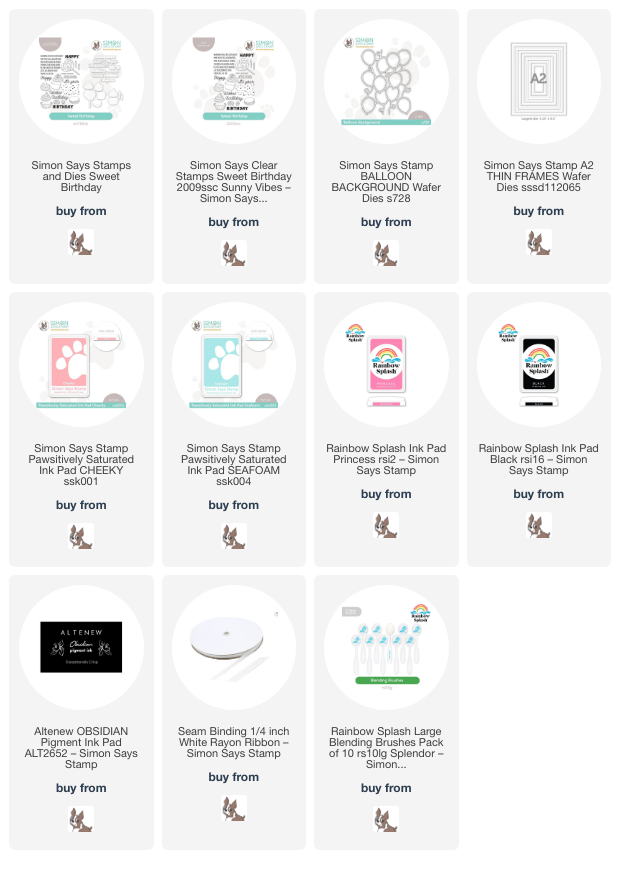
Both of my projects feature a dreamy, cotton candy-inspired color palette, with a soft pink, muted blue, and warm peach created by pairing the beautiful Cheeky and Seafoam Pawsitively Saturated Ink with Rainbow Splash Princess ink and some pastel Copic marker selections. I think this color palette is just delectable and the perfect complement to these sugary sweet treats from the Sweet Birthday set!

For my first card, I started by stamping a trio of macarons from Sweet Birthday using Rainbow Splash Black ink, which is alcohol marker-friendly. I used some pastel Copic markers to add color and shading to the images and die cut them using the coordinating die. I created a coordinating background using some super soft and ethereal blending with Cheeky and Seafoam Pawsitively Saturated Ink and Rainbow Splash Princess ink with blending brushes, keeping the blending around the edges of the card and leaving the center of the A2 card a bright, crisp white with a colorful halo. Once I had completed the blending, I splattered the background with some iridescent glitter watercolors from my stash, which I think enhances the dreamy blending so perfectly!

After I had allowed my background to dry completely, I added an iridescent white Balloon Background die, which adds some extra festiveness and shine to the simple backdrop. I also stamped some of the fabulous sentiments from the Sweet Birthday set using black pigment ink and clear embossed over the top, die cutting them with their coordinating dies. I popped up the greeting pieces with some foam adhesive and stacked up my macarons next to the sentiment. Finally, I tucked a bow created using 1/4″ white ribbon and added a smattering of shimmering gems to finish everything off!

For my second card, I continued the cotton candy color palette, this time stamping some cupcakes and that large lollipop from Sweet Birthday and coloring them using the same Copic color palette. I also added some watercolored sparkles to the lollipop and the cherry on the cupcake, covering the cherry with clear lacquer, as well. I also blended the background with the same soft ink colors from the first card, this time concentrating the color in the center of the A2 card front to create a glow from behind my cluster of sweets, adding some more sparkling splatters over the top of the ink blending as well!

After I had finished my background and treats, I die cut some white frames using the A2 Thin Frames and some iridescent white foil cardstock. I offset one of the frames over the blended area, then arranged my treats in a trio and adhered them using foam adhesive squares. I added some more greetings from Sweet Treats, stamped with black pigment ink and clear embossed, then popped up with a double layer of foam adhesive. Finally, I added a few more sparkling gems to make the card extra special and festive!

Well, that’s all for my projects today! I love celebrating special occasions with sweet treats. How cute would these cards be with a little gift card to your favorite bakery tucked inside? I know I would be super excited to receive that gift! Thanks so much for stopping by today, and have a marvelous day!
Filed Under: simon says stamp Tagged With: A2 thin frames, balloon background, birthday, ink blending, sweet treats

A Triple Birthday Card Suite with Simon Says Stamp!

June 3, 2023

Hi there! I have been trying to use more things in my stash that haven’t seen any love, and one of those sets was the Time To Party set from Simon Says Stamp. I love the graphic feel of this set; it has so many different elements that you can make a ton of different projects that all have that same graphic feel but with completely different layouts! I selected three different shades of ink and a smattering of other birthday-themed products from Simon Says Stamp’s collection and went to town creating three birthday cards with lots of cheerful colors and crisp white accents. Let’s get started with the details!

All three of my cards feature the same color combination created using inks from the Pawsitively Saturated ink line from Simon Says Stamo: Cheeky, Watermelon, and Orchid. Individually, these colors are quite unique themselves, but together I think they make such a pretty and interesting color palette!

For my first card, I stamped the birthday hat from Time To Party, stamping the first layer of the hat with Cheeky ink, then tapping my Watermelon pad around the edge of the same stamp lightly and dabbing it with my microfiber cloth to soften the edges a bit and stamping that layer, as well, to create a more dimensional look. I also stamped the polka dots and fluffy topper for the hat using Orchid ink. Once I had finished stamping the different elements for the hat, I die cut them using the coordinating dies.

For the background, I first lightly blended some Cheeky ink around the edges of a white A2 card base, then added some white Streamer Ribbons die cuts, adhering them with dots of liquid glue to create a simple, festive backdrop for my vibrant party hat. To create my sentiment, I blended some Orchid ink on a scrap of white cardstock, then die cut the Birthday On A Line die, once from the coordinating purple cardstock and twice from plain white cardstock, adhering them together to create a dimensional die cut sentiment. I stamped smaller greeting from the Time To Party set on a small rectangle of white cardstock, as well. I arranged the die cuts on my card front, making the greeting even more festive by popping that hat on top of it at a jaunty angle! Finally, I added a few iridescent white pearls for some shine.

My second card features more die cuts from Time To Party in the same colors. I stamped and die cut some balloons and a yummy cupcake using the Cheeky, Watermelon, and Orchid inks and die cut them with the coordinating dies. I also die cut a Balloon Background Die from white cardstock and layered it on a white A2 card front to create a slightly textured, but still simple, background that fit the festive theme of the card without detracting from the bright focal points.

I created a custom sentiment by stamping part of one of the greetings from Time To Party, then enhancing it with an iridescent white Birthday die cut. I popped up all of the different die cut elements using foam adhesive, then added a few iridescent white pearls for some sparkle.

My last card is one of those super fun flat shaker cards that are so popular and so fun to make! I stamped some custom patterned paper using the balloons and confetti stamps from Time To Party and Cheeky, Watermelon, and Orchid inks. I used some leftover stamp packaging to create a cellophane wrapper for my patterned panel, filling it with some tiny shimmering sequins. The cellophane bag is loose enough that the sequins shakes so easily and are so festive!!

I kept the sentiment simple to keep the focus on the fun shaker element, stamping two different sentiments from Time To Party and adding them to the front of the card at a playful angle using foam adhesive. I love how this one came out. It was super easy to make, too, and the shaker makes such an impact! Everybody loves a shaker, right?

Well, that’s all for my projects today! I am having so much fun pulling products that haven’t seen enough love from me and giving them so well-deserved attention. Thanks so much for stopping by today, and have a marvelous day!

Filed Under: simon says stamp Tagged With: balloon background, birthday, birthday card, birthday on a line, flat shaker, pawsitively saturated, shaker card, streamer ribbons

Simon Says Stamp Good Luck Charm Release!

February 16, 2022

Hi there! My friends over at Simon Says Stamp just released their fabulous new Good Luck Charm collection, and I am super excited to share a project that I made using several of the new goodies! Now, I know it’s usually all florals all the time around here, but I’ll let you in on a little secret: I love making birthday cards almost as much as I love painting flowers. Balloons, confetti, birthday cake… I love it all! The new Good Luck Charm release has several fantastic new birthday-themed products, and I combined a few of them to create this festive project. Let’s get started with the details!

I began by die cutting the Balloon Background die from some shiny holographic blue foil cardstock. To coordinate with the colors in the iridescent foil cardstock, I created a colorful card base by blending Spring Rain, High Dive, and Mint Candy inks. I blended some white pigment ink over the Layered Confetti stencils, then splattered some white and silver gouache to make a festive, colorful background with lots of levels of dimension and texture. I adhered the shiny foil balloon die cut with some liquid adhesive.

For the greeting, I die cut the Basic Box Card Happy Birthday dies three times from some deep teal cardstock, then once from white, iridescent glittery cardstock. I adhered all of the pieces together to create a dimensional die cut. To help make the greeting stand out a bit more, I used the included outline die to cut a piece of vellum and adhered the dimensional die cut greeting to it. I popped up the greeting die cut with some foam adhesive to add lots of dimension and height. I also trimmed one of the preprinted All Things Happy Sentiment Remix panels and added it to the card front with some more foam adhesive.

After I’d added the greeting die cuts, I thought that the card needed a bit more of the shiny holographic foil, so I added a few of the extra balloons from the Balloon Background with some foam tape. Finally, I added a few sequins to add a touch more sparkle.

Well, that’s all for my project today! I’ve been busy creating a few more projects that I’ll share in a few days. In the meantime, I hope you’ll take a peek at the Good Luck Charm release! Thanks so much for reading, and have a marvelous day!

Filed Under: simon says stamp Tagged With: balloon background, basic box card happy birthday, birthday card, ink blending, layered confetti stencils

Primary Sidebar

  • Facebook
  • Instagram
  • Pinterest
  • YouTube

Favorite Shops

Secondary Sidebar

Subscribe

Enter your email address to subscribe to this blog and receive notifications of new posts by email.

Instagram
Something is wrong.
Instagram token error.
Follow
Load More

Archives

Tags

3D embossing folder alcohol markers better press birthday birthday card blog hop card kit christmas christmas card christmas tag colored pencil copic copic coloring Daniel Smith die cutting embossing folder embroidery felt giveaway holiday holiday card hot foil ink blending karin brushmarker pro layered stencil masculine my monthly hero new release no line coloring no line watercolor OLO marker olo markers original illustration pawsitively saturated rainbow shaker card slimline stamping stamptember stencil thank you thinking of you valentine's day video watercolor

Popular Posts

Simon Says Stamp October 2026 Card Kit of the Month: Homespun Gratitude!
Altenew Craft A Flower: Poppy Blog Hop+Giveaway!
Honey Bee Stamps Cheerful Love Blog Hop!
Autumn Legs with Colorado Craft Company and Catherine Pooler!
Simon Says Stamp Cozy & Bright Inspiration, Part Two!
February 2018 My Monthly Hero Blog Hop!
The Ton Anniversary Release- Day 2
Sunflower Home Decor with Simon Says Stamp!
Simon Says Stamp STAMPtember Surprise: Boo Bundle Halloween Card Kit!
Hero Arts Spring 2020 Catalog Release Blog Hop+Giveaway!

Disclosure

Some affiliate links are used in my posts. This means that, should you click on one of my links and purchase something from that company, I will receive a small portion of the sale at no extra cost to you. I use the money earned from these sales to help maintain my blog. I so appreciate you visiting and, if you do choose to use one of my affiliate links, thank you so much for your support!
Copyright © 2026 ·Brunch Pro Theme · Genesis Framework by StudioPress · WordPress · Log in
Loading Comments...