• Skip to main content
  • Skip to primary sidebar
  • Skip to secondary sidebar

Sixth Street Sundries

Emily Midgett

  • Home
  • About Me
  • Contact
  • OLO Marker Color Swatch Chart
  • Shop

basic sentiments

VIDEO: No-Ink Press Plates with Pinkfresh Studio!

April 24, 2025

Hi friends! I am on the Pinkfresh Studio YouTube Channel today with this pretty “blurple” project inspired by the colors of one of my favorite flowers: hydrangeas! You can watch the video HERE on YouTube or below:

Below, I’ve included a quick written rundown of my techniques!

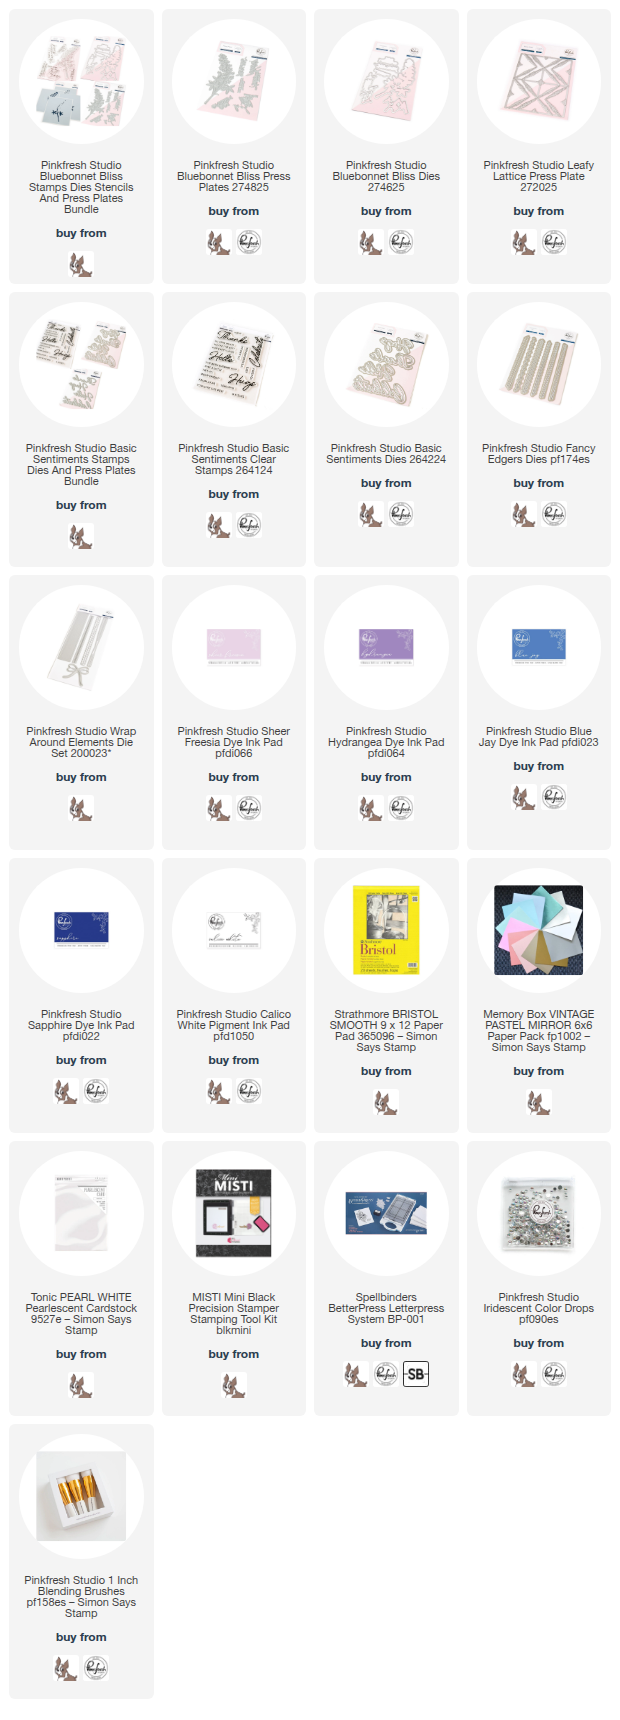
To begin, I used the Pinkfresh Studio 1″ Blending Brushes to blend a superb combination of blue and purple inks in an ombré, creating a soft “blurple” blended background. From light to dark, I blended: Sheer Freesia, Hydrangea, Blue Jay, and Sapphire inks on my plain white A2 panel of cardstock. After I had blended this pretty background, I adhered it with light-tack tape to a panel of thick scrap cardstock, creating a bit of a cushion behind this regular-weight cardstock so that I could use it with the Leafy Lattice Press Plate! Carissa Wiley shared this trick awhile ago, and I have been absolutely obsessed with it since then. After adhering the blended panel to the scrap Bristol cardstock, I used Calico White ink to press the Leafy Lattice Press Plate into my blended background. The extra cushion allows that impression to be nice and crisp in the lighter-weight cardstock, and the white pigment ink creates a subtle pattern and texture.

Once the background had been completed, I turned to the focal point. I have been having fun experimenting with textures on coated cardstocks lately, pairing pearlescent cardstocks with embossing folders, and today I used the Bluebonnet Bliss Press Plate and dies with some stunning periwinkle mirror cardstock that I found in my stash. (I make it my mission to collect interesting “specialty” cardstocks and sometimes have the problem of wanting to hoard them for a long time, so then I forget where I found them!) I impressed the beautifully detailed Bluebonnet Bliss Press Plate into this foil cardstock without inking up the plates, allowing the almost etched impression to be the focal point for my card! I impressed the image twice and then die cut the images out with their coordinating dies.

To accent the background and further enhance the feminine feel of this card, I die cut some Midnight Navy Glitter Cardstock from Pinkfresh Studio using the Fancy Edgers dies, backing the glittery, lacy strip with some pearlescent white cardstock for added shimmer and contrast. I placed the strip on the blended and pressed card front with liquid adhesive, then added the impressed Bluebonnet die cuts with liquid and thin foam adhesives. For the greeting, I stamped the “hugs” from the Basic Sentiments Stamps suite, using Hydrangea and Blue Jay inks to create an ombré sentiment. I popped the sentiment pieces up using thicker foam adhesive squares, then added a white pearlescent bow die cut created using the Wrap Around Elements dies (which are now discontinued– a twine bow would also work here!) to create the look of a hand-tied bouquet. Finally, I added a few Iridescent Dew Drop embellishments to fill in some of the blank areas on the card.

Well, that’s all for my project today! If you haven’t tried using your Press Plates without ink to add gorgeous texture, I hope this project inspires you to try it out. The impressed texture is exquisite and lends such an air of sophistication to your projects. Thanks so much for stopping by today, and have a marvelous day!
Filed Under: pinkfresh studio, Uncategorized Tagged With: basic sentiments, better press, bluebonnet bliss, fancy edgers, ink blending, letterpress, press plate, video

VIDEO: Green Monochromatic Botanicals with Pinkfresh Studio!

February 27, 2025

Hi friends! I am up on the Pinkfresh Studio YouTube channel today with a new video featuring a fun letterpress technique using white ink on colored cardstock (yes, letterpress on colored cardstock!) as well as some beautiful monochromatic images that I’ve created using some selective stenciling. You can watch the video below or HERE on YouTube:

https://youtu.be/6ms5uWg7vJA

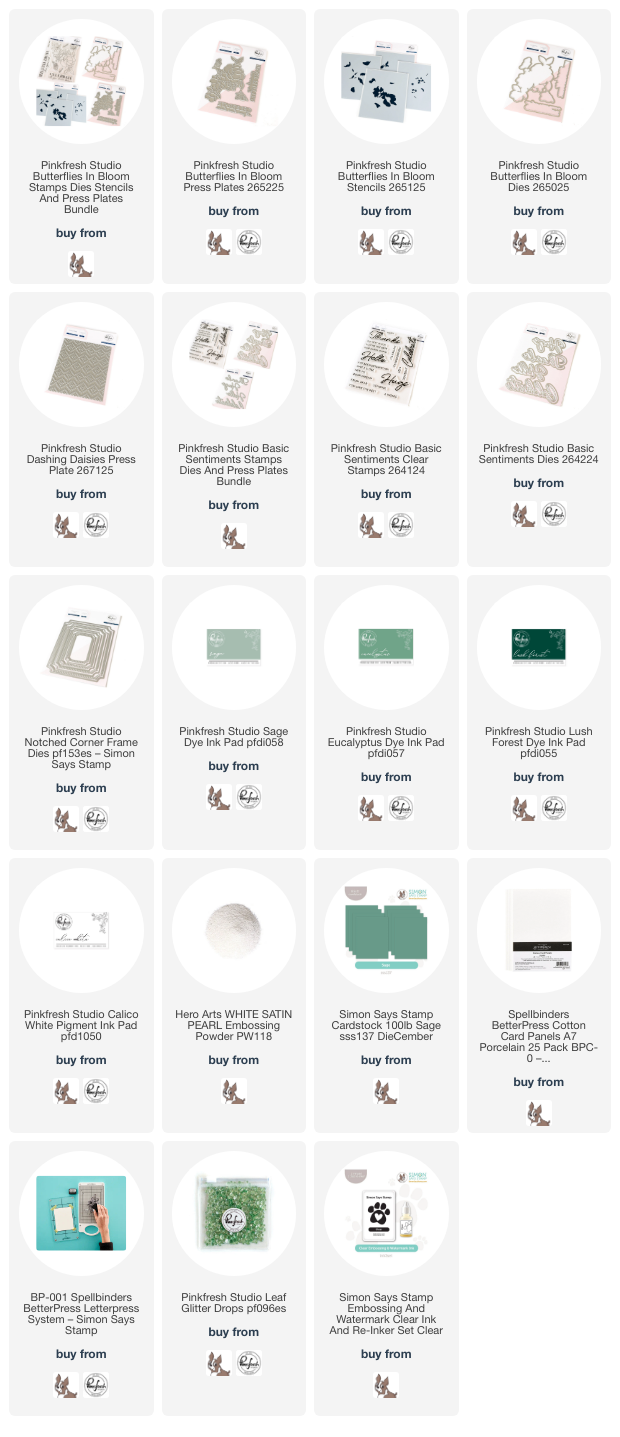
In case you can’t watch the video, I will give a quick explanation of my process. To start, I used Eucalyptus Ink from Pinkfresh Studio to impress the Butterflies in Bloom Press Plate onto some white letterpress paper. This letterpress suite impresses a gorgeous floral bouquet and some standalone butterflies that you can use to create a charming visual triangle on your card front! I used Sage, Eucalyptus, and Lush Forest ink with the Butterflies in Bloom Stencils. These stencils create a very graphic overall feel when used in their entirety, but for this card, I wanted to add some very subtle color, creating almost “white” blooms surrounded by dense, dramatic green foliage and no other colors accenting the main images, so I made sure to avoid the butterfly stencils and used a light hand with the Sage and Eucalyptus inks on the main flowers. After I had finished stenciling, I used the coordinating one-go die to die cut all of the images with one pass through my die cut machine!

For the background, I die cut a plain notched rectangle from Simon Says Stamp Sage Green cardstock using the Notched Corner Frames die set. Because colored cardstock is not quite thick enough to use with press plates on its own, I used a trick that I learned from the talented Carissa Wiley: use light-tack tape to adhere a piece of thick watercolor or letterpress cardstock behind your colored cardstock, then letterpress as you would normally. For this card, I wanted to keep the area behind the light flowers a consistent sage green, so I used the Dashing Daisies press plate with Calico White ink. The inks from Pinkfresh Studio work beautifully with the press plates; because the Calico White ink has a very soft foam pad, it is important to use a very light hand when adding ink to your plate so that you don’t get ink where you don’t want it. I inked up the plate with the white ink, then ran it through my Better Press system on the green Notched Corner Frame die cut.

For the greeting, I stamped two different images from the Basic Sentiments stamp set onto some more of the Sage cardstock using White Calico ink, then stamped again directly over the top with embossing ink and added some White Satin Pearl embossing powder. The embossing powder adds a lovely shimmer and enhances the white stamped image. I trimmed the “you’re the best” with a trimmer, die cut the large “thanks” with the coordinating die, then began arranging the die cuts on my card front. I adhered everything with different heights of foam adhesive squares to keep things interesting visually, then added a few sparkling Glitter Drops: Leaf on the card front for one last touch of shine!

Well, that’s all for my project today! If you’ve never tried doing letterpress on colored cardstock, I highly encourage you to give it a try. It’s so simple, and it opens up a whole new world of possibilities! Thanks so much for stopping by today, and have a marvelous day!

Filed Under: pinkfresh studio Tagged With: basic sentiments, betterpress, butterflies in bloom, colored cardstock, dashing daisies, die cutting, letterpress, notched corner frame, stencil, thank you card, thanks

Pinkfresh Studio “Gentle Greetings & Greenery” Release Blog Hop

December 10, 2024

Hi friends! Today, I am hopping along with Pinkfresh Studio to help introduce their newest collection: Gentle Greetings and Greenery! This collection has some truly beautiful new floral designs as well as some versatile and super useful sentiments, along with some fun basic backgrounds that will make your focal points pop. You should have arrived here from Dawn, and your next stop is Enza. You can also start at the beginning at the Pinkfresh Studio Blog.

*I have gathered links to all of the products used at the bottom of the post for your convenience, using affiliate links. Thank you for shopping with my links! I truly appreciate your support for my work!*

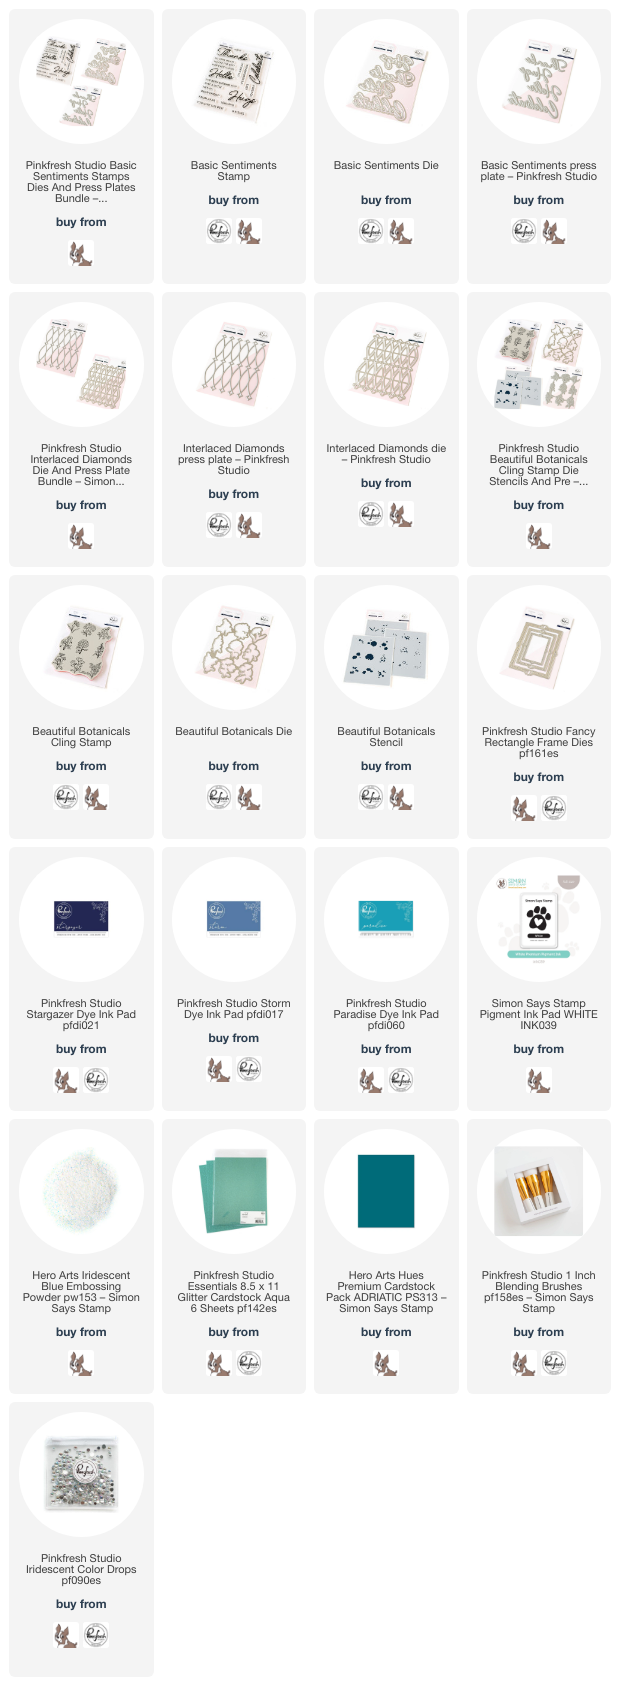
I am always up for a good ombré color palette, and today’s color palette was inspired by some cards I did for the October Create & Connect Press Plate class. Deep royal purple moving to muted blue to intense teal is such a soothing color palette to my eyes, and I thought it was perfect for the Gentle Greetings theme. I pulled out Paradise, Storm, and Stargazer inks to pair with the new Beautiful Botanicals stamps to create this pair of paradoxical cards: one deeply color saturated and vibrant, and one with lots of crisp white and pops of color!

For my first card, I took advantage of the lovely, symmetrical arrangement on the Beautiful Botanicals stamp set and the coordinating stencils. I wanted to create an ombré effect with the florals, so after stamping the Beautiful Botanicals cling stamp onto white cardstock using Paradise ink, I stamped it again with sticky embossing ink and covered the images with Iridescent Blue embossing powder, adding a ton of shimmer and iridescent shine to these beautifully detailed images! After I had heated the embossing powder, I used the coordinating Beautiful Botanicals Stencils to color the images, inking the flowers from the top down using Paradise, Storm, and Stargazer inks, then using the foliage stencil with only Paradise, adding the details on the last stencil with the same coordinating inks used on each flower. Pairing the gradient ink blending on the flowers with the iridescent shimmer on the embossing creates a magical effect!

After I had finished stenciling, I trimmed down the panel very slightly and matted it on a panel of coordinating deep teal cardstock, leaving a super thin contrasting frame around the edge.

For the greeting, I used the large Thanks sentiment from the new Basic Sentiments Press Plate set. This sentiment set is truly a must-have in my opinion, with its beautiful font and large scale making an excellent impact on your cards! After running the letterpress sentiment through my machine with the Better Press using Paradise ink, I die cut the sentiment with its coordinating die. I centered it over a small, Aqua Glitter Fancy Rectangles Frame, adhering the sentiment to the frame and adding some foam adhesive behind the solid die cut to keep the glittery die cut clean. I finished the card off with a white silk bow and some Iridescent Bubble embellishments!

For my second card, I used the new Basic Sentiments coordinating die as my focal point, allowing the large scale die cuts to be the star of the show with some support from the beautiful new Interlaced Diamonds Press Plate and Coordinating Die and some vibrant ink blending. I began by using Paradise, Storm, and Stargazer inks on the Interlaced Diamonds Press Plate to create a gradient effect, then used blending brushes to blend the same colors over the top lightly before die cutting with the coordinating die. I used the same ink and brushes to blend another panel in an identical pattern, adding some iridescent glitter watercolor splatters after blending for added sparkle and texture! I popped the die cut up with some thin strips of foam adhesive for added texture and dimension, which is key to keeping these monochromatic cards from becoming visually boring.

After I had created my background, I die cut the large scale Hugs from the new Basic Sentiment die set, enhancing it with some sentiment strips from the Basic Sentiment stamp set, which I stamped using white pigment ink and embossed with Iridescent Blue embossing powder on deep teal cardstock. I used the same white pigment ink and iridescent embossing powder combination to stamp and emboss the Beautiful Botanicals stamp set, arranging a few of the die cuts in a swag in the corner of a glittery Fancy Rectangles Frame. I tucked the sentiment pieces within the frame using foam adhesive, finally adding some more iridescent bubble embellishments for added shimmer and shine!

Well, that’s all for my projects today. Now for some fun giveaway information!

To celebrate this release, Pinkfresh Studio is hosting fabulous giveaways! Pinkfresh Studio will be giving away the full release on the Pinkfresh blog & YouTube channel. They will also be giving away a total of TEN $25  gift cards along the hop. The winners will be selected from the comments.
Winners will be announced on December 18, 2024 on our GIVEAWAY PAGE. Winners must claim their prize within 2 weeks.

Here’s the full hop list. Thanks so much for stopping by, and happy hopping!

You are invited to the Inlinkz link party!

Click here to enter

Filed Under: pinkfresh studio Tagged With: basic sentiments, beautiful botanicals, better press, die cutting, fancy rectangle frame, ink blending, letterpress

Primary Sidebar

  • Facebook
  • Instagram
  • Pinterest
  • YouTube

Favorite Shops

Secondary Sidebar

Subscribe

Enter your email address to subscribe to this blog and receive notifications of new posts by email.

Instagram
Something is wrong.
Instagram token error.
Follow
Load More

Archives

Tags

3D embossing folder alcohol markers better press birthday birthday card blog hop card kit christmas christmas card christmas tag colored pencil copic copic coloring Daniel Smith die cutting embossing folder embroidery felt giveaway holiday holiday card hot foil ink blending karin brushmarker pro layered stencil masculine my monthly hero new release no line coloring no line watercolor OLO marker olo markers original illustration pawsitively saturated rainbow shaker card slimline stamping stamptember stencil thank you thinking of you valentine's day video watercolor

Popular Posts

Simon Says Stamp Sending Cheer Release: Now Available!
Joyful Snowman with New Simon Says Stamp Sending Cheer Release!
Autumn Legs with Colorado Craft Company and Catherine Pooler!
February 2018 My Monthly Hero Blog Hop!
Altenew Paint A Flower: Carnation Blog Hop+Giveaway!
Altenew March 2020 Release Blog Hop+Giveaway!
Special Release: Simon Says Stamp Limited Edition STAMPtember Christmas Card Kit!
Pinkfresh Studio 5th Birthday!
Pinkfresh Studios June Washi and Stamp Release Blog Hop!
Advent Calendar Extravaganza with Taheerah Atchia

Disclosure

Some affiliate links are used in my posts. This means that, should you click on one of my links and purchase something from that company, I will receive a small portion of the sale at no extra cost to you. I use the money earned from these sales to help maintain my blog. I so appreciate you visiting and, if you do choose to use one of my affiliate links, thank you so much for your support!
Copyright © 2026 ·Brunch Pro Theme · Genesis Framework by StudioPress · WordPress · Log in
Loading Comments...