• Skip to main content
  • Skip to primary sidebar
  • Skip to secondary sidebar

Sixth Street Sundries

Emily Midgett

  • Home
  • About Me
  • Contact
  • OLO Marker Color Swatch Chart
  • Shop

better press

Pinkfresh Studio “Good Times” Release Blog Hop

April 15, 2025

Hi friends! I am hopping along with my friends at Pinkfresh Studio to share some inspiration using their marvelous new Good Times release! I never tire of the beautiful images that Pinkfresh share with us each month, and this month features gorgeous new floral arrangements, Essentials dies, and some spectacular butterflies-and nearly all of these fabulous images feature both stamps and press plates, which can be used for letterpress and hot foiling! So much bang for your buck, right? I have a pretty-in-purple project to share with you today, so let’s get started with the details!

Every time I reorganize my office, I find something fun that I had forgotten that I’d purchased (whoops!). Today’s idée fixe is press plates paired with pearlescent cardstock, of which I found a whole stash in fun colors, including a lovely lavender and crisp, pearly white! I decided to use these two colors as the palette for my project today, envisioning a springy card with ethereal, fluttering butterflies and graceful blooms.

*I have gathered links to all of the products used at the bottom of the post for your convenience, using affiliate links. Thank you for shopping with my links! I truly appreciate your support for my work!*

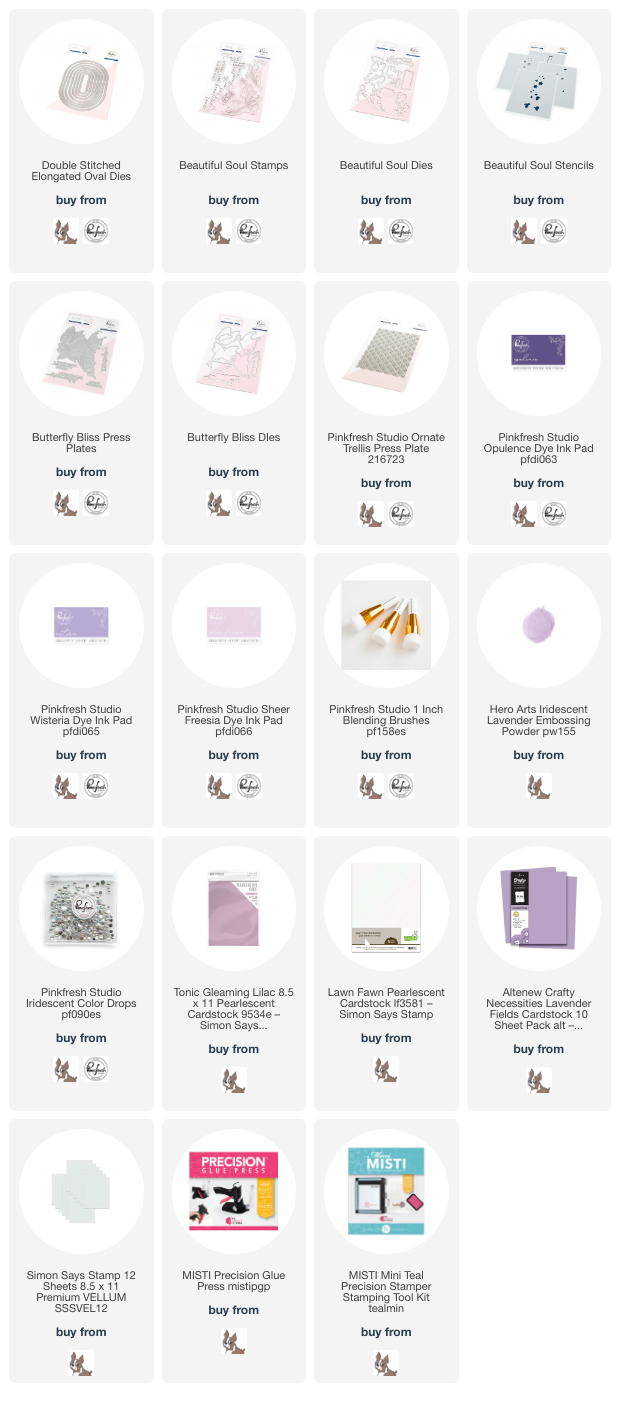
To begin, I stamped the gorgeous images from the new Beautiful Soul Stamp set twice on gorgeous lavender cardstock using white pigment ink, then again with embossing ink, then sprinkled Iridescent Lavender embossing powder over the top to create a subtle, shimmering shine on my stamped images. I then used the coordinating Beautiful Soul Stencils with Opulence, Wisteria, and Sheer Freesia inks to add some monochromatic color to each of the images, creating a touch of contrast with the individual leaves and flowers while still allowing the lavender haze to be the central visual for my color palette. I die cut the finished images with their coordinating Beautiful Soul Dies.

After I had created the floral images, I used some of that gorgeous pearlescent white cardstock with the new Butterfly Bliss Press Plate and dies. This cardstock is approximately the same weight as typical colored cardstock, so in order to use it with the press plates, I backed it with some inexpensive watercolor paper to create a bit more cushion and allow the plates to impress into the thinner cardstock, creating a crisp image. (Carissa Wiley is the genius that came up with this, and I just love it!) The fine details on the butterflies impress beautifully into the pearlescent cardstock, visible even without the addition of any ink. After impressing the butterfly images, I die cut the butterflies with their coordinating dies. I used this same technique to add some texture to the pearlescent lavender background with the Ornate Trellis Press Plate.

For the greeting, I heat embossed a sentiment from the Beautiful Soul stamp set, stamping first using Opulence ink, then again with embossing ink and adding the same Iridescent Lavender embossing powder over the top to create a marvelous sheen for my greeting. I also die cut a vellum oval using the new Double Stitched Elongated Oval, adhering my sentiment in the center of the oval and arranging the flowers and butterflies around it. The vellum oval provides a soft grounding for my sentiment. Finally, I added a few Iridescent Clear Drops to fill in a few of the blank spots in my arrangement. Such a pretty springtime card!

Well, that’s all for my project today. Now for some fun giveaway information:

Pinkfresh Studio will give away the full release on the Pinkfresh blog and YouTube channel. 
Pinkfresh Studio will also give away TEN $50 gift cards along the hop. As usual with blog hops, the winners will be selected from the comments.
Winners will be selected and posted on April 23, 2025, on our GIVEAWAY PAGE. Winners must check that page and claim their prize within 2 weeks
.

Well, that’s all for me today! You can find the full hop list below. Thanks so much for stopping by today, and happy hopping!
You are invited to the Inlinkz link party!

Click here to enter

Filed Under: pinkfresh studio, Uncategorized Tagged With: beautiful soul, better press, butterflies, butterfly bliss, die cutting, double stitched elongated oval dies, ink blending, letterpress, ornate trellis

Altenew April 2025 Release Blog Hop + Giveaway!

April 10, 2025

Hi friends! I am hopping along with my friends at Altenew today to celebrate and share inspiration using their latest release for April 2025 (which you can check out HERE). You should have arrived from Dana, and your next stop is Therese. You can also start back at the beginning at the Altenew Blog. The Anniversary release is always fantastic, and each year Altenew releases an extra large stamp set that is super special and unique. This year’s Flourishing Bouquet is no different. I have three different projects to share with you today using a vibrant

*I have gathered links to all of the products used at the bottom of the post for your convenience, using affiliate links. Thank you for shopping with my links! I truly appreciate your support for my work!*

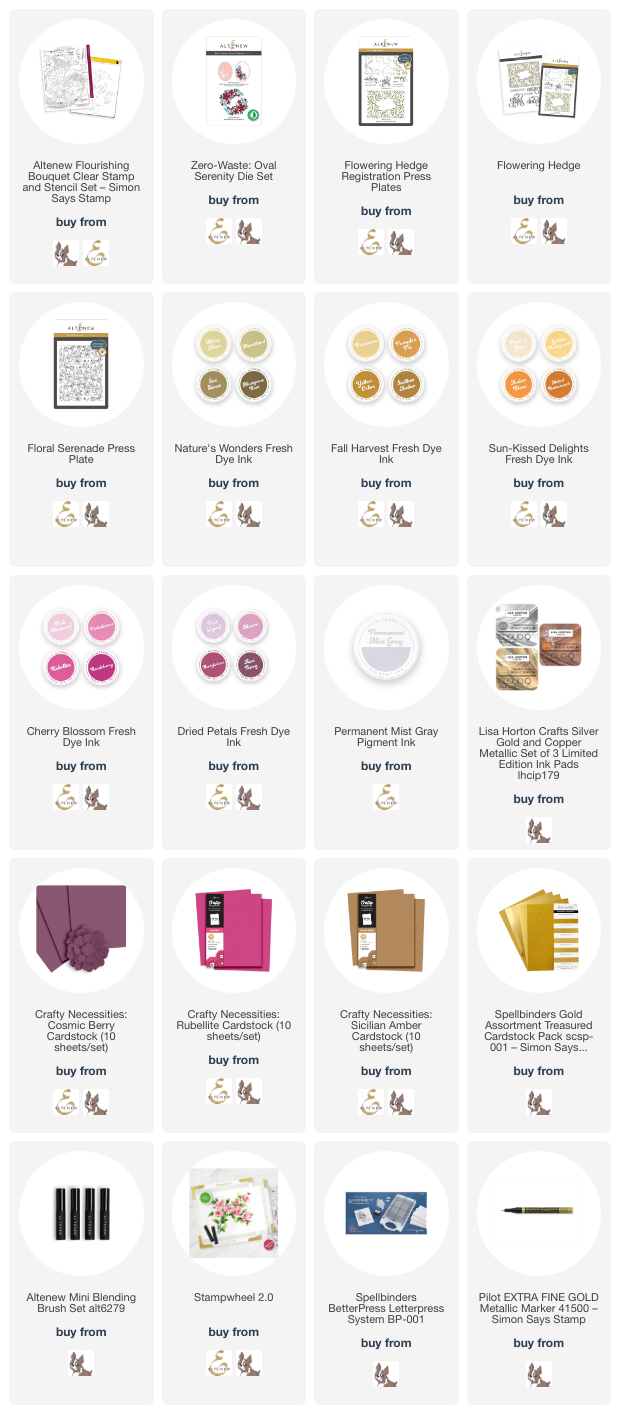
This trio of projects was inspired by a dress from my daughter’s closet, featuring a unique plum, fuchsia, mustard, and gold color palette. I selected Acai Berry, Mangrove Root, Sicilian Amber, Rubellite, and Golden Honeycomb Fresh Dye Ink from my ink wall, as well as some shimmering gold pigment ink from my ink stash to add some sparkle. I also pulled several shades of cardstock from Altenew’s Crafty Necessities line, including Cosmic Berry, Rubellite, and Sicilian Amber and some pearlescent gold cardstock that coordinated beautifully with the other colors in the palette.

For my first project, I used Lisa Horton Crafts Solid Gold pigment ink to impress the the Floral Serenade Press Plate into some Sicilian Amber cardstock, backing the colored cardstock panel with a piece of inexpensive but thick watercolor cardstock to add some extra padding and allow the pattern to impress into the thinner colored cardstock. I matted the tone-on-tone patterned panel with an A2 piece of Cosmic Berry cardstock to add a frame, then used a sentiment created with one of the greetings from the Flowering Hedge Registration Press Plate, Cosmic Berry Cardstock, and more gold pigment ink. I also impressed a sentiment strip onto some pearlescent gold cardstock without any ink, allowing the deep impression on the coated cardstock to create the crisp sentiment. I framed the greeting with some die cuts created using the new Zero Waste Oval Serenity Dies, arranging them in clusters around the large sentiment, finally finishing the project off with some gems and a pretty plum ribbon bow.

For my second project, I created a piece of wall art that will be gorgeous adorning the wall in my daughter’s new bathroom! I first stamped the huge floral arrangement from the new Flourishing Bouquet stamp set onto a panel of cardstock using Permanent Mist Gray ink and the Stampwheel 2.0. The Stampwheel 2.0 has a removable panel, allowing you to work with extra large stamps, giving you tons of versatility and options for creativity! I stamped the image with the pale gray ink, then used the layering stencils and ink blending tools to blend Acai Berry, Mangrove Root, Sicilian Amber, Rubellite, and Golden Honeycomb Fresh Dye Ink, creating a vibrant floral panel. To add some definition between the petals and to add veins to the foliage, I added some shiny gold paint pen lines; the shine and shimmer is just divine! I matted the 6.5″ x 8.5″ panel with some slightly larger Acai Berry cardstock, then added a full 8″ x 10″ Pearlescent Gold cardstock backer. I placed the image in a crisp white frame, and I can’t wait to hang it on the wall in my daughter’s “big girl” bathroom!

For my final project, I paired the same color palette with the new Flowering Hedge Registration Press Plate. These layered Press Plate sets are super user friendly, creating a multi-colored image with the help of the included, pre-printed acetate panel that makes lining the images up a breeze. I used Mangrove Root, Sicilian Amber, and Rubellite Fresh Dye Ink with each layer, impressing the images onto thick Betterpress cardstock. I used the coordinating dies to die cut the gorgeous floral frame, popping it up on some Cosmic Berry cardstock with foam adhesive. I used another gold and plum letterpress sentiment from the Flowering Hedge set, placing it in the center of the floral frame with a double layer of foam adhesive. I embellished the greeting pieces with some leftover Zero Waste Oval Serenity die cuts created with Cosmic Berry, Rubellite, and gold shimmer cardstock. Finally, I added a touch more sparkle with some more coordinating gems!

Well, that’s all for my projects today. Isn’t that color palette scrumptious?

Now for some fun giveaway information!

$300 in total prizes! To celebrate this release, Altenew is giving away a $100 gift certificate to 1 lucky winner and a $50 gift certificate to 4 winners! Please leave a comment on the Altenew Card Blog and/or each designer’s blog post on the blog hop list below by April 17th for a chance to win. Altenew will draw 5 random winners from the comments left on each stop of this blog hop and announce the winners on the Altenew Winners Page on April 19th, 2025.
The winner of the $100 gift certificate will be chosen from comments left on the Altenew blog. 

Here’s the full hop list in case you get lost:

You are invited to the Inlinkz link party!

Click here to enter

Thanks so much for stopping by today, and happy 11th anniversary to Altenew!

Filed Under: altenew Tagged With: better press, die cutting, floral serenade, flourishing bouquet, flowering hedge, ink blending, layered stencil, press plate, stampwheel 2.0, zero waste oval serenity

Altenew January 2025 Release Blog Hop + Giveaway!

January 9, 2025

Hi friends! I am hopping along with my friends at Altenew to help introduce some of their gorgeous new products from the January 2025 release. You should have arrived here from Agnieszka, and your next stop is Svitlana. You can also start back at the beginning at the Altenew Blog. My mom was in a bad car accident over the holidays and was finally released to my house from the hospital, so I didn’t get to play with as much of the release as I would have liked, but the new Stencil Art: Romantic Roses + coordinating die was too gorgeous to pass up. Let’s get started on the details for my project!

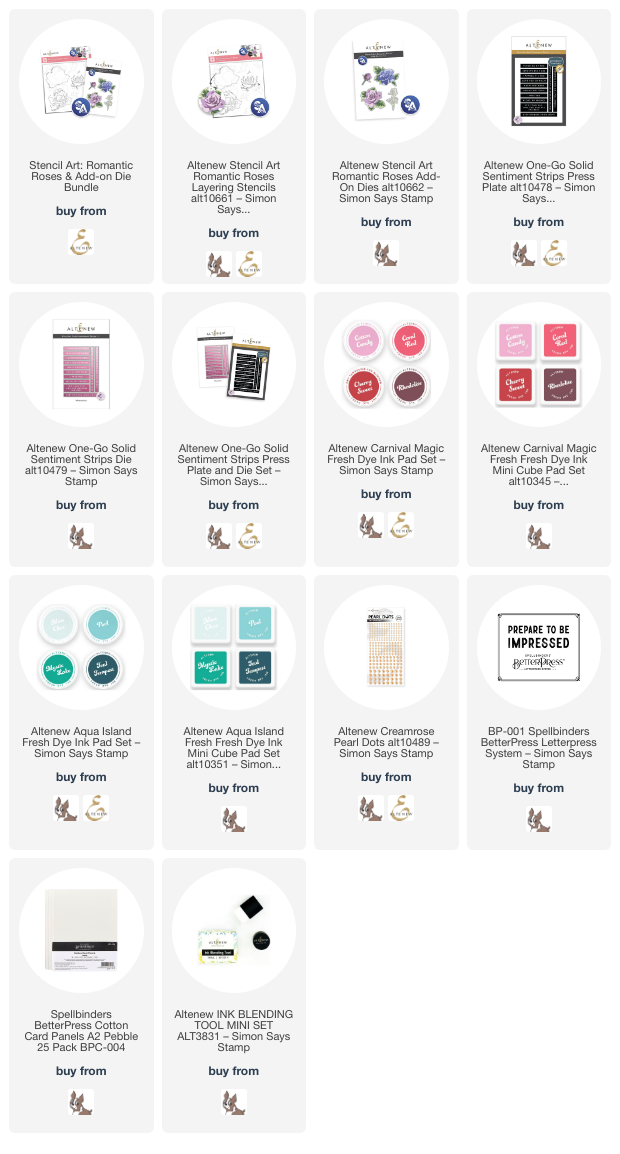
I began my project by blending the Carnival Magic Fresh Dye Ink and Aqua Island Fresh Dye Ink quartets to stencil all of the beautiful images from the new Stencil Art: Romantic Roses. I then die cut the finished images with their coordinating die, which is available separately from the subscription, but can be purchased as a bundle with the layering stencils! The layering stencils are super intuitive, featuring very handy etched outlines so that you can easily line up each individual layer.

I wanted to create a beautiful glowing, somewhat mixed media background using the script stencil included with the Stencil Art: Romantic Roses. I began by blending multiple layers of color from the Aqua Island Fresh Dye Ink on the edges of a panel of white A2 cardstock, then used the script stencil to add some interesting pattern and texture to the blended background. I love the subtle tone-on-tone effect that the script stencil adds to the background!

I arranged the floral stenciled die cuts in a corner swag on the blended card base, adhering them with multiple layers of foam adhesive. For the greeting, I used one of the sentiments from the One Go: Solid Sentiment Strips Press Plate, which I created using Rhodolite ink from the Carnival Magic ink quartet, then die cut with the Coordinating Die. Finally, I pulled in some of the peachy undertones from the stenciled flowers with a few of the new Creamrose Pearl Dots, adding additional shimmer and texture ot the card front.

Well, that’s all for my project today. Now for some fun giveaway information!

$300 in total prizes! To celebrate this release, Altenew is giving away a $100 gift certificate to 1 lucky winner and a $50 gift certificate to 4 winners! Please leave a comment on the Altenew Card Blog and/or each designer’s blog post on the blog hop list below by January 15th for a chance to win. Altenew will draw 5 random winners from the comments left on each stop of this blog hop and announce the winners on the Altenew Winners Page on January 17th, 2025. The winner of the $100 gift certificate will be chosen from comments left on the Altenew blog. 

Here’s the full hop list in case you get lost:

You are invited to the Inlinkz link party!

Click here to enter

Thanks so much for stopping by today, and happy hopping!

Filed Under: altenew Tagged With: better press, die cutting, fresh dye ink, giveaway, ink blending, layering stencils, one-go solid sentiment strips, romantic roses, stencil art

Altenew December 2024 Blog Hop + Giveaway!

December 11, 2024

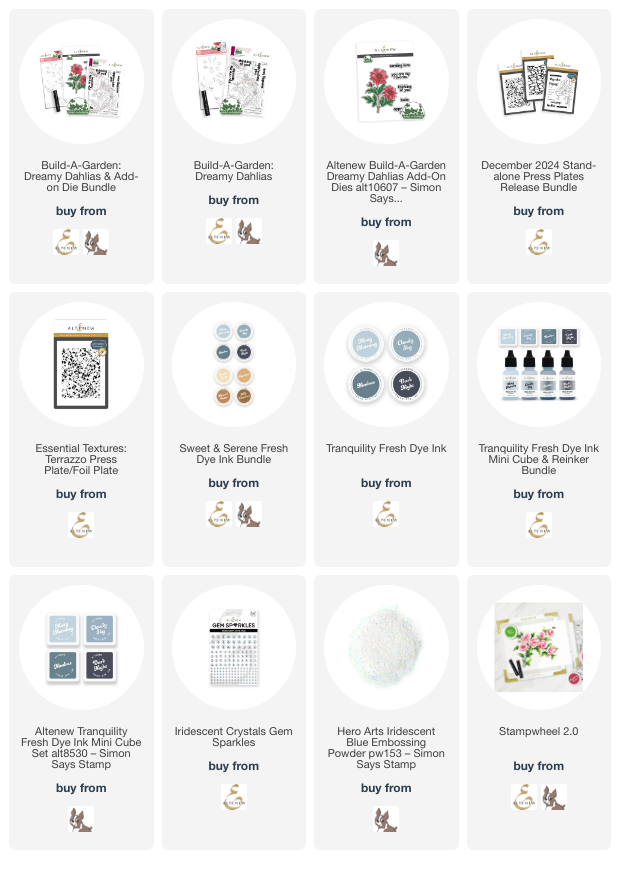
Hi friends! I am hopping along with Altenew today to celebrate their December 2024 release! You should have arrived here from Therese, and your next stop is Cathy. You can also start back at the beginning at the Altenew Blog! It is feeling like winter outside today, which is a perfect backdrop for this serene and icy blue card using some of the gorgeous new Fresh Dye Inks and the new Build-A-Garden: Dreamy Dahlias product suite. Let’s get started on the details for my project!

*I have gathered links to all of the products used at the bottom of the post for your convenience, using affiliate links. Thank you for shopping with my links! I truly appreciate your support for my work!*

To begin, I stamped the bold and beautiful floral image from the new Build-A-Garden: Dreamy Dahlias product suite. This large-scale image creates a breathtakingly detailed and generously-sized floral arrangement, which you can stamp perfectly and easily using the new Stampwheel 2.0! I stamped the image using the lightest shade of blue from the new Tranquility Fresh Dye Ink quartet, then stamped directly over the top again with some sticky embossing ink and covered the entire image with gorgeous Iridescent Blue embossing powder. The combination of the colored ink base layer with the translucent, iridescent embossing powder creates an absolutely magical finished effect. Subtle, but oh so lovely.

After I had heat embossed the entire image, I used the coordinating stencils from the Build-A-Garden: Dreamy Dahlias product suite and the beautiful blues in the Tranquility Fresh Dye Ink quartet to add stenciled details to this lovely monochromatic floral image. Chinoiserie is having a moment right now in home decor, and so I was channeling that blue and white imagery with the tranquil blues on this card! After I had finished stenciling all of the layers, holding my cardstock and stencils down using the sticky mat from the Stampwheel 2.0 to make stenciling super simple and quick, I used the coordinating Add-On Die to cut the intricate floral arrangement out.

To create a simple background, I decided to add a touch of texture to my white card front using the new Terrazzo Press Plate on some plain white cardstock. Now, I am a bit of a hoarder when it comes to my “specialty” cardstock, so when working to create a background whose function is mainly to add a touch of textural interest behind my focal point, I like to use a hack that I learned from the incredibly talented Carissa Wiley. Rather than use a panel of the expensive letterpress cardstock, you can place a panel of “scrap” cardstock (I use inexpensive watercolor paper that I don’t like for watercoloring but works beautifully for this technique!) behind your panel of white or colored cardstock, tape them together using light-tack tape, then use them in your Better Press Letter Press system like you would for a normal press plate. This technique impresses the pattern into your plain cardstock, allowing you to stretch the uses for your Press Plate system even further!

I blended the lightest shade from the Tranquility Fresh Dye Ink quartet around the edges of the textured panel, then mounted my floral die cut with foam adhesive, trimming off any excess that might be hanging over the edges. I also created a sentiment with one of the greetings included with the Build-A-Garden: Dreamy Dahlias product suite, stamping it first with the darkest color from the ink suite and then again with embossing ink, covering it with the same Iridescent Blue embossing powder to create that magical shimmer and shine. I popped up the greeting with some foam adhesive, then added a white bow and some sparkling embellishments for added texture and interest!

Well, that’s all for my project today. Now for some fun giveaway information!

  • $300 in total prizes! To celebrate this release, Altenew is giving away a $100 gift certificate to 1 lucky winner and a $50 gift certificate to 4 winners! Please leave a comment on the Altenew Card Blog and/or each designer’s blog post on the blog hop list below by December 17th for a chance to win. Altenew will draw 5 random winners from the comments left on each stop of this blog hop and announce the winners on the Altenew Winners Page on December 19th, 2024.
  • The winner of the $100 gift certificate will be chosen from comments left on the Altenew blog.

Here’s the full hop list in case you get lost:

You are invited to the Inlinkz link party!

Click here to enter

Thanks so much for stopping by today, and happy hopping!

Filed Under: altenew Tagged With: better press, build a garden, die cutting, dreamy dahlias, fresh dye ink, ink blending, layered stencil, press plate, terrazzo

Pinkfresh Studio “Gentle Greetings & Greenery” Release Blog Hop

December 10, 2024

Hi friends! Today, I am hopping along with Pinkfresh Studio to help introduce their newest collection: Gentle Greetings and Greenery! This collection has some truly beautiful new floral designs as well as some versatile and super useful sentiments, along with some fun basic backgrounds that will make your focal points pop. You should have arrived here from Dawn, and your next stop is Enza. You can also start at the beginning at the Pinkfresh Studio Blog.

*I have gathered links to all of the products used at the bottom of the post for your convenience, using affiliate links. Thank you for shopping with my links! I truly appreciate your support for my work!*

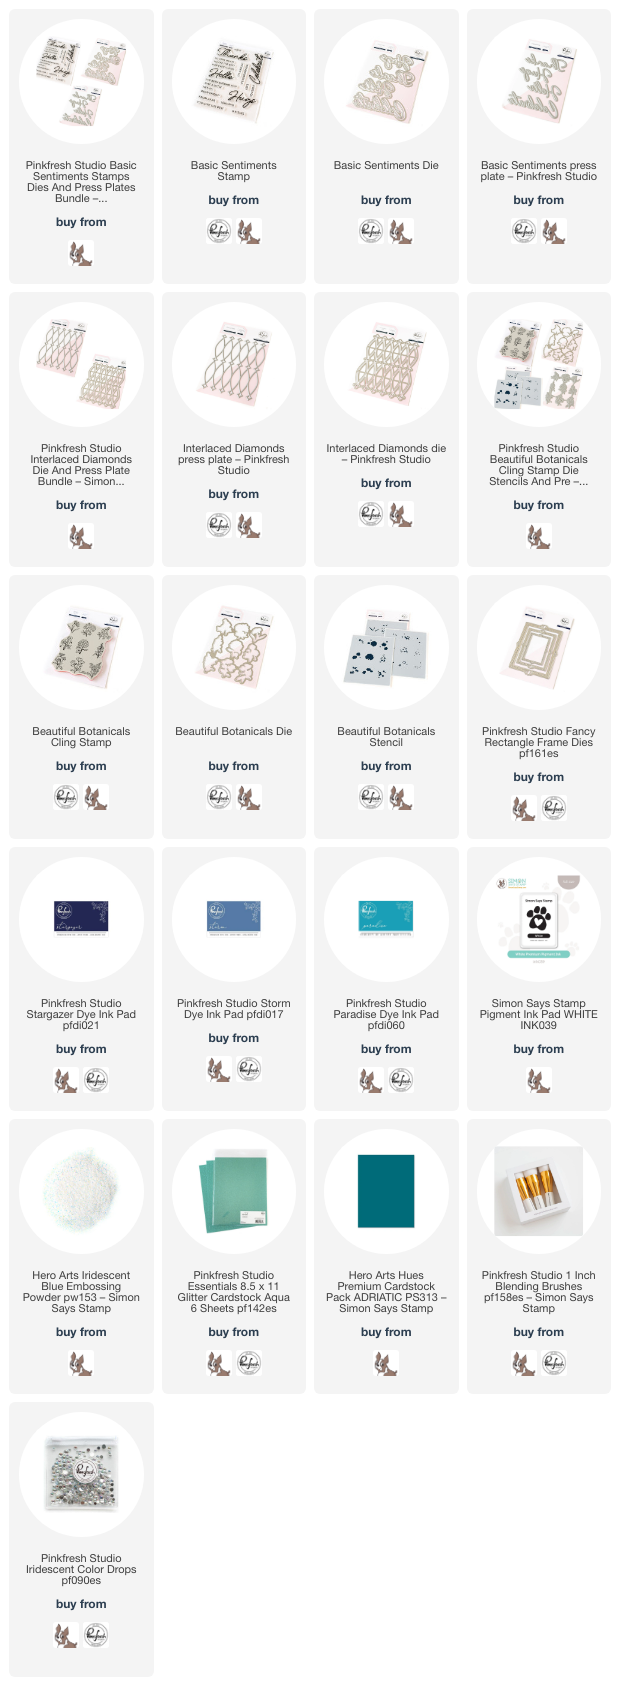
I am always up for a good ombré color palette, and today’s color palette was inspired by some cards I did for the October Create & Connect Press Plate class. Deep royal purple moving to muted blue to intense teal is such a soothing color palette to my eyes, and I thought it was perfect for the Gentle Greetings theme. I pulled out Paradise, Storm, and Stargazer inks to pair with the new Beautiful Botanicals stamps to create this pair of paradoxical cards: one deeply color saturated and vibrant, and one with lots of crisp white and pops of color!

For my first card, I took advantage of the lovely, symmetrical arrangement on the Beautiful Botanicals stamp set and the coordinating stencils. I wanted to create an ombré effect with the florals, so after stamping the Beautiful Botanicals cling stamp onto white cardstock using Paradise ink, I stamped it again with sticky embossing ink and covered the images with Iridescent Blue embossing powder, adding a ton of shimmer and iridescent shine to these beautifully detailed images! After I had heated the embossing powder, I used the coordinating Beautiful Botanicals Stencils to color the images, inking the flowers from the top down using Paradise, Storm, and Stargazer inks, then using the foliage stencil with only Paradise, adding the details on the last stencil with the same coordinating inks used on each flower. Pairing the gradient ink blending on the flowers with the iridescent shimmer on the embossing creates a magical effect!

After I had finished stenciling, I trimmed down the panel very slightly and matted it on a panel of coordinating deep teal cardstock, leaving a super thin contrasting frame around the edge.

For the greeting, I used the large Thanks sentiment from the new Basic Sentiments Press Plate set. This sentiment set is truly a must-have in my opinion, with its beautiful font and large scale making an excellent impact on your cards! After running the letterpress sentiment through my machine with the Better Press using Paradise ink, I die cut the sentiment with its coordinating die. I centered it over a small, Aqua Glitter Fancy Rectangles Frame, adhering the sentiment to the frame and adding some foam adhesive behind the solid die cut to keep the glittery die cut clean. I finished the card off with a white silk bow and some Iridescent Bubble embellishments!

For my second card, I used the new Basic Sentiments coordinating die as my focal point, allowing the large scale die cuts to be the star of the show with some support from the beautiful new Interlaced Diamonds Press Plate and Coordinating Die and some vibrant ink blending. I began by using Paradise, Storm, and Stargazer inks on the Interlaced Diamonds Press Plate to create a gradient effect, then used blending brushes to blend the same colors over the top lightly before die cutting with the coordinating die. I used the same ink and brushes to blend another panel in an identical pattern, adding some iridescent glitter watercolor splatters after blending for added sparkle and texture! I popped the die cut up with some thin strips of foam adhesive for added texture and dimension, which is key to keeping these monochromatic cards from becoming visually boring.

After I had created my background, I die cut the large scale Hugs from the new Basic Sentiment die set, enhancing it with some sentiment strips from the Basic Sentiment stamp set, which I stamped using white pigment ink and embossed with Iridescent Blue embossing powder on deep teal cardstock. I used the same white pigment ink and iridescent embossing powder combination to stamp and emboss the Beautiful Botanicals stamp set, arranging a few of the die cuts in a swag in the corner of a glittery Fancy Rectangles Frame. I tucked the sentiment pieces within the frame using foam adhesive, finally adding some more iridescent bubble embellishments for added shimmer and shine!

Well, that’s all for my projects today. Now for some fun giveaway information!

To celebrate this release, Pinkfresh Studio is hosting fabulous giveaways! Pinkfresh Studio will be giving away the full release on the Pinkfresh blog & YouTube channel. They will also be giving away a total of TEN $25  gift cards along the hop. The winners will be selected from the comments.
Winners will be announced on December 18, 2024 on our GIVEAWAY PAGE. Winners must claim their prize within 2 weeks.

Here’s the full hop list. Thanks so much for stopping by, and happy hopping!
You are invited to the Inlinkz link party!

Click here to enter

Filed Under: pinkfresh studio Tagged With: basic sentiments, beautiful botanicals, better press, die cutting, fancy rectangle frame, ink blending, letterpress

  • « Go to Previous Page
  • Page 1
  • Page 2
  • Page 3
  • Page 4
  • Page 5
  • Go to Next Page »

Primary Sidebar

  • Facebook
  • Instagram
  • Pinterest
  • YouTube

Favorite Shops

Secondary Sidebar

Subscribe

Enter your email address to subscribe to this blog and receive notifications of new posts by email.

Instagram
Something is wrong.
Instagram token error.
Follow
Load More

Archives

Tags

3D embossing folder alcohol markers better press birthday birthday card blog hop card kit christmas christmas card christmas tag colored pencil copic copic coloring Daniel Smith die cutting embossing folder embroidery felt giveaway holiday holiday card hot foil ink blending karin brushmarker pro layered stencil masculine my monthly hero new release no line coloring no line watercolor OLO marker olo markers original illustration pawsitively saturated rainbow shaker card slimline stamping stamptember stencil thank you thinking of you valentine's day video watercolor

Popular Posts

Simon Says Stamp October 2026 Card Kit of the Month: Homespun Gratitude!
February 2018 My Monthly Hero Blog Hop!
Altenew Craft A Flower: Poppy Blog Hop+Giveaway!
Felted Gourd Wall Hanging with Simon Says Stamp!
Sunflower Home Decor with Simon Says Stamp!
Craft Your Life Project Kit: Feathered Lilies Blog Hop+Giveaway!
Simon Says Stamp October 2025 Card Kit of the Month!
Altenew Standalone Die Blog Hop+Giveaway!
The Ton Anniversary Release- Day 2
Altenew Build A Flower Japanese Mum Blog Hop!

Disclosure

Some affiliate links are used in my posts. This means that, should you click on one of my links and purchase something from that company, I will receive a small portion of the sale at no extra cost to you. I use the money earned from these sales to help maintain my blog. I so appreciate you visiting and, if you do choose to use one of my affiliate links, thank you so much for your support!
Copyright © 2026 ·Brunch Pro Theme · Genesis Framework by StudioPress · WordPress · Log in
Loading Comments...