• Skip to main content
  • Skip to primary sidebar
  • Skip to secondary sidebar

Sixth Street Sundries

Emily Midgett

  • Home
  • About Me
  • Contact
  • OLO Marker Color Swatch Chart
  • Shop

birthday card

Hero Arts 2019 Catalog Blog Hop+Giveaway!

February 15, 2019

Good morning! Today is the day… the new Hero Arts 2019 Catalog is finally available on the Hero Arts website! The Creative Team and some extra special guests are welcoming the new products to the Hero Arts site with a special blog hop, filled with tons of inspiration and a giveaway! You should have arrived here from Caly’s blog and your next stop is Ilina’s blog. Be sure to read all the way to the end to find out how to be entered to win our giveaway!


I have two projects for you today using some of the brand new goodies from the newest Catalog release! My first project features the new Color Layering Birthday Cake. I love the fact that stamps allow me to create my own patterned paper, in any color and in any amount! I stamped a cheerful pattern on a panel of A2 white card stock using the Color Layering Birthday Cake in a pink, mint, and yellow color scheme. I used the Life Changing Blending Brushes around the edge to blend a bit more pink to soften the pattern a bit.

After I had finished stamping the background, I used some of the (absolutely fabulous) new Azalea card stock to die cut one of the new Birthday Message Fancy Dies. I combined the die cut with some sentiments from the Color Layering Birthday Cake to create a custom greeting.

For my second project today, I wanted to do some coloring with the new Fairy Kisses stamp set. I love the movement in the skirt and the hair on the fairy, and wanted to add shadows and depth to the image. I began by stamping the fairy onto some Copic friendly white card stock using Intense Black ink, then used my Copic markers to color the image with pretty shades of pool and used the coordinating Fairy Kisses Frame Cuts to die cut the image.

For the background, I die cut the Floral Border Fancy die from some more white card stock, then used the smaller Life Changing Blender Brushes to add color to the flowers, foliage, and butterflies.

I cut an A2 panel of the new Paradise card stock, then used the Blending Brushes to blend some Aegean ink towards the top, the combination of which created a very pretty, almost lavender-to-turquoise ombre effect. I placed my fairy approximately where I wanted her, then heat embossed some sparkles included in the Fairy Kisses stamp set using Silver Sparkle embossing powder. I adhered the blended frame to the blended turquoise “sky” using liquid adhesive, then popped up the fairy and coordinating sentiment using foam adhesive.

I also added a bit of sparkle to the fairy’s wings and wand with some Wink of Stella to help enhance the magical, ethereal feel of the card.

Well, that’s all for my projects today! Now, Hero Arts is generously giving away not one, but FOUR $50 shopping sprees to four random commenters! The more comments you leave on the hop, the more chances you have to win! The comments will close on Sunday, February 17 at midnight PST, and the winners will be announced the following week.

Here’s the whole hop list, just in case you get lost:

The Hero Arts Blog
Caly Person
Emily Midgett
Ilina Crouse
Janette Kausen
Jessica Frost-Ballas
Michelle Short Nichol Spohr
Yana Smakula
Amy Kolling
Debi Adams
Jennifer McGuire
Julee Tilman
Kathy Racoosin
Kelly Latevola
Laurie Willison
Lydia Fiedler
Maria Willis
Libby Hickson

Birthday Cake Supplies:

Fairy Supplies:

Filed Under: Hero Arts Tagged With: birthday card, blog hop, giveaway, hero arts 2019 catalog

Where Creativity Meets C9: Anything Goes!

August 9, 2018

Good morning! For the month of August, the Where Creativity Meets C9 team has the pleasure of joining Concord and 9th as their guests for the month. We are helping celebrate their 3rd birthday by kicking off their release day with some projects featuring the new Freebie for this month: Birthday Dies and Birthday Balloons stamp set! The dies are free with any purchase over $60, and you get both the dies and the Birthday Balloons stamp set when you spend $120 (which is not difficult with the gorgeousness that is this release! Swooooon.) These little freebies are perfect for birthday cards, especially those masculine cards that so many of us find so challenging!

Our theme this month for Where Creativity Meets C9 is “Anything Goes,” so I chose to go with some simple stamping and die cutting to get started. I find that when I’m in need of some color inspiration, I go to pinterest and look for different color combinations from Design Seeds, wedding planners, and so forth. (You can check out my Pinterest board for color combos that inspire me here.) I found a really pretty pin with the unique color combination of baby pink, smokey blue, bright, royal blue, and mustard yellow. (The closer we get to fall, the more mustard yellow seems to appeal to my creativity.) I translated this to Spun Sugar, Stormy Sky, Mustard Seed, and Blueprint Sketch Distress Oxide inks.

I first stamped the balloons and confetti in all of these different Oxide colors, which was easy because of the opacity of the Oxide inks… no masking required. Plus, the slight translucence of the inks create that illusion of slightly translucent balloons. I love that you can actually stamp with Oxides and get great results!

After I’d stamped my balloons and confetti from the new freebie Birthday Balloons set, I used the dies to die cut some banners and the greeting from the freebie Birthday Dies set using some bright blue foil card stock. I used my gridded craft mat to carefully arrange the individual letters of “birthday” so that they were nice and straight, then picked them up with some low-tack washi tape and added adhesive to the back, then added both die cut words to the card front while still attached to the washi tape. After the liquid adhesive had dried, I carefully removed the washi tape, revealing a nice straight sentiment. Easy!


This card is perfectly flat and super simple to mail… it would look great in all masculine colors too, though I guess there are enough masculine colors on this card to be used in a pinch, right? That little bit of pink won’t hurt a tough guy! Ha! #realmenwearpink #unlesshesaredhead

I hope you will check out the new release from Concord and 9th…. there are some stunning floral sets and some simpler, super versatile sets that are just fantastic. I can’t wait to show you all that we’ve been working on! Now, for some challenge details: create a project-any project- using Concord and 9th stamps as the focus of your project, then link it up to our post. Be sure to read all of the rules so that, if your project is chosen, you have covered all of the bases to be eligible to win! One lucky random winner will be the recipient of a $25 shopping spree to Concord and 9th, and one crafter will be chosen to be a guest designer for Where Creativity Meets C9 on an upcoming challenge.

Thanks so much for dropping by today! The Where Creativity Meets C9 team will be back with you every Friday for the month of August to share more inspiration using the new Concord and 9th release, so be on the lookout. Have a marvelous day!

Filed Under: Concord and 9th, Where Creativity Meets C9 Tagged With: birthday card, concord and 9th, masculine card, one layer card

Reverse Confetti March 2018 Release Blog Hop!

March 8, 2018

Good morning! Today is the day… you can finally get your shop on with all of the goodies the Reverse Confetti crew and guests have been tantalizing you with all week!

If you’ve been to my blog before, you know that I have a thing for flowers. My creative brain sees everything with a side of flowers. #putafloweronit

So it’s not any surprise that the Tall Blooms set really spoke to me. These next two cards are not the end of my obsession with this stamp set, believe me. The Tall Blooms set is really quite stunning in its simplicity… You can make it super clean and simple, or you can dress it up a bit. These next cards showcase both.

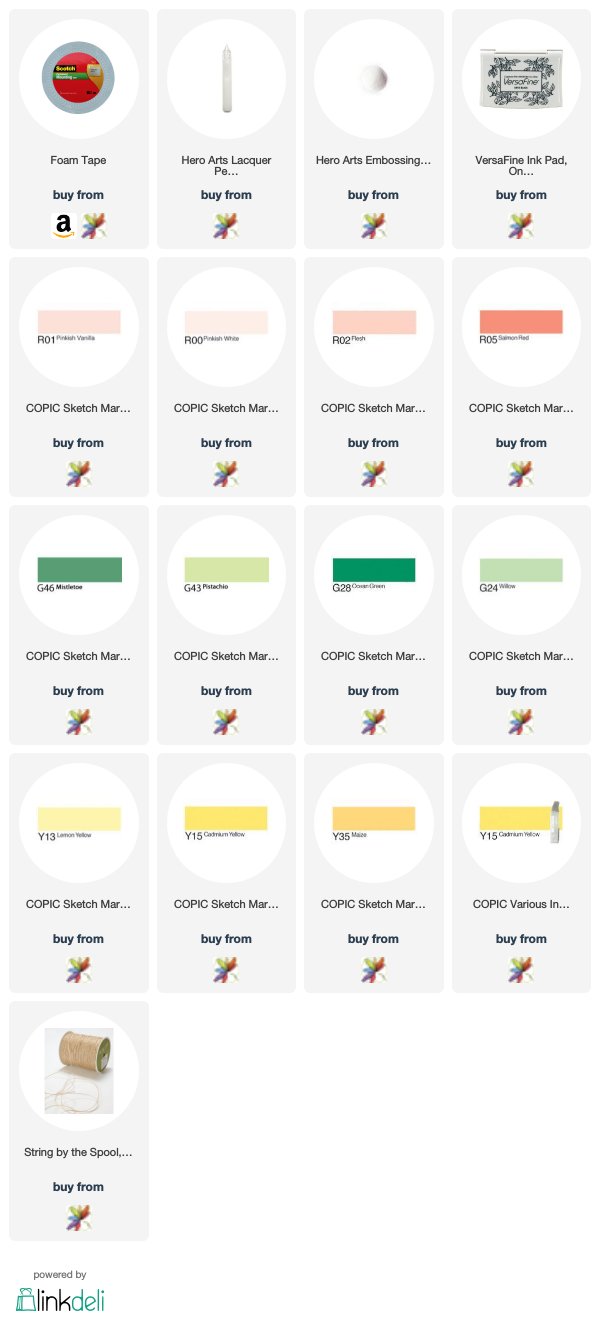
This first card is an exercise in clean-and-simple. This style is not my natural habitat, but it’s definitely growing on me. A well-placed sentiment, a pretty image, a little something extra… when the images are as pretty as the ones in Tall Blooms, you don’t need much. I started by stamping the large floral stem onto white card stock using Intense Black ink. Next, I colored it in a pretty shade of peach using my Copic markers (which I’ll list individually at the bottom). I also selected a lovely get well sentiment in an almost handwritten font. That pretty font reminds me of something my grammy would have written… neat, precise, elegant.

After determining approximately where I wanted my bloom and greeting on the card front, I adhered the bloom with dimensional foam adhesive, then used my Misti to stamp my greeting. (I always get nervous stamping things after other elements are adhered down… what if I screw it up?! Misti takes that issue out of the equation haha.) I added some Nuvo Shimmer pen to the flower and added a twine bow to the stem. Simple, but oh so pretty.

For the second card, I wanted a bit more “zhuzh.” Just a little extra something. I have no idea what these blooms are based on in real life, but they remind me of something blowing on the rolling hills of Texas…. I guess that’s what led me to yellow. Yellow’s not my favorite color to craft with, but I love it on these pretty stems! I die cut and stamped three of these blooms using the Intense Black ink again, then colored them with Copic markers. I stamped another of the pretty greetings included in Tall Blooms using Versafine ink onto a strip of white card stock, clear embossed it, and trimmed it down. (I like the intensity of the embossed black for sentiments… really makes them pop!)

I arranged the flowers the way I wanted them in a pretty little bouquet, then adhered them to the card base with some Scor Tape and added another twine bow. I adhered the greeting using dimensional foam adhesive. The final touch was to add some Hero Arts Crystal Lacquer pen to the yellow blooms to add some dimension and texture.

Well, that’s all for me today! I hope you’ve enjoyed the new release from Reverse Confetti this week! I’m so happy to have been able to join in as a guest. Thanks so much to Jen and the Reverse Confetti team for having me! Happy Hopping!

Reverse Confetti Blog
Amy Kolling  
Melissa Phillips
Amy Sheffer
Tricia Barber
Kelly Lunceford
Lisa Henke
Amy Rohl
Christiana Reuling
Laurie Schmidlin
Heather Hoffman
Amy Tsuruta
Kathy Schweinfurth
Audrey Tokach
Deanne Kuntz
Emily Midgett <— that’s me!
Jeanne Jachna
Susan Liles


Filed Under: Reverse Confetti Tagged With: birthday card, clean and simple, copic coloring, floral, get well soon

Coral Camellias.

February 26, 2018

Good morning! I have a special post for you today with a giveaway sponsored by a fabulous stamp company, Technique Tuesday! I’ve ogled the beautiful Greenhouse Society series from Technique Tuesday for a long time, so I was thrilled to have the chance to play with them! This gorgeous Camellia stamp is an absolute blast to color…. I used Copics for today, but I have plans to do some watercoloring with this pretty set very soon! Just gorgeous!

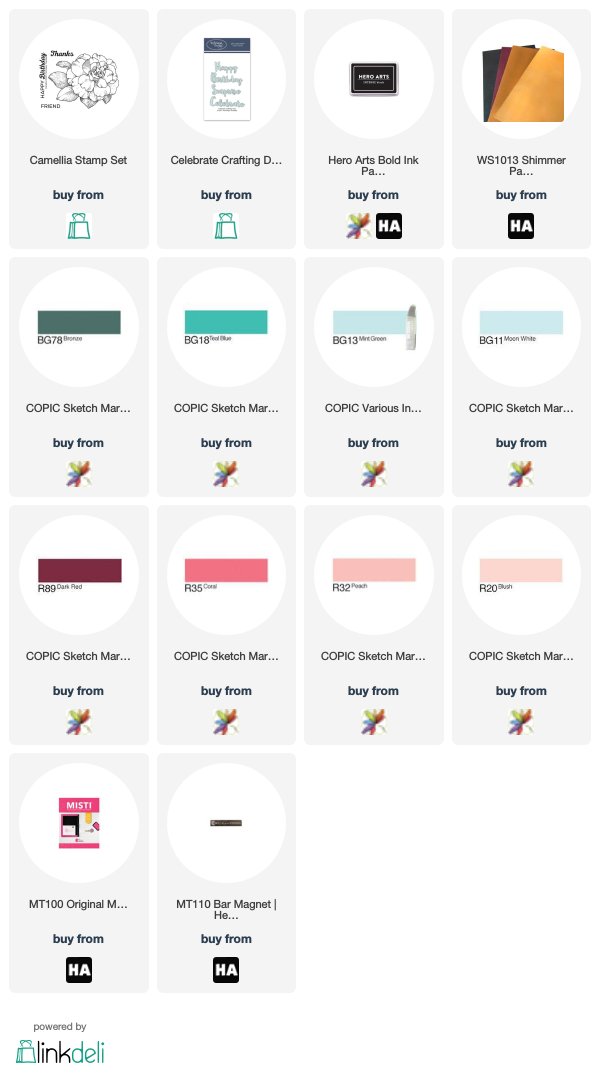
To start, I did some simple stamping in the bottom corner of a panel of white, Copic friendly card stock using Hero Arts Intense Black ink with the Greenhouse Society Camellia stamp set. I love that this is just one stamp…. no worries about masking to get the leaves nestled beneath the bloom nicely! I then colored my little garden using Copic markers in lovely shades of Coral and Teal. Such a springy color combo, don’t you think? One of my favorite discoveries about using Copics (I recently rediscovered my love of Copic coloring and am sad thinking about how many of my Copics I sold off last year….) is that you can add lots of shimmer using your Spectrum Noir Shimmer pen without muddling your meticulous coloring like you would if you had used watercolor! Score for sparkly flowers!

Look at that shimmer:

After I had finished coloring and be-sparkling my Camellias, I die cut “Happy Birthday” from the Celebrate die collection using black shimmer card stock. I trimmed 1/4″ from the edge of my Copic colored panel, then adhered it to the corner of the A2 black shimmer paper.  I decided to add a few “droplets of dew” here and there on the flowers using my Hero Arts Lacquer Pen. Love the 3D effect it has!


~~~Now, for the GIVEAWAY!~~~

The generous folks at Technique Tuesday have graciously sponsored a giveaway for my blog readers. All you have to do is make sure that you’re a blog subscriber, then check out the Greenhouse Society page of the Technique Tuesday website and let me know in the comments which stamp and die set is your favorite! (You can simply add your email address to the “Subscribe” box on the left side of my blog homepage!) I will choose a random commenter on Friday, March 2 at 1 pm CST. Thanks for stopping by today, and good luck! Have a marvelous day!


Filed Under: giveaway, technique tuesday Tagged With: birthday card, camellia, copic coloring, die cutting, giveaway, happy birthday

Celebrating United We Flourish!

February 24, 2018

Over the last year, Ellen Hutson has been collaborating with several different companies within the industry to create some beautiful, limited edition stamp sets. As you know, I have a love affair with all things Concord and 9th, and this darling Sweet Sprinkles United We Flourish set is just so cute that I had to create another project to celebrate the Sweet Sprinkles spotlight on the Ellen Hutson blog.

Isn’t that set just darling? I used it to create an ice cream cone for the Sweet Sprinkles United We Flourish release a few months ago, so today I wanted to focus on the adorable sprinkle strip and the cupcake!

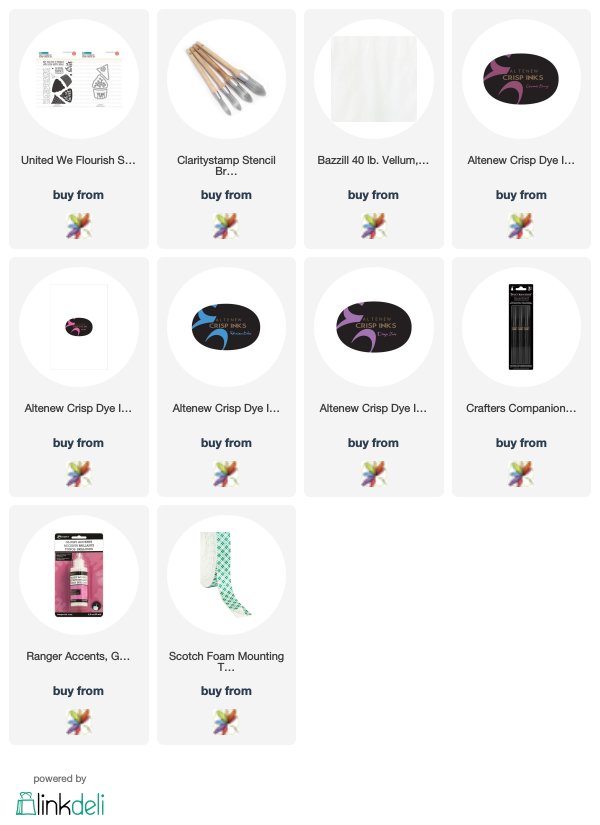
To start, I die cut the cupcake with the dies included in the Sweet Sprinkles set onto some plain white card stock, then stamped the main cupcake image using the Rock ‘n Roll technique to add a little dimension. The cupcake liner is stamped in Persian Blue and Sapphire inks, while the frosting is stamped using Rubellite and Cosmic Berry inks (all from Altenew). I die cut a few white hearts from the included die set, adhered them to the frosting as “sprinkles,” then added some shimmer pen and Glossy Accents to the sprinkles to really make them pop.

For the background, I stamped the included “sprinkle strip” in a blue-to-pink ombre on an A2 white card base using Rubellite, Deep Iris, and Persian Blue inks, then went over them again lightly with the same inks using my Clarity Stencil Brushes to try to “blend” the colors a little. For the greeting, I trimmed a panel of vellum down and white heat embossed a super cute sentiment from the Sweet Sprinkles set.

I adhered my cupcake to the center of the vellum panel, then hid my dimensional adhesive on the back of the vellum panel behind the cupcake. A cute and colorful birthday card made with this limited edition set! Definitely a must have for your birthday card-making collection. Hop on over to The Classroom to see lots more inspiration using this sweet set from Ellen Hutson and Concord and 9th!

Have a marvelous Saturday, friends!


Filed Under: Concord and 9th, Ellen Hutson Tagged With: birthday card, ink blending, stamping, united we flourish

  • « Go to Previous Page
  • Page 1
  • Interim pages omitted …
  • Page 10
  • Page 11
  • Page 12

Primary Sidebar

  • Facebook
  • Instagram
  • Pinterest
  • YouTube

Favorite Shops

Secondary Sidebar

Subscribe

Enter your email address to subscribe to this blog and receive notifications of new posts by email.

Instagram
Something is wrong.
Instagram token error.
Follow
Load More

Archives

Tags

3D embossing folder alcohol markers better press birthday birthday card blog hop card kit christmas christmas card christmas tag colored pencil copic copic coloring Daniel Smith die cutting embossing folder embroidery felt giveaway holiday holiday card hot foil ink blending karin brushmarker pro layered stencil masculine my monthly hero new release no line coloring no line watercolor OLO marker olo markers original illustration pawsitively saturated rainbow shaker card slimline stamping stamptember stencil thank you thinking of you valentine's day video watercolor

Popular Posts

Simon Says Stamp October 2026 Card Kit of the Month: Homespun Gratitude!
February 2018 My Monthly Hero Blog Hop!
Altenew Craft A Flower: Poppy Blog Hop+Giveaway!
Felted Gourd Wall Hanging with Simon Says Stamp!
Sunflower Home Decor with Simon Says Stamp!
Craft Your Life Project Kit: Feathered Lilies Blog Hop+Giveaway!
Simon Says Stamp October 2025 Card Kit of the Month!
Altenew Standalone Die Blog Hop+Giveaway!
The Ton Anniversary Release- Day 2
Altenew Build A Flower Japanese Mum Blog Hop!

Disclosure

Some affiliate links are used in my posts. This means that, should you click on one of my links and purchase something from that company, I will receive a small portion of the sale at no extra cost to you. I use the money earned from these sales to help maintain my blog. I so appreciate you visiting and, if you do choose to use one of my affiliate links, thank you so much for your support!
Copyright © 2026 ·Brunch Pro Theme &middot; Genesis Framework by StudioPress &middot; WordPress &middot; Log in
Loading Comments...