• Skip to main content
  • Skip to primary sidebar
  • Skip to secondary sidebar

Sixth Street Sundries

Emily Midgett

  • Home
  • About Me
  • Contact
  • OLO Marker Color Swatch Chart
  • Shop

blooms of encouragement

Blending and Vellum Flowers with Simon Says Stamp!

July 2, 2026

This post was sponsored by Simon Says Stamp. Thanks, Simon! *I have gathered links to all of the products used at the bottom of the post for your convenience, using affiliate links at no extra cost to you. Thank you for shopping with my links! I truly appreciate your support for my work!*

Hi friends! I have a somewhat simple card to share with you today using my newest Blooms of Encouragement stamp set. This set features two pretty floral bouquets, and this dahlia swag that I used on my project today is one of my favorite images that I’ve drawn! I wanted to showcase how nicely it works on it’s own without having to add lots of intricate coloring (in case you are not coloring-obsessed like I am!). That doesn’t mean that you don’t have to have color, though! I took advantage of the details on the image to do some heat embossing on vellum, a little blending, some sparkles, and a bit of twine for texture. Let’s get started with the details on my project!

To start, I heat embossed the dahlia image from Blooms of Encouragement a few times on some semi-transparent vellum using silver embossing powder. The super smooth surface of the vellum makes embossing super detailed images like this an absolute dream; just be sure that you don’t heat up the powder too much, or it will bubble! After I had finished embossing, I used the coordinating dies to cut out each detailed image.

For the card base, I used blending brushes to blend Pawsitively Saturated Inks in shades of Taffy + Lilac on the corner of my white A2 card front. The vibrant colors will peek through the semi-transparent vellum! To add a little extra texture and sparkle to the card front, I splattered some iridescent glittering watercolors on the blended background. I used thin strips of clear foam dimensional adhesive to add the embossed blooms to the blended card front, trimming off the excess from the edges to create clean lines along each edge.

For the greeting, I silver embossed two sentiments from the Blooms of Encouragement, then die cut them with their coordinating dies. I added a light wash of pink over the embossed greetings using the residual ink left on the Taffy blending brush. I popped the greetings up on the card front using thin foam adhesive and tucked an iridescent bow beneath the greeting. Finally, I added a few Prism Pawsitively Dazzling Gems for added sparkle!!

Well, that’s all for my project today! If you don’t love to color or maybe are short on time, I hope this project shows that floral bouquets don’t have to have super intricate coloring to make a huge impact on a card front. Thanks so much for stopping by today, and have a marvelous day!

Filed Under: simon says stamp Tagged With: blooms of encouragement, die cutting, encouragement card, heat embossing, ink blending, original illustration, vellum

Faithful Frame with Blooms of Encouragement from Simon Says Stamp!

June 24, 2026

This post was sponsored by Simon Says Stamp. Thanks, Simon! *I have gathered links to all of the products used at the bottom of the post for your convenience, using affiliate links at no extra cost to you. Thank you for shopping with my links! I truly appreciate your support for my work!*

Hi friends! I have a fun framed project to share with you today using the same technique that I shared in THIS post. Whenever I am out and about, I am always on the hunt for fun, inexpensive items that I can customize with stamps and dies, and these arched frames from my local dollar store immediately set my creative wheels spinning!! Once I had worked out the technique for painting on glass with acrylic paint markers, I knew that I wanted to apply the same technique on this larger frame, creating some pretty decor! Let’s get started with the details on my project!

To begin, I stamped the large tulip floral arrangement from my newest stamp set for Simon Says Stamp, called Blooms of Encouragement onto some scrap paper, then used washi tape to adhere the glass front of the frame over the stamped image, centering the flowers on the arched glass. I then used acrylic paint markers to paint the images. I used a bit of a reverse painting technique compared to the method in which I normally paint. Typically, I paint the darkest areas first, but for this project with acrylic markers, I painted the lightest spots first. This ensures that those light highlighted areas are at the forefront. After I had finished painting the images, I used some pretty gold acrylic paint to outline the painted image and the central oval, adding some luxurious gold luster to the blank area in the center.

I flipped the painted glass panel over and placed it in the frame, with the painted side on the interior of the frame to protect it from being scratched. I used the frame’s backer to cut out a bright purple cardstock backer, placing it behind the painted image. I think the contrast of the pretty pink and green blooms looks so lovely with the vibrant purple background!

After I had the frame finished, I wanted to add an inspirational greeting in the blank gold space at the center of the floral arrangement, so I heat embossed the “have faith” sentiment from the new Blessed stamp set. I heat embossed the image in gold on pale pink cardstock, then die cut it with the coordinating dies, which are super detailed. I used foam adhesive to pop up the sentiment die cut, then added a delicate pink velvet bow, which I adhered using my hot glue gun.

Well, that’s all for my project today! I am so excited to play with this technique some more. It creates such a unique look with the bold and colorful painted images on the glass, and placing it in the frame creates something lasting that you can use as decor for your home or office. Thanks so much for stopping by today, and have a marvelous day!

Filed Under: simon says stamp Tagged With: acrylic markers, acrylic painting, blessed, blooms of encouragement, frame, home decor

Introducing: OLO Fine Nibs-Now Available for Preorder!!

June 16, 2026

(Affiliate links used at no cost to you. Thank you for your support!)

Hello friends! I am SO EXCITED to share that my friends over at OLO Marker have been cooking up something truly wonderful over the last several months. To date, my single complaint about my OLO Markers is that the nibs are a wee bit hefty for some of the super fine detail work that I like to do with no-line coloring on my stamped images. I know I was not alone in that sentiment!! Well…. OLO has listened to our pleas, and I am so thrilled to let you know that they are putting OLO Fine Nibs into production! I was sent some prototypes of the new fine nib markers to share my thoughts with you all, and let me tell you, they are TRULY a game changer for the delicate images with which we card makers work!

Now, you have even more options to customize your markers, depending on your coloring style and the types of images with which you work. The bold Chisel Nib is great for big backgrounds and large, solid images. The Brush Nib works perfectly for the medium-sized images that need that juicy color saturation. And now, the Fine Nib has been added to the lineup to complete the trifecta of coloring options, making coloring delicate images much easier!

I have put together a short introductory video/reel to show what they can do, and I plan to do a video this week putting these fabulous markers to use in longer format.

My initial thoughts?

~The blends are exquisite; buttery smooth, as we’ve come to expect from these exceptional markers.

~The Fine Nibs are a bit sturdier than the brush nibs, and while the brush nibs work beautifully for larger images, the fine nibs make it possible to maneuver and blend the colors without having too much saturation on the cardstock, which is a must for those tiny images.

~The sturdy construction of the Fine Nibs make them ideal for doing tip-to-tip color blending, creating even smoother blends without oversaturation on your cardstock! (I demonstrate this technique in the video above.)

~The Fine Nibs are absolutely perfect for the small, detailed images with which cardmakers particularly create. The super smooth blends with this sturdy, fine nib within the small confines of stamped images really are going to be a game-changer.

I used a combination of the Brush and Fine Nib markers to create this image in the video, and I am gobsmacked at how perfectly they colored these tiny, delicate images from my new Blooms of Encouragement stamp set. (Side note: I used only two of each color for these images above, and it is incredible to me the depth that you can achieve with merely two shades!)

How to purchase:

This release is a bit different than others; rather than having all of the markers in production already, the folks at OLO are working on kind of a kickstarter campaign, meaning that once the preorders have reached a certain level, the production will officially begin.

To entice you further, the folks at OLO are offering discounts for those who place their preorder during the launch campaign. You can receive 20% off for the full 256 set, 15% off for the 128 color set, or 10% off of the 64 color set. These discounts will be available until the goal has been reached, so be sure to take advantage!

You can peruse the Fine Nib page on the OLO Website HERE.

OLO has created a page to answer your Frequently Asked Questions, which you can check out HERE.

Preorder your set HERE!!

Please don’t hesitate to reach out to me or to OLO if you have any questions. These markers are going to be such an incredible addition to my craft room, and I’m so excited to see them put into production!

Thanks so much for stopping by today, and have a marvelous day!

Filed Under: OLO markers Tagged With: blooms of encouragement, fine nib, olo markers, video

Love is in the Air with New Simon Says Stamp!

June 11, 2026

This post was sponsored by Simon Says Stamp. Thanks, Simon! *I have gathered links to all of the products used at the bottom of the post for your convenience, using affiliate links at no extra cost to you. Thank you for shopping with my links! I truly appreciate your support for my work!*

Hi friends! I am back today with a card to kick off wedding season! While my husband and I are pretty much out of the “wedding season” phase, it’s always a good idea to have a card on hand for a wedding or bridal shower. I used my new Blooms of Encouragement set with OLO Markers to do some intricate no-line coloring on this wedding card, creating a continuous pattern on my card front that I think looks like gorgeous wrapping paper or fabric. Let’s get started with the details!

To begin, I stamped the smaller dahlia nosegay stamp from Blooms of Encouragement on my white A2 card front using no-line coloring ink. I created the pattern by stamping the image in it’s entirety once on the card front, then rotating the panel and the stamp so that it hung over the edge of the panel, making sure that none of the images were repetitive or at the same angle each time, so that it looks as unique and continuous as possible. Once I had finished stamping all of the background, leaving a space for a greeting, I used OLO Markers to color the images with a rich green, muted lavender, and soft pink color palette.

Once the coloring was complete, I turned my attention to the sentiment. I die cut the detail layer of the new Timeless Love die set using Simon Says Stamp’s Seashell cardstock, backing it with a vellum shadow layer. I enhanced this large die cut greeting focal point with some smaller sentiment strips from the EZ Strips Traditional Wedding sentiment card set. I popped all of the greeting pieces up using thin foam adhesive squares for a bit of extra height and dimension.

Once I had completed the main elements of the card, it was time to add some extra texture and sparkle. I tied a dainty white silk bow and tucked it beneath the sentiment strips with liquid adhesive, then added a few shimmering Opal Pawsitively Dazzling Gems for added shine and texture. I love the effect that these few additions have on the overall aesthetic of the card!

Well, that’s all for my project today! I am so excited about the new Blooms of Encouragement set…. it fulfills so many of my coloring dreams and it’s great for a variety of occasions. Thanks so much for stopping by today, and have a marvelous day!
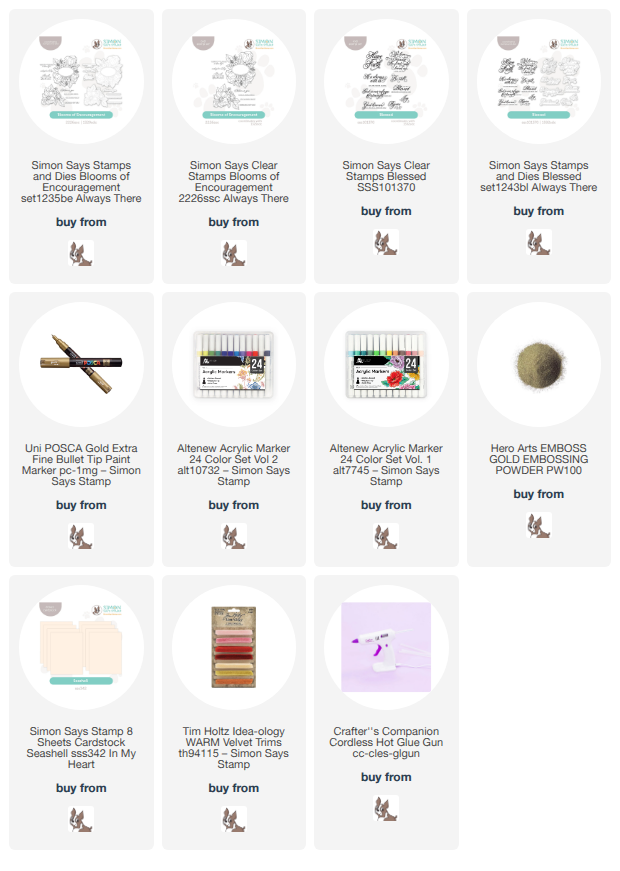
Filed Under: simon says stamp, Uncategorized Tagged With: blooms of encouragement, bridal shower, die cutting, ez strips traditional wedding, no line coloring, olo markers, original illustration, timeless love, wedding card

Simon Says Stamp Always There Blog Hop, Day 2 + Free Gift!

May 30, 2026

This post was sponsored by Simon Says Stamp. Thanks, Simon! *I have gathered links to all of the products used at the bottom of the post for your convenience, using affiliate links at no extra cost to you. Thank you for shopping with my links! I truly appreciate your support for my work!*

Hi friends! It’s Day 2 of the Simon Says Stamp Always There Blog Hop, celebrating the fabulous Always There release! (Click HERE to see the entire collection!) You should have arrived here from Barbara Tarayao, and your next stop is Nichol Spohr. You can check the full hop list over on the Simon Says Stamp Blog. As always, there is a fun freebies to celebrate the release and the blog hop!

This month’s release is an ode to springtime with gorgeous flowers and greenery in stamp, stencil, and die form, and I am so happy that I have designed two different sets for this release: Keep Palm (click HERE) and Blooms of Encouragement (click HERE). I love coloring large scale images, and the flowers in Blooms of Encouragement are some of my favorite flowers that I’ve illustrated. I created this gift set featuring a fun framed painting on glass and a coordinating card made with layered stamped blooms from the new Heirloom Roses. Let’s get started on the details for my projects!

To begin my card, I stamped the gorgeous blooms and foliage from Heirloom Roses using Pawsitively Saturated Inks in shades of Jade, Eucalyptus, Shell, Salmon, Coral. These colors are so beautifully springy to me, with that bright pop of coral juxtaposed with the soft minty greens. I used the coordinating dies to cut the stamped images out, as well as a greeting from Heirloom Roses stamped using Juniper ink on crisp white cardstock.

Behind the blooms and sentiment, I wanted to create some tone-on-tone texture using the new Willowweave Plate. I die cut the plate from white cardstock, as well as a frame using the new A2 Notched Rectangles, nestling two of the nested dies together to create the frame. I added adhesive on the back of the Notched Rectangle die cut, then placed the Willowweave die cut on it, creating a decorative framed backdrop for the flowers. I trimmed off any excess foliage from the Willowweave die cut, then popped up the frame on my A2 card front. The extra texture that these vines of foliage add behind the blooms is just so pretty, I think! I added the blooms and sentiment die cuts over the framed backdrop with more foam adhesive, then added a few Opal Pawsitively Dazzling Gems for a bit of sparkle.

For the gift portion of the set, I used the pretty dahlia image from Blooms of Encouragement to create this framed painted artwork. I used a technique that was quite new to me. I started by stamping the bouquet on a piece of cardstock, then placing the glass from a 4×4 inch frame that I purchased from the local dollar store over the stamped image, taping it to the panel with some washi tape. I didn’t want to stamp the image directly to the glass, so I took advantage of the clear glass to use it as a guide to create this pretty painted bloom.

I used acrylic paint markers to add color to the glass, following the lines of the stamped image on the paper. This method of painting is quite forgiving; as long as you start with the parts of the image that are closest to you, mistakes are minimal. The opacity of the markers ensures that the images painted first are the ones that are visible when the painting is flipped over to the proper side. The markers moved like a warm knife through butter over the glass, and I was so impressed with how the painting turned out!

I did use a dry paintbrush to blend some some of the petals a bit, creating a smoother transition between colors for shadows and shape. Once I had completed the painting, I used a hot glue gun to securely place the glass back in the frame, allowing the clear glass to remain safely in the frame without having to add the backer which which the frame was purchased. To protect the painting from potential scratches, I also hot glued a piece of clear acetate on the back, cut to fit the glass frame. Finally, since the frame back that I discarded contained the hanger for the frame, I decided to hot glue some coordinating satin ribbon to the frame. I can’t wait to hang this in my new craft room and am so excited to experiment more with this technique. A simple dollar store frame can be so much more with a little creativity!

Well, that’s all for my projects today! This release is fantastic, right? So gorgeous! And Simon Says Stamp is offering the adorable gift-with-purchase that you see in the graphic at the top of the post with any purchase from the Always There release! (Click HERE to see the entire collection!)

Don’t forget to check out Day 1 of the blog hop, as well! (Click HERE to see the full list from yesterday’s hop!)Your next stop on the hop is Nichol Spohr. Thanks so much for stopping by today, and happy hopping!

Filed Under: simon says stamp Tagged With: a2 notched rectangles, acrylic paint, acrylic paint marker, blog hop, blooms of encouragement, die cutting, gift set, heirloom roses, no line coloring, picture frame, willowweave plate

  • Page 1
  • Page 2
  • Go to Next Page »

Primary Sidebar

  • Facebook
  • Instagram
  • Pinterest
  • YouTube

Favorite Shops

Secondary Sidebar

Subscribe

Enter your email address to subscribe to this blog and receive notifications of new posts by email.

Instagram
Something is wrong.
Instagram token error.
Follow
Load More

Archives

Tags

3D embossing folder alcohol markers better press birthday birthday card blog hop card kit christmas christmas card christmas tag colored pencil copic copic coloring Daniel Smith die cutting embossing folder embroidery felt giveaway holiday holiday card hot foil ink blending karin brushmarker pro layered stencil masculine my monthly hero new release no line coloring no line watercolor OLO marker olo markers original illustration pawsitively saturated rainbow shaker card slimline stamping stamptember stencil thank you thinking of you valentine's day video watercolor

Popular Posts

Watercolor Poinsettia Card and Tag with Tim Holtz and Simon Says Stamp!
Cottagecore Christmas Framed Artwork with New Simon Says Stamp!
Simon Says Stamp Joy For You Blog Hop- Day 1!
Warmth and Love at Christmastime with New Simon Says Stamp!
Honey Bee Stamps 4th Anniversary Celebration!
Simon Says Stamp Glory to the Newborn King Holiday Kit-Part II!
Altenew July Stamp and Die Blog Hop+Giveaway!
Altenew Watercolor Coloring Book Release Blog Hop + Giveaway!
Cottagecore Canvas with New Simon Says Stamp Shine On Release!
Hero Arts Partners Blog Hop: Lawn Fawn!

Disclosure

Some affiliate links are used in my posts. This means that, should you click on one of my links and purchase something from that company, I will receive a small portion of the sale at no extra cost to you. I use the money earned from these sales to help maintain my blog. I so appreciate you visiting and, if you do choose to use one of my affiliate links, thank you so much for your support!
Copyright © 2026 ·Brunch Pro Theme · Genesis Framework by StudioPress · WordPress · Log in
Loading Comments...