• Skip to main content
  • Skip to primary sidebar
  • Skip to secondary sidebar

Sixth Street Sundries

Emily Midgett

  • Home
  • About Me
  • Contact
  • OLO Marker Color Swatch Chart
  • Shop

brilliant hibiscus

Textured Thank You with Simon Says Stamp + SALE!

May 26, 2025

This post was sponsored by Simon Says Stamp. Thanks, Simon!

Hi friends! It’s Memorial Day here in the United States, a day in which we honor those who have fallen in service to our country. In honor of their sacrifice, I have a serene thank you project full of texture to share with you today featuring some beautiful soothing aqua tones that I’ve embellished with a bit of sparkle and shimmer. Let’s get started with the details!

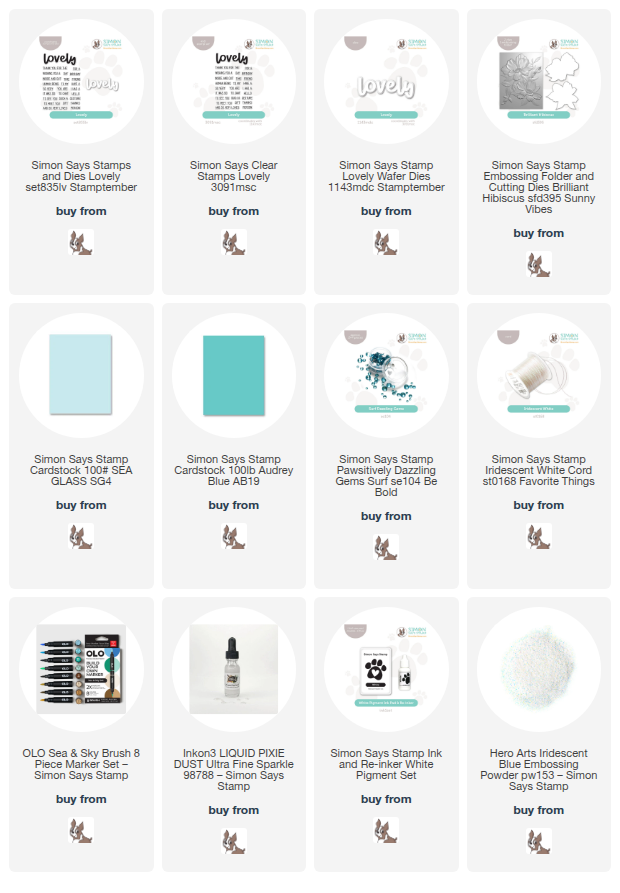
*I have gathered links to all of the products used at the bottom of the post for your convenience, using affiliate links. Thank you for shopping with my links! I truly appreciate your support for my work!*

To begin, I ran a panel of pearlescent aqua carotdstock through my die cutting machine using the Brilliant Hibiscus Embossing Folder. The pearlescent coating on the cardstock enhances the details of the embossed images beautifully. I also used the coordinating dies to die cut some Simon Says Stamp Sea Glass cardstock, then ran the die cut images through my Brilliant Hibiscus embossing folder, nestling them in the appropriate area to ensure that the details came through perfectly.

After I had embossed the die cut images, I used my OLO Markers to add some additional shading to the die cut flower. I selected markers that were the same general color as the Sea Glass cardstock, allowing the pale aqua cardstock to be the main focus of the color palette and using the OLO Markers to enhance the shadows. I used the 0 marker around the edges of the marker shading to soften the edges and create a seamless blend between the marker and the colored cardstock. I also used some glittering watercolors to add shimmer to the stamens of the flower and the edges of each petal.

For the greeting, I used Simon Says Stamp White Pigment Ink to stamp a greeting from the Lovely stamp set onto some Audrey Blue Cardstock. I also added some Iridescent Blue embossing powder over the top to add some gorgeous shimmer to my stamped sentiments. I die cut the “lovely” detail layer from some iridescent white foil cardstock and the shadow layer from some more Audrey Blue Cardstock, layering the die cut pieces together with liquid adhesive. Once I had finished the sentiment components, I used Simon Says Stamp Thin Foam Squares to adhere the die cut pieces over the deeply textured, embossed background. The deeper Audrey Blue cardstock against the pale pearlescent aqua backdrop is so gorgeous and highlights the shading on the die cut floral!

I finished the project off with a few Surf Pawsitively Dazzling Gems for added sparkle and tucked a Simon Says Stamp Iridescent White Cord bow beneath the greeting for a bit more texture and shine.

Well, that’s all for my project today. To honor our heroes and to celebrate the official start of summer, Simon Says Stamp is offering 15% off your entire purchase!
Simply enter code SPLASH at checkout to take 15% off of your purchase through the end of the day Monday, May 26!

Well, that’s all for my project today. Thanks so much for stopping by today, and if you are celebrating today, take a moment to remember the sacrifices of our soldiers and their loved ones so that we can be free. Have a marvelous day, friends!
Filed Under: simon says stamp Tagged With: 3D embossing folder, brilliant hibiscus, embossing folder, lovely, monochromatic, olo markers

VIDEO: Ink Swiping with Metallic Details Using Simon Says Stamp!

August 13, 2024

This post was sponsored by Simon Says Stamp. Thanks, Simon!

Hi friends! I have been having tons of fun lately with the popular ink swiping technique using the debossed side of embossing folder panels. I have been loving playing with different ink color combinations; the key to being able to use multiple colors on your ink swiped projects is selecting lighter colors to blend on your images and very dark colors for your ink swiping to ensure that those messy “overspill” areas are completely covered. Here’s a video to demonstrate:

Or you can click HERE to watch on YouTube!

In case you can’t watch the video, here’s a quick rundown of the process:

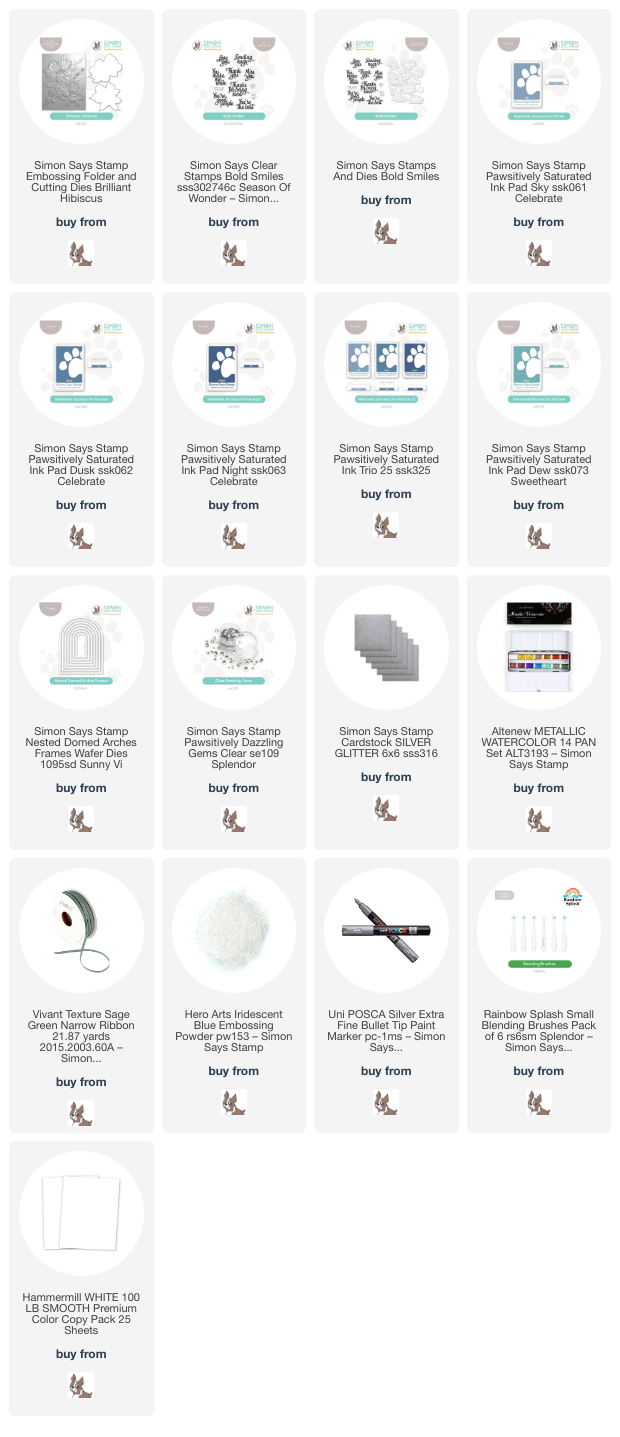
Brilliant Hibiscus Embossing Folder

Bold Smiles

Pawsitively Saturated Ink:

Sky, Dusk, Night, Dew

Nested Domed Arches Frames

Clear Pawsitively Dazzling Gems

silver glitter cardstock

Altenew Metallic Watercolor Palette

Vivant Sage Green Narrow Ribbon

Hero Arts Iridescent Blue Embossing Powder

silver paint marker

To start, run an A2 panel of white cardstock through your die cutting machine using the gorgeous Brilliant Hibiscus Embossing Folder. Rather than using the side with the embossed images popped up, we are going to flip the panel over so that the images are impressed down into the paper. I selected a cool blue color palette, using the gorgeous blues in the Pawsitively Saturated Ink Trio 25 and Dew for the foliage. I blended Sky and Dusk in the center of each flower using a blending brush, then blended some Dew ink on the foliage. These cards come together quite quickly, as you don’t have to be too fastidious about your ink blending, because the darker ink will cover up anything that spills over the sides.

After I had blended the details on the flower images, I placed my Night inkpad directly on the paper and gently swiped the color on the raised areas. Because the flowers are depressed into the cardstock, the petals and images will keep their light, blended color and the details will be highlighted with the dark ink!

After I had blended and swiped to create the pretty background, I decided to go in with some metallic highlights to add some extra luxury and shimmer to the card. First, I used a silver paint marker to add the flower centers, then used both silvery white and minty green metallic paints from the Altenew Metallic Watercolor Palette on the edges of the petals and the foliage. I also splattered some more of the silvery white metallic paint around the edges of the card, creating lots of shimmering highlights on this pretty card!

For the greeting, I stamped a sentiment from Bold Smiles onto some white cardstock using Dusk ink, then stamped again with sticky embossing ink, which I covered with Hero Arts Iridescent Blue Embossing Powder to add iridescent shine to the sentiment. I used some residual ink left on the blending brushes to make sure that the sentiment die cut matched the rest of the saturated blue background. To highlight the sentiment and draw the eye to it amongst the bold background images, I die cut a Nested Domed Arches Frames from some silver glitter cardstock. I popped it up with some foam adhesive, then added the sentiment die cut with a double layer of foam adhesive to give it a bit more height and make it more visible amongst the busy background. Finally, I added a few finishing touches with some Vivant Sage Green Narrow Ribbon and Clear Pawsitively Dazzling Gems for extra texture and sparkle!

Well, that’s all for my project today! I don’t know who came up with this technique, but I am certainly enjoying playing with it. Thanks so much for stopping by today, and have a marvelous day!

Filed Under: simon says stamp Tagged With: 3D embossing folder, bold smiles, brilliant hibiscus, embossing folder, ink swiping, nested domed arches, nested domed arches frames, video

Simon Says Stamp Sunny Vibes Release Blog Hop Day 2 + Giveaway!

June 22, 2024

This post was sponsored by Simon Says Stamp. Thanks, Simon!

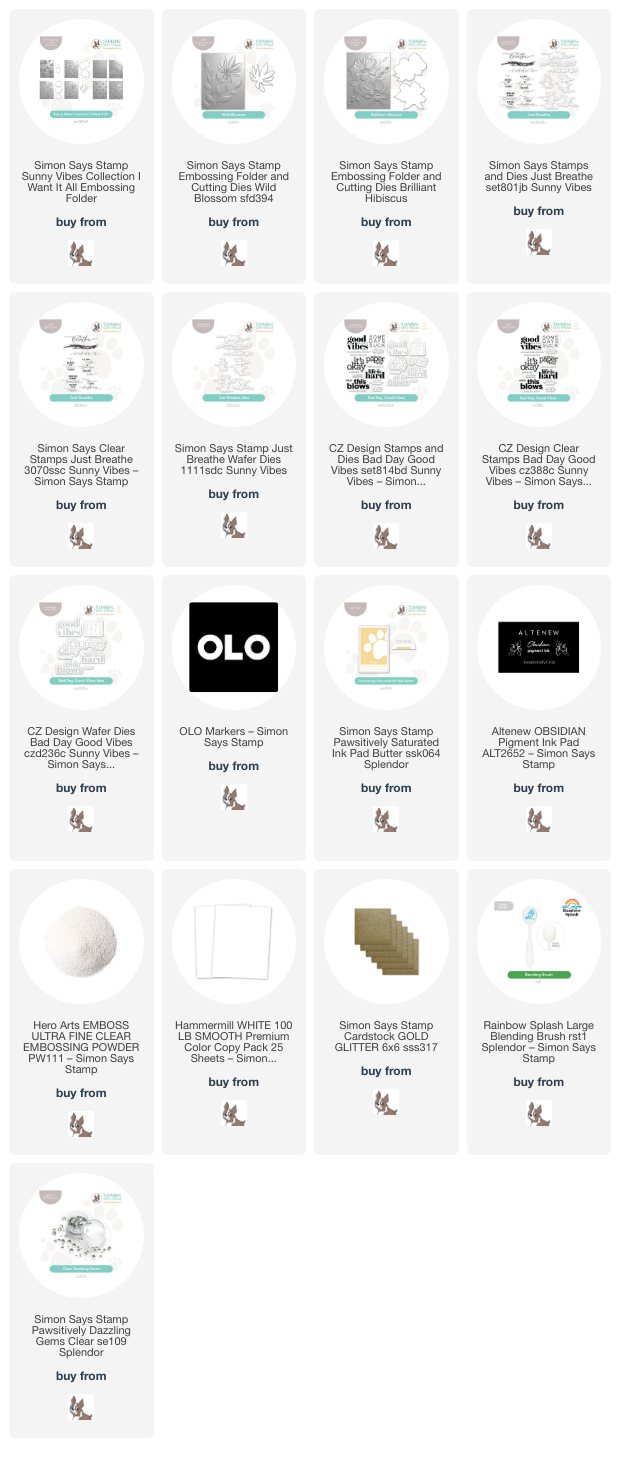
Hi friends! I am hopping along with Simon Says Stamp today to share more inspiration using the absolutely gorgeous new Sunny Vibes release! You should have arrived here from Mindy Eggen, and your next stop is Yana Smakula. You can also find the full blog hop list on the Simon Says Stamp Blog in case you get lost! Simon Says Stamp has some of the most beautiful floral 3D embossing folders in the industry, and the embossing folders in the Sunny Vibes release are truly gorgeous (click HERE to see them all!). I always jump at the chance to color them up with my coloring mediums, especially OLO markers. I have two vibrant, summery projects to share with you today using the new Brilliant Hibiscus and Wild Blossom embossing folders. Let’s get started with the details!

For both of my projects, I embossed the images onto some Hammermill cardstock using my Platinum 6. I love using the Hammermill for these embossing folders; the details become super crisp and alcohol marker coloring is a dream on this super smooth cardstock.

For my first card, I used the Brilliant Hibiscus Embossing Folder with some gorgeous new shades of pink from OLO markers. Though alcohol ink dries super quickly, I still try to treat my coloring on these embossed images similarly to no-line watercoloring by keeping the wet sections separate until dry in order to keep the definition on the images. The individual petals are made more visible the more contrast you add, so keeping the contrast between those dark petals that are tucked beneath and the lighter highlighted petals on the top is very important! I love that the Brilliant Hibiscus Embossing Folder also includes a coordinating die for the flowers, so you can create your own bouquet arrangements! I can’t wait to play more with this beautiful embossing folder and die combo.

After I had finished coloring the gorgeous, large scale image, I stamped a sentiment from the Just Breathe stamps and die set onto some more white cardstock using Obsidian Black pigment ink and added clear embossing powder. This combination always makes the sentiments that much more crisp and clean and makes the sentiment really pop amongst the colorful background! I popped up the die cut sentiment with some foam squares, then added a trio of Clear Pawsitively Dazzling Gems for a bit of sparkle.

For my second project, I used the new Wild Blossom Embossing Folder to create this sunny card. I embossed an A2 panel of Hammermill cardstock using the Wild Blossom folder, then used the included coordinating die to die cut another individual flower, which I embossed using the folder. I again used OLO markers, this time in citrus shades of lemon and lime, to add color and shadow to the flowers and foliage. I trimmed the bottom off, then used a blending brush to blend some Butter Pawsitively Saturated Ink around the edges, creating a sunny glow.

For the greeting, I stamped one of the sentiments from the new Bad Day, Good Vibes stamp and die set, again using Obsidian Black pigment ink and clear embossing powder to create a super crisp sentiment die cut. Because I had trimmed off the bottom edge of the embossed panel, I allowed a very thin strip of gold glitter cardstock to peek out along the bottom edge, then found some coordinating sunny yellow cardstock in my stash and finished out the rest of the A2 panel with that. I popped up the greeting die cut with some foam squares, then added a few sunny yellow gems for added sparkle!

Well, that’s all for my projects today! Now for some fun giveaway and free gift with purchase information:

Simon Says Stamp is giving away a $25 coupon to every stop on the hop from your blog comment section. Winners will be selected and posted on our Simon Says Stamp blog on Wednesday the 26th of June. Winners can email us to claim his/her prize 🙂

Simon Says Stamp is also offering a free gift with purchase to celebrate this new Sunny Vibes release. Simply follow the instructions on the graphic at the top of this post to find the fabulous stamp and coordinating die set, valued at over $20, then add code HELLO at checkout to receive it for free with any purchase of $50 or more!

Be sure to check out the incredible inspiration from Day 1 of this two day blog hop. More prizes and loads more inspiration awaits! Your next stop is Yana Smakula. Thanks so much for stopping by today, and happy hopping!

Filed Under: simon says stamp Tagged With: 3D embossing folder, bad day good vibes, brilliant hibiscus, embossing folder, just breathe, OLO marker, wild blossom

Primary Sidebar

  • Facebook
  • Instagram
  • Pinterest
  • YouTube

Favorite Shops

Secondary Sidebar

Subscribe

Enter your email address to subscribe to this blog and receive notifications of new posts by email.

Instagram
Something is wrong.
Instagram token error.
Follow
Load More

Archives

Tags

3D embossing folder alcohol markers better press birthday birthday card blog hop card kit christmas christmas card christmas tag colored pencil copic copic coloring Daniel Smith die cutting embossing folder embroidery felt giveaway holiday holiday card hot foil ink blending karin brushmarker pro layered stencil masculine my monthly hero new release no line coloring no line watercolor OLO marker olo markers original illustration pawsitively saturated rainbow shaker card slimline stamping stamptember stencil thank you thinking of you valentine's day video watercolor

Popular Posts

Simon Says Stamp Sending Cheer Blog Hop- Day 2 + Freebie + Giveaway!
Joyful Snowman with New Simon Says Stamp Sending Cheer Release!
Simon Says Stamp Sending Cheer Release: Now Available!
Altenew October 2026 Release Blog Hop + Giveaway!
February 2018 My Monthly Hero Blog Hop!
Altenew March 2020 Release Blog Hop+Giveaway!
Special Release: Simon Says Stamp Limited Edition STAMPtember Christmas Card Kit!
Simon Says Stamp Cozy & Bright Inspiration, Part Two!
Essentials By Ellen September Blog Hop!
Waffleflower December Release Blog Hop!

Disclosure

Some affiliate links are used in my posts. This means that, should you click on one of my links and purchase something from that company, I will receive a small portion of the sale at no extra cost to you. I use the money earned from these sales to help maintain my blog. I so appreciate you visiting and, if you do choose to use one of my affiliate links, thank you so much for your support!
Copyright © 2026 ·Brunch Pro Theme · Genesis Framework by StudioPress · WordPress · Log in
Loading Comments...