• Skip to main content
  • Skip to primary sidebar
  • Skip to secondary sidebar

Sixth Street Sundries

Emily Midgett

  • Home
  • About Me
  • Contact
  • OLO Marker Color Swatch Chart
  • Shop

chalkboard

Chalkboard Pumpkins with New Simon Says Stamp STAMPtember!

September 11, 2025

This post was sponsored by Simon Says Stamp. Thanks, Simon!

Hi friends! We were enjoying the most deliciously autumnal temperatures over the last couple of weeks, but that typical Midwest “false fall” has receded back into the throes of summer temperatures again, sadly. So let’s channel fall with some pretty pumpkins and leaves on cards, shall we? The Simon Says Stamp STAMPtember mega-release that kicked off our month-long STAMPtember celebration (check it out HERE!) featured several new fall-themed products, including the beautiful Pumpkin Blessings stamp, die, and stencil set. I always love a good banner, and pairing the banner with some pretty pumpkins and autumnal florals is so classy in my opinion. When I first started crafting, chalkboard cards were all the rage, especially when a banner was involved, so I thought I would recreate that vintage (ha!) look with my colored pencils and some sparkly die cuts. Let’s get started with the details on my project!

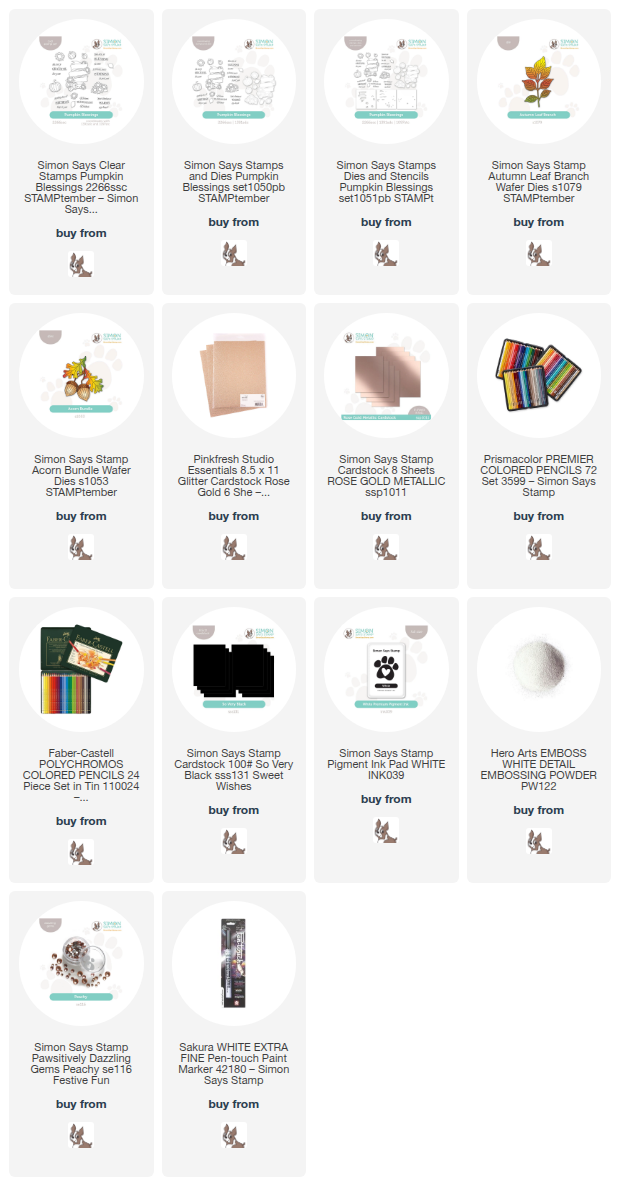
*I have gathered links to all of the products used at the bottom of the post for your convenience, using affiliate links. Thank you for shopping with my links! I truly appreciate your support for my work!*

I began by stamping the banner image from Pumpkin Blessings onto some black cardstock using Simon Says Stamp White Pigment Ink. I like to pair white pigment ink with colored pencils on colored cardstock, because the white ink stands out beautifully and seems to absorb into the pencil coloring very nicely, creating a crisp no-line colored look. I used my favorite colored pencils to add some vibrant yellows, oranges, and greens to the flowers and pumpkins, then used a white paint pen and a careful hand to outline the lines on the banner, making them a bit more vivid on the black cardstock without having to sacrifice my no-line colored florals! It totally gives chalkboard vibes.

After I had finished coloring and enhancing the lines on my banner image, I white embossed a greeting from Pumpkin Blessings onto the banner, then die cut the image with it’s coordinating die. I also die cut the foliage from the new Autumn Leaf Branch and Acorn Bundle die sets using rose gold foil and glitter cardstocks.

I adhered the die cut Pumpkin Blessings image onto an A2 panel of black cardstock using foam adhesive, then began tucking the die cut foliage pieces around the banner, creating a visual cascade from top left to bottom right on the card. I used a mixture of foam and liquid adhesive to get los of dimension! Finally, I added a few Peachy Pawsitively Dazzling Gems which work nicely with the metallic foliage die cuts.

Well, that’s all for my project today! Thanks so much for stopping by today, and happy STAMPtember!
Filed Under: simon says stamp Tagged With: acorn bundle, autumn leaf branch, chalkboard, colored pencil, die cutting, fall, grateful for you, no line coloring, pumpkin blessings, thank you card

Simon Says Stamp Hello Gorgeous Release-Introducing Mother’s Day Tulips!

March 21, 2022

Hi there! I’m super excited to help Simon Says Stamp introduce their fantastic new Hello Gorgeous release for March 2022. This release features a huge variety of products, many Mother’s Day themed, as well as beautiful sentiments and lovely spring florals. I am also pleased as punch to introduce a new set that I’ve designed for Simon Says Stamp, called Mother’s Day Tulips! This large 6×8 stamp set features a large and beautiful tulip corner, sized to fit a slimline card front, but also could be adapted to fit other sizes as well! I have a few cards to share with you today, so let’s get started with the details!

My first project features my new Mother’s Day Tulips. I stamped the large image on a mini slimline card base using Hero Arts Intens-ified Black ink. I love the wide variety of colors that you can find with tulips, and I find the the deep purple tulips to be enchanting. I colored the image using Copic markers V09, V17, V15, V12, and V01 to add lots of intensity and shadows to the large images. I love coloring large images like this; the extra space allows you to really get down into the tiny areas and add lots of contrast and depth.

Once I had finished coloring the image, I blended some Blue Violet and Deep Purple inks around the edge opposite the floral arrangement using the new Flat Blending Brush. The blending brush does a beautiful job of blending these intense colors softly on the card base, leaving a halo around the flowers themselves and helping them to shine!

For the greeting, I used the new Reverse Foundations preprinted sentiment strips. I trimmed the sentiment down to three separate pieces using my trimmer, then popped them up on the colored panel using foam adhesive. The final touch was to add some shimmering purple gems for a touch of sparkle!

My next cards features the beautiful new Delicate Floral Frames stamps and dies. I contemplated going light and bright with these, but the pretty frames were just begging to be made into some chalkboard style projects! I stamped both of the frame images onto some Pitch Black cardstock using white pigment ink, then used Karin Decobrush Pigment markers to add some bright color to the black cardstock! Because these images are not terribly detailed, these opaque pigment markers made it super simple to add some quick pops of color to the images. This is the first time that I’ve tried this technique, and I absolutely love how they turned out.

To back this arched frame image from the Delicate Floral Frames stamps and dies, I die cut one of the beautiful new Detail Mandala Cover Plate dies from some more Pitch Black cardstock. The subtle pierced detail on this cover plate die is stunning; it’s surely going to become a staple in my craft room!

To accent the greenery on the arched frame, I die cut a few leaves from some Glossy Black cardstock using the new Olive Leaves dies. I popped up the frame with some foam tape, then added the shiny black leaves with some liquid adhesive. I added a greeting from the marvelous new All About Mom sentiment stamp and die set. I love the bold, chunky font on this set! These sentiments are large enough to make a really big impact on your card front. I added a few iridescent gems for a touch of sparkle.

My second card features the same technique, but places the die cuts on a plain black card front. I adhered the oval Delicate Floral Frames stamped and colored die cut to an A2 black card front using foam adhesive, then added more glossy black leaves behind the floral swag to add another element of texture to the card front.

I popped up the white embossed greeting from All About Mom. When I’m working with limited color palettes and tone-on-tone textures, I like to use tons of foam tape to add as much dimension and interest as possible, so these black and white projects have lots of height and variations in texture! I added a few more sparkling gems for an additional textural element as well as adding some sparkle.

Well, that’s all for my projects today! I hope you’ll check out the rest of the products from the Hello Gorgeous release. So many beautiful new pieces. I’m so excited that my Mother’s Day Tulips illustration is a part of it! Thanks so much for stopping by, and have a marvelous day!

Filed Under: karin, original illustrations, simon says stamp Tagged With: all about mom, chalkboard, delicate floral frames, karin pigment markers, mother's day card, mother's day tulips

Ellen Hutson October 2021 Release-Pt 2!

October 18, 2021

Hi there! I’m back today with some more inspiration using a few of the new goodies from the Ellen Hutson Essentials By Ellen release. I seem to be gravitating towards simple color schemes lately, and these cards today are an homage to my love of chalkboard! Any time I see a beautiful, chunky sentiment, I immediately think “this needs to be a chalkboard.” I have two “ode to chalkboard” projects for you today, so let’s get started with the details! (Affiliate links used where possible. Thank you for your support!)

Both of my projects feature the new Sending Holiday Cheer sentiment stamp set. The typography in this set is marvelous; those chunky sentiments just make me so happy, and they make creating your card front so quick and easy!

For my first project, I began by white embossing the “may your days be merry and bright” sentiment (cannot get enough of that phrase for holiday cards!) from Sending Holiday Cheer onto some Pitch Black cardstock from Hero Arts. I wanted to make the sentiment cover a bit more of the card front, so I used my sharp scissors and fussy cut each line to create four separate sentiment lines.

I wanted some subtle texture for the backdrop of this pretty sentiment, so I die cut the Twirling Flurries die from some more Pitch Black cardstock. I used some Hero Arts Unicorn White Pigment Ink and a blending brush to blend some frosty, chalky ink around the edges. I love the way the white pigment ink highlights the subtle stitching in the beautiful background! I backed the die cut card front with some white cardstock to allow the tiny little die cut snowflakes to peek through, then used foam tape to adhere the sentiment for lots of dimension and texture on this card front. The final touch was to add some iridescent white gems for a bit of sparkle! The bright, crisp white embossing stands out so beautifully from the subtly textured black background.

My next project features the new Holiday Sprigs stamp set, as well as the Sending Holiday Cheer stamps. I again began by doing some white embossing on black cardstock using the “sending holiday cheer” stamp from Sending Holiday Cheer. I also embossed a big bunch of the botanical images from Holiday Sprigs stamp set, then die cut them with their coordinating dies.

I die cut one of my most favorite dies from the Essentials By Ellen line: Stitches Cover Plate from another panel of Pitch Black cardstock. I adhered the die cut flowers and sentiment using lots of foam adhesive and liquid adhesive to add plenty of dimension. The final touch was to add a few bright red gems. I adore a pop of red on a monochromatic card front! I think they look almost like holly berries.

Well, that’s all for my projects today! If you haven’t looked already, I hope you’ll check out the new Essentials By Ellen holiday release… there are so many fun new goodies available right now! Thanks so much for stopping by today, and have a marvelous day!

Filed Under: Ellen Hutson Tagged With: chalkboard, christmas card, essentials by ellen, holiday, holiday cheer, holiday sprigs, twirling flurries

Elegant Christmas Cards in 20 Minutes or Less: Volume 2 with Simon Says Stamp!

December 16, 2020

Hi there! I’m back again today with another idea for my “Christmas Cards in 20 Minutes or Less” series, this time featuring a gorgeous stamp from Simon Says Stamp called Center Cut Holiday Floral and a fun chalkboard technique that is super easy and quick but adds that extra special touch to create a beautiful Christmas card!

Here’s the video:

Or you can watch in HD here.

One of my favorite quick-but-high-impact techniques is to create a “chalkboard” card. It’s basically some heat embossing with a few extra additions of white. In the video, I talk about adding different values of white, basically meaning different intensities of white to create that white halo left behind on a chalkboard. To achieve this, I utilize a white pencil, white gouache splatters, and some white ink blending around the edges, which totally reminds me of when I was in grade school and the erasers needed to be taken out back (ha) and beaten together to clean them! These different intensities of white help to add to that overall chalkboard look and are quite quick to pop on your card front!

I began by heat embossing the gorgeous Center Cut Holiday Floral with white embossing powder on some Charcoal cardstock cut to 5×7. (Such a large, beautiful stamp deserves to be shown off in it’s entirety!) I then used my white pencil to add some light shading on the larger poinsettia leaves and added a few splatters of watered down white gouache. After the gouache had dried, I added some white blending around the edge using Simon Says Stamp White Pigment Ink and a foam blending tool. After I’d finished all of my chalkboard additions, I die cut the Simon Says Stamp’s Season’s Greetings die twice from white cardstock, then adhered it to the center with some liquid adhesive. The final touch was to add some red “berries” using the Studio Katia Scarlet Red gems to add some extra sparkle!

Well, that’s all for my “Christmas Cards in 20 Minutes or Less” project today. I hope these videos are giving you some useful tips for your last minute holiday cardmaking! We all are so busy this time of year that any little tricks to simplify things a bit helps! Thanks so much for stopping by today, and have a marvelous day!

Filed Under: simon says stamp Tagged With: center cut holiday floral, chalkboard, easy christmas card, season's greeting

August 2018 My Monthly Hero Blog Hop+Giveaway!

August 6, 2018


Good morning! Today is the monthly Hero Arts My Monthly Hero Blog Hop celebrating the fabulous new My Monthly Hero kit! You should have arrived from Clare’s blog and your next stop is Ilina’s blog.  This month’s kit is coffee themed, with some fabulous coffee images and coordinating dies, as well as a fantastic fancy die that I used in this post. So many fun images, accessories, and that fabulous fancy die… here’s the breakdown of the items included in the kit:

6″x8″stamp set
3.5″x4.5″ window fancy die
11 coordinating frame cuts
Crystal Clear Lacquer Pen
White Puff Embossing Powder
2 8.5″x5.5″ sheets of coffee and tea hand dyed decorative paper

There are so many amazing coffee themed images included in this kit, and it’s a bargain at $34.99 (valued at over $70!). These kits frequently sell out, so it’s always a good idea to subscribe if you want to ensure that you’ll get your hands on one! The kit & add-ons go live in the Hero Arts store on Monday August 6th at 1pm eastern/10am pacific. The main kit is available for a limited time only – once it’s gone, it’s gone. Kits begin shipping from Hero Arts on Friday, August 10th.

For my project today, I wanted to invoke those lovely chalkboards that you see so frequently in cafes and coffee shops. I love creating chalkboard cards with my colored pencils and black card stock, so I thought I’d recreate that feel with my stamps, some white ink, and a white colored pencil. Let’s get started with the details!

I began by stamping the tall, footed coffee cup and some whipped cream from the main kit onto some black cardstock using Unicorn White pigment ink, as well as a few images from the new add-on stamp set Tea Time. I die cut all of the images using the coordinating dies.

I arranged my cluster of coffee shop goodies on my card front in approximately the spots that they would be on the final card, then began work on my custom sentiment. I love accenting certain words in sentiments with die cut letters, so I trimmed off the “coffee” of the “You’re the cream in my coffee” sentiment included in the main kit, then die cut the letters from white card stock. I stamped the partial sentiment in white pigment ink. I then used my gridded mat to arrange my die cut letters in a nice straight line, used washi tape to pick them up and add adhesive to the back, then adhered them to my card front.

I adhered my coffee die cuts using foam tape, then used my T-square to create a white frame around the edge of my card panel. Looks just like a sandwich board that you’d see outside a coffee shop, right? Love this technique!

Now for some fun giveaway information! Hero Arts is giving away an August My Monthly Hero kit (and if you purchase a kit and then win, they will reimburse you!). All you have to do to enter is comment on the blog hop posts. The more comments you leave, the more chances to you have to win! Here’s the full lineup in case you get lost:

The Hero Arts Blog
Amy Kolling
Amy Tsuruta
Clare Prezzia
Emily Midgett<— you are here
Ilina Crouse
Janette Kausen
Jennifer McGuire
Jessica Frost-Ballas
Julee Tilman
Kelly Latevola
Laurie Willison
Libby Hickson
Lydia Fiedler
Michelle Short
Nichol Spohr
Wanda Guess
Yana Smakula


Filed Under: Hero Arts, polychromos Tagged With: blog hop, chalkboard, colored pencil, my monthly hero

  • Page 1
  • Page 2
  • Go to Next Page »

Primary Sidebar

  • Facebook
  • Instagram
  • Pinterest
  • YouTube

Favorite Shops

Secondary Sidebar

Subscribe

Enter your email address to subscribe to this blog and receive notifications of new posts by email.

Instagram
Something is wrong.
Instagram token error.
Follow
Load More

Archives

Tags

3D embossing folder alcohol markers better press birthday birthday card blog hop card kit christmas christmas card christmas tag colored pencil copic copic coloring Daniel Smith die cutting embossing folder embroidery felt giveaway holiday holiday card hot foil ink blending karin brushmarker pro layered stencil masculine my monthly hero new release no line coloring no line watercolor OLO marker olo markers original illustration pawsitively saturated rainbow shaker card slimline stamping stamptember stencil thank you thinking of you valentine's day video watercolor

Popular Posts

Simon Says Stamp Sending Cheer Blog Hop- Day 2 + Freebie + Giveaway!
Altenew October 2026 Release Blog Hop + Giveaway!
Rustic Monochromatic Stars for Christmas with Rainbow Splash!
Waffleflower July Release Blog Hop!
Hero Arts Partners Blog Hop: Lawn Fawn!
March 2020 Essentials By Ellen Blog Hop+Giveaway!
December 2018 My Monthly Hero Blog Hop + Giveaway!
The Ton Stamps Summer Release: Day 1
The Ton Anniversary Release: Day 1!
Altenew Paint A Flower: Carnation Blog Hop+Giveaway!

Disclosure

Some affiliate links are used in my posts. This means that, should you click on one of my links and purchase something from that company, I will receive a small portion of the sale at no extra cost to you. I use the money earned from these sales to help maintain my blog. I so appreciate you visiting and, if you do choose to use one of my affiliate links, thank you so much for your support!
Copyright © 2026 ·Brunch Pro Theme &middot; Genesis Framework by StudioPress &middot; WordPress &middot; Log in
Loading Comments...