• Skip to main content
  • Skip to primary sidebar
  • Skip to secondary sidebar

Sixth Street Sundries

Emily Midgett

  • Home
  • About Me
  • Contact
  • OLO Marker Color Swatch Chart
  • Shop

challenge

Pinkfresh Studio June 2023 Monthly Challenge-Sunshine On My Mind!

June 4, 2023

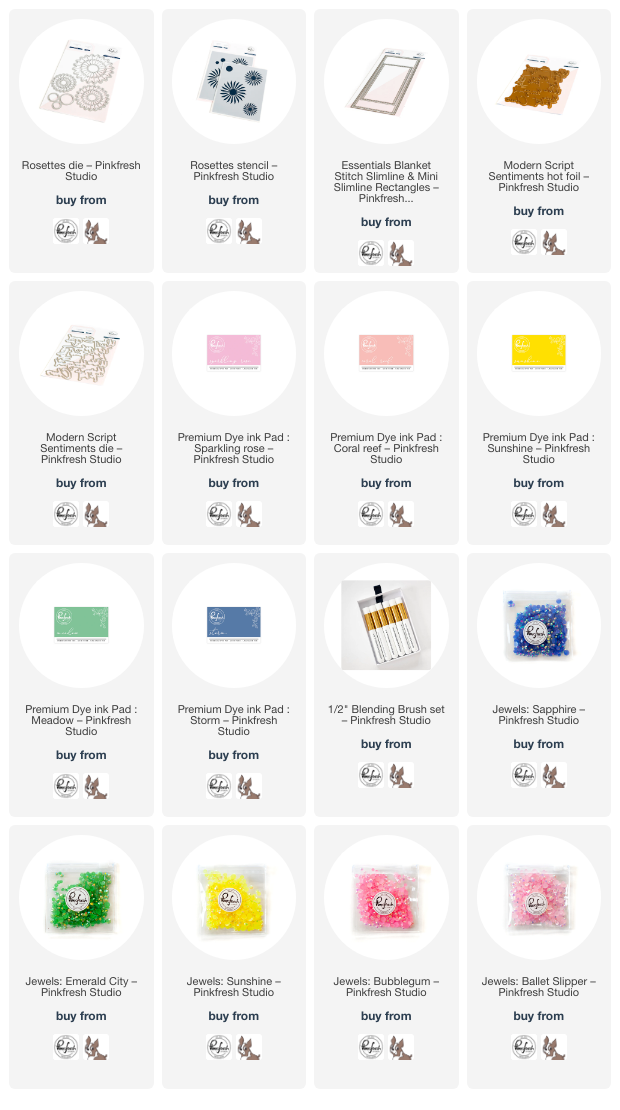
Hi there! The new theme for Pinkfresh Studio’s June 2023 Challenge is live, and this month we’re focusing on all things summertime with “Sunshine On My Mind!” (You can read all of the details of the challenge HERE) My kiddos just started their summer vacation, and what could be more appropriate for the start of summer than a party with rosettes and rainbows? I pulled out the Rosettes Stencils and Coordinating Dies, a bunch of pretty ink colors, a hot foil “cheers” sentiment, and created this super festive summer celebration card!

The colors for this month’s challenge are: Coral Reef, Sparkling Rose, Sunshine, Storm, & Meadow. I pulled out all five colors to create this festive rainbow card. Though there are two layers in the Rosettes Stencil set, I used only one shade of ink on each, blending one layer a bit softer and the second layer a bit harder and more intense. The contrast between the two intensities helped to create that 3D effect with the layered stencils!

After I’d finished blending my party rosettes, I die cut them with the Coordinating Dies, which adds stitching details and small die cut holes to make them look extra realistic. I also die cut a slimline card front from some white cardstock using the Essentials Blanket Stitched Slimline Die. I arranged the stenciled rosette die cuts down the front in ROYGBIV fashion, popping some up with foam adhesive, adhering others with liquid adhesive, to create lots of dimension and interest.

To emphasize the rainbow feel of the card, I pulled out my hot foiled sentiments that I’d previously foiled using Aura hot foil from Spellbinders. This foil has a lovely iridescent rainbow sheen to it, which perfectly coordinates with the rainbow theme on my card! I thought the Cheers sentiment from the Modern Script Sentiments Hot Foil Plate set worked perfectly to complete the festive theme of the card. I popped it up with some more foam tape to help it stand out from the busy background, then added some gems down the card front in coordinating colors to complete my summery, cheerful rainbow!

Well, that’s all for my project today! To enter a project of your own, check out all of the details on the Sunshine On My Mind challenge over at Pinkfresh Studio. You could be selected to win a $50 shopping spree to the Pinkfresh Store! Thanks so much for stopping by today, and have a marvelous day!
Filed Under: pinkfresh studio Tagged With: birthday card, celebration, challenge, ink blending, layered stencils, pinkfresh studio challenge, rosettes, slimline, stencils

Pinkfresh Studio May 2023 Challenge: Rainbows!

May 9, 2023

Hi there! The new challenge over at Pinkfresh Studio has begun, and this month it’s all about that timeless classic: Rainbows! ROY G BIV FTW! Primary colors aren’t really my favorite thing, however, so I took the theme of the challenge and adapted it to fit my own style with some rainbow pastel ink blending. Let’s get started with the details!

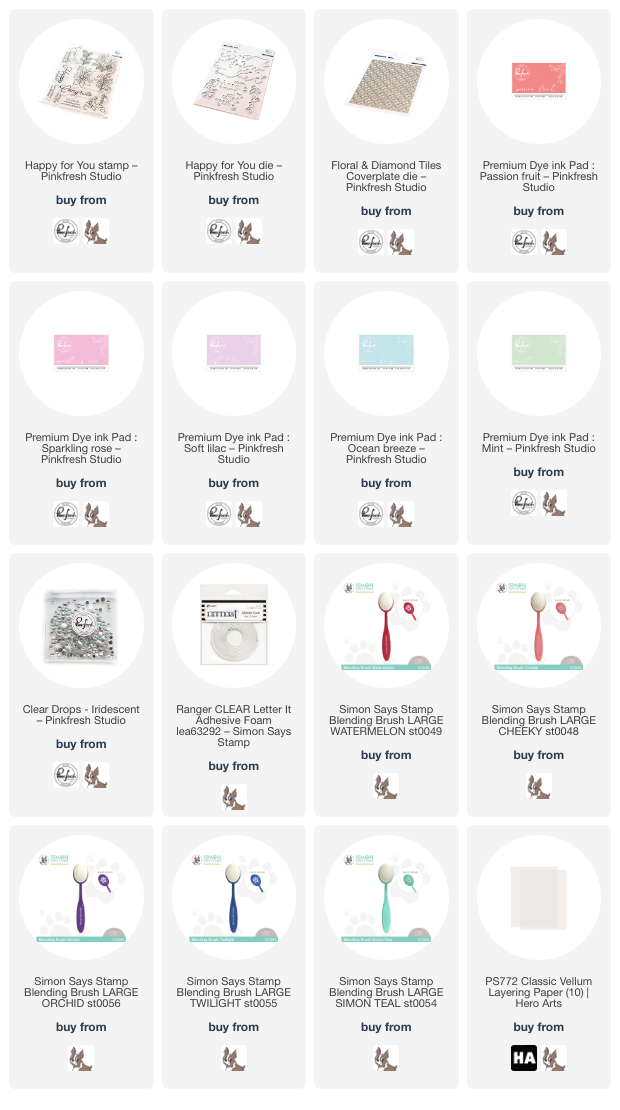
I began by ink blending Mint, Ocean Breeze, Soft Lilac, Sparkling Rose, and Passion Fruit inks on two A2 sized panels. I kept one panel intact and ran the other through my die cut machine with the Floral & Diamond Tiles Cover Plate. I layered the die cut blended panel over the top of the plain blended panel, keeping the colors in the same order to create subtle texture on the colorful background.

I wanted to keep the focus on the colorful background, so I white embossed the Happy For You image stamp onto some heavyweight vellum. I adore the delicate, lacy feel that the white embossing creates on the vellum! I used the handy dandy one piece die to cut the finished embossed images.

I also white embossed one of the lovely, larger greetings from Happy For You onto some white cardstock. I wanted to blend over the sentiment with the same colors as my background, so that the sentiment would blend in seamlessly with the rainbow gradient, so I determined the basic layout for my card and thus which inks to blend over my sentiment. Before die cutting, I used blending brushes to blend Ocean Breeze, Soft Lilac, and Sparkling Rose inks over the sentiment. Doing this before die cutting allows the blending to stay soft around the edges, rather than the color being more concentrated and intense around the die cut edges.

I adhered the blended die cut to a piece of iridescent white foil cardstock and cut around the edges to create a shadow around the die cut. The shiny foil adds a bit of textural difference from the colorful background and matte vellum, while the white edge helps to draw the eye to the sentiment. I added a strip of the same iridescent white foil cardstock to the blended card front for another level of texture. I then adhered the vellum floral images to the card front using clear dimensional adhesive and added the sentiment with a double layer of foam tape to help it pop even more. The final touch was to add some coordinating Iridescent Clear Drops. The iridescent coating on these drops accent the colors of the rainbow background beautifully!

Well, that’s all for my project today! You can check out all of the details for the Rainbow Challenge by clicking HERE. Each time you enter a project to the link list, you are entered for a chance to win a $50 shopping spree to the Pinkfresh Studio Store!

Thanks so much for stopping by today, and have a marvelous day!

Filed Under: pinkfresh studio Tagged With: challenge, floral & diamond cover plate, happy for you, ink blending, rainbow

Pinkfresh Studio March Challenge-Layers!

March 8, 2023

Hi friends! March has begun, so we are introducing a new challenge over at Pinkfresh Studio. This month, our theme is Layers. This theme was pretty darn easy for me, as I layer layer layer on pretty much all of my cards…Creating a flat card is so difficult for me! I love foam tape and I cannot lie. I used a variety of older products, including my Magnolia stamp set, which is great fun for watercoloring. Let’s get started with the details!

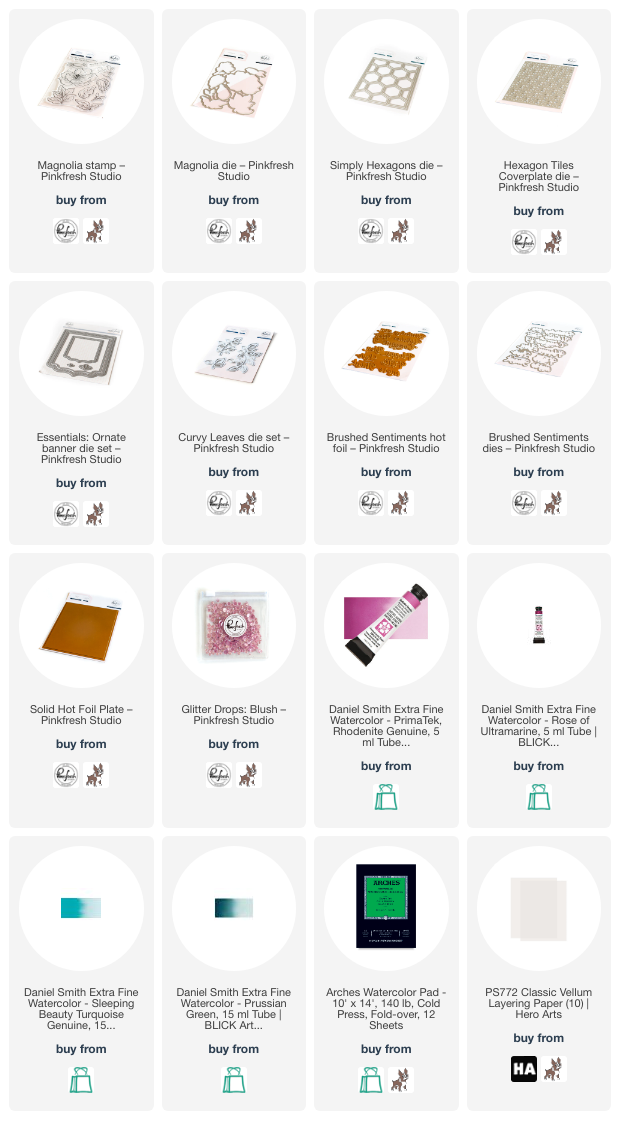
I began by heat embossing all of the images from one of my favorite sets that I’ve illustrated for Pinkfresh Studio: Magnolia! I used white embossing powder to emboss the one-and-done stamp. (I love that you only have to stamp once to stamp all of the images included in this set! So quick and easy.) When I want to create a softer look, I reach for the lighter embossing powders, like white or white satin pearl. It helps to give the softness of no-line coloring, but with the ease of having those raised ridges to make your watercoloring a little simpler. I heat embossed the images on the smoother side of some Arches cold press watercolor paper, then used my Daniel Smith watercolors to add some soft painting in shades that coordinated with the color scheme for this month’s challenge. I made sure to add some pale turquoise watercolor around the edges of my images so that the die cuts would have that finished, polished look on the eventual card front. I used the coordinating one-and-done die to cut out my watercolored magnolia flowers.

Because this month’s challenge was layers, I turned to my dies to see what dies I could layer beneath the pretty pink blooms to create subtle layers without overwhelming the card. I always like to have some subtle texture behind my flowers to help add interest, and I usually achieve this with either tone-on-tone cover plate die cuts or adding stitched texture with a cover plate, so I thought why not combine the two techniques? I wanted to use the Simply Hexagons Cover Plate Die, so to coordinate with the hexagon shapes in the cover plate, I also pulled out the Hexagon Tiles Cover Plate die, which adds a beautiful stitched pattern to your solid cardstock. I used a favorite shade of icy pastel blue cardstock for both die cuts, creating a tone-on-tone background for my pretty pink blooms.

To create a ground for my floral bouquet, I die cut a small Essentials: Ornate Banner die from some vellum. The die cut shape itself provides a bit of a ground around which my floral bouquet can shape itself, while the semi-transparent vellum does not had any extra bulk. I arranged my die cut and watercolored flowers around the corner of the vellum, adhering them to the vellum die cut with liquid adhesive and then hiding my foam tape behind the solid die cuts. I also added a few iridescent white leaves cut using the Curvy Leaves dies (another layer!), tucking them in amongst the floral bouquet. For the greeting, I used one of my previously-hot foiled Brushed Sentiments greetings, foiled using the “leftovers” and the Solid Hot Foil Plate. I popped that up with a double layer of foam tape to help the greeting stand out even more, then added a few sparkling Blush Glitter Drops for one last layer and bit of sparkle!

Well, that’s all for my project today. The Pinkfresh Studio March 2023 Challenge runs through March 28, 2023, and there is a $50 shopping spree up for grabs! Simply create your own project (or projectS!) with lots of layers, and link them up to the challenge before 3/28 to be eligible to win. Thanks so much for stopping by today, and have a marvelous day!

Filed Under: pinkfresh studio Tagged With: brushed sentiments, challenge, curvy leaves, Daniel Smith, hexagon, hexagon tiles, hot foil, magnolia, ornate banner, solid hot foil, watercolor

Pinkfresh Studio Inspiration Challenge-January 2023!

January 12, 2023

Each month, Pinkfresh Studio hosts a challenge with a different theme, which can be used as your inspiration to create a project and enter it to win a $50 shopping spree! The first challenge for 2023 is “Challenge Review,” where you can choose any of the challenge themes from the last year to use as your inspiration for your own project! I chose to use the March 2022-Frame It Up challenge as my inspiration to create this soft card, full of cool mauves and lavender, with touches of shiny metallic charcoal foil. Let’s get started with the details!

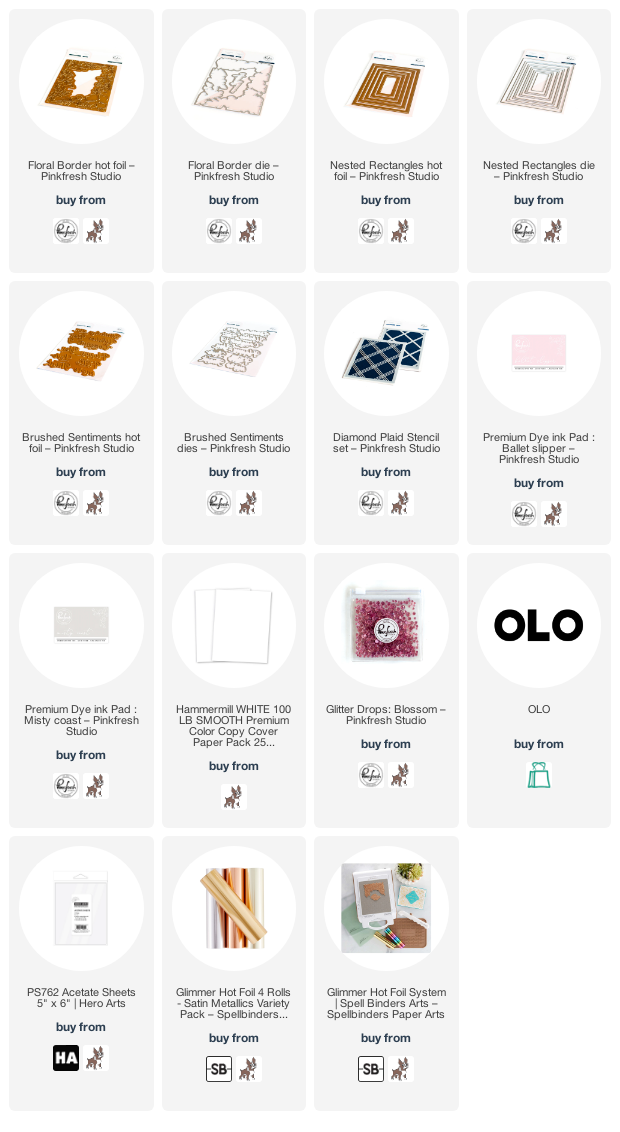
When creating projects for the new releases, I always hot foil a bunch of the new images and sentiments to save for a rainy day. I have been wanting to use my OLO Markers on the Floral Border Hot Foil image that I hot foiled last month. I had hot foiled the image on some Hammermill cardstock using matte charcoal foil from the Satin Metallics Variety Pack.

I used the coordinating die to cut out foiled image, creating a floral frame. I colored the images with my OLO Markers in a muted color palette of pale lavender, cool mauve, and some minty foliage. I am in love with how beautifully these colors worked together! Using my sharp scissors, I did some trimming to create a floral frame on just one side of my A2 card front.

For the background, I wanted a subtle pattern to accent the colors on my floral frame without adding too much to distract from the pretty flowers, so I used one of the Diamond Plaid Stencils and lightly blended Ballet Slipper and Misty Coast with blending brushes to create a dusty mauve that coordinated nicely with the large flowers in the floral frame.

I added a rectangular hot foiled frame created using the satin charcoal foil and the Nested Rectangles Hot Foil and Coordinating Dies, adhering it to the plaid background using foam adhesive. I arranged the floral die cut border around the frame, tucking a couple of the “leftovers” on the edge of the frame itself. I also added a greeting created using the Brushed Sentiments Hot Foil and Coordinating Dies, which I hot foiled onto some acetate to create a floating sentiment! (Have you tried hot foiling on acetate yet? It’s SO fun!) I added a few Blossom glitter drops for some sparkle!

Well that’s all for this project! If you haven’t checked out the challenge, I hope you will do so. There are so many fun themes and color schemes from which to choose, not to mention there’s a $50 shopping spree up for grabs! Thanks so much for stopping by today, and have a marvelous day!

Filed Under: pinkfresh studio Tagged With: brushed sentiments, challenge, diamond plaid, floral border, hot foil, nested rectangles, olo markers

Where Creativity Meets C9 October Edition!

October 9, 2018

Good morning! Today is the 9th, which means that we have a new Concord and 9th release and a new challenge for you on the Where Creativity Meets C9 blog! This month’s challenge is Layers… so many ways to interpret that prompt. Love it! Here’s my take on it:

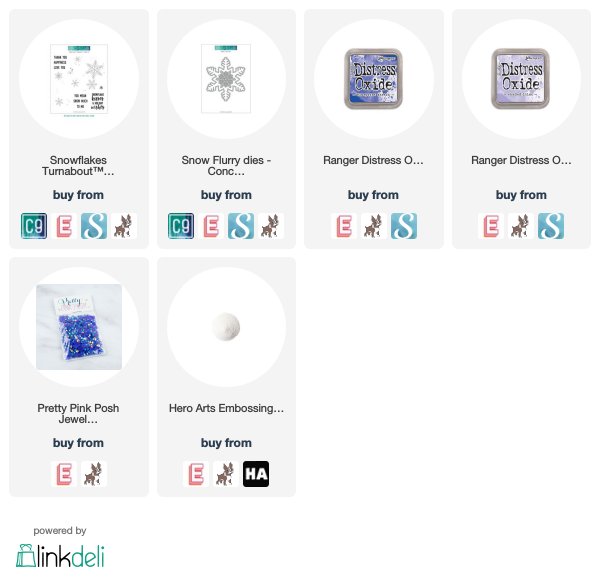
I used the Snowflakes Turnabout that was released last month to do some stamping and pearlized embossing. Have you tried using Distress Oxide inks to stamp and emboss? The effect is really lovely, and you suddenly have a huge stash of colored embossing powder in your stash! I love pairing the Oxides with pearl embossing powder. I stamped the Turnabout twice, once with Blueprint Sketch, rotated it 180*, then stamped again with Lilac Shadow and added the Pearl Embossing Powder. It creates such a lovely color in combination with the Oxide inks.


Next, I die cut a large glitter snowflake using the Snow Flurry dies. I added them to the sides of the snowflake panel, adhering them with liquid adhesive. I stamped a greeting from the Snowflake Turnabout using Blueprint Sketch Oxide ink, embossing it with the same pearl embossing powder, then trimmed the panel and popped it up on the snowflake card front using dimensional foam adhesive.

A few Amethyst crystals from Pretty Pink Posh finished it off.

Well, that’s all for today’s project! Now, for some challenge details. I hope you are inspired to bring out your Concord and 9th products to create a project inspired by the color inspiration photo! Simply create a project, link it up to the Where Creativity Meets C9 blog post by September 29, and you could have a chance to win a $25 shopping spree to the Concord and 9th store! One winner will also be chosen to be a guest on an upcoming challenge!

Thanks for stopping by, and have a marvelous day!


Filed Under: christmas card, Concord and 9th, holiday card Tagged With: challenge, challenge blog, christmas, holiday

  • Page 1
  • Page 2
  • Go to Next Page »

Primary Sidebar

  • Facebook
  • Instagram
  • Pinterest
  • YouTube

Favorite Shops

Secondary Sidebar

Subscribe

Enter your email address to subscribe to this blog and receive notifications of new posts by email.

Instagram
Something is wrong.
Instagram token error.
Follow
Load More

Archives

Tags

3D embossing folder alcohol markers better press birthday birthday card blog hop card kit christmas christmas card christmas tag colored pencil copic copic coloring Daniel Smith die cutting embossing folder embroidery felt giveaway holiday holiday card hot foil ink blending karin brushmarker pro layered stencil masculine my monthly hero new release no line coloring no line watercolor OLO marker olo markers original illustration pawsitively saturated rainbow shaker card slimline stamping stamptember stencil thank you thinking of you valentine's day video watercolor

Popular Posts

Simon Says Stamp Sending Cheer Blog Hop- Day 2 + Freebie + Giveaway!
Joyful Snowman with New Simon Says Stamp Sending Cheer Release!
Simon Says Stamp Sending Cheer Release: Now Available!
Altenew October 2026 Release Blog Hop + Giveaway!
February 2018 My Monthly Hero Blog Hop!
Altenew March 2020 Release Blog Hop+Giveaway!
Special Release: Simon Says Stamp Limited Edition STAMPtember Christmas Card Kit!
Simon Says Stamp Cozy & Bright Inspiration, Part Two!
Waffleflower December Release Blog Hop!
Altenew Build A Flower Japanese Mum Blog Hop!

Disclosure

Some affiliate links are used in my posts. This means that, should you click on one of my links and purchase something from that company, I will receive a small portion of the sale at no extra cost to you. I use the money earned from these sales to help maintain my blog. I so appreciate you visiting and, if you do choose to use one of my affiliate links, thank you so much for your support!
Copyright © 2026 ·Brunch Pro Theme · Genesis Framework by StudioPress · WordPress · Log in
Loading Comments...