• Skip to main content
  • Skip to primary sidebar
  • Skip to secondary sidebar

Sixth Street Sundries

Emily Midgett

  • Home
  • About Me
  • Contact
  • OLO Marker Color Swatch Chart
  • Shop

christmas tag

More Simon Says Stamp Bright Christmas Card Kit!

November 15, 2025

This post was sponsored by Simon Says Stamp. Thanks, Simon!

Hi friends! I am back with some more inspiration using the beautiful new Bright Christmas Card Kit of the Month from Simon Says Stamp! (Click HERE to see the full kit!) These kits always come filled with supplies to create tons of projects, from patterned papers, stamps and dies, cardstock, and embellishments! I love creating coordinating gift sets, and who doesn’t love a coordinating card and tag gift set at Christmas? Giving something handmade that the recipient can put to good use is such a fulfilling way to use our supplies! Let’s get started with the details on my projects.

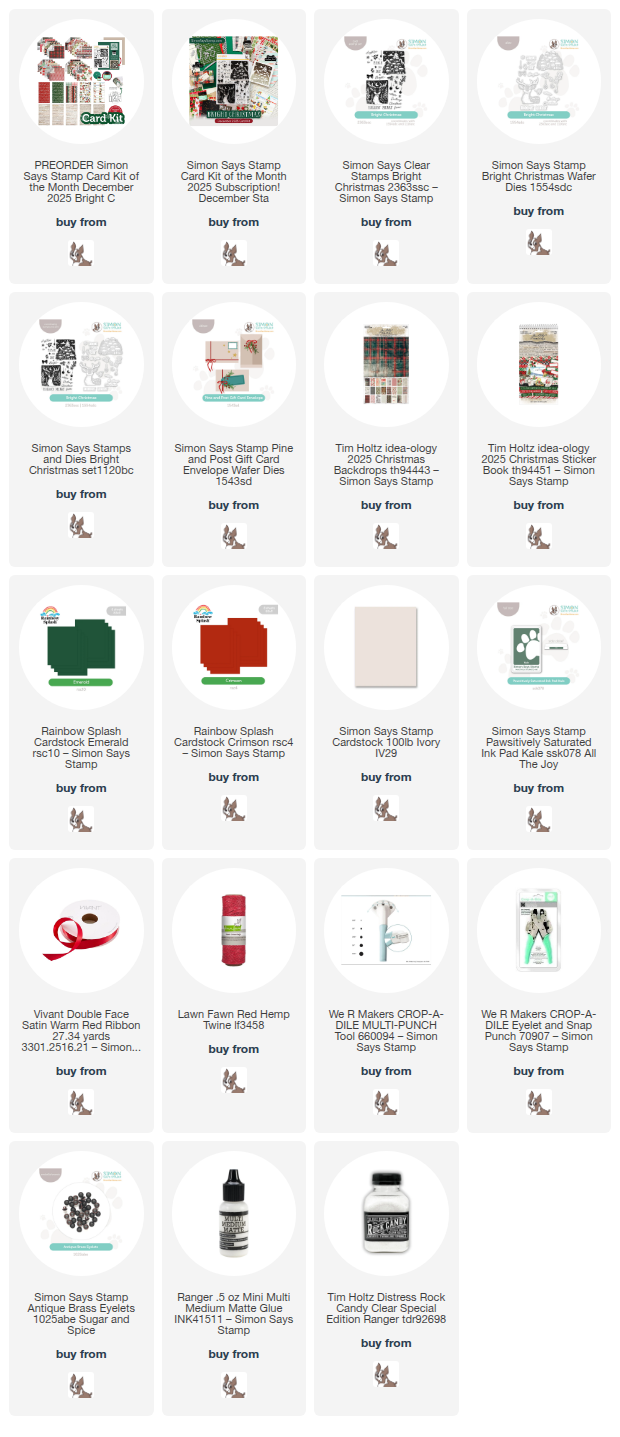
*I have gathered links to all of the products used at the bottom of the post for your convenience, using affiliate links at no extra cost to you. Thank you for shopping with my links! I truly appreciate your support for my work!*

For today’s project suite, I filled a glassine bag with a group of gift tags, a gift card envelope, and a simple-but-elegant coordinating A2 card, embellishing the bag with some vibrant red cardstock and the beautiful linocut illustrations in the card kit!

To create my cigar band for the gift bag, I used a strip of red 12×12 cardstock, folding it over the folded bag and connecting the ends with one of the linocut images, stamped on Simon Says Stamp Ivory Cardstock with Kale Pawsitively Saturated Ink. To make this cigar band a touch more festive, I added some Distress Medium Matte and Rock Candy Glitter to the tops of the trees and the roofs of the houses, then adhered a red satin bow with my glue gun!

For the coordinating card, I stamped the gorgeous deer image from the Bright Christmas set again using Kale ink, trimming the edges down and mounting it on a slightly larger panel of red cardstock, creating a crisp red mat. I also stamped some of the individual sentiments on a separate strip of Ivory cardstock, trimming them down and mounting them on another, slightly larger strip of red cardstock. I popped both of these red framed stamped images up on my A2 Ivory card base, then added a touch of whimsy and texture with a red hemp twine bow on the deer’s neck! A simple, elegant card that was super simple to make and simple to mail!

For the hang tags, I used my trimmer to trim down the Emerald cardstock to 3″ x 6″ strips, folding them in half to create square tags. I used my hole punch to add some small holes in the corner, then threaded some loops of red twine through. I used the included cardstock stickers and patterned papers to add simple embellishments to the front of the tags! These simple tags add just a touch of handmade affection to your gifts without taking up a ton of your time! It makes my heart hurt a bit to see tags upon which I’ve worked painstakingly tossed in the trash, so it makes me feel better to make such quick work of these tags with the help of the patterned papers and cardstock stickers!

Finally, I used the marvelous new Pine and Post Gift Card Envelope die set included in the kit with some patterned paper, twine, an eyelet, and a cardstock sticker to create a fun coordinating gift card holder! I die cut the envelope from some green plaid patterned paper, then assembled the envelope and adhered the flaps with strong double sided tape. I added one of the cardstock stickers that reminds me of vintage gift tags as the perfect spot for the gift-giver to write their to/from information!

To keep the gift card safely tucked inside the envelope, I used one of Simon Says Stamp’s newer Antique Brass Eyelets to add some red twine, which I wrapped around the envelope twice before tying in a pretty bow!

Well, that’s all for my projects today! I loved this month’s Card Kit so much that I created two different suites of coordinating projects, perfect for gift-giving! It’s such a joy to give handmade gifts, and these card kits make it super easy to create coordinating gifts, tags, and cards with the gorgeous goodies included in the kit.

The Simon Says Stamp Card Kits are such an incredible value; the value of the individual elements of each kit equals far more than the $44.99 price tag, so you’re getting incredible bang for your buck. If you are consistently interested in the Simon Says Stamp Card Kit of the Month, you can sign up HERE to become a subscriber for an even bigger discount on these carefully curated products. As always, Simon also makes each individual element of the kits available a la carte, so that you can pick and choose what you would like to purchase if buying the entire kit isn’t really your thing. Who can say no to such incredible value though, right?

Thanks so much for stopping by today, and have a marvelous day!
Filed Under: simon says stamp Tagged With: bright christmas, card kit of the month, christmas, christmas card, christmas tag, eyelet, gift card, gift set, glitter, holiday card, ideaology, pine and post, rocky candy, tim holtz

More Inspiration using the Simon Says Stamp Warmth and Wonder Limited Edition Holiday Kit!

October 1, 2025

This post was sponsored by Simon Says Stamp. Thanks, Simon!

Hi friends! I am back today with some more inspiration using the new, limited edition Simon Says Stamp Warmth and Wonder Holiday Card Kit! (Click HERE to see the whole kit!) This limited edition kit was one of the last fun surprises for the month-long STAMPtember celebration, and it is available for preorder right now with the intent to ship later in October. The kit comes absolutely jam-packed full of goodies to make your holiday cardmaking a breeze: two stamp sets, a fancy standalone die, embossing folder + die set, stencil set, ink cubes, patterned papers and coordinating ephemera, cardstock, envelopes… everything you need to create tons of marvelous coordinating-but-not-matching holiday cards! Some people love to mass produce, but some others, like myself, get a bit bored with creating the same card over and over again. To keep things simple but still creatively interesting, each of the elements of this card kit work beautifully in concert or individually, making your creative process a breeze! I created no less than six different projects using this card kit and barely made a dent in the goodies; when you add in dies, inks, and cardstock from your own stash, it stretches even further! For yesterday’s projects, I focused mainly on the marvelous patterned papers included in the kit. (Click HERE to see that post.) Let’s get started on the details for my projects today, which focus on the amazing stamps and other non-consumable items in the kit.

*I have gathered links to all of the products used at the bottom of the post for your convenience, using affiliate links. Thank you for shopping with my links! I truly appreciate your support for my work!*

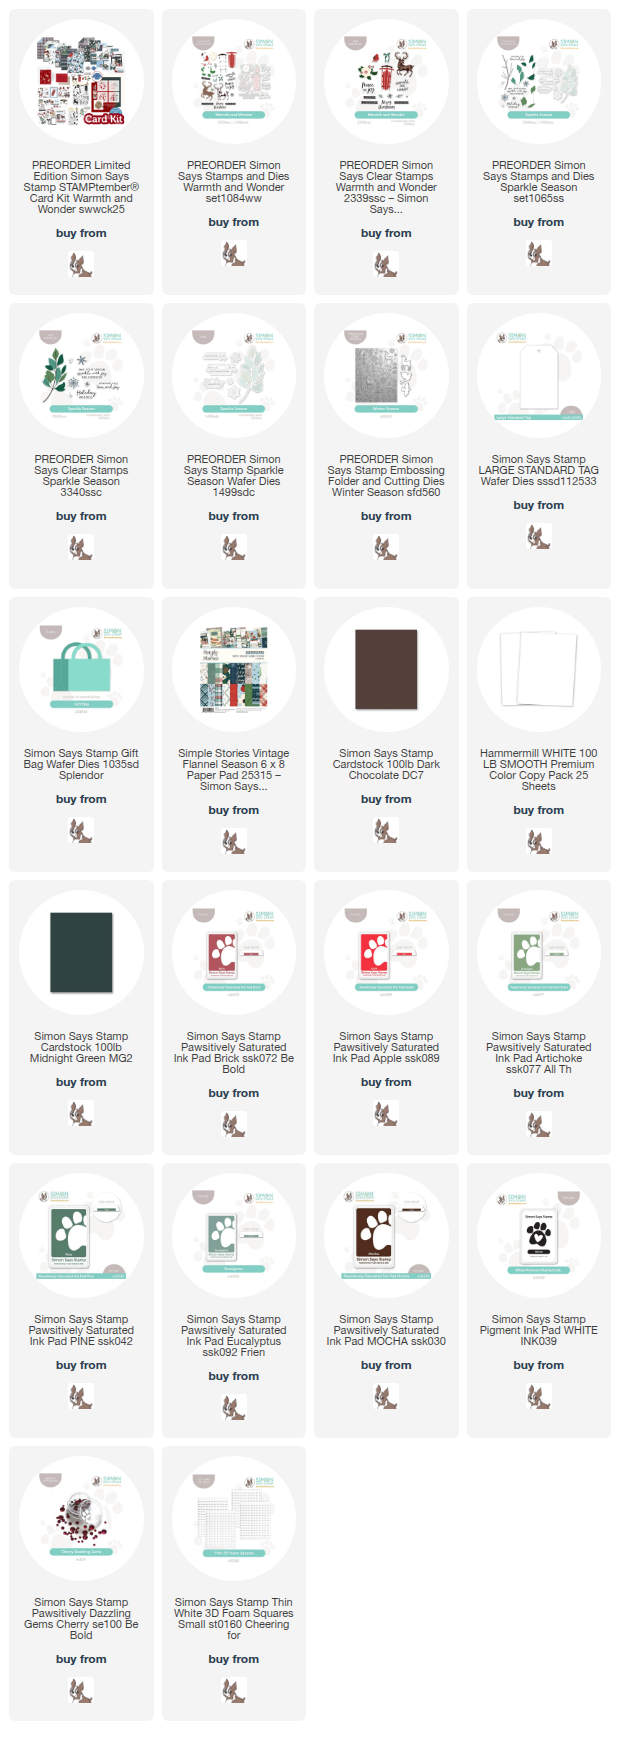
Using the colors of some of the patterned paper as my inspiration point, I selected Pawsitively Saturated Inks in shades of Brick, Apple, Artichoke, Pine, Eucalyptus, and Mocha, which create a rich, vibrant holiday color palette!

I used some plaid patterned paper and ephemera bits to create this fun little gift bag, die cutting the Gift Bag die from Midnight Green cardstock and adding the ephemera bits with foam adhesive.

I also created this coordinating festive, detailed card using both of the stamp sets included in the Warmth and Wonder kit, using the coordinating dies to cut out the stamped images. I love how the simplicity of the solid stamped images from the Warmth and Wonder stamp set work so beautifully with the layered foliage branch from the Sparkle Season stamp set!

I ran a panel of Dark Chocolate cardstock through my die cutting machine with the new Winter Season embossing folder, then swiped the Simon Says Stamp White Pigment Ink Pad directly over the raised areas to enhance the imagery quickly and simply. I then trimmed a strip of red foil cardstock to be 4.75″ long, notching the ends with my sharp scissors to create a flag, and arranged the stamped die cuts around the red foil flag strip, popping everything up with lots of foam adhesive. The final touch was to add a few sparkling Cherry Pawsitively Dazzling Gems for some holiday shine!

Finally, I created this simple and elegant tag using the layered sleigh image from the Warmth and Wonder stamp set along with some foliage and that gorgeous stamped bow. I stamped the sleigh using Apple and Mocha ink, the foliage using Pine ink, and the bow using Apple and Brick inks. I die cut two Large Standard Tags from Chocolate cardstock, adhering the scratched sides together so that the outward sides were both clean, then adhered the sleigh and foliage die cuts to the front. I added a red seam binding loop to the tag for a simple and elegant gift adornment!

Well, that’s all for my projects today! You can’t go wrong with this kit; the value is over $100, but Simon Says Stamp has priced these fabulous kits at only $69.99. As always with Simon Says Stamp kits: you can purchase individual items outside of the kits when it sells out or if you would like duplicates (like that fabulous ephemera and patterned paper!). Don’t wait to purchase this kit at an incredible value! Thanks so much for stopping by today, and have a marvelous day!

Filed Under: simon says stamp Tagged With: card kit, christmas, christmas card kit, christmas tag, embossing folder, gift bag, holiday, holiday card kit, holiday tag, limited edition, patterned paper, sparkle season, warmth and wonder, winter season

The Holidays Are Coming with New Simon Says Stamp!

August 25, 2025

This post was sponsored by Simon Says Stamp. Thanks, Simon!

Hi friends! Can you believe that we are merely four months from Christmas? I am in shock at how quickly this year has gone! The weather is cooperating with that reminder today, as well, for the air is crisp and gorgeous. I always enjoy adding some new and beautiful holiday imagery to my stash, as well as a beautifully curated holiday sentiment set, and the new CZ Design items from the Simon Says Stamp Happy Camper release are absolute staples, in my opinion. Cathy Zielske has such a way with fonts, making the simplest fonts look completely classy and timeless with her use of different sizes and kerning… perfection! Let’s get started on the details for my holiday card with it’s matching tag!

*I have gathered links to all of the products used at the bottom of the post for your convenience, using affiliate links. Thank you for shopping with my links! I truly appreciate your support for my work!*

I kept my color palette for this pair of projects mostly traditional, with reds and greens made a bit more modern by using a pale blush cardstock rather than white cardstock. This pale blush cardstock is so pale that it works perfectly for blending, allowing the blended colors to maintain their true tones without getting muddled by the touch of pink.

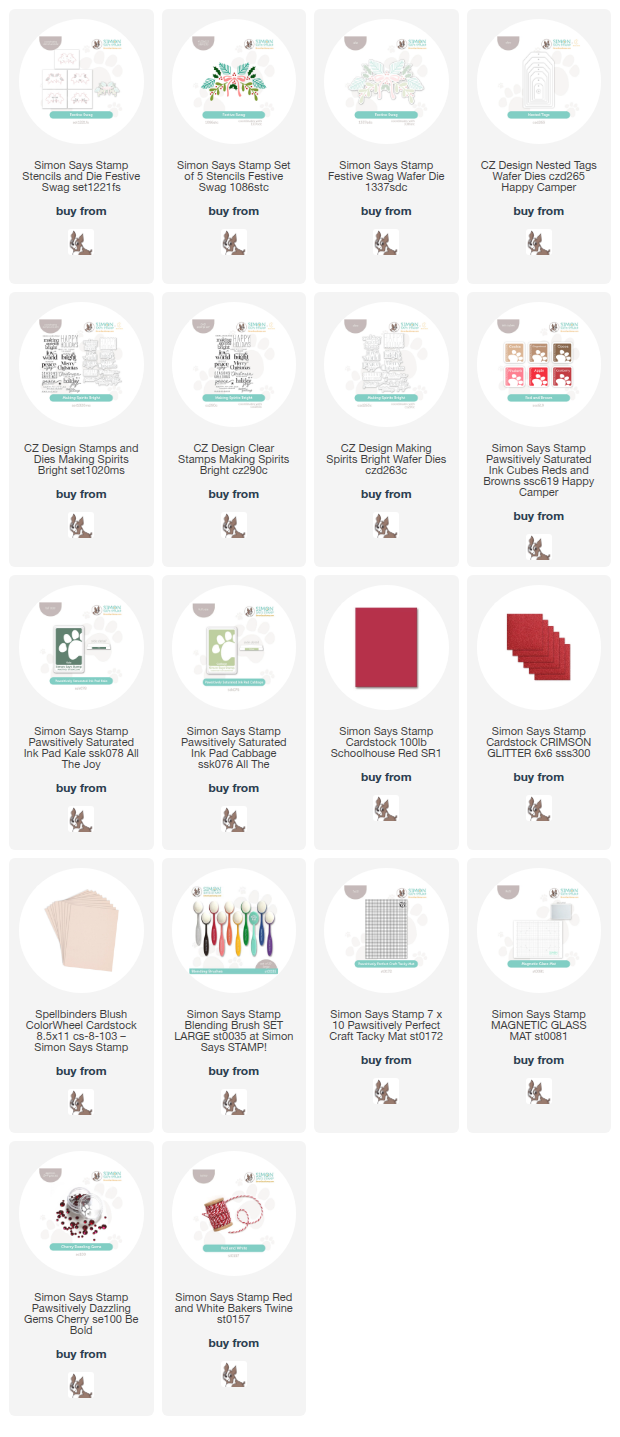
For my card, I used the new Festive Swag stencil set, stenciling the greenery using Pawsitively Saturated Inks: Kale & Cabbage and adding some vibrant red from the new Red & Brown Ink Cubes. I rotated my stencil station (I keep a stencil station set up at all times using a Pawsitively Perfect Craft Tacky Mat on a Simon Says Stamp Magnetic Glass Mat so that I can do my stenciling lickety split!) and repeated the stenciling process again, creating a mirror image of the swag top and bottom on my blush card front. I trimmed the stenciled panel down 1/8″ on each side, then matted it on a deep red card front, creating a beautiful red frame around the detailed stenciled image.

For the greeting, I stamped the bold Happy Holidays sentiment from the new Making Spirits Bright using bright red ink on some more blush cardstock, then die cut it with the coordinating die. I added a few strips of the same cherry red cardstock, as well as a strip of red glitter cardstock, in the center of my stenciled panel, adding a bit more intentionality with the design as well as some additional texture and sparkle. I popped up the sentiment with some foam adhesive, then added Cherry Pawsitively Dazzling Gems to the holly berries on the stenciled images for another touch of shine! Even with the addition of the blush cardstock, I think this card exudes holiday imagery and spirit!

I continued the same color palette with my matching tag, this time taking advantage of the detailed coordinating die from the Festive Swag product suite. I stenciled the image using the same ink colors and blush cardstock, the die cut the finished image. I also stamped the “peace and joy” sentiment from Making Spirits Bright using vibrant red ink, as well as a sentiment strip, cutting the strip with my trimmer and the larger sentiment with the coordinating die. I die cut a large tag from more blush cardstock using the new Nested Tags dies, adding some strips of red and red glitter cardstocks to the bottom with liquid adhesive before adding the rest of the die cuts above with a double and single layer of foam adhesive. Finally, I finished the tag off with a red and white twine loop, all ready to add to a pretty holiday package!

Well, that’s all for my projects today! Let the holiday cardmaking begin! (that is, if you haven’t already begun…. I’m so behind!) Thanks so much for stopping by today, and have a marvelous day!

Filed Under: simon says stamp Tagged With: christmas card, christmas tag, die cutting, festive swag, holiday card, ink blending, layered stencil, making spirits bright

Steel Cardstock Spotlight #3: Rose Gold and Mixing Neutrals!

January 30, 2025

This post was sponsored by Simon Says Stamp. Thanks, Simon!

Hi friends! I am back with one final project on my Steel Cardstock spotlight, this time pairing the neutral medium gray cardstock from Simon Says Stamp with another neutral cardstock with some metallic flair. I think this combination demonstrates the versatility of the Steel cardstock, for it pairs beautifully with so many different color palettes. I had several images released before Christmas that I didn’t get a chance to use for holiday cards, but I wanted to see if I could use them to create a wintry birthday card with some leftover rose gold snowflakes. Let’s get started with the details on my projects!

*I have gathered links to all of the products used at the bottom of the post for your convenience, using affiliate links. Thank you for shopping with my links! I truly appreciate your support for my work!*

When working with the DieCember products, I had created THESE projects using the beautiful Snowflake Sensation dies, focusing on the outline images created with the dies and SSS Rose Gold Metallic cardstock. I had several snowflakes leftover, and so for today’s project I decided to use these delicate snowflake die cuts to create a snowy background and had enough left to create a little tag, probably to save for next Christmas.

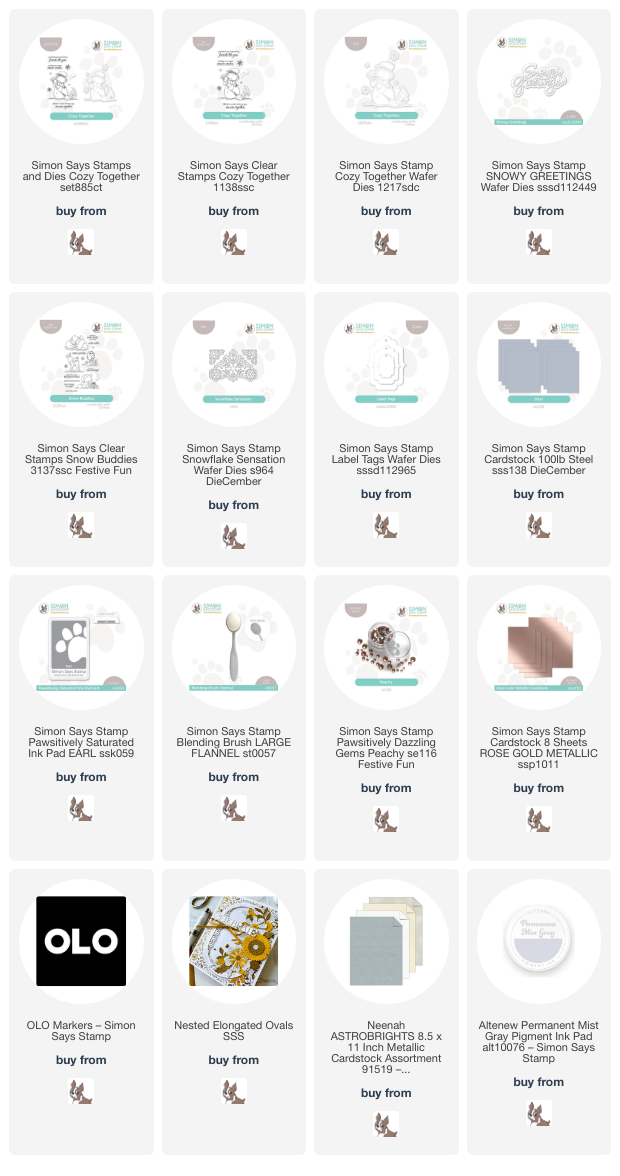
For my card, I began by stamping the sweet snowman from the Cozy Together stamp set using Altenew’s Permanent Mist Gray ink onto some white Hammermill cardstock, then used my OLO markers to add some subtle shadows to the snowman, ensuring a smooth transition from the pale gray alcohol marker to the white of the cardstock by softening the edge of the colored areas with the Zero marker, aka OLO’s colorless blender marker. I also added some metallic copper stripes to the snowman’s scarf and twirling dust using a metallic acrylic marker and some details to his face with a fine-tipped black pigment marker. I die cut the finished snowman with the coordinating die.

After I had finished the main focal point, I began to put the background together. I first blended some Earl Pawsitively Saturated Ink on one edge of the Steel A2 card front, then splattered it with some rose gold metallic glitter watercolor to add extra whimsy and texture to the background. Once the watercolor had dried, I used the leftover rose gold snowflake die cuts to create a pretty snowflake pattern on the blended and splattered areas, adhering them with liquid adhesive. For the greeting, I die cut the detail layer of the Snowy Greetings word die set from some more Metallic Rose Gold cardstock, then adhered it to a vellum shadow layer with liquid adhesive. I added a pearlescent silver die cut oval frame to the snowflake background with some foam adhesive, then enhanced the die cut sentiment with an embossed greeting from Snow Buddies, adhering all of the different die cuts with foam adhesive. Finally, I added a few Peachy Pawsitively Dazzling Gems for a bit of added sparkle!

I had a couple of rose gold snowflake die cuts leftover, so I decided to layer them to create a simple, pretty tag! I die cut two Label Tag dies from some more Steel cardstock, adhering the two pieces together with the scratched sides facing each other, which ensures that each side of the tag is clean and smooth. I adhered the two snowflake die cuts in the center of the tag die cut, rotating the top snowflake so that it created a beautifully full snowflake. Finally, I added a white silk ribbon loop to the top of the tag and a few more Peachy Pawsitively Dazzling Gems on the snowflakes for added sparkle!

Well, that’s all for my projects today! I hope you’ve enjoyed this spotlight on Simon Says Stamp’s Steel Cardstock. It is fun to direct my creative focus on one unsung hero and give it a little extra love. The shade of gray is a true neutral, and it makes it perfect for so many different applications. Thanks so much for stopping by today, and have a marvelous day!

Filed Under: simon says stamp Tagged With: birthday card, christmas tag, copic coloring, cozy together, ink blending, label tags, no line coloring, olo markers, snow buddies, snowflake sensation, snowman, snowy greetings, steel cardstock, winter birthday

Holiday Joy in Pink and Green with New Simon Says Stamp DieCember!

December 6, 2024

This post was sponsored by Simon Says Stamp. Thanks, Simon!

Hi friends! With the Simon Says Stamp DieCember release and celebration of all things die cutting, I have been having so much fun with die cutting lately, pushing myself to move outside of my typical cards and wanting to do something with my newest obsession: felt! I recently fell down a felt and stitching rabbit hole, and so I am looking for any and all excuses to felt everything up. (I used felt with some of the new DieCember dies HERE to create the sweetest cardinal holiday ornament!) One of the reasons that I have been looking to expand outside of paper is that paper just feels so…. disposable, you know? Something that people can throw away without much afterthought. Felt and fabric feel a bit more permanent, something that has the power to last a bit longer, at least in my opinion. For my projects today, I paired a fun hot pink and lime color palette with a newer embossing folder and some dies to create this pretty gift set. Let’s get started with the details!

*I have gathered links to all of the products used at the bottom of the post for your convenience, using affiliate links. Thank you for shopping with my links! I truly appreciate your support for my work!*

I love watercoloring on embossed images using various watercolor mediums. The depth and dimension that you can achieve when pairing watercoloring with the 3D texture of the embossing folders is unmatched in my opinion! I love using Karin Brushmarker Pro Watercolor Markers with these embossing folders; their vivid color palette creates are wonderful to create unique and super colorful cards. I carried that hot pink and green color palette into my stocking gift card holder, as well, finding felt in my stash that matched beautifully!

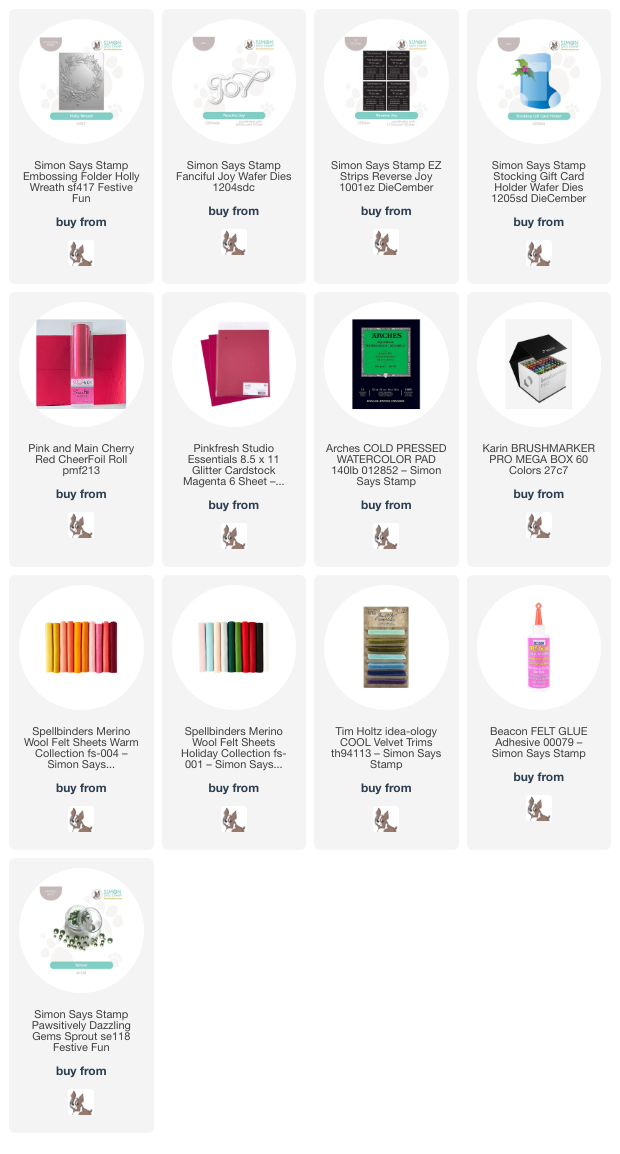
I began by running an A2-sized panel of Arches Cold Press watercolor paper through my die cutting machine using the newer Holly Wreath Embossing Folder. The texture on the Arches Cold Press works beautifully with these deeply etched embossing folders. It’s amazing how much detail this heavy duty watercolor paper picks up! I used the Karin Brushmarker Pro Watercolor Markers with a damp paintbrush to add lots of vivid color to the images. When working with watercolor markers, I like to scribble the color onto my glass work surface, then pick up the color with my damp paintbrush. This allows me a bit more control over the concentration of the color while also helping to create the contrast needed to create definition on the images for this no-line coloring style of painting. After I had painted the main images, I pulled out my handmade shimmer watercolor palette and added some sparkling green to the pine boughs and some shimmering splatters around the edges. It’s so difficult to capture the sparkle and shine on this card in photos!

For the greeting, I paired the new Fanciful Joy die set with the coordinating greetings in the Reverse Joy EZ strips. These user-friendly strips are printed with toner, and so can be paired with toner foil and a Minc or a laminator to create super shiny foiled sentiment strips that you can use to create buildable sentiments. I used Pink & Main Cherry Red Cheerfoil to add foil to these sentiments (don’t you just love that font?) and cut the detail layer of the Fanciful Joy die from some Pinkfresh Studio Magenta Glitter Cardstock and the shadow layer from vellum. I layered the sentiment pieces over the wreath, popping them up with some foam adhesive. I added a coordinating glitter accent strip and a pretty pink bow to accent the wreath and add additional texture. Finally, I added a few Sprout Pawsitively Dazzling Gems for even more sparkle!

For my second project, I used the new Stocking Gift Card Holder with some deep pink felt to create this sweet little gift card holder that can be used as an ornament after it’s fulfilled its gift-giving purpose! I am really enjoying using non-stitching dies to create fun stitched projects lately. I’m finding that my biggest limitation is my creative imagination!! I die cut the main stocking portion twice from deep pink felt and added the top portion using some white felt. Before stitching the two stocking die cuts together, I added some holly leaves and berries, adding some stitching details to the veins on the leaves with coordinating tone-on-tone floss. I also added some sequins and beads to the pale pink berries to add extra texture. I am in love with these pretty colors and the luxurious texture of the felt!

After I had stitched the berries and leaves onto my stocking, I used coordinating pink embroidery floss to stitch the stocking together, adding an olive green velvet ribbon loop to the top corner. I used felt glue to add the white “fur” to the top of the stocking; the felt glue keeps things nice and clean. I’ve been using felt glue a lot lately, making it super simple to put fun felt scenes together as easily as with paper and glue! For one last feminine touch, I added a coordinating olive green velvet bow next to my holly berries. Wouldn’t this be so cute hanging from a Christmas tree or embellishing a pretty Christmas gift?

Well, that’s all for my projects today! I still have so many fun things to share with you using the new DieCember release… if you’d like to receive an email each time I post, you can sign up to become an email subscriber so that you don’t miss any inspiration! I appreciate all of you very much! Thanks so much for stopping by today, and happy DieCember!

Filed Under: simon says stamp Tagged With: cheerfoil, christmas card, christmas tag, felt, gift card, gift card holder, holiday card, holly wreath, karin brushmarker pro, minc, no line coloring, reverse joy, stitching, stocking gift card holder, watercolor

  • « Go to Previous Page
  • Page 1
  • Page 2
  • Page 3
  • Page 4
  • Interim pages omitted …
  • Page 7
  • Go to Next Page »

Primary Sidebar

  • Facebook
  • Instagram
  • Pinterest
  • YouTube

Favorite Shops

Secondary Sidebar

Subscribe

Enter your email address to subscribe to this blog and receive notifications of new posts by email.

Instagram
Something is wrong.
Instagram token error.
Follow
Load More

Archives

Tags

3D embossing folder alcohol markers better press birthday birthday card blog hop card kit christmas christmas card christmas tag colored pencil copic copic coloring Daniel Smith die cutting embossing folder embroidery felt giveaway holiday holiday card hot foil ink blending karin brushmarker pro layered stencil masculine my monthly hero new release no line coloring no line watercolor OLO marker olo markers original illustration pawsitively saturated rainbow shaker card slimline stamping stamptember stencil thank you thinking of you valentine's day video watercolor

Popular Posts

Simon Says Stamp October 2026 Card Kit of the Month: Homespun Gratitude!
February 2018 My Monthly Hero Blog Hop!
Altenew Craft A Flower: Poppy Blog Hop+Giveaway!
Felted Gourd Wall Hanging with Simon Says Stamp!
Sunflower Home Decor with Simon Says Stamp!
Craft Your Life Project Kit: Feathered Lilies Blog Hop+Giveaway!
Simon Says Stamp October 2025 Card Kit of the Month!
Altenew Standalone Die Blog Hop+Giveaway!
The Ton Anniversary Release- Day 2
Honey Bee Stamps Cheerful Love Blog Hop!

Disclosure

Some affiliate links are used in my posts. This means that, should you click on one of my links and purchase something from that company, I will receive a small portion of the sale at no extra cost to you. I use the money earned from these sales to help maintain my blog. I so appreciate you visiting and, if you do choose to use one of my affiliate links, thank you so much for your support!
Copyright © 2026 ·Brunch Pro Theme · Genesis Framework by StudioPress · WordPress · Log in
Loading Comments...