• Skip to main content
  • Skip to primary sidebar
  • Skip to secondary sidebar

Sixth Street Sundries

Emily Midgett

  • Home
  • About Me
  • Contact
  • OLO Marker Color Swatch Chart
  • Shop

christmas

Simon Says Stamp Happy Camper Release Blog Hop-Day 2!

August 2, 2025

This post was sponsored by Simon Says Stamp. Thanks, Simon!

Hi friends! I am hopping along with Simon Says Stamp to share some inspiration using the new Happy Camper release. You should have arrived here from Lisa Addesa, and your next stop is Heather Ruwe. You can also start at the beginning at the Simon Says Stamp Blog! I was so inspired by my Christmas in July series from last month that I couldn’t resist adding some festive flair to my card for today’s hop, pulling in an ombré holiday color palette to work perfectly with the new Dual Diamonds Cover Plate. Let’s get started on the details of my project!

*I have gathered links to all of the products used at the bottom of the post for your convenience, using affiliate links. Thank you for shopping with my links! I truly appreciate your support for my work!*

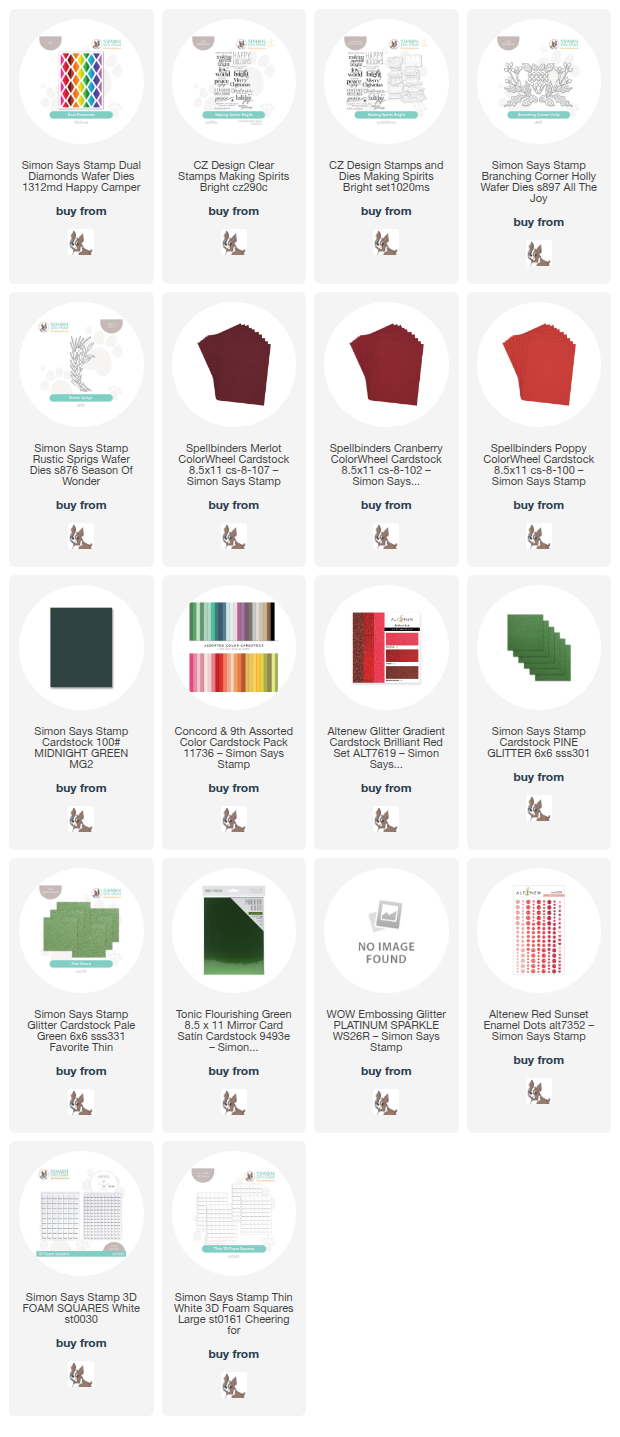
To begin, I selected sixteen (yes, sixteen!!) different shades of red and green cardstock to create my ombré color palette, bridging the gap between the complementary colors with a deep maroon glitter cardstock and equally intense Midnight Green cardstock, which I think work so nicely next to one another! I pulled out my scrap envelopes, which I have organized by color family, and selected strips about 1/2″ wide, working from a light coral-red to vibrant peridot green. I first die cut the black diamond outlines from the Dual Diamonds Cover Plate and adhered it to my card front, then die cut the individual strips of colored cardstock with the cover plate, adhering each row to the card base as I went to make sure that none of the pieces were lost. This definitely was a bit fiddly and required me to pay strict attention to my project, but I think it was totally worth it in the end!

I selected a holiday color palette so that I had an excuse to use the marvelous new Making Spirits Bright sentiment set. These sentiments are absolute perfection; the font pairings and generous size of the sentiments, as well as the delicate sentiment strips, make this set so versatile and useful for holiday cards! I heat embossed the two greetings on some deep wine cardstock using Platinum Sparkle embossing powder, then used the coordinating die cut and my trimmer to cut the sentiments out. I popped them up on the ombré card front with some foam adhesive, staggering them slightly.

To accent my sentiment focal point, I die cut the older Branching Corner Holly and Rustic Sprigs dies from some green cardstock, the same green that I used on two of the ombré strips. I adhered them to the card front with liquid and foam adhesive, creating a holiday foliage “bouquet” around my sentiment. I accented the greenery with some red enamel dots for berries, adding another element of texture and dimension to the card.

Well, that’s all for my project today! Now for some fun giveaway information:

Simon Says Stamp is giving away a $25 coupon to every stop on the hop from each blog’s comment section. Winners will be selected and posted on the Simon Says Stamp blog on Wednesday the 6th of August. Winners can email us to claim his/her prize! The more comments you leave along the hop, the more chances you have to win!

Simon Says Stamp is also offering a fabulous freebie with each purchase from the new Happy Camper release! You don’t need to do anything special; the lovely (and not-yet-released) Sunflower Dance stamp set will be automatically added to your order with any purchase from the Happy Camper release. Click HERE to see the entire release!

Don’t forget to check out Day 1 of this two-day blog hop for even more inspiration and prizes! Click HERE to start at the beginning on the Simon Says Stamp Blog.

Your next stop on the hop is Heather Ruwe. Thanks so much for stopping by today, and happy hopping!
Filed Under: simon says stamp Tagged With: branching corner holly, christmas, christmas card, die cutting, dual diamonds, holiday, holiday card, rustic sprigs

Poshta Designs Sneak Peeks-Day 2!

July 3, 2025

Hi friends! I am back with another project from the new Poshta Designs Christmas In July release. Today, we are introducing the Kringle Krew: a sweet grouping of your favorite holiday characters!! Meet Santa, Mrs. Claus, one of the elves, and a reindeer, easily customized to work with your favorite color palette. Lizzie herself inspired me so much with THIS sweet birthday banner that I decided to create my own and super size it to fit the Kringle Krew. Let’s get started with the details on my project!


*I have gathered links to all of the products used at the bottom of the post for your convenience, using affiliate links. Thank you for shopping with my links! I truly appreciate your support for my work!*

Reminder: All of the links for the products will be available after the official Christmas in July release on Saturday, July 5th, 2025 at noon Eastern time.

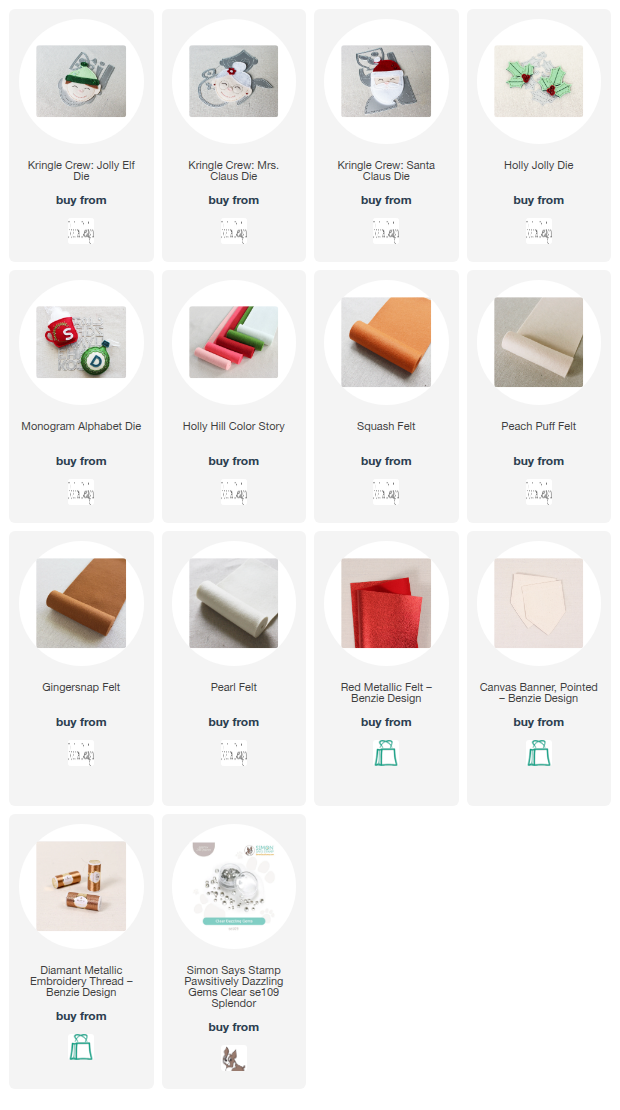
To start, I die cut all of the faces from Peach Puff felt from Poshta, then used Pearl felt for Santa’s beard and the greens and red from the Holly Hill Color Story for the hats.

I stitched everything together using the coordinating DMC floss, adding some coppery metallic thread from my stash for Mrs. Claus’s glasses!

To make Mrs. Claus a little festive and fancy, I cut the Holly Jolly die from the two different shades of green felt and two shades of pinky red included with the Holly Hill Color Story and tucked them on her bun. I also gave her some twinkling earrings using some gems from my stash!

I stitched all of my holiday characters onto a black canvas banner, placing them neatly in a row with Santa in the middle, of course!

I couldn’t help but add Santa’s jolly “ho ho ho” to the banner, so I die cut the letters from the Monogram Alphabet die set using metallic red foil felt. I stitched them to the banner with coordinating red thread, adding a period after each word with another sparkling gem.

I also added a pretty sprig of holly at the center of the point of the canvas banner, helping to fill in some of the empty space beneath my letters!

Finally, taking my inspiration from Lizzie’s banner that I linked above, I added some coordinating red pom pom trim around the edges of the banner, adhering the trim with Fabri-Tac glue. To make the back as neat as the front, I also adhered some holiday fabric that I have in my stash to cover up the stitches and the messy back of the trim. I added a black and white gingham ribbon with a bow to hold my banner on the wall, as well. I think this turned out just darling. I can’t wait to hang it up this Christmas!

Well, that’s all for my project today! Be sure to check out the Poshta Blog for all of the details on these new products, as well as more inspiration from Lizzie and the other, super talented guest creators! (Psst-there’s a gift card giveaway up for grabs, as well!) Thanks so much for stopping by today, and have a marvelous day!

PS: These new products will be available for purchase on Saturday, 7/5/25 at noon Eastern time!

Filed Under: Poshta Design Tagged With: banner, christmas, decor, embroidery, holiday, kringle krew, stitching

Fun With Felt: Baking Spirits Bright with Honey Bee Stamps + SALE!

December 30, 2024

Hi friends! I am back with another couple of felt projects today created using some absolutely darling products from the  Cozy Christmas release. I will admit that I have a felt and embroidery obsession right now; after my mom’s accident in November, I found it a very therapeutic way to channel my anxiety into something a bit more tangible than my normal projects. (Also, the shopping was a great distraction, lol) I also love giving Christmas gifts, and handmade Christmas gifts are the best ones to give, don’t you think?

*I have gathered links to all of the products used at the bottom of the post for your convenience, using affiliate links. Thank you for shopping with my links! I truly appreciate your support for my work!*

I don’t normally do “cute” very well, but I made an exception to create this adorable banner for my mom to give as a gift to her boss! I knew that I wanted to create some holiday kitchen decor using the adorable Lovely Layers: Christmas Cookies images, but needed to create a larger scale sentiment to fit the blank canvas banner that I had purchased. I decided to create a custom message by pairing some alphabet dies with the “bright” portion of the Merry & Bright die, die cutting the individual letters for the first two words using an older alphabet die set and some metallic bronze felt, then die cut the “bright” from some more bronze felt and using my sharp scissors to snip the extra letters off, creating a completely custom die cut word. I love it when a little extra creativity stretches your supplies even further! It doesn’t hurt that the font for “bright” is totally stunning.

After adhering the sentiment in the center of my black canvas pennant banner using felt glue, I began die cutting and assembling the sweet little cookies from the Lovely Layers: Christmas Cookies, keeping my color palette bright and very traditional. I made gingerbread men and ladies as well as some shaped sugar cookies, all in a vivid red, green, and white color palette! I adhered all of the components together with more felt glue, then used needle and thread to add some seed bead accents to each cookie

I adhered the finished cookies in a whimsical arrangement around the felt die cut sentiment, then used needle and metallic thread to create seed beads, sequins, and bugle bead “snowflakes” (or are they stars? I can’t decide.). These additional bits of sparkle help to add extra texture and fill in some of the larger gaps left between the cookies. Finally, I sewed on a little coordinating metallic thread bow for one last bit of shimmer and texture! So cute, right? I hope that my mom’s boss loved it as much as I do!

With my newfound felt obsession, I am now on the lookout for any dies that might be useful with felt, even if they are maybe not used for what I see in my head! Hey, that’s called “thinking outside the box,” right? I used the Christmas tree from the Lovely Layers: Window Holiday Add-On die set to create a sweet embroidery hoop ornament, as well as some ornaments and pine boughs from the Postcard: Holiday Add-On. Pairing these images with some simple stitching and beading allowed simple shapes to become super special and elegant!

I die cut a couple of pine boughs from the Postcard: Holiday Add-On using kelly green felt and adhered them to my neutral linen embroidery hoop, then used some lovely shades of red, magenta, lilac, and royal purple felt to add ornaments and bows to my Christmas tree branch. To embellish my plain felt shapes, I used needle and thread with seed beads to make the ornaments more ornate and add some fabulous sparkle! Finally, I added a pretty pink bow and loop, as well as some sparkling Prism gems from Simon Says Stamp.

For my last, miniature ornament, I used the plain Christmas tree from Lovely Layers: Window Holiday Add-On, cutting the tree from some beautiful muted teal felt and embellishing it with iridescent seed beads and sequins. I used the same simple stitches to add some silver stars and a few more floating seed beads (snowflakes?) around the tree, finally finishing it off with some sparkling silver ribbon!

Well, that’s all for my felt projects for this holiday season. I am contemplating continuing to make them throughout the year, just because I enjoyed it so very much, and I have so many fun dies with which I could put to work with the felt!

Now, for something even more amazing, my friends at Honey Bee Stamps have their entire store on sale for a whopping 30% off in honor of Melissa’s birthday! You don’t have to even enter a coupon code; the discount is automatically applied at checkout! Click HERE to start shopping! But don’t wait, because the sale ends on 12/31/24 at midnight PST.

Thanks so much for stopping by, and happy shopping!

Filed Under: Honey Bee Stamps Tagged With: christmas, christmas card, embroidery, embroidery hoop, felt, holiday, holiday card, home decor, lovely layers christmas cookies, lovely layers window holiday, ornament, postcard holiday, stitching

Fun with Felt: Traditional Holiday Imagery Using New Honey Bee Stamps Dies!

December 22, 2024

Hi friends! My dear friends over at Honey Bee Stamps very kindly sent me some of their exquisite new holiday products from the Cozy Christmas release with which to play, and I went a little nutty creating some felt home decor and ornaments. Working with anything sewing-related has always been incredibly intimidating to me, but I recently discovered that you can use felt and felt glue in almost exactly the same way that you can use paper and regular glue! It seriously has opened up a whole new world (and new shopping opportunities) for me! I learned a few (very simple) stitches to add some bead and sequins adornments, and dug out my hot glue gun and ribbons to create some lovely gifts to accompany our annual cookie boxes for friends and family. I wanted to share them here to hopefully inspire you to try something new, even if it is a bit intimidating! Let’s get started with the details on this first round of projects (because, like I said earlier, I went a bit nutty!).

*I have gathered links to all of the products used at the bottom of the post for your convenience, using affiliate links. Thank you for shopping with my links! I truly appreciate your support for my work!*

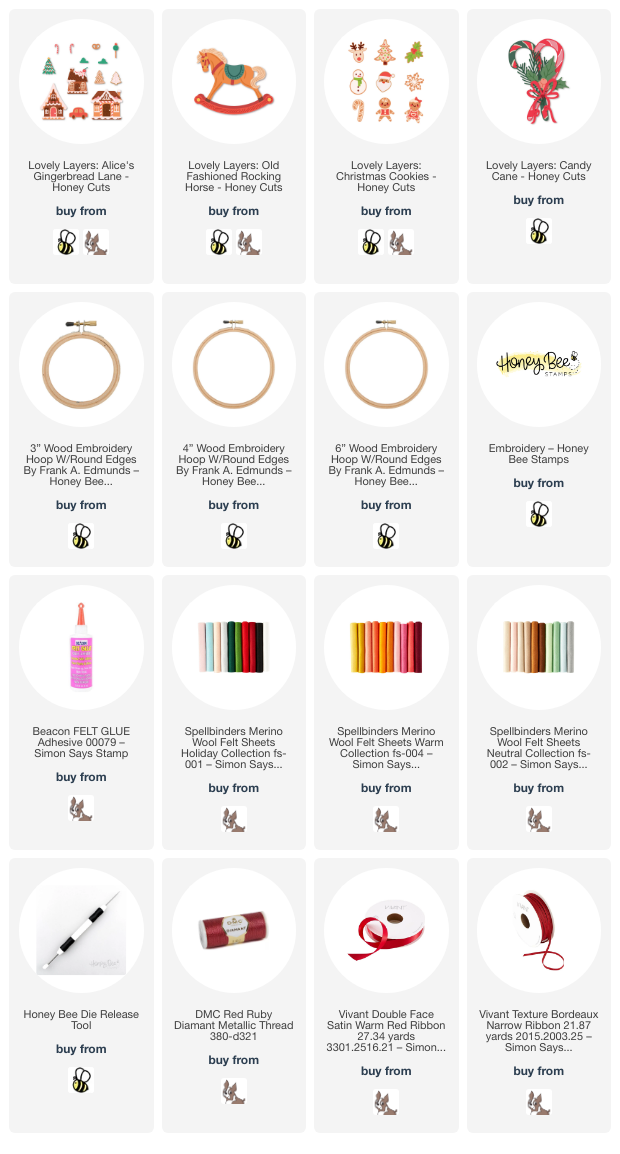
The absolutely darling Alice’s Gingerbread Lane dies were up first; I couldn’t resist creating some adorable embroidery hoop ornaments and home decor pieces with these exquisitely detailed dies! The die set contains a ton of different pieces for each house, but with the handy color guide included with each die set and the debossed details on the die cuts themselves, each of these houses are super simple to assemble. I have been acquiring felt in lots of different shades lately, but thought that it would be best to be as traditional as possible with these little houses, sticking to that cinnamon brown for the gingerbread itself with lots of white, red, and green, with a few touches of baby pink!

After I had loaded up my 4″ embroidery hoop with some textured linen material in a natural white color, I used felt glue to adhere the felt die cuts to their appropriate spot. For the super delicate pieces, I did find it easier to place a blob of glue on a piece of scrap paper and use the super fine tip on the die release tool to “paint” the glue on to these super thin pieces, like the windows. I added some stitched details to the door and the roof of the gingerbread house, then used seed beads to add some extra little details and lovely texture to the house and tree, as well as some clear glass snowflakes to the background. I used some gorgeous red ribbon from Vivant to add a loop to create my ornament as well as a bright red bow, which I adhered with my trusty hot glue gun. I am absolutely in love with how this one turned out!

My second house is on a larger 6″ hoop to accommodate the height on the gingerbread house from the Alice’s Gingerbread Lane dies. I again die cut each of the layers from different colors of felt, this time adding in some metallic bronze felt for the eaves and base of the house and some metallic red felt for the garland on the tree. I adhered all of the pieces together with the same felt glue and added the finished pieces to my embroidery hoop with felt glue. To add the beads and stitched stars/snowflakes, I used some gorgeous metallic red embroidery thread. While most of my felt pieces were made to be given away for Christmas gifts, I definitely decided to keep this one for myself to put on my own mantle! It’s so cute!

My next projects featured some ornaments a bit simpler in design using some new and one older die sets. I always make a huge variety of cookies to give out to friends and family in tins, and this year I wanted to include a little something handmade. These dies were perfect for creating a little handmade gift to decorate the top of the tins and, hopefully, our loved ones’ Christmas trees!!

After placing some adorable polka dotted fabric in my 3″ embroidery hoop, I used felt in traditional taupe and cream to create the horse from the adorable Lovely Layers: Old Fashioned Rocking Horse, adding some light blue and red accents for a bit of color. I used some embroidery floss and a satin stitch over the top of the reins, bridle, and saddle to make them a bit neater and secure them down more permanently. I have found that the teeny felt die cuts fray a bit more easily, but you can make them a bit more sturdy with some glue or by adding stitching over the top.

For my next project, I used the tree from the Lovely Layers: Christmas Cookies die set with some green felt and lots of seed beads and sequins to create this festive and sparkling Christmas tree. So much sparkle and detail on this one!

Finally, I created another 4″ ornament with the accents from Lovely Layers: Candy Cane, an older die set that features not only a beautifully detailed layered candy cane image, but also some gorgeous foliage, berries, and a fluffy bow. I cut the foliage from two different shades of green, adhering them with dabs of felt glue; I again used the tip of my die release tool to “paint” the delicate pine sprigs with glue to securely adhere them to my textured linen fabric. I added the fluffy bow to my foliage arrangement, cut from some more metallic red felt, finally adding some stitched details to the holly leaves and some sequins and beads. I finished this one off with another loop of ribbon for the hanger and a fluffy bow at the top!

Well, that’s all for my projects today. I have a few more blog posts planned using these marvelous new dies, so stay tuned! A whole new stitching world has been opened to me, along with a new artistic medium to learn in my spare time. Thanks so much for stopping by today, and have a marvelous day!

Filed Under: Honey Bee Stamps Tagged With: alice's gingerbread lane, christmas, embroidery, felt, gift, holiday, home decor, lovely layers: candy cane, lovely layers: christmas cookies, lovely layers: old fashioned rocking horse, stitching

Painted Holiday Heart with Poinsettia Swag from Simon Says Stamp!

November 22, 2024

This post was sponsored by Simon Says Stamp. Thanks, Simon!

Hi friends! I am back with another project featuring my Poinsettia Swag illustration, this time with some different and unique-to-me mediums. I have been really enjoying creating things other than cards lately, and raided my local dollar store to find different items that I could pair with my stamps and dies. I found these birch wood heart cutouts and thought they’d make perfect ornaments or little wall hangings! I used the Altenew Acrylic Markers to add some color to my Poinsettia Swag illustration from the new Festive Fun release from Simon Says Stamp. Let’s get started with all of the details!

*I have gathered links to all of the products used at the bottom of the post for your convenience, using affiliate links. Thank you for shopping with my links! I truly appreciate your support for my work!*

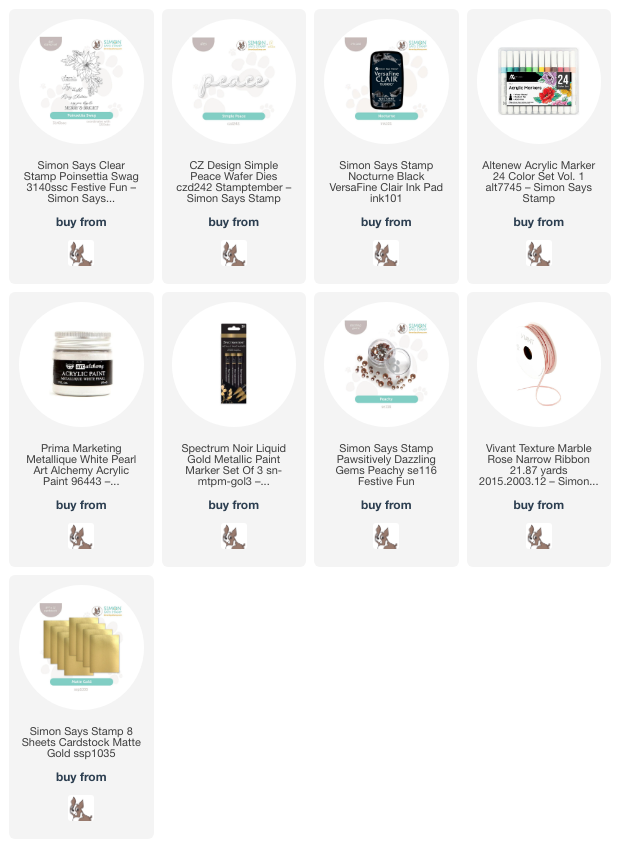
I began my project by painting the entire heart with some pearlescent white paint. I did paint it with multiple coats of this white pearl paint, allowing some dry time between each coat to allow for maximum coverage. After I had allowed the white pearl paint to dry overnight, I used Nocturne ink to stamp the floral image directly onto the painted wooden heart. I used my heat gun to dry the ink a bit, then began coloring.

The Altenew Acrylic Markers are great fun for projects like this; their opacity and viscous nature means that they can be applied to a variety of surfaces, including this painted wood! I used the markers in shades of coral-y red, peach, and minty greens to add vibrant color to the poinsettia images, then used the Spectrum Noir Liquid Gold markers to enhance the details on the individual petals. The addition of this golden metallic marker helps to add a level of luxuriousness to the project and helps to further define each individual petal. I also used the gold marker to add some little dots here and there around the bouquet, almost like I would with sequins or gems! I think it helps to balance out the images a bit.

Once I had finished coloring the image, I die cut the detail layer of the Simple Peace Die from Simon Says Stamp’s Matte Gold Metallic cardstock once and twice more from plain white cardstock, adhering the three layers together with liquid adhesive. I added the simple sentiment to the painted wooden panel with liquid adhesive, then added a few Peachy Pawsitively Dazzling Gems around the bouquet. Finally, I threaded some coordinating ribbon through the holes at the top of the wooden heart to create a hanger.

Well, that’s all for my project today. I love creating things that are a bit more tangible and purposeful than cards… things that hopefully would be kept for a bit longer than a card, ha. (I can’t be the only one who struggles thinking about their hard work getting tossed in the trash!) This would be so pretty on a Christmas tree as an ornament, or even on a door knob or just as a wall hanging, I think! Thanks so much for stopping by today, and have a marvelous day!

Filed Under: simon says stamp Tagged With: acrylic markers, altenew acrylic marker, christmas, home decor, liquid gold, metallic paint, no line coloring, original illustration, poinsettia swag, simple peace

  • « Go to Previous Page
  • Page 1
  • Page 2
  • Page 3
  • Page 4
  • Page 5
  • Interim pages omitted …
  • Page 17
  • Go to Next Page »

Primary Sidebar

  • Facebook
  • Instagram
  • Pinterest
  • YouTube

Favorite Shops

Secondary Sidebar

Subscribe

Enter your email address to subscribe to this blog and receive notifications of new posts by email.

Instagram
Something is wrong.
Instagram token error.
Follow
Load More

Archives

Tags

3D embossing folder alcohol markers better press birthday birthday card blog hop card kit christmas christmas card christmas tag colored pencil copic copic coloring Daniel Smith die cutting embossing folder embroidery felt giveaway holiday holiday card hot foil ink blending karin brushmarker pro layered stencil masculine my monthly hero new release no line coloring no line watercolor OLO marker olo markers original illustration pawsitively saturated rainbow shaker card slimline stamping stamptember stencil thank you thinking of you valentine's day video watercolor

Popular Posts

Simon Says Stamp Joy For You Blog Hop- Day 1!
Watercolor Poinsettia Card and Tag with Tim Holtz and Simon Says Stamp!
Cottagecore Christmas Framed Artwork with New Simon Says Stamp!
Fluted Frames and Tags with New Simon Says Stamp!
Simon Says Stamp Glory to the Newborn King Holiday Kit-Part II!
Warmth and Love at Christmastime with New Simon Says Stamp!
Cottagecore Canvas with New Simon Says Stamp Shine On Release!
Honey Bee Stamps 4th Anniversary Celebration!
Shaped Holiday Shaker Card with New Simon Says Stamp Jolly Season Card Kit of the Month!
Simon Says Stamp Card Kit November 2026: Jolly Season!

Disclosure

Some affiliate links are used in my posts. This means that, should you click on one of my links and purchase something from that company, I will receive a small portion of the sale at no extra cost to you. I use the money earned from these sales to help maintain my blog. I so appreciate you visiting and, if you do choose to use one of my affiliate links, thank you so much for your support!
Copyright © 2026 ·Brunch Pro Theme · Genesis Framework by StudioPress · WordPress · Log in
Loading Comments...