• Skip to main content
  • Skip to primary sidebar
  • Skip to secondary sidebar

Sixth Street Sundries

Emily Midgett

  • Home
  • About Me
  • Contact
  • OLO Marker Color Swatch Chart
  • Shop

classic correspondence

VIDEO: Air Mail Inspired Belated Birthday with Pinkfresh Studio!

May 15, 2025

Hi friends! I am up on the Pinkfresh Studio YouTube Channel today with this fun “air mail-inspired” project featuring the new Classic Correspondence product suite from Pinkfresh Studio! You can watch the full video below or HERE on YouTube!

If you can’t watch the video or prefer written instructions, I will give a brief rundown of how I created this card!

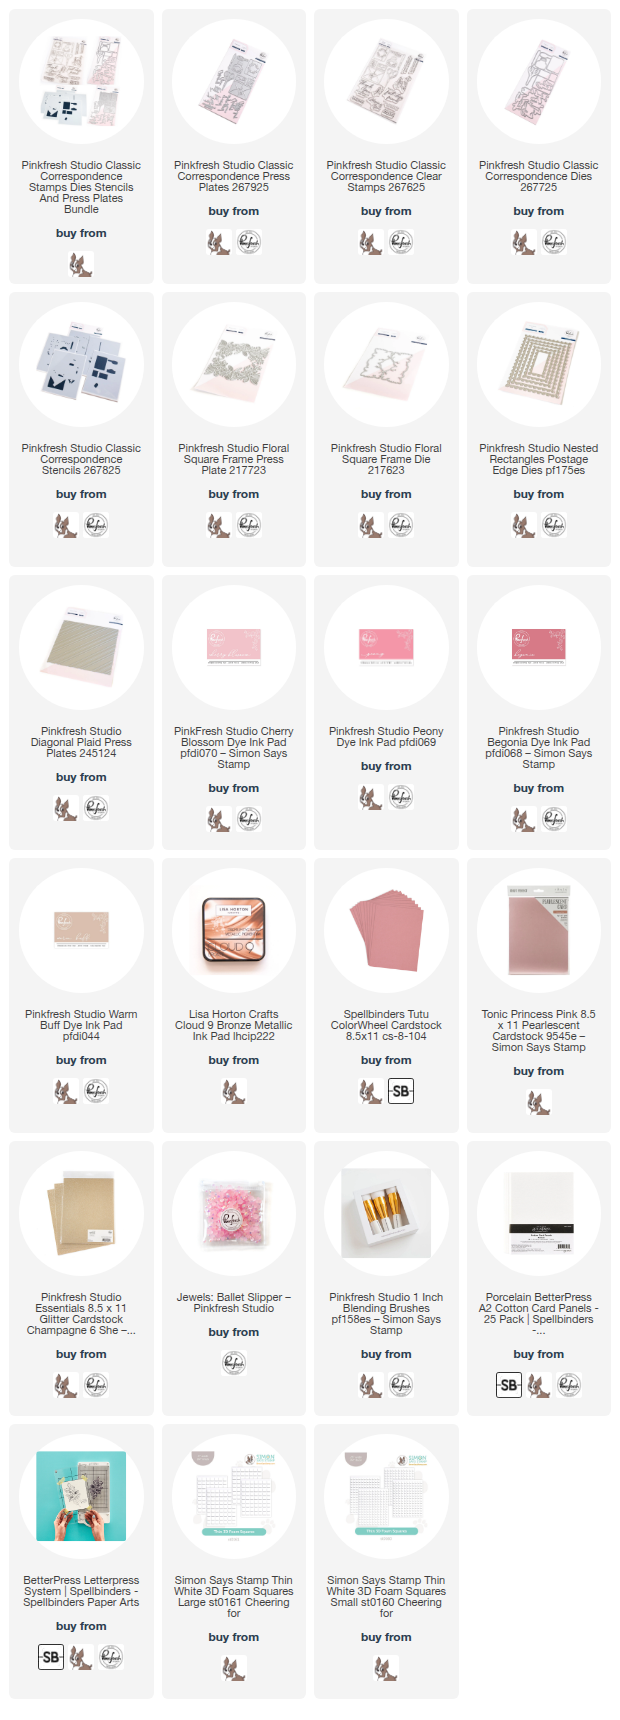
To begin, I inked up the Diagonal Plaid Press Plate with some Metallic Bronze Ink from Lisa Horton Crafts. This pigment ink works beautifully with press plates and adds a beautiful, subtle shimmer to your projects! While I had my Better Press System out, I used Warm Buff ink from Pinkfresh Studio to press the Classic Correspondence Press Plate onto some Better Press cardstock, then used the trick that I learned from Carissa Wiley to press the gorgeous Floral Square Frame Press Plate into some pearlescent pink cardstock without inking the plate, creating beautiful and intricate texture on the coated cardstock. (I demonstrate this technique in several videos on the Pinkfresh YouTube Channel if you would like to see it in action!)

After I had pressed all of the images, I used the Classic Correspondence Stencils with Cherry Blossom, Peony, Begonia, and Warm Buff inks from Pinkfresh Studio and the fabulous Pinkfresh Studio 1″ Blending Brushes to add a warm, feminine color palette to the mail images from Classic Correspondence. I used the fabulous one-pass die to die cut all of the stenciled images, then die cut the detailed Floral Square Frame image. I also die cut the large Postage Edge Dies from Pinkfresh Studio’s Glitter Champagne cardstock, then trimmed the long edges off of the die cut to use as an accent for my colored cardstock panel. I adhered the glittery postage accent strips so that they were peeking out from around my Tutu pink cardstock piece, adding another touch of sparkle and helping to break up the contrasting patterns on the card.

For the greeting, I used the same Bronze ink to stamp the sentiments from the Classic Correspondence Stamp set, then added clear embossing powder over the top to make the sentiments even more crisp, helping highlight them amongst the busy background. After trimming and die cutting the sentiment components, I used liquid and foam adhesive to adhere al of the elements to the card front, finally adding a few Ballet Slippers Jewels to help fill in some of the bare spots on my card design.

Well, that’s all for my project today! It’s always fun for me to mix and match new and old products, and the goodies from Pinkfresh work so well together even if they’re not necessarily designed to coordinate. Thanks so much for stopping by today, and have a marvelous day!

Supplies used (affiliate links used at no extra cost to you-thank you for helping to support my work!):
Filed Under: pinkfresh studio Tagged With: better press, classic correspondence, diagonal plaid press plate, floral square frame, ink blending, layered stencil, nested rectangles, postage edge dies, press plate, stencil

Pinkfresh Studio “Pure Bliss” Release Blog Hop

February 11, 2025

Hi friends! I am hopping along with my friends at Pinkfresh Studio to help introduce the new Pure Bliss collection for February 2025! You should have arrived here from Isha, and your next stop is Erica. You can also start at the beginning over on the Pinkfresh Studio Blog. We had about 5 days with absolutely stunning temperatures amidst the bitterly cold days, so I am channeling that springtime feeling with my projects today, adding in a bit of icy blue to cool things back down to the winter temps that came back with a vengeance. Let’s get started with the details on my projects!

*I have gathered links to all of the products used at the bottom of the post for your convenience, using affiliate links. Thank you for shopping with my links! I truly appreciate your support for my work!*

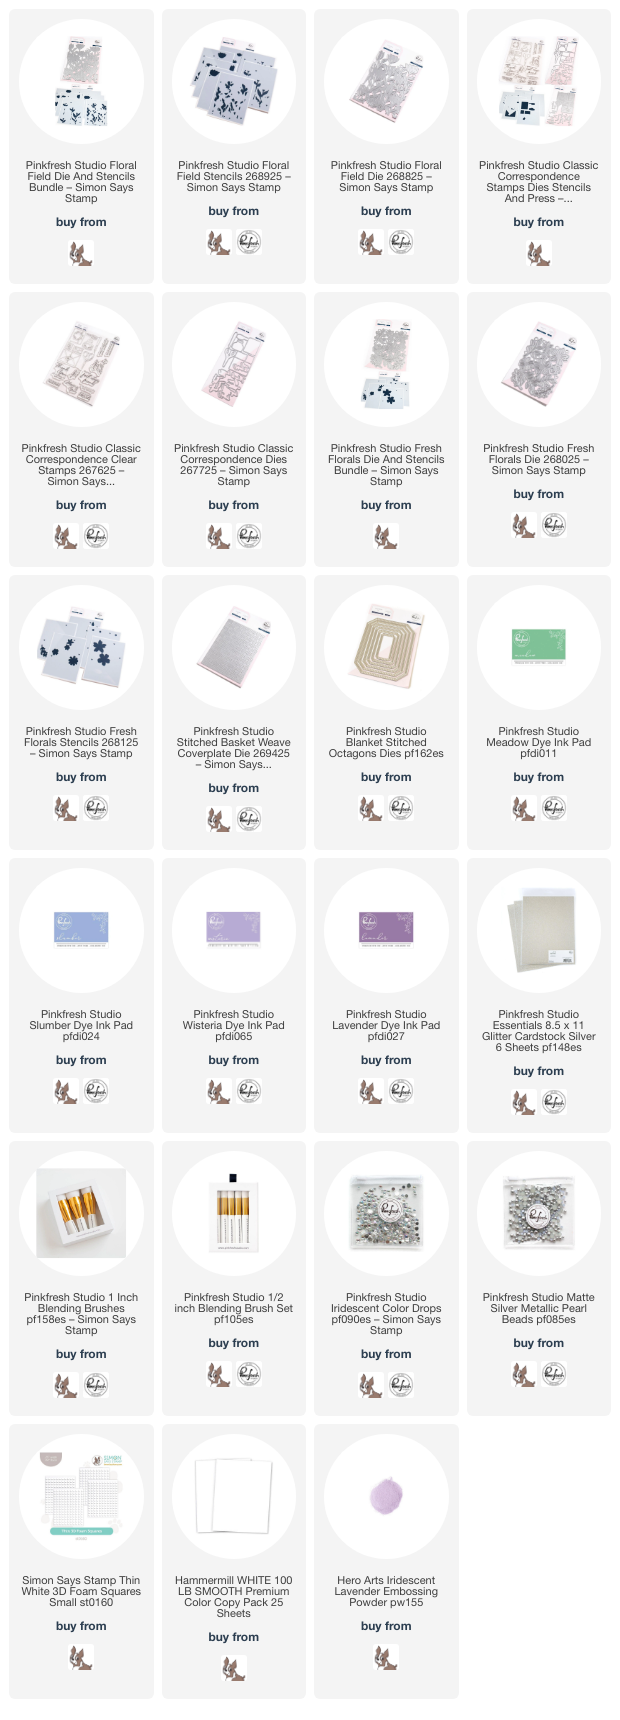
For both of my projects today, I chose to work with a cool palette featuring Meadow, Wisteria, Lavender, Slumber inks, pulling in the soft blues and purples of late winter with the cheery, vibrant fresh green of early spring. The images in the new Floral Field die and stencil set reminded me so much of a field of tulips!

To begin, I die cut a panel of plain white cardstock using the new the new Floral Field die, and I even contemplated leaving it plain, allowing the beautiful debossed details to enhance the beauty of the image. I decided to pair those gorgeous ink colors with the coordinating layering stencils, however, using Pinkfresh Studio’s exceptional blending brushes to add super soft blending. I kept the purple tulips simple, concentrating the color towards the bottom of hte bloom, and kept the color concentrated at the top of the blue blooms, fading gently down into white towards the base of the bloom. For the greenery, I kept things simple with one shade of ink, only increasing or decreasing the amount of pressure used to make the images more or less vibrant.

After I had finished blending the beautiful field of flowers, I used the large blending brushes to gently blend Lavender, Slumber, and Meadow inks on a panel of plain white cardstock, concentrating the green down towards the bottom to indicate “grass,” while softly blending the blue and purple together to create a serene sky backdrop. I popped up the floral die cut on the blended background with some foam adhesive, then added a die cut Blanket Stitched Octagons frame, cut from plain white cardstock. For the greeting, I used a sentiment from the Classic Correspondence stamp set, stamping the sentiment in Lavender, then again directly over the top with embossing ink, then adding Iridescent Lavender embossing powder, which adds a delightful iridescent shimmer to the sentiment, the unique texture of which helps the sentiment to stand out amongst the matte blended background. Finally, I added a smattering of Iridescent Bubble Drops for an additional bit of shine!

For my second project, I continued my cool, springy color palette into this card featuring the new Fresh Florals stencil + die set. The new standalone floral die sets from Pinkfresh Studio are so much fun to play with, because not only do they feature Pinkfresh’s unique one-pass die design allowing you to die cut many images at once, the coordinating stencils allow you to blend multiple colors for the different blooms to create tons of versatility within each product suite! I used the same Meadow, Wisteria, Lavender, and Slumber color palette to blend the flowers and greenery from the Fresh Florals stencil set onto a panel of white cardstock. I kept the colors very light, concentrating the darkest areas around the edges of the stenciled images and fading towards the center of each bloom. I used the 1/2″ blending brushes to add some touches of Slumber on the tips of the greenery, adding some fun color gradation on the foliage. I also die cut another set of the Fresh Florals images from some Pinkfresh Studio Silver Glitter cardstock to use for the flower centers and to add some sparkling foliage to my bouquet.

For the background, I used the new Stitched Basketweave die on a panel of coordinating lavender cardstock, trimming the long edges so that I could offset the panel on a piece of coordinating cornflower blue cardstock. The Stitched Basketweave die is a crafty staple design; the neutral, consistent pattern provides lovely texture behind your focal point without detracting from it, while also keeping the backdrop subtly interesting. I popped up the basketweave strip with some thin foam adhesive and added a vellum Nested Hexagon Blanket Stitch Die cut, around which I built my bouquet of stenciled and die cut flowers. For the greeting, I stamped a sentiment from the Classic Correspondence stamp set onto some light gray cardstock using white pigment ink, then added some more Iridescent Lavender embossing powder to add luminous shimmer and a touch of subtle purple color. I die cut the sentiment with its coordinating die and tucked it amongst the flowers. Finally, I added some touches of silver with the glittering foliage, flower centers, and some Matte Silver Pearls, finishing everything off with a delicate white silk bow.

Well, that’s all for my projects today! Now for some fun giveaway information:

Pinkfresh Studio will give away the full release on the Pinkfresh blog and YouTube channel. They also will give away TEN $50 gift cards along the hop. The winners will be selected from the comments.
All winners will be posted on February 19, 2025, on our GIVEAWAY PAGE. Winners must check that page and claim their prize within 2 weeks.

Here’s the full hop list in case you get lost:

You are invited to the Inlinkz link party!

Click here to enter

Thanks so much for stopping by today, and happy hopping!

Filed Under: pinkfresh studio Tagged With: blanket stitched octagons, classic correspondence, floral field, fresh florals, ink blending, layered stencil, stitched basket weave

Primary Sidebar

  • Facebook
  • Instagram
  • Pinterest
  • YouTube

Favorite Shops

Secondary Sidebar

Subscribe

Enter your email address to subscribe to this blog and receive notifications of new posts by email.

Instagram
Something is wrong.
Instagram token error.
Follow
Load More

Archives

Tags

3D embossing folder alcohol markers better press birthday birthday card blog hop card kit christmas christmas card christmas tag colored pencil copic copic coloring Daniel Smith die cutting embossing folder embroidery felt giveaway holiday holiday card hot foil ink blending karin brushmarker pro layered stencil masculine my monthly hero new release no line coloring no line watercolor OLO marker olo markers original illustration pawsitively saturated rainbow shaker card slimline stamping stamptember stencil thank you thinking of you valentine's day video watercolor

Popular Posts

Simon Says Stamp Sending Cheer Blog Hop- Day 2 + Freebie + Giveaway!
Joyful Snowman with New Simon Says Stamp Sending Cheer Release!
Simon Says Stamp Sending Cheer Release: Now Available!
Altenew October 2026 Release Blog Hop + Giveaway!
February 2018 My Monthly Hero Blog Hop!
Altenew March 2020 Release Blog Hop+Giveaway!
Special Release: Simon Says Stamp Limited Edition STAMPtember Christmas Card Kit!
Simon Says Stamp Cozy & Bright Inspiration, Part Two!
Waffleflower December Release Blog Hop!
Altenew Build A Flower Japanese Mum Blog Hop!

Disclosure

Some affiliate links are used in my posts. This means that, should you click on one of my links and purchase something from that company, I will receive a small portion of the sale at no extra cost to you. I use the money earned from these sales to help maintain my blog. I so appreciate you visiting and, if you do choose to use one of my affiliate links, thank you so much for your support!
Copyright © 2026 ·Brunch Pro Theme · Genesis Framework by StudioPress · WordPress · Log in
Loading Comments...