• Skip to main content
  • Skip to primary sidebar
  • Skip to secondary sidebar

Sixth Street Sundries

Emily Midgett

  • Home
  • About Me
  • Contact
  • OLO Marker Color Swatch Chart
  • Shop

colored pencil

Colored Pencil Daisy Frame with New Simon Says Stamp!

August 10, 2026

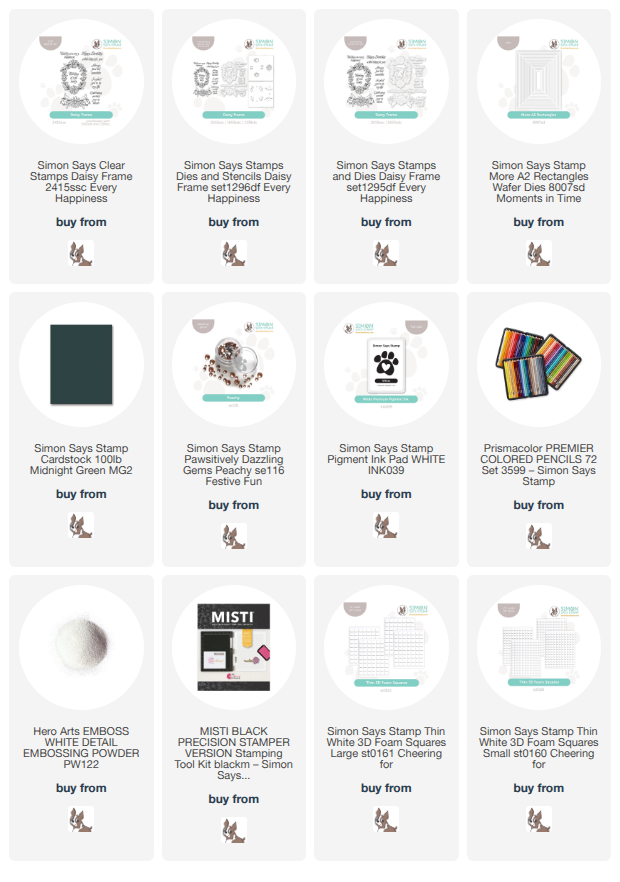
This post was sponsored by Simon Says Stamp. Thanks, Simon! *I have gathered links to all of the products used at the bottom of the post for your convenience, using affiliate links at no extra cost to you. Thank you for shopping with my links! I truly appreciate your support for my work!*

Hi friends! I am back today with another project featuring my latest design for Simon Says Stamp: Daisy Frame! This pretty stamp set was released during the Simon Says Stamp Every Happiness release (click HERE to check out the entire release!), and it features two different daisy arrangements with lots of gorgeous sentiments, and of course you can also purchase fantastically detailed dies and even simple coloring stencils! After creating THIS card in which I enhanced the stenciled images with some light colored pencil shading, I chose to put my colored pencils to use again on their own with this inlaid project. Let’s get started with the details on how I created this dramatic thinking of you card!

To begin, I placed the large frame die from the Daisy Frame product suite in the (approximate) center of an A2 card front created using Midnight Green Simon Says Stamp cardstock. I reserved the positive die cut for another project, then placed a clean A2 card front in the same Midnight Green cardstock in my MISTI and placed the negative die cut leftover over the top, lining up both pieces of cardstock in the corner of my MISTI. I then placed the coordinating daisy frame stamp from Daisy Frame within the negative die cut and closed the lid of my MISTI. This technique allows me to place the stamped image exactly in the center of the die cut window!

After I had placed my stamp in the proper spot, I stamped the image onto that deep green cardstock using Simon Says Stamp White Pigment Ink. I find that stamping the images on which I intend to color using colored pencils onto dark cardstock with the White Pigment Ink works a treat; the white pigment ink sits atop the cardstock rather than sinking down into it like a dye ink, so the lines get reabsorbed into the opaque colored pencil coloring! I used colored pencils in shades of coral and cool jungle green to color this detailed image with a no-line coloring style, and you can see in the photos how nicely that white pigment ink is absorbed into the colored pencil coloring, making it look like I drew this wreath by hand! (Sneaky, sneaky!)

After I had finished coloring the image, I placed the negative die cut frame over the top, centering it over the stamped image and adhering the panel with thin foam adhesive squares. This is a hard one to see in photos because of the dark cardstock, but the raised frame adds a bit more dimension and interest to the card front. I wanted to keep the color palette simple, so instead of adding any more colors or metallic accents, I decided to stamp the greeting from Daisy Frame onto more Midnight Green cardstock using White Pigment Ink and added white embossing powder over the top. I die cut the finished sentiment with it’s coordinating die, then placed it in the center of the floral wreath image with a double layer of foam adhesive to help it pop from the deeply saturated background. I thought that the card could use a bit more texture around the edges, so I die cut the More A2 Rectangles die from some more Midnight Green cardstock and adhered the largest one to the card front using liquid adhesive. Finally, I added some Peachy Pawsitively Dazzling Gems for a bit of sparkle!

Well, that’s all for my project today! I love using coordinating dies to create inlaid images, and creating these pretty coral daisies on this dramatically dark green cardstock was such a fun way to blend the two techniques. Thanks so much for stopping by today, and have a marvelous day!
Filed Under: simon says stamp Tagged With: colored pencil, condoloences, daisy frame, midnight green, more A2 rectangles, no line coloring, original illustration, thinking of you

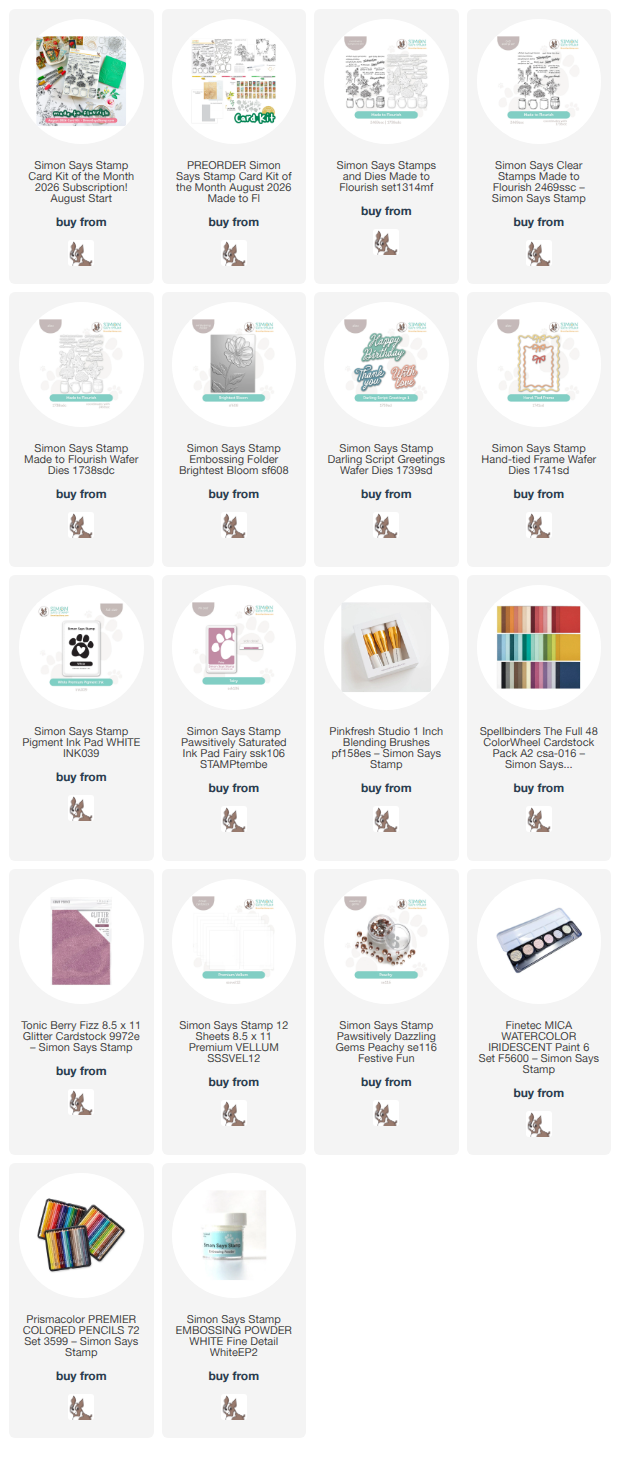
Simon Says Stamp August 2026 Card Kit of the Month: Made to Flourish!

July 14, 2026

This post was sponsored by Simon Says Stamp. Thanks, Simon! *I have gathered links to all of the products used at the bottom of the post for your convenience, using affiliate links at no extra cost to you. Thank you for shopping with my links! I truly appreciate your support for my work!*

Hi friends! The new Simon Says Stamp August 2026 Card Kit is now available for preorder, and it’s such a stunner! With summertime comes verdant gardens and vibrant flowers, and the Made to Flourish kit pays homage to them so beautifully! (Click HERE to see all of the details on the kit!)

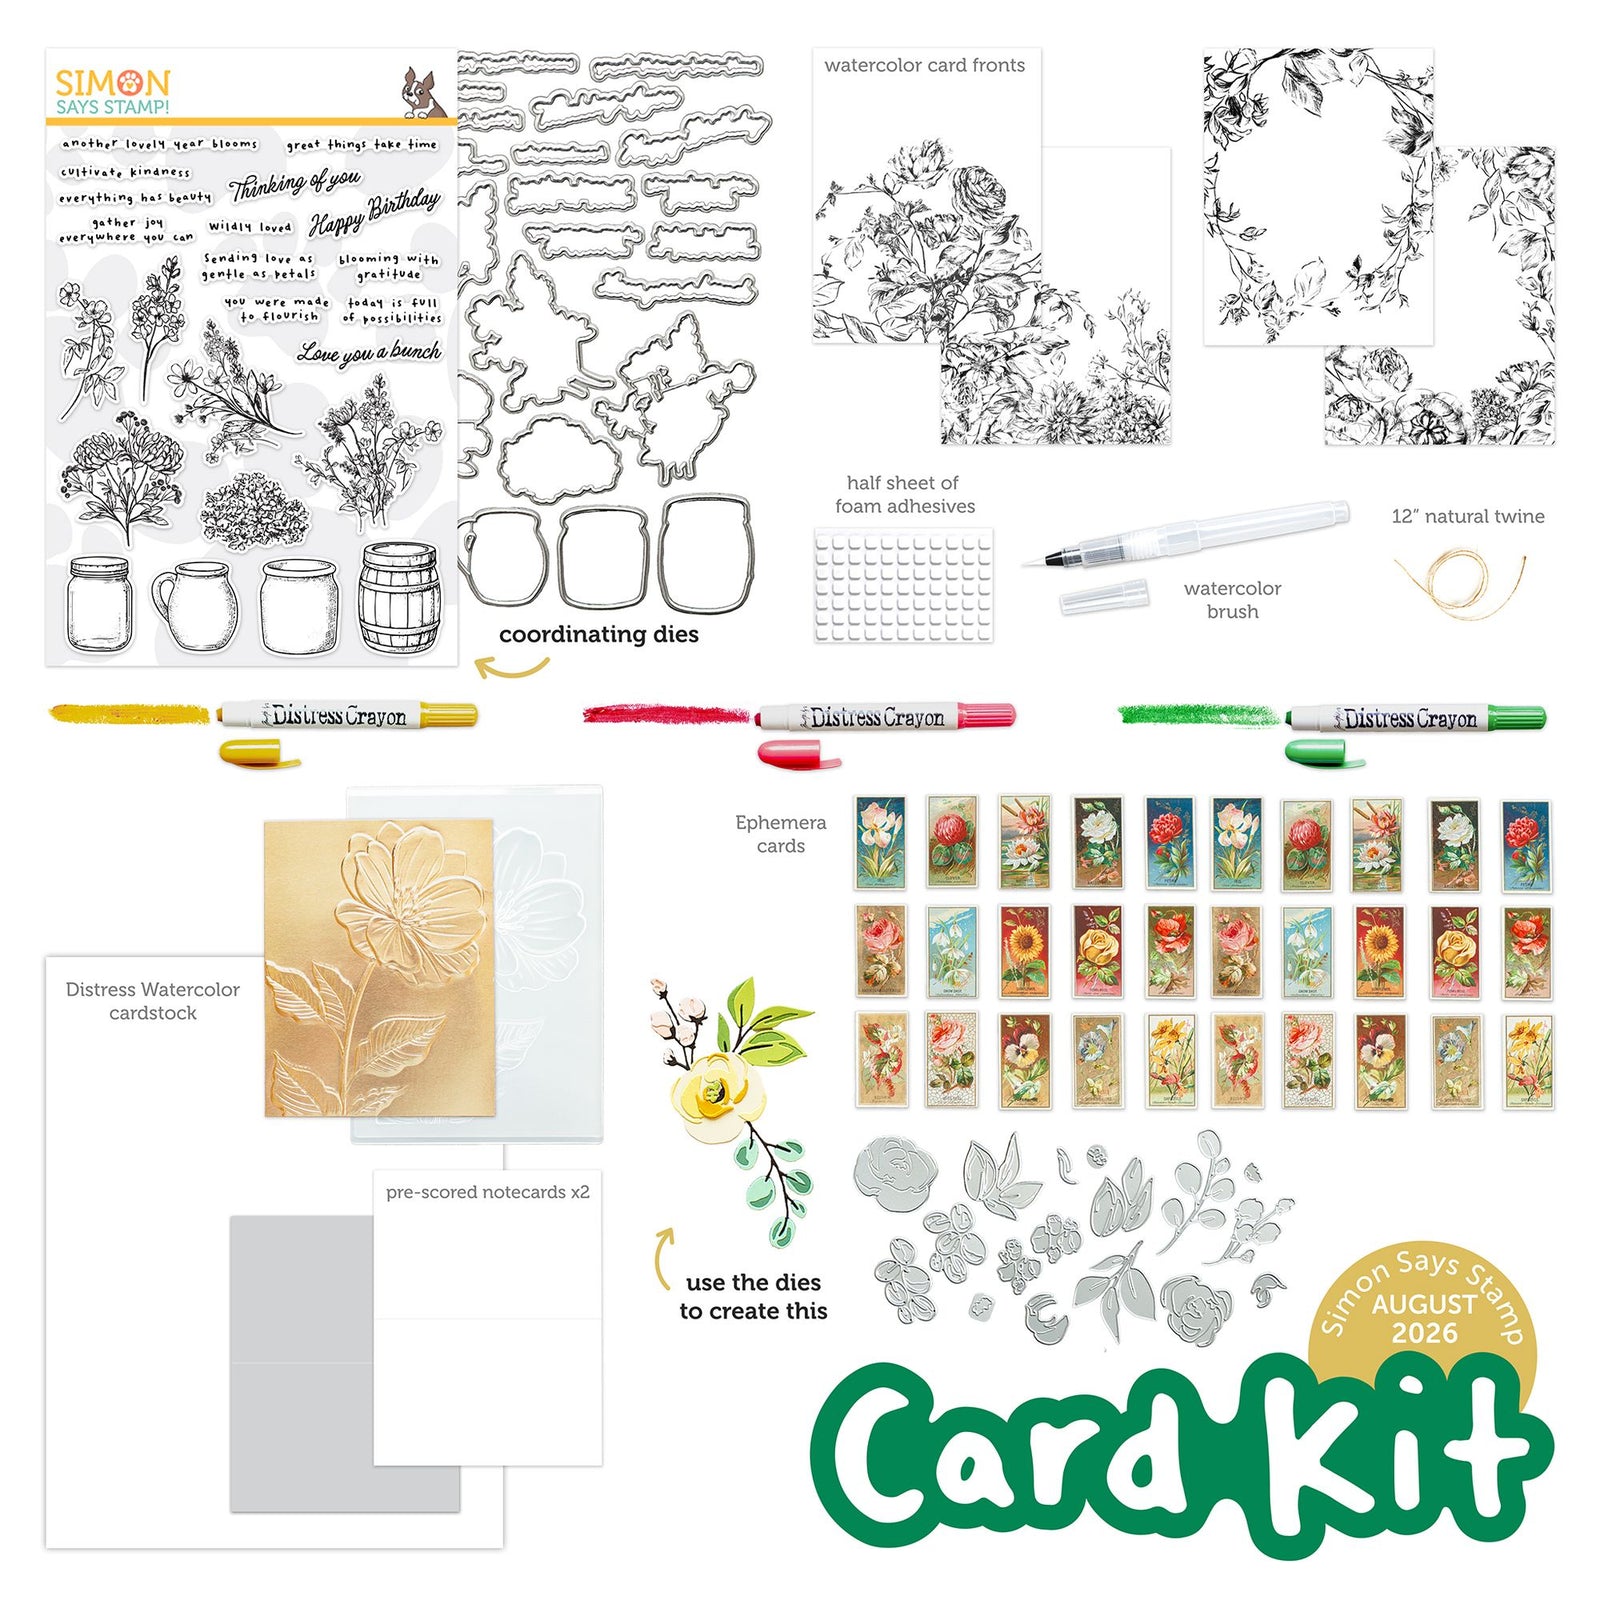
Here’s a sneak peek of the kit’s contents:

The amount of product in this kit is truly incredible; not only do you receive a fabulous new embossing folder, standalone die set, ephemera, and papers, but you also receive a gorgeous 6×8 stamp set with coordinating dies. Incredible value, right? The items retail for $125 when purchased individually, but you can purchase this amazing kit (while supplies last!) for only $44.99 (click HERE) or $39.99 for kit subscribers! (Click HERE to see how to become a subscriber!)

Sometimes, I find myself in a bit of a color rut, and when that happens, I like to pull out my Pinterest boards and look for an inspiring color palette. This orchid, peach, and blush color palette really spoke to me, so I selected several shades of colored cardstock from my stash and decided to use that as the creative kickoff point for my projects! I love pairing colored pencils with colored cardstock, so I knew that I would be pairing the florals from that gorgeous new Made to Flourish stamp set with my colored pencils and pretty pink cardstock!

For my first card, I chose to focus on that spectacular bloom from the new Brightest Blooms Embossing Folder, highlighting the details with some ink blending and sparkling watercolor gilding! I ran a panel of lavender-pink cardstock through my die cutting machine using the Brightest Blooms Embossing Folder. I then used a blending brush to lightly blend Fairy Pawsitively Saturated Ink around the edges of the embossed panel, keeping the embossed image clean.

After I had finished blending, I used iridescent glitter watercolors to “gild” the details of the flower and foliage, adding some lovely sparkle to the focal point. I also splattered some more sparkling watercolor around the blended edges, covering the main flower with a piece of scrap paper to keep the splatters from landing on the flower. Once I had finished adding the shimmering splatters, I die cut a simple greeting using the new add-on sentiment die set called Darling Script Greetings. I cut the detail layer from some orchid glitter cardstock, then backed it with a vellum shadow layer. I used thin strips of foam adhesive to pop up the sentiment, then added a pretty pink twine bow and some Peachy Pawsitively Dazzling Gems for additional sparkle!

For my second card, I kept that gorgeous orchid, peach, and blush colored cardstock palette, this time putting my colored pencils to use to create a lovely vase of flowers! I stamped a crock and one of the lovely bouquets from Made to Flourish using white pigment ink on the same lovely pale orchid cardstock used for the first card. I find that the white pigment ink works beautifully with no-line coloring using colored pencils on colored cardstock; the ink gets absorbed nicely into the colored pencil coloring! The key to coloring small images with colored pencils is a good pencil sharpener so that your points are always nice and crisp! Once I had finished coloring the crock and the bouquet, I used the included coordinating dies to cut the images out, using a pen knife to cut a slit in the crock so that I could place my bouquet within the vase itself.

After I had finished coloring the main focal point, I decided to frame the image in with one of the new Hand Tied Frame images, an add-on to the main kit. I love how whimsical these frames are; the bow at the top is designed to be part of the single die cut, but they also have included a standalone bow, as well! I die cut the large frame and the individual bow from darker orchid cardstock, pulling in more of the colors from the penciled bouquet onto my card front. I used alcohol markers to enhance some of the shadows on the standalone bow, deepening the orchid and adding some dimension.

I blended a little halo of color behind the bouquet with a blending brush and some Fairy Pawsitively Saturated Ink, splattering the background with some more iridescent glitter watercolors for more magic and whimsy. I adhered the frame with liquid adhesive, then arranged my bouquet and white embossed sentiment die cuts, grounding them with a strip of pearlescent blush cardstock. Finally, I popped up the standalone bow with some thin strips of foam adhesive and added some sparkling Peachy Pawsitively Dazzling Gems for one last touch of sparkle!

Well, that’s all for my projects today!

The Simon Says Stamp Card Kits are such an incredible value; the value of the individual elements of each kit equals far more than the $44.99 price tag, so you’re getting incredible bang for your buck. If you are consistently interested in the Simon Says Stamp Card Kit of the Month, you can sign up HERE to become a subscriber for an even bigger discount on these carefully curated products. As always, Simon also makes each individual element of the kits available a la carte, so that you can pick and choose what you would like to purchase if buying the entire kit isn’t really your thing. Options galore! Who can say no to such incredible value though, right?

Thanks so much for stopping by, and have a marvelous day!

Filed Under: simon says stamp Tagged With: brightest bloom, card kit, card kit of the month, colored pencil, darling script greetings, die cutting, embossing folder, hand-tied frame, ink blending, made to flourish, no line coloring

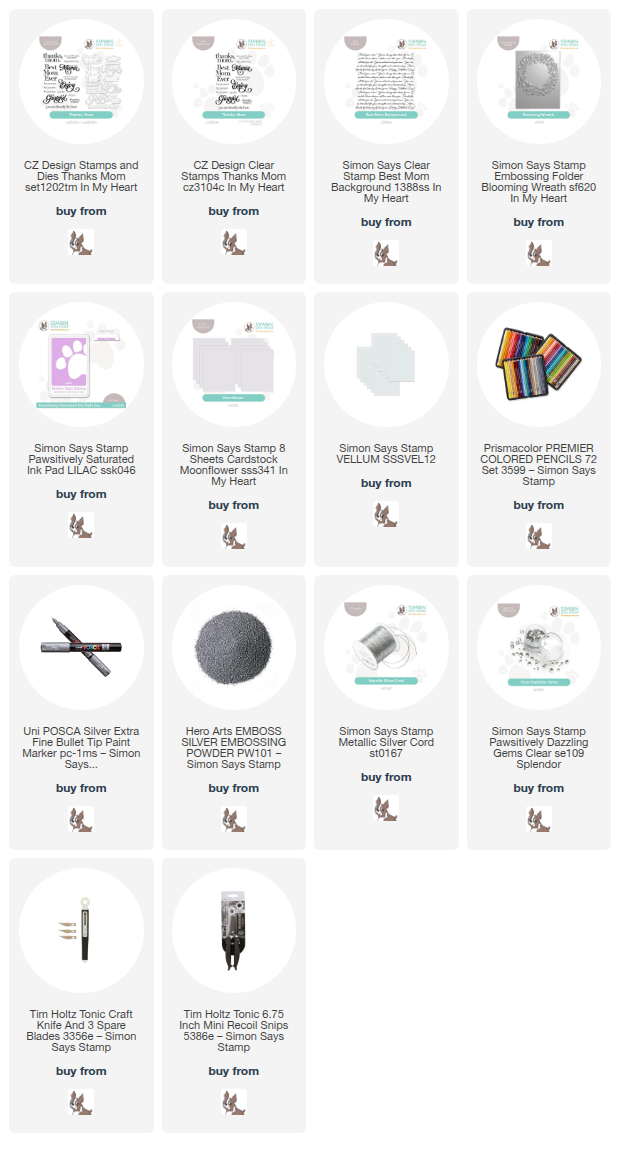
Mother’s Day Love in Purple with New Simon Says Stamp!

March 30, 2026

This post was sponsored by Simon Says Stamp. Thanks, Simon! *I have gathered links to all of the products used at the bottom of the post for your convenience, using affiliate links at no extra cost to you. Thank you for shopping with my links! I truly appreciate your support for my work!*

Hi friends! I just spent a weekend with some of my favorite crafty friends, and I’m back feeling refreshed and with a new creative spring in my step! I have some Easter projects planned for this week, but I wanted to share this pretty-in-purple Mother’s Day card with you using lots of new goodies from the  Simon Says Stamp n My Heart release! (Click HERE to see the entire new release!) Embossing folders are one of my absolute favorite products to use; so many incredible techniques can be applied to the magnificent textures created with these inexpensive products. They truly give you such a great bang for your buck! I chose to add some pencil coloring to the new Blooming Wreath embossing folder, adding some extra interest by starting with a colored cardstock base. Let’s get started with the details on my project!

To begin my project, I ran a panel of the new Moonflower cardstock through my die cutting machine using the Blooming Wreath embossing folder. I then used my colored pencils and a silver paint pen to add lots of delicate details to the embossed flowers, adding different shades of purple and shimmering metallics to the intricate images that had been embossed into my cardstock. Starting with the pale lavender cardstock helps enhance the monochromatic aesthetic of my project! Once I had finished coloring all of the images, I used my sharp scissors to cut the finished wreath out, as well as using a sharp craft knife to cut out the center of my wreath. I backed the finished wreath with vellum, creating the perfect circlet upon which to arrange my greeting!

After I had completed the floral wreath, I stamped the new Best Mom Background onto a full size A2 panel of the Moonflower cardstock using Lilac Pawsitively Saturated Ink. I then adhered the finished wreath over the center of the stamped panel using foam adhesive. The vellum behind the wreath helps to soften the patterned background, allowing plenty of visual space for the eye to focus on the sentiment!

After I had mounted the wreath, I heat embossed two greetings from the new Thanks Mom stamp set onto more Moonflower cardstock using silver embossing powder. I used the coordinating dies to die cut the greetings and placed them in the center of my colored wreath, again using foam adhesive, adding a bit of extra height to the sentiment so that it was easily viewed by the recipient. I tied some silver cord around the entire card base, nestling the bow beneath the greeting, then adhered my card front to my A2 card base. Finally, I added some Clear Pawsitively Dazzling Gems for an additional touch of sparkle!

Well, that’s all for my project today! I hope you’re enjoying the springtime temperatures like we are… the sun is warm and bright today, and the flowers are a-blooming. Thanks so much for stopping by today, and have a marvelous day!

Filed Under: simon says stamp Tagged With: best mom background, blooming wreath, colored pencil, die cutting, embossing, embossing folder, monochromatic, mother's day, no line coloring, thanks mom

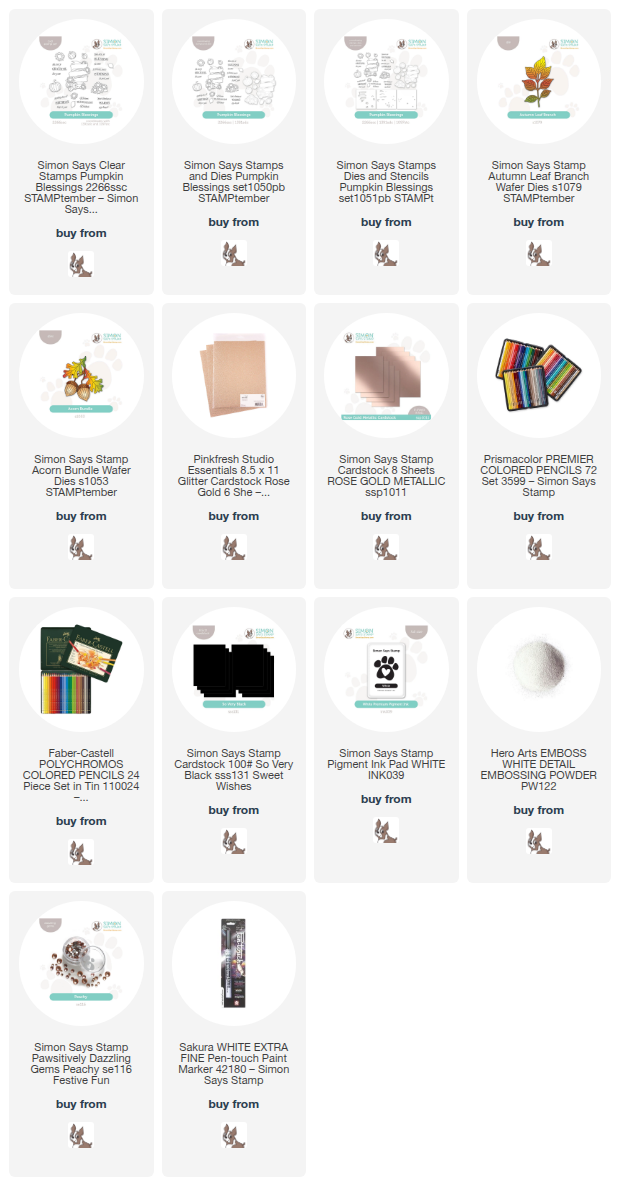
Chalkboard Pumpkins with New Simon Says Stamp STAMPtember!

September 11, 2025

This post was sponsored by Simon Says Stamp. Thanks, Simon!

Hi friends! We were enjoying the most deliciously autumnal temperatures over the last couple of weeks, but that typical Midwest “false fall” has receded back into the throes of summer temperatures again, sadly. So let’s channel fall with some pretty pumpkins and leaves on cards, shall we? The Simon Says Stamp STAMPtember mega-release that kicked off our month-long STAMPtember celebration (check it out HERE!) featured several new fall-themed products, including the beautiful Pumpkin Blessings stamp, die, and stencil set. I always love a good banner, and pairing the banner with some pretty pumpkins and autumnal florals is so classy in my opinion. When I first started crafting, chalkboard cards were all the rage, especially when a banner was involved, so I thought I would recreate that vintage (ha!) look with my colored pencils and some sparkly die cuts. Let’s get started with the details on my project!

*I have gathered links to all of the products used at the bottom of the post for your convenience, using affiliate links. Thank you for shopping with my links! I truly appreciate your support for my work!*

I began by stamping the banner image from Pumpkin Blessings onto some black cardstock using Simon Says Stamp White Pigment Ink. I like to pair white pigment ink with colored pencils on colored cardstock, because the white ink stands out beautifully and seems to absorb into the pencil coloring very nicely, creating a crisp no-line colored look. I used my favorite colored pencils to add some vibrant yellows, oranges, and greens to the flowers and pumpkins, then used a white paint pen and a careful hand to outline the lines on the banner, making them a bit more vivid on the black cardstock without having to sacrifice my no-line colored florals! It totally gives chalkboard vibes.

After I had finished coloring and enhancing the lines on my banner image, I white embossed a greeting from Pumpkin Blessings onto the banner, then die cut the image with it’s coordinating die. I also die cut the foliage from the new Autumn Leaf Branch and Acorn Bundle die sets using rose gold foil and glitter cardstocks.

I adhered the die cut Pumpkin Blessings image onto an A2 panel of black cardstock using foam adhesive, then began tucking the die cut foliage pieces around the banner, creating a visual cascade from top left to bottom right on the card. I used a mixture of foam and liquid adhesive to get los of dimension! Finally, I added a few Peachy Pawsitively Dazzling Gems which work nicely with the metallic foliage die cuts.

Well, that’s all for my project today! Thanks so much for stopping by today, and happy STAMPtember!

Filed Under: simon says stamp Tagged With: acorn bundle, autumn leaf branch, chalkboard, colored pencil, die cutting, fall, grateful for you, no line coloring, pumpkin blessings, thank you card

Simon Says Stamp Moments In Time Release Blog Hop- Day 2!

May 31, 2025

This post was sponsored by Simon Says Stamp. Thanks, Simon!

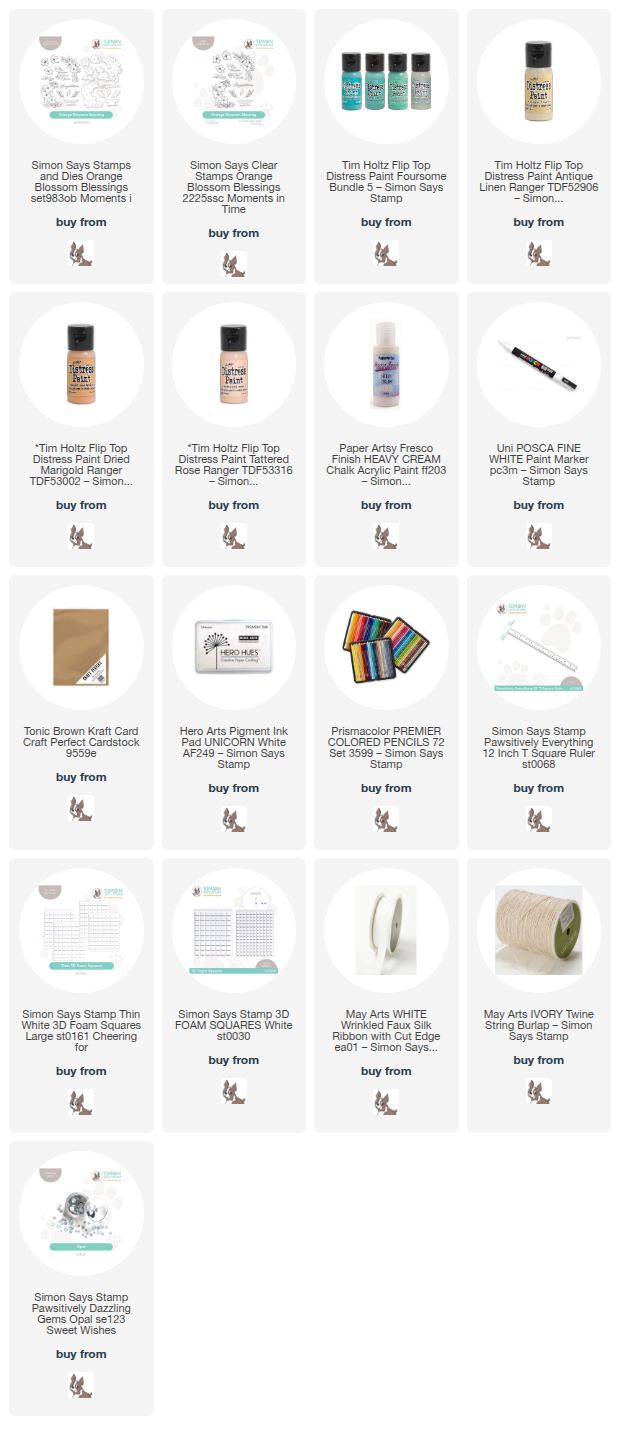
Hi friends! I am hopping along with my friends at Simon Says Stamp to celebrate their newest release: Moments in Time! You should have arrived here from Debby Hughes and your next stop is Yana Smakula. You can also start back at the beginning at the Simon Says Stamp Blog in case you get lost. I am always over the moon excited when one of my illustrations are released, and this one is extra special to me. My husband and I got married 16 years ago this June, and one of the cards that we received with a wedding gift had the sentiment “May your troubles be less, and your blessings be more, and nothing but happiness come through your door.” It made such an impact on me that I still remember it (so many) years later, and so when I was designing Orange Blossom Blessings, I absolutely had to include it with the sentiments for this wedding-themed set. We are past the wedding phase of our mid-20’s now, but we do have a wedding coming up this summer for a friend of my husband’s, so I took the opportunity to use Orange Blossom Blessings to create a wedding gift and card. Let’s get started with the details!

*I have gathered links to all of the products used at the bottom of the post for your convenience, using affiliate links. Thank you for shopping with my links! I truly appreciate your support for my work!*

I’ve been doing some organizing and cleaning in my craft room closet; my mom was living in my craft house for six months while she recuperated from a nasty car accident, so while I was helping to care for her, my office organization was sorely neglected. She went home a couple of weeks ago, so as I have been slowly trying to get my office back under control, and I found these papier machê ornaments that I purchased long ago to embellish. I thought they’d look gorgeous with orange blossoms painted on to create a keepsake ornament for the bride and groom, and of course I had to make a coordinating card!

I stamped one of the floral swags directly onto the papier machê ornament using Simon Says Stamp White Pigment Ink Pad and pulled out my acrylic paints in shades of peach, buttery yellow, and muted teal to add some color to the ornament. I have not really worked with acrylic paints before, though I have a fairly extensive collection (ha) so it was a bit of a learning experience for me, but I am thrilled with the results. I can’t wait to play with them even more! I kept the colors light and bright, creating a lovely contrast between the mid-brown background from the pastel blooms. After I had finished painting the flowers, I used a white paint pen to add a “Mr. & Mrs.” to commemorate the bride and groom’s special day! Once I had completed the ornament, I added a white bow to the top with my glue gun. I hope the happy couple love it!

To create the coordinating card, I stamped some more of the blooms from Orange Blossom Blessings onto an A7 panel of Kraft Cardstock using the Simon Says Stamp White Pigment Ink Pad. I love working with colored pencils on colorful (even brown) cardstock; I think that the seamless pop of color on the background is so unique and lovely! I stamped the orange blossom swag in one corner, then rotated my cardstock in my MISTI to stamp the same swag in the opposite corner. I also stamped a few individual blooms and foliage on a separate panel of Kraft cardstock. I used my colored pencils to add vibrant color to each of the images, die cutting the individual images once colored. I also used the Simon Says Stamp T-square Ruler to create a frame around the edges of the card front, drawing the eye to the center of the card. I love using this trick to create a bit smaller visual canvas for my focal point!

After I had finished coloring and die cutting the floral images, I used white pigment ink with embossing powder to stamp my favorite sentiment from Orange Blossom Blessings on some more Kraft cardstock. I used the coordinating die to cut the greeting out, then adhered it to the card front with foam adhesive. I tucked the individual flowers next to the die cut sentiment with some thin foam adhesive squares. I tied a double twine bow and adhered it beneath the floral accents, finally adding a few Opal Pawsitively Dazzling Gems for some sparkle!

Well, that’s all for my projects today. Now for some fun giveaway and freebie information!

Simon Says Stamp is giving away a $25 coupon to every stop on the hop, selected from each blog comment section. Winners will be selected and posted on the Simon Says Stamp blog on Wednesday the 4th of June. All winners can email Simon Says Stamp to claim his/her prize!

Simon Says Stamp is also offering a sweet freebie for blog hoppers! Simply make any purchase from the Moments in Time collection to receive the to-be-released Best Fishes stamp set totally free!

Your next stop on the hop is Yana Smakula. Thanks so much for stopping by today, and happy hopping!

Filed Under: simon says stamp Tagged With: acrylic paint, colored pencil, distress paint, kraft, orange blossom blessing, ornament, wedding card, wedding gift

  • « Go to Previous Page
  • Page 1
  • Page 2
  • Page 3
  • Page 4
  • Interim pages omitted …
  • Page 12
  • Go to Next Page »

Primary Sidebar

  • Facebook
  • Instagram
  • Pinterest
  • YouTube

Favorite Shops

Secondary Sidebar

Subscribe

Enter your email address to subscribe to this blog and receive notifications of new posts by email.

Instagram
Something is wrong.
Instagram token error.
Follow
Load More

Archives

Tags

3D embossing folder alcohol markers better press birthday birthday card blog hop card kit christmas christmas card christmas tag colored pencil copic copic coloring Daniel Smith die cutting embossing folder embroidery felt giveaway holiday holiday card hot foil ink blending karin brushmarker pro layered stencil masculine my monthly hero new release no line coloring no line watercolor OLO marker olo markers original illustration pawsitively saturated rainbow shaker card slimline stamping stamptember stencil thank you thinking of you valentine's day video watercolor

Popular Posts

Simon Says Stamp Sending Cheer Blog Hop- Day 2 + Freebie + Giveaway!
Altenew October 2026 Release Blog Hop + Giveaway!
Rustic Monochromatic Stars for Christmas with Rainbow Splash!
March 2020 Essentials By Ellen Blog Hop+Giveaway!
December 2018 My Monthly Hero Blog Hop + Giveaway!
The Ton Stamps Summer Release: Day 1
Waffleflower July Release Blog Hop!
Hero Arts Partners Blog Hop: Lawn Fawn!
Simon Says Stamp STAMPtember Tim Holtz Collaboration: Festive Holidays!
Altenew Exotic Garden Stamps/Dies/Stencils/Embossing Folders Collection Release Blog Hop + Giveaway

Disclosure

Some affiliate links are used in my posts. This means that, should you click on one of my links and purchase something from that company, I will receive a small portion of the sale at no extra cost to you. I use the money earned from these sales to help maintain my blog. I so appreciate you visiting and, if you do choose to use one of my affiliate links, thank you so much for your support!
Copyright © 2026 ·Brunch Pro Theme · Genesis Framework by StudioPress · WordPress · Log in
Loading Comments...