• Skip to main content
  • Skip to primary sidebar
  • Skip to secondary sidebar

Sixth Street Sundries

Emily Midgett

  • Home
  • About Me
  • Contact
  • OLO Marker Color Swatch Chart
  • Shop

copic

Hot Foil Friday with Simon Says Stamp!

March 24, 2023

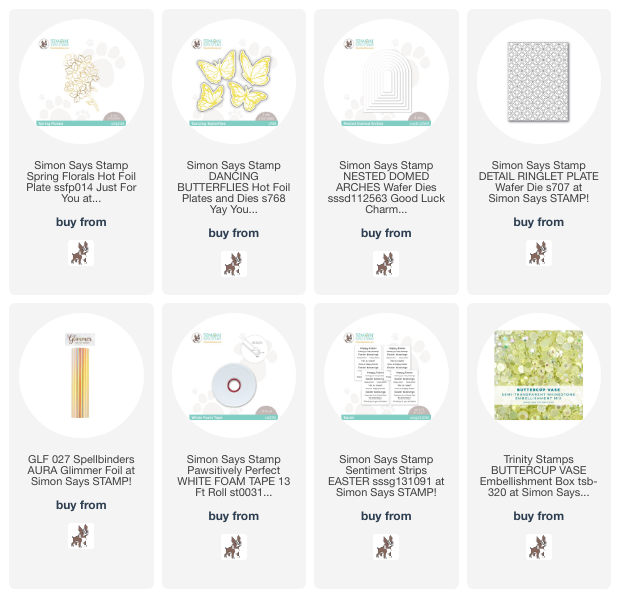
Happy Friday, my friends! We are mere hours away from the weekend, thankfully! I always love the weekends, not just because I don’t have to roust my kiddos out of bed before they’re ready, but also because the days just feel a little slower and less chaotic when we aren’t scheduled down to the minute with activities. I know that will change as the kids get older and get involved in more activities, but for now, I’m savoring it. It took me a bit to jump on the hot foil bandwagon, but once I finally got comfortable with it…. I was hooked. I came up with the idea of “Hot Foil Friday” a while ago, thinking I would share hot foil projects with you all on Fridays, and I thought I’d share a hot foil project today using the new Spring Florals Hot Foil Plate from the new Just For You release from Simon Says Stamp!

I began by hot foiling these lovely spring blooms using the Spring Florals Hot Foil Plate and some Aura hot foil from Spellbinders. I love the subtle iridescent rainbow on this hot foil roll. At first glance, it looks like a cool golden metallic foil, but as you shift the card, it takes on a rainbow shine! I used Copic markers to add some pale yellow to these blooms, then cut them out with my sharp scissors.

To create a ground for my buttery yellow blooms, I used my favorite Nested Domed Arches dies to cut a frame and a solid background. I ran the large solid piece through my die cut machine with the Detail Ringlet Cover Plate to add some subtle texture, then layered the exterior frame over the top. The white on white is so classic and creates such a lovely backdrop for my sunny blooms! I popped the arch up on a white card front using some foam adhesive, then nestled my colorful Spring Florals blooms in the corner and popped them up with another layer of foam tape, making a double layer of foam adhesive.

To enhance the simplistic color scheme of this card, I wanted a simple greeting, so I trimmed down one of the Sentiment Strips: Easter greetings, snipping it in half to create two shorter strips instead of one long one. I nestled the sentiment strips amongst the flowers with some more foam tape, then added a vellum butterfly that I created using more Aura foil and the Dancing Butterflies Hot Foil Plate and Dies. The final touch was a few Buttercup Vase gems for one last bit of sparkle.

Welll, that’s all for my project today! Thanks so much for stopping by, and have a wonderful weekend, friends!
Filed Under: simon says stamp Tagged With: copic, dancing butterflies, easter, hot foil, hot foil friday, nested domed arch, sentiment strips, spring florals

Altenew Build-A-Garden: Magnificent Branch Release Blog Hop + Giveaway ($200 total prizes)

May 1, 2022

Good morning! Today marks the start of a new subscription from Altenew: Build-A-Garden! We’re hopping along to celebrate this newest addition to the Altenew subscription family. You should have arrived here from Vicky Papaioannou, and your next stop is Cheryl Espie. You can also start back at the beginning at the Altenew Card Blog. Here’s a bit about the new series from Altenew:

Enjoy our Build-A-Garden project set, an exciting monthly package that is sure to get the creative juices flowing! Each month includes a stamp set along with a coordinating stencil set and/or die set PLUS a customer-favorite Mini Blending Brush! Build your collection of brushes from month to month so you will never be left looking for the perfect tool while crafting.

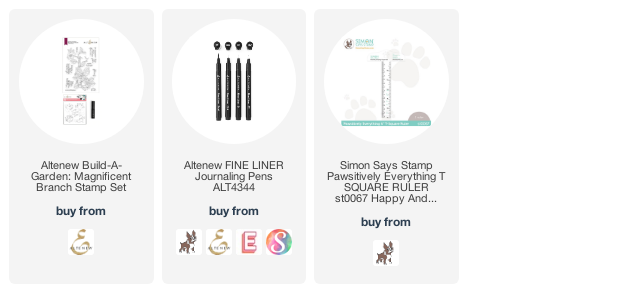
This set contains the following products:
– one 6″ x 8″ stamp set containing 10 stamps made in the USA from high-quality photopolymer
– one layering stencil set containing 4 stencils that coordinate with the stamp set
– one Mini Blending Brush for ink blending
Note: These products are NOT sold separately.

If this new series sounds like something you can’t live without each month (that blending brush is such an awesome addition to the kit!), you can subscribe to be guaranteed to receive the new set each month-and at a discount!! Click HERE to see all of the details on how you can subscribe!

This initial installment is called Magnificent Branch, and it’s absolutely gorgeous. It features a long branch filled with beautiful blooms and greenery, large enough when stamped to create two card fronts! You can color to your heart’s content with your favorite coloring medium, or you can use the included layering stencils to create a unique color blocked look with your favorite stenciling technique! Here’s a peek at this month’s kit:

Incredibly beautiful, right? I chose to create a custom patterned paper with the main stamp by angling it different ways along the edge of my paper. Let’s get started with the details on my project!

I began by stamping the image from Magnificent Branch a few different times on white cardstock with Copic-friendly black ink, angling it different ways so as to create some custom patterned paper and covering the majority of the A2 card front. I colored the image with Copic markers in a lovely feminine color scheme featuring mauve, pale pink, and jade green.

Once I had finished coloring all of the images stamped on the card front, I used my T-square and a black pen from the Fine Liner Pen set to add a very thin, subtle frame around the edges to help highlight the beautiful images and add another element of black to the card front.

For the greeting, I white embossed one of the sentiments included in the Magnificent Branch stamp set onto some black cardstock, which I then popped up using foam tape on the colored card front. Finally, I added a trio of black gems for one more touch of black, as well as some sparkle on this matte card front.

Well, that’s all for my project today! Now for some fun giveaway information:

$200 in total prizes! To celebrate this release, Altenew is giving away a $50 gift certificate to 2 lucky winners and a $20 gift certificate to 5 winners! Please leave a comment on the Altenew Card Blog and/or each designer’s blog post on the blog hop list below by 05/07/2022 for a chance to win. Altenew will draw 7 random winners from the comments left on each stop of this blog hop and announce the winners on the Altenew Winners Page on 05/09/2022.

Your next stop is Cheryl Espie. Thanks so much for stopping by today, and happy hopping!

Filed Under: altenew Tagged With: build a garden, copic, copic coloring, subscription

Guest Post: Simon Says Stamp+No-Line Copic Coloring+Stenciling VIDEO!

February 26, 2022

Hi there! Today, I am sharing my last projects as a guest for Simon Says Stamp. It’s been so much fun to play with the beautiful new release products, and I so appreciate Heidi giving me the opportunity! I have two projects to share with you today, both featuring no-line coloring with Copic markers. My first project is a more traditional technique, while the second one features a new-to-me technique and involves a stencil! I even have a video to show you how I did it. Let’s get started with the details!

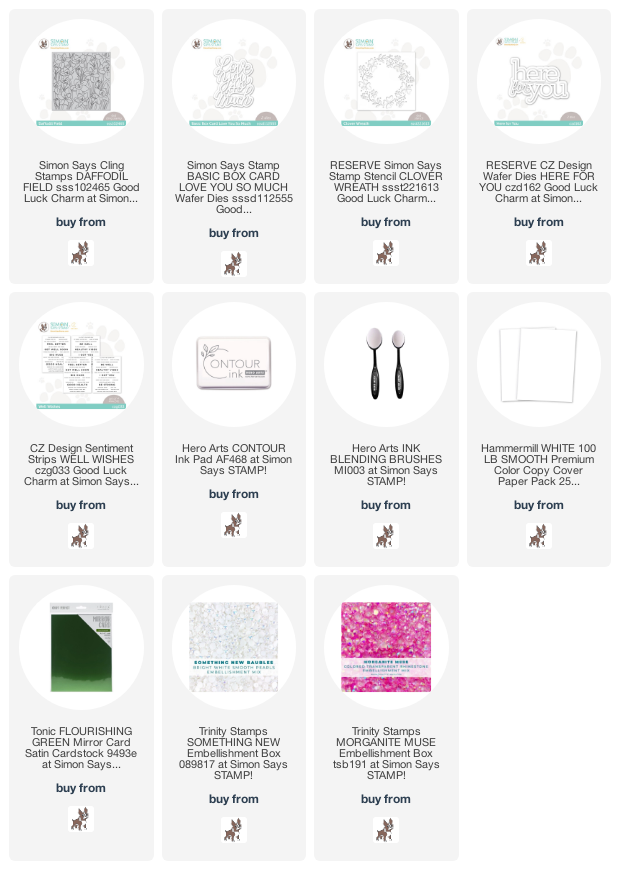
My first project uses that absolutely gorgeous new Daffodil Field cling stamp. I stamped the beautiful background onto some white Hammermill cardstock using Hero Arts Contour Ink. I used my Copic markers to add lots of vibrant color to the image, trimming it down so that it was just slightly smaller than a typical A2 card front. I added two thin strips of grassy green foil cardstock on either side to add an extra element of texture.

For the greeting, I die cut the detail layer of the Love You So Much Basic Box Card die twice from white cardstock, then adhered it to a vellum base layer. The vellum helps to soften the areas around the sentiment die cut so that it stands out on the colorful patterned background panel!

I added the sentiment die cut in the center of the floral panel using clear foam adhesive, then added another very thin sentiment strip from the Sentiment Strips: Well Wishes using some regular foam adhesive. Lots of dimension and heigh on this card front! I hadn’t realized that the sentiment covered up the only pink crocus on the left side of the card until it was too late, so I added a few pink Morganite Muse gems to help balance the color a bit better. I love the springy flowers with the bold green foil and softly emphasized sentiment! Such a cheery card.

My second project features a new-to-me technique: no-line coloring a stenciled image! You can watch the video above or you can click here to watch on YouTube.

In case you can’t watch the video, this card features the beautiful new Clover Wreath stencil, but I used some Post-It notes and washi tape to modify the layout a bit! I used a blender brush to blend some Contour Ink on my slimline card front, then used Copic markers to color right over the top of the blended areas. The neutral pale gray ink fades beautifully beneath the vibrant Copic coloring!

I chose to use another sentiment die set for this card, die cutting the detail layer of the Here For You die twice from white cardstock and adhering them together, then adding them to the vellum base layer with some more liquid adhesive.

I popped up the greeting using clear foam tape to help hide the adhesive. The final step was to add a few Something New iridescent white pearls from Trinity Stamps to the card front for a bit of shine.

Well, that’s all for my projects today! I have so enjoyed working with these fabulous new products from the Simon Says Stamp Good Luck Charm release. Thanks so much for stopping by today, and have a marvelous day!

Filed Under: simon says stamp Tagged With: clover wreath, copic, daffodil field, no line coloring, no line copic coloring, stencil, video

Hero Arts 2022 Spring Catalog Launch Blog Hop+Giveaway!

February 15, 2022

Hi there! Today, I am super excited to be hopping along with Hero Arts as we debut the new products in the Spring 2022 Catalog! You should have arrived here from Debi Adams, and your next stop is Ilina Crouse. The new catalog is chock full of beautiful new products, with imagery so evocative of spring and summer! I have two projects for you today, so let’s get started with the details on my projects.

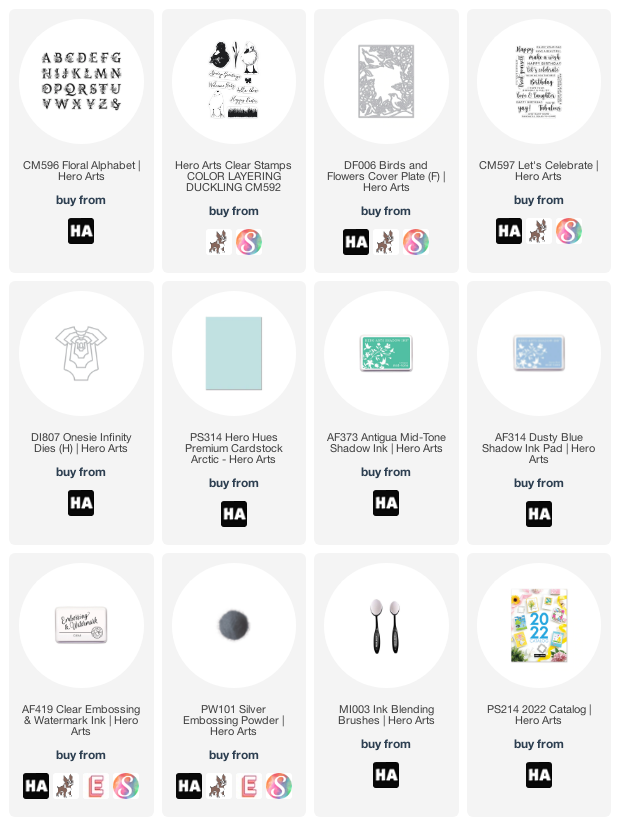
My first project would be a perfect card to accompany a baby shower gift, using the beautiful new Floral Alphabet stamps. I began by die cutting four teeny onesies from Arctic cardstock using the Onesie Infinity Dies. Using the negative spaces on the cardstock from which I cut the onesies, I used my MISTI to white emboss the B-A-B-Y from Floral Alphabet onto the aqua onesies. So cute!

Next, I trimmed down an Arctic cardstock slimline card base as well as another layer, slightly smaller than the slimline card base. I used Antigua ink to stamp a little border of grass (from the new Color Layering Duckling) and daisies (from the new Color Layering Bunny) along the bottom edge of the slightly smaller panel of cardstock for a simple tone-on-tone effect. Just enough to add a bit of interest to the background, but not too much to distract from the main focal point!

Next, I arranged my heat embossed onesies so that they were draped as though on a clothesline. I adhered them with some foam adhesive, then added a couple of white twine bows to complete the clothesline/banner idea. Finally, I added the “hello there” greeting on a strip of Arctic cardstock using some more foam adhesive. Simple, but the delicate images and monochromatic color scheme are perfect for a baby card!

My next card is quite a bit more involved, in both technique and color scheme. I combined the gorgeous new Birds and Flowers Cover Plate die with my Copic markers to create a chinoiserie effect. These detailed cover plate dies are some of my absolute favorite products from Hero Arts; the amount of detail that you can add with your favorite coloring medium is amazing, but you also have the option to simply die cut the images and use them as silhouettes! I die cut the Birds and Flowers Cover Plate die from some white, Copic-friendly cardstock and used a variety of Copic markers in vivid, springy shades to add lots of color and detail to the die cut, hopefully evoking chinoiserie imagery!

Once I’d finished my coloring, I used silver embossing powder to emboss a greeting from the new Let’s Celebrate sentiment stamp set on some strips of plain white cardstock. I also lightly blended some Dusty Blue ink around the edges of my A2 card base with a super soft Hero Arts Blending Brush, just to give a bit of extra interest to the background.

Once all of my components had been completed, I used lots of foam adhesive to adhere the vivid Copic-colored die cut and embossed sentiment strips to the blended card base. I just love the bright, springy colors after the dreary winter days we’ve been having lately!

Well, that’s all for my projects today!

I hope you will check out the entire Spring 2022 Hero Arts catalog. SO many fun new products, including a new line of Hero Tools that are going to make life so much easier! Tons of new tools, including small, medium, large, and extra large sizes of blending brush, a Handy Holder tool caddy, metal snips, and the piece de resistance: a new Compact Cutter! These products will begin shipping in March, and I highly encourage you to sign up to be notified when they’re back in stock. Anybody who signs up to be notified via email when they become available will be entered into a drawing to win the entire line of Hero Tools!

Hero Arts is also hosting a giveaway to celebrate the new catalog!

Hero Arts is giving away THREE $50 gift cards, drawn from the comments left across the hop. Enter by Sunday, February 20 at 11:59pm pacific, and the winner will be announced on the Hero Arts blog the following week. The more comments you leave, the more chances you have to win!

Well, that’s all for my projects today! Your next stop is Ilina Crouse. Thanks so much for stopping by, and happy hopping!

Filed Under: Hero Arts Tagged With: baby card, Birds and Flowers cover plate, birthday card, catalog, Color Layering Bunny, Color Layering Duckling, copic, copic coloring, Floral Alphabet, giveaway, ink blending, Onesie Infinity Dies

Colorado Craft Company Free Shipping Days!

February 13, 2022

Hi there! Just popping in quickly to let you all know that Colorado Craft Company‘s Free Shipping Days ends tonight! I have a sweet little project featuring one of the new sets from the new Kris Lauren release-Mouse House. Let’s get started with the details on this fairly straightforward project!

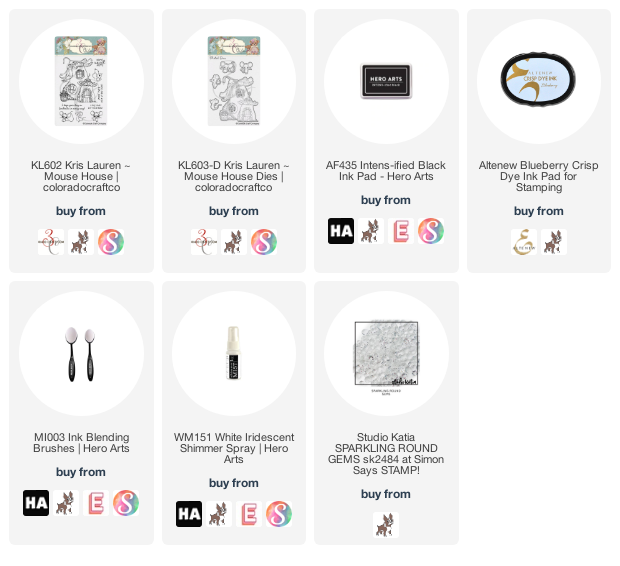
I began by stamping the darling little mouse cottage and mouse from Mouse House onto some Copic-friendly white cardstock using Hero Arts’ Intensi-fied Black ink. I colored the image with my Copic markers, using my Colorless Blender to pull some of the color away from the house so that I could add some colorful flowers and moss on the edge of the cottage. I die cut the colored images using the coordinating dies.

For the card base, I lightly blended some very pale blue ink along the edges using a blending brush just to create the slightest suggestion of blue sky. I also spritzed some iridescent shimmer spray to add a hint of shimmer to this matte card.

I arranged the die cuts on the shimmering card front and adhered them using foam adhesive. I added a greeting from Mouse House, backed with some glittery black cardstock to give it a little extra emphasis. A perfect sentiment for a birthday card! I added a few clear gems for a bit of added texture. I think they look like dew drops falling on the teeny little mouse!

Well, that’s all for my project. I hope you’ll take a peek at the new release from Colorado Craft Company. The new illustrator is absolutely fantastic! Today is also the last day to take advantage of the Free Shipping Days for this new release!

Through midnight tonight, you can receive free shipping on your order from the Colorado Craft Company website by adding the code FREESHIPPINGEM at checkout!

Thanks so much for stopping by today, and have a marvelous day!

Filed Under: colorado craft company Tagged With: copic, ink blending, mouse, mouse house

  • « Go to Previous Page
  • Page 1
  • Page 2
  • Page 3
  • Page 4
  • Page 5
  • Interim pages omitted …
  • Page 9
  • Go to Next Page »

Primary Sidebar

  • Facebook
  • Instagram
  • Pinterest
  • YouTube

Favorite Shops

Secondary Sidebar

Subscribe

Enter your email address to subscribe to this blog and receive notifications of new posts by email.

Instagram
Something is wrong.
Instagram token error.
Follow
Load More

Archives

Tags

3D embossing folder alcohol markers better press birthday birthday card blog hop card kit christmas christmas card christmas tag colored pencil copic copic coloring Daniel Smith die cutting embossing folder embroidery felt giveaway holiday holiday card hot foil ink blending karin brushmarker pro layered stencil masculine my monthly hero new release no line coloring no line watercolor OLO marker olo markers original illustration pawsitively saturated rainbow shaker card slimline stamping stamptember stencil thank you thinking of you valentine's day video watercolor

Popular Posts

Simon Says Stamp October 2026 Card Kit of the Month: Homespun Gratitude!
February 2018 My Monthly Hero Blog Hop!
Altenew Craft A Flower: Poppy Blog Hop+Giveaway!
Felted Gourd Wall Hanging with Simon Says Stamp!
Sunflower Home Decor with Simon Says Stamp!
Craft Your Life Project Kit: Feathered Lilies Blog Hop+Giveaway!
Simon Says Stamp October 2025 Card Kit of the Month!
Altenew Standalone Die Blog Hop+Giveaway!
The Ton Anniversary Release- Day 2
Honey Bee Stamps Cheerful Love Blog Hop!

Disclosure

Some affiliate links are used in my posts. This means that, should you click on one of my links and purchase something from that company, I will receive a small portion of the sale at no extra cost to you. I use the money earned from these sales to help maintain my blog. I so appreciate you visiting and, if you do choose to use one of my affiliate links, thank you so much for your support!
Copyright © 2026 ·Brunch Pro Theme · Genesis Framework by StudioPress · WordPress · Log in
Loading Comments...