• Skip to main content
  • Skip to primary sidebar
  • Skip to secondary sidebar

Sixth Street Sundries

Emily Midgett

  • Home
  • About Me
  • Contact
  • OLO Marker Color Swatch Chart
  • Shop

cover plate die

Floral Thinking of You with New Simon Says Stamp and Leftovers!

July 17, 2026

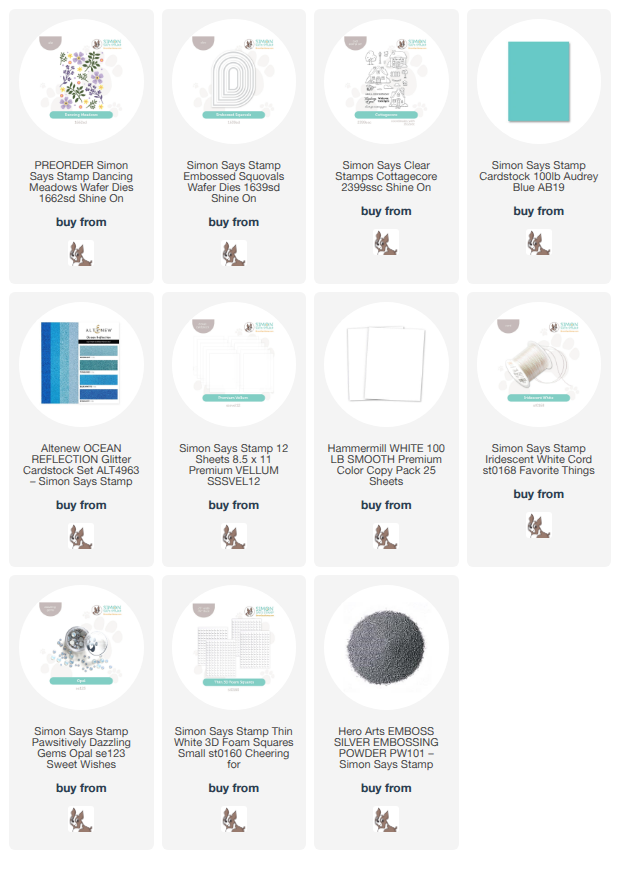
This post was sponsored by Simon Says Stamp. Thanks, Simon! *I have gathered links to all of the products used at the bottom of the post for your convenience, using affiliate links at no extra cost to you. Thank you for shopping with my links! I truly appreciate your support for my work!*

Hi friends! I have a project to share with you today using some “leftovers” from THIS project! As I mentioned in yesterday’s post, I have such a fondness for cover plate dies. With one pass through your die cutting machine, you can create such lovely cards with so many options for techniques and customization. I especially love cover plates that do double duty, with which you can use both the positive and negative die cuts to create beautiful projects! I was enamored of the fabulous Dancing Meadows cover plate die, because not only does it die cut lovely standalone flora and foliage, it also leaves you with a full sized A2 panel with a delicate floral pattern. The project linked above showcases the individual die cuts used to embellish a large scale sentiment, but today’s project uses the leftover cover plate die cut to create a crisp floral background. Let’s get started with the details!

To begin, I die cut the Dancing Meadows cover plate die from a panel of plain white cardstock. I enhanced the positive floral die cuts with my alcohol markers for the project linked above, but for this project wanted to keep things simple. I adhered the negative die cut to a panel of gorgeous Audrey Blue cardstock, a perfectly vibrant, mid-weight turquoise that just pops behind that crisp white die cut!

To make sure that the peekaboo pattern was the star of the show, I chose to add a simple sentiment and embellish it with a few extras. To ground the sentiment, I die cut a vellum Embossed Squovals die; this vellum softens the vibrant and somewhat busy background, allowing the sentiment to be a bit more visible. I also used some glittering aqua scrap cardstock to die cut a few sprigs with the Dancing Meadows die, strategically placing the scraps on the sprigs that I wanted to cut and securing them with some low-tack tape before running the plate through my die cutting machine.

For the greeting, I heat embossed a simple sentiment from the new Cottagecore stamp set using silver embossing powder on white cardstock, cutting it out with sharp scissors. I layered the sentiment in the center of my Squoval vellum die cut with some foam adhesive, then tucked the glittering sprigs behind the sentiment, further enhancing the greeting and making it pop from the background. I added some more thin foam adhesive squares behind the sentiment, hiding the adhesive behind the solid die cuts, and placed the entire piece in the corner of my card front. Finally, I added some shimmering embellishments, tucking an Iridescent Cord bow next to the greeting and placing lots of sparkling Opal Pawsitively Dazzling Gems in the center of each individual flower in the background. I think those gems add just the right finishing touch, don’t you?

Well, that’s all for me today! I am getting ready to head out on vacation with our kiddos and my husband’s family, so I will be popping in periodically, but won’t be around as much next week. Tis the season before school starts in just a few short weeks!! Thanks so much for stopping by today, and have a marvelous day!
Filed Under: simon says stamp Tagged With: cottagecore, cover plate die, dancing meadows, die cutting, squovals, thinking of you

Glittery Smooches on the Honey Bee Blog!

January 23, 2021

Hi there! I’m over on the Honey Bee Blog today with some super sparkly, shiny cards combining some old and some new products with crazy sparkly and shiny cardstock from Tonic. Valentine’s Day is the perfect day to add all kinds of glitz to your projects, and the new Smooch and Adore Buzzwords look fantastic with the glittery Berry Fizz cardstock.

I hope you’ll stop by the Honey Bee Blog and take a peek at how I made these two-fer cards!

Have a marvelous day, friends!

Filed Under: Honey Bee Stamps, Uncategorized Tagged With: adore, cover plate die, fluttering hearts, glitter paper, quilted cover plate, smooch, stenciling, valentine's day

ELEGANT CHRISTMAS CARDS IN 20 MINUTES OR LESS-VOLUME 3 with Pinkfresh Studio!

December 17, 2020

Hi there! I’m back with day 3 of my “Christmas Cards in 20 Minutes or Less” series, this time featuring some sparkling poinsettias from Pinkfresh Studio! In today’s video, we let the beautiful Ornate Poinsettia cover plate die from Pinkfresh Studio do the heavy lifting for us to create a simple and very elegant Christmas card in less than 15 minutes!

Here’s the video:

You can also watch it in HD here.

One of the quickest ways that I’ve found to make a huge impact on a card front with minimal effort on my part is to use a detailed cover plate background die. These cover plates are workhorses; you can use them to create subtle texture by using tone-on-tone color scheme; you can watercolor, ink blend, or Copic color on them to add lots of intricate detail and bright color; or, as I’ve done here, you can utilize some sparkling cardstock and a pretty base layer to create a simple but stunning card base that only needs a sentiment to finish it off.

For this card, I’ve die cut the Ornate Poinsettia from some sparkling white glitter cardstock. The beautiful die cut details in this cover plate die cut don’t need much help to create a beautiful card front! I adhered it to a pale aqua card base upon which I lightly blended some Aquamarine ink around the edges to add a bit of extra interest to the background. I added a die cut greeting from Classic Holiday Words dies, which I die cut from some heavyweight vellum and matte teal foil, popped up with clear foam adhesive. The final step was to add some turquoise gems to the center of the poinsettia die cuts, which add a bit more bling and some extra texture to the card front!

Well, that’s all for my “Christmas Cards in 20 Minutes or Less” project today. I hope these videos are giving you some useful tips for your last minute holiday cardmaking! We all are so busy this time of year that any little tricks to simplify things a bit helps! Thanks so much for stopping by today, and have a marvelous day!

Filed Under: pinkfresh studio Tagged With: christmas card, cover plate die, easy christmas card, ink blending, ornate poinsettia, video

Primary Sidebar

  • Facebook
  • Instagram
  • Pinterest
  • YouTube

Favorite Shops

Secondary Sidebar

Subscribe

Enter your email address to subscribe to this blog and receive notifications of new posts by email.

Instagram
Something is wrong.
Instagram token error.
Follow
Load More

Archives

Tags

3D embossing folder alcohol markers better press birthday birthday card blog hop card kit christmas christmas card christmas tag colored pencil copic copic coloring Daniel Smith die cutting embossing folder embroidery felt giveaway holiday holiday card hot foil ink blending karin brushmarker pro layered stencil masculine my monthly hero new release no line coloring no line watercolor OLO marker olo markers original illustration pawsitively saturated rainbow shaker card slimline stamping stamptember stencil thank you thinking of you valentine's day video watercolor

Popular Posts

Shaped Holiday Shaker Card with New Simon Says Stamp Jolly Season Card Kit of the Month!
Simon Says Stamp Card Kit November 2026: Jolly Season!
More Inspiration Using the Warm Hearts Christmas Card Kit for Simon Says Stamp!
Altenew Whimsical Wonder Stamps/Dies/Stencils/Embossing Folders Collection Release Blog Hop + Giveaway
Simon Says Stamp Sending Cheer Blog Hop- Day 2 + Freebie + Giveaway!
Altenew 9th Anniversary Blog Hop Day 1 + Giveaway (over $2,200 in Total Prizes)
Pinkfresh Studio Create & Connect: Holiday!
Altenew March 2020 Release Blog Hop+Giveaway!
Tonic Studios Garden Party Blog Hop!
Hero Arts My Monthly Hero May 2022 Blog Hop+Giveaway!

Disclosure

Some affiliate links are used in my posts. This means that, should you click on one of my links and purchase something from that company, I will receive a small portion of the sale at no extra cost to you. I use the money earned from these sales to help maintain my blog. I so appreciate you visiting and, if you do choose to use one of my affiliate links, thank you so much for your support!
Copyright © 2026 ·Brunch Pro Theme · Genesis Framework by StudioPress · WordPress · Log in
Loading Comments...