• Skip to main content
  • Skip to primary sidebar
  • Skip to secondary sidebar

Sixth Street Sundries

Emily Midgett

  • Home
  • About Me
  • Contact
  • OLO Marker Color Swatch Chart
  • Shop

critters

Sassy Kitties with New Simon Says Stamp!

January 14, 2026

This post was sponsored by Simon Says Stamp. Thanks, Simon!

Hi friends! I know that my blog is typically all flowers, all the time, but sometimes a cute little critter set intrigues and appeals to my sassy side. Enter: Sassy Sally from the Heart to Heart Release! (click HERE to check out the entire release!) This 4×6 set has super cute kitties doing kitty things, which are naturally done with a little extra attitude (cat-itude?) than necessary, and some equally sassy sentiments to coordinate. I created this simple card that is perfect to send to that friend that you can’t be trusted to sit next to during a serious occasion. 😉 Let’s get started with the details on my project!

*I have gathered links to all of the products used at the bottom of the post for your convenience, using affiliate links at no extra cost to you. Thank you for shopping with my links! I truly appreciate your support for my work!*

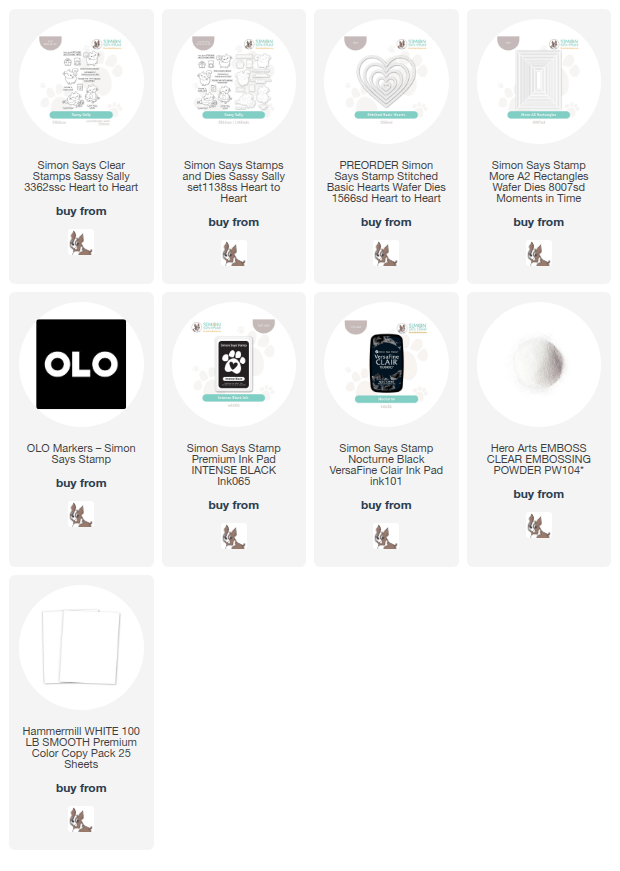
To start, I stamped two kitties from Sassy Sally onto some white cardstock using alcohol marker-friendly Intense Black ink. I used OLO Markers to color the images, creating an homage to my first kitties, named Ben and Daisy. They were brother and sister, the best of frenemies, and the facial expressions on these little felines is them to a T! Once I had finished coloring the kitties and adding stripes to Ben’s fur, I used the coordinating dies to cut the images out.

In order to keep the card simple and allow those kitties to do the heavy lifting visually, I kept the elements on the rest of the card a crisp white. I die cut one of the new Stitched Basic Heart dies, which adds a lovely stitching detail to both the interior of the die cut as well as the exterior, so that you can create Stitched Heart frames with the leftover negative die cut. I also die cut a delicate white frame using the More A2 Rectangles die set, nesting two dies together to create this frame that adds a simplistic bit of texture and interest to the card base.

For the greeting, I stamped the simple “for a sassy friend” on another piece of white cardstock using Nocturne Black Pigment Ink and added some clear embossing powder to make it super crisp and detailed. I adhered the frame with liquid adhesive, then added the stitched heart with some thin foam adhesive in the center of the card. I used another layer of thin foam adhesive to add the kitties and the sentiment, making a double layer of adhesive for those elements so that they really pop off of the crisp white background. No embellishments needed for this one!

Well, that’s all for my project today. How cute are these kitties?! I recently lost my two kitties after 17.5 years. I’d had them since birth; they were my babies before I had my human babies. It is so strange to not be yelled at for food constantly! I don’t know if we will get any more indoor kitties, as I am allergic, but my daughter desperately wants a black cat. We have a giant Bernedoodle and an elderly pitbull, plus four kids-ha!, so I don’t know if we have the room nor the time for a kitten at this point. Are you a cat person or a dog person? Furry friends definitely make a house feel like a home, whatever the type! Thanks so much for stopping by today, and have a marvelous day!
Filed Under: simon says stamp Tagged With: critters, die cutting, olo markers, sassy sally, stitched basic hearts

 Pinkfresh Studio “Delights & Doodles” Release Blog Hop

June 13, 2025

Hi friends! I am hopping along with my friends at Pinkfresh Studio today to share their latest release, called Delights and Doodles! This new release is a bit different from their typical style, featuring whimsical critters, treats, and some sweet accessories created with stamps, stencils, and dies! I have a pair of cards to share with you today featuring these new goodies, so let’s get started with the details.

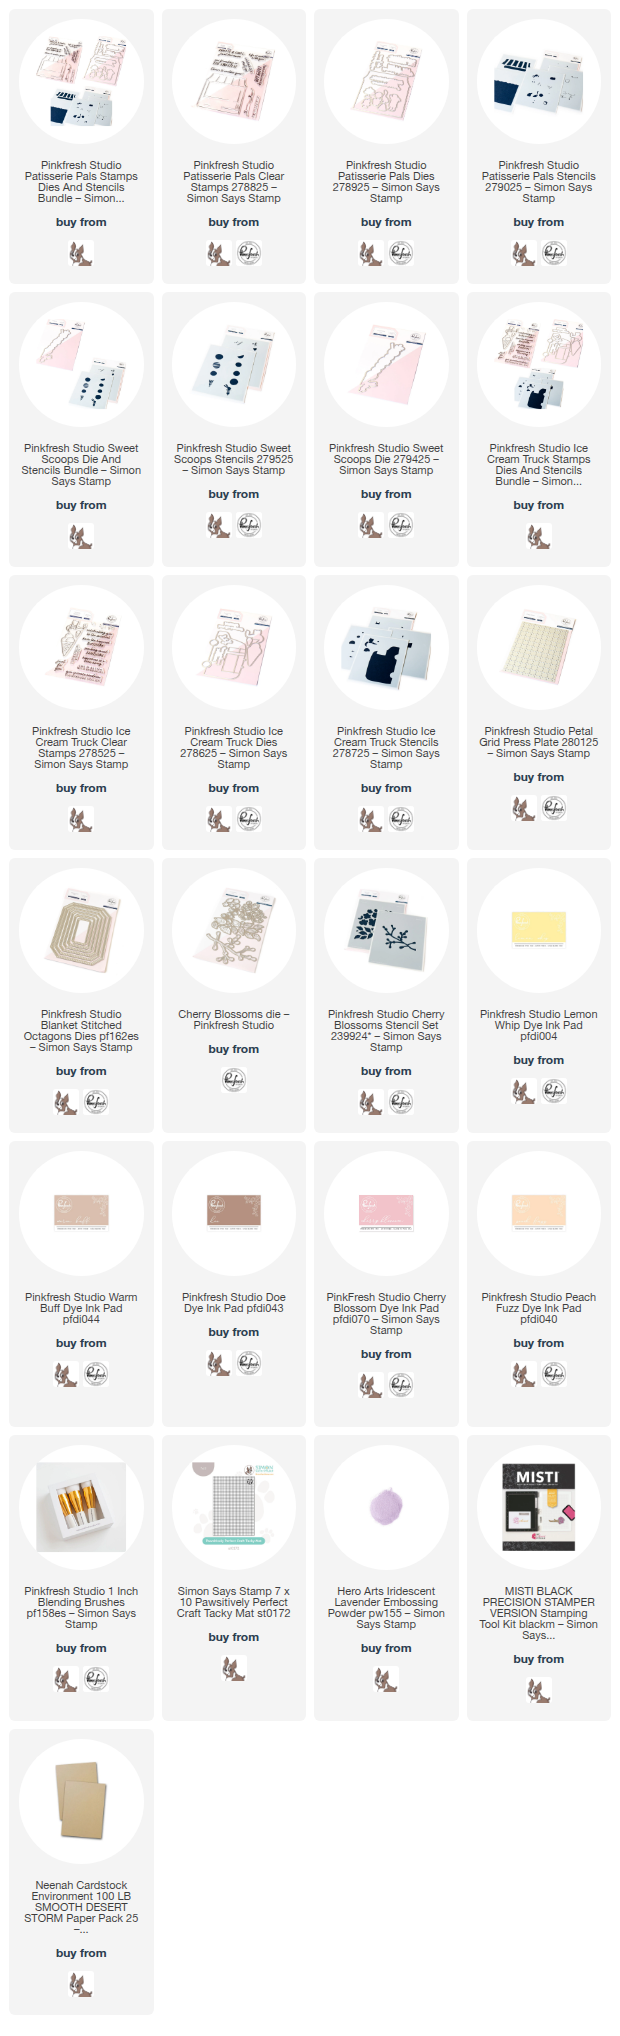
For both of these projects, I kept the color palette sherbet-themed, featuring Lemon Whip, Doe, Warm Buff, Cherry Blossom, and Peach Fuzz inks. The addition of the light brown helps balance out the sunshiny pastel colors! Both projects feature the darling sweet shop from the new Patisserie Pals, which I stamped with Doe ink for the outline, then stamped directly over the top with embossing ink, then added Iridescent Lavender embossing powder to add an ethereal shimmer to the images. I used Cherry Blossom and Warm Buff inks with the coordinating stencils to create a pastel sweet shop, complete with striped awning! The large size of this finished image meant that I could easily cut the image in half to use it for not one, but two projects!

For my first project, I decided to pair the sweet and whimsical images from Patisserie Pals with some florals and a frame to create a little scene. I die cut the kraft frame from Blanket Stitched Octagons, then popped it up with thin foam adhesive squares on a white A2 card front. I tucked one half of the sweet shop beneath the frame, allowing it to peek out, then added some sweets and the adorable little bunny with foam and liquid adhesive.

To adorn the sweet shop and create an almost Parisian vibe for this neighborhood patisserie shop, I used Warm Buff and Cherry Blossom inks with the Cherry Blossoms stencils, then used the coordinating dies to die cut the foliage and blossoms, adhering the pieces with liquid adhesive. I also die cut a branch from some more kraft cardstock, then added all of the blooms and foliage with liquid adhesive. To create a fuller floral corner with this single Cherry Blossom branch, I used my scissors to snip some of the twigs off and create a custom arrangement in the corner of the octagonal frame. For the greeting, I stamped a sentiment from Patisserie Pals using Doe ink, then added the same Iridescent Lavender embossing powder over the top to create a unique sentiment that stands out beautifully amongst the pastel imagery in the background!

For my second card, I created a sweet ice cream shop using some of the leftovers from the first project! One of my favorite things about Pinkfresh Studio product suites is how many of them utilize the “one and done” idea: all of the images are connected on the same stencil or stamp or die, maximizing your time at your craft desk to create tons of images in one fell swoop! Because the Patisserie Pals stamp and stencil suite created so many images, I was able to use some of the images on the previous project and still have leftovers to use for this project! I also stamped images from the Ice Cream Truck product suite and used the same shades of ink with their coordinating stencils, as well as the Sweet Scoops stencils and dies. I used all of these sweet critters with the leftover patisserie shop (now an ice cream shop!) to create a little scene!

Before I began arranging all of my images, I used the new Petal Grid Press Plate with Cherry Blossom ink to create a lightly textured and patterned background. This delicate pattern is so sweet and fairly neutral; it adds interest behind my scene without overwhelming it. I also used the leftover Blanket Stitched Octagons die cuts to create a Kraft frame to ground my images and make the focal point a bit more central to the card front. I popped up the frame, then arranged the stamped and stenciled die cuts, adhering them with a mixture of liquid and foam adhesives. Finally, I added another greeting from Patisserie Pals, stamped again with Doe ink and embossed with Iridescent Lavender embossing powder.

Well, that’s all for my projects today! Now for some fun giveaway information:

Pinkfresh Studio will give away the full release on the Pinkfresh blog and YouTube channel. They will also be giving away TEN $50 gift cards along the hop. The winners will be randomly selected from the comments, so the more comments you leave along the way, the more chances you have to win!
Winners will be selected and posted on June 20, 2025, on our GIVEAWAY PAGE. Winners must check that page and claim their prize within two weeks.

Here’s the full hop list in case you get lost:

You are invited to the Inlinkz link party!

Click here to enter

Thanks so much for stopping by today, and happy hopping!

Filed Under: pinkfresh studio Tagged With: better press, birthday, blanket stitched octagons, cherry blossoms, critters, die cutting, ice cream truck, ink blending, layering stencils, patisserie pals, petal grid, press plate, sweet scoops

On the Farm with New Simon Says Stamp!

March 26, 2025

This post was sponsored by Simon Says Stamp. Thanks, Simon!

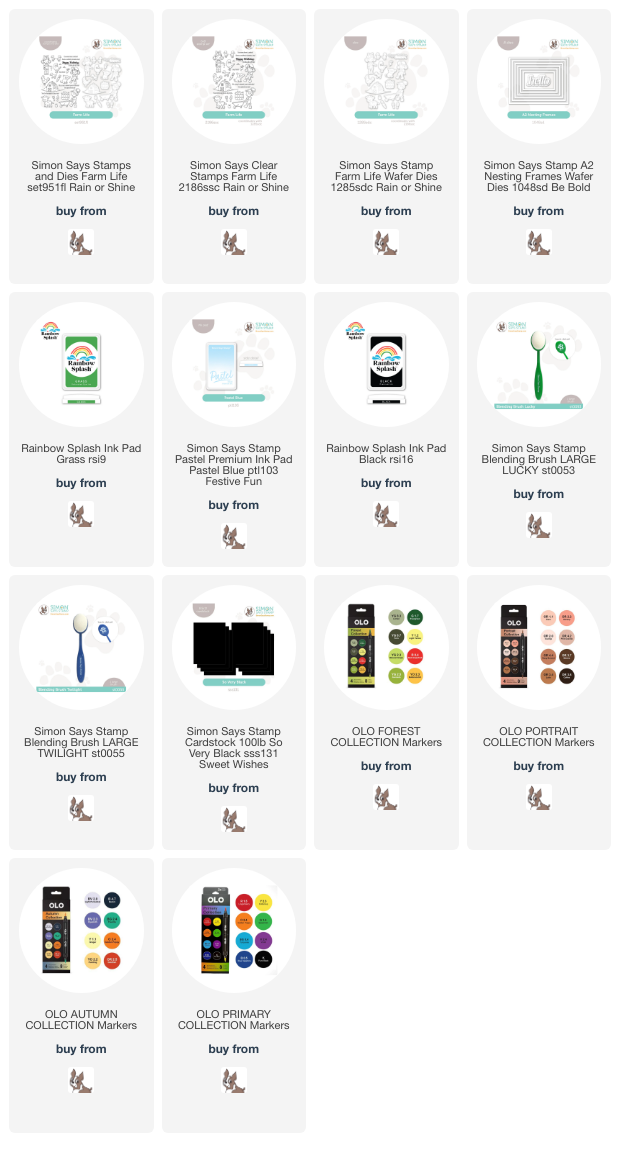
Hi friends! I have some sweet little critters to share with you today using the adorable new Farm Life stamp set from the new Rain or Shine release from Simon Says Stamp! My friend Alberto Gava illustrated this set (along with his many other darling sets, and I always try to push myself outside of my comfort zone to play with his products. My brain gets a little overwhelmed at the prospect of scene-building, so I have to put my thinking cap on, but I always am so happy with the results. Let’s get started with the details on my project!

*I have gathered links to all of the products used at the bottom of the post for your convenience, using affiliate links. Thank you for shopping with my links! I truly appreciate your support for my work!*

To begin, I stamped several images from Farm Life onto some white cardstock using alcohol marker-friendly black ink, then stamped the barn image on a white A2 card front. I used OLO Markers to add lots of vivid color to the little farm girl and her critters, keeping the colors fairly simple and in the primary color palette. Once I had finished coloring all of the individual images, I used the coordinating dies to cut everything out.

For the barn background, I added color to the barn, bush, and hill with OLO Markers, then used blending brushes to blend Rainbow Splash Grass Ink and Pastel Pigment Blue Ink for grass and sky. I wanted to keep the blending simple and suggestive, creating a simple background for the the vibrant critters. After I had finished blending, I added a thin black frame cut using Simon Says Stamp So Very Black cardstock and the A2 Rectangle Frames, which encloses my scene and makes the canvas a little smaller, and thus more manageable for my scene-building.

I arranged the critters and their girl on the card front, adhering them with liquid and foam adhesive squares, then stamped a sentiment with Nocturne black pigment ink, adding clear embossing powder to make the sentiment super crisp. I popped up the sentiment with foam adhesive squares, as well. I contemplated some sparkles, but thought that the scene was busy enough without any additional elements!

Well, that’s all for my project today! I always enjoy embracing a challenge, and scene-building definitely challenges me to step outside of my flowery comfort zone. I encourage you to try it, too! Thanks so much for stopping by today, and have a marvelous day!

Filed Under: simon says stamp Tagged With: A2 Nesting Frames dies, birthday card, critters, die cutting, farm, farm life, ink blending, olo markers

Simon Says Stamp STAMPtember Collaboration: Hero Arts!

September 22, 2023

Hi friends! I’m back with another STAMPtember collaboration set! Throughout the month, many of the companies in our industry have teamed up with Simon Says Stamp to celebrate our love of this hobby with a limited edition stamp set, and today, Hero Arts is in the spotlight!! The Hero Arts Collaboration Set (or you can purchase the Hero Arts Collaboration Set with Coordinating Dies) features some adorable little critters jamming their hearts out, and I’ve got a sweet little congratulatory card to inspire you! Let’s get started with the details.

I began my project by stamping the raccoon and bear on the center of my A2 card front, as well as a greeting from the Hero Arts Collaboration Set using Intens-ified Black ink, also stamping the cute little maraca-loving squirrel on a separate sheet of Hammermill cardstock. I then used Copic markers to color the little critters fairly simply, adding some simple shadows and shape with 2-3 markers per critter. Once I was finished coloring, I used my sharp scissors to fussy cut the squirrel.

To create a ground for my little scene, I placed one of the circle stencils from the Simon Says Stamp Circle Masks and Stencils set directly over my Copic-colored critters and blended Cheeky and Blush Pawsitively Saturated inks using a blending brush. This grounds the critters and creates a little scene, rather than having them floating in midair. I popped the squirrel up with some foam tape, creating a little trio without having to worry about masking. Hooray for simplicity!

To accent the musical trio, I stamped lots of the musical notes from the Hero Arts Collaboration Set using more black ink to add some movement to the background and show off what a party these fellas are having!! Finally, I trimmed down the colored panel slightly and mounted it on a panel of black cardstock to create a delicate black frame around the edge of the focal point.

Well, that’s all for today’s project! If you love these STAMPtember collaboration sets, don’t wait, because they have a tendency to sell out extremely quickly. Thanks so much for stopping by today, and happy STAMPtember!

Filed Under: Hero Arts, simon says stamp Tagged With: copic coloring, critters, ink blending, stamptember, stencil

STAMPtember Begins with a New Release!

August 31, 2023

This post was sponsored by Simon Says Stamp. Thanks, Simon!

Hi friends! STAMPtember has officially begun over at Simon Says Stamp, and it’s going to be such an amazing celebration for the entire month, with marvelous surprises and gorgeous new products with which you can create long after the party has ended! This month is all about celebrating stamping and the joy that comes with it, and I’m so excited to be part of it. The first STAMPtember release just went live in the Simon Says Stamp store, and I have two projects to share with you using several of the new goodies. Let’s get started with the details!

The color palette for my projects today was inspired by the new Purple Fields Pawsitively Saturated Ink Cubes that were released tonight! This set of six ink cubes features two different purple palettes to make for super simple stamp layering and ink blending, taking the guesswork out of which colors work together, as well as creating a beautiful ombré color palette. Both of my projects today feature a deep blue violet with pops of vivid magenta, but utilizing two completely different styles.

To start my first project, I die cut some of the gorgeous Etched Primrose dies, Layered Rose Leaves dies, and Privet Branch die from some plain white Hammermill cardstock. I then used OLO markers to transform these plain white die cuts into this vivid magenta and mint floral bouquet! I added some shimmering handmade watercolors to the centers of each of the flowers to add extra sparkle. Before arranging my bouquet on my card front, I trimmed down a panel of Blue Violet Cardstock to A2 size and used a blending brush to blend the Iris ink from the new Purple Fields Pawsitively Saturated Cubes set over the Diamond Circles Stencil. This tone-on-tone blending creates a super subtle pattern behind the floral bouquet and adds just a touch of interest to the background!

After I had adhered my floral bouquet to the stenciled card front using foam adhesive, I turned my attention to the sentiment. I heat embossed the outline “enjoy” from the new Enjoy Phrases stamp set using silver embossing powder on more Blue Violet Cardstock. I used the handmade metallic glitter watercolors to fill in the interior of the outline; the opacity of these watercolors really makes the word pop from the deep blurple cardstock! I popped up the sentiment elements with a double layer of foam adhesive to really help it stand out. Finally, I added a few shimmering gems for some more sparkle. Such a vivid, dramatic card!

For my second card, I used one of the darling new Happy Days stamps from the STAMPtember release! These sweet storybook critters each are so unique and have the most precious expressions on their faces. I can’t wait to color more of them. I started by using Blending Brushes to blend a super saturated sunset sky background using Amethyst, Lilac, and Iris inks from the Purple Fields Pawsitively Saturated Cubes. I splattered the darker section with some glittering metallic watercolors to create stars. Such a fun effect!

I stamped the mouse from Happy Days on his little mushroom using Contour Ink onto Hammermill cardstock, then colored the image using Warm Gray OLO Markers. I wanted to create a little sunset scene, with the mouse gazing up at the stars, so I “glazed” the lighter areas of the stamped scene with a super pale pink alcohol marker, creating a bit of a pink glow on the image to match the glowing pink sunset background.

To give my stargazing mouse some ground out of which his mushrooms could grow, I die cut two strips of some deep teal cardstock using a grass border die from Honey Bee Stamps. I layered the strips one behind the other, popping the front grass border up with some foam adhesive and tucking my mouse behind it with some more foam tape. I heat embossed another greeting from Enjoy Phrases, this time using the solid large “enjoy” stamp with silver embossing powder and fussy cut it out and pairing it with the retirement sentiment. I loved the notion of a retiree finally having time to gaze at the stars and contemplate the universe like this sweet little mouse! I popped up the greeting pieces using more foam tape, then added a few sparkling gems for one last touch of shine!

Well, that’s all for my projects today! You can check out the entire STAMPtember release HERE. Buckle up, because STAMPtember 2023 is going to be an amazing ride! Be sure to check back this weekend as we kick things off with a fabulous blog party! Thanks so much for stopping by today, and have a marvelous day!

Filed Under: simon says stamp Tagged With: critters, diamond circles, enjoy phrases, etched primrose, happy days, ink blending, layered rose, no line coloring, pawsitively saturated, stamptember, stencil

  • Page 1
  • Page 2
  • Go to Next Page »

Primary Sidebar

  • Facebook
  • Instagram
  • Pinterest
  • YouTube

Favorite Shops

Secondary Sidebar

Subscribe

Enter your email address to subscribe to this blog and receive notifications of new posts by email.

Instagram
Something is wrong.
Instagram token error.
Follow
Load More

Archives

Tags

3D embossing folder alcohol markers better press birthday birthday card blog hop card kit christmas christmas card christmas tag colored pencil copic copic coloring Daniel Smith die cutting embossing folder embroidery felt giveaway holiday holiday card hot foil ink blending karin brushmarker pro layered stencil masculine my monthly hero new release no line coloring no line watercolor OLO marker olo markers original illustration pawsitively saturated rainbow shaker card slimline stamping stamptember stencil thank you thinking of you valentine's day video watercolor

Popular Posts

Simon Says Stamp Sending Cheer Blog Hop- Day 2 + Freebie + Giveaway!
Altenew October 2026 Release Blog Hop + Giveaway!
Rustic Monochromatic Stars for Christmas with Rainbow Splash!
Waffleflower July Release Blog Hop!
December 2018 My Monthly Hero Blog Hop + Giveaway!
March 2020 Essentials By Ellen Blog Hop+Giveaway!
The Ton Anniversary Release: Day 1!
The Ton Stamps Summer Release: Day 1
Hero Arts Partners Blog Hop: Lawn Fawn!
Simon Says Stamp STAMPtember Tim Holtz Collaboration: Festive Holidays!

Disclosure

Some affiliate links are used in my posts. This means that, should you click on one of my links and purchase something from that company, I will receive a small portion of the sale at no extra cost to you. I use the money earned from these sales to help maintain my blog. I so appreciate you visiting and, if you do choose to use one of my affiliate links, thank you so much for your support!
Copyright © 2026 ·Brunch Pro Theme · Genesis Framework by StudioPress · WordPress · Log in
Loading Comments...