• Skip to main content
  • Skip to primary sidebar
  • Skip to secondary sidebar

Sixth Street Sundries

Emily Midgett

  • Home
  • About Me
  • Contact
  • OLO Marker Color Swatch Chart
  • Shop

distress

Simon Says Stamp STAMPtember Tim Holtz Collaboration: Festive Holidays!

September 5, 2025

Hi friends! Exciting STAMPtember news hot off the presses: the perennially amazing Tim Holtz has partnered with Simon Says Stamp to not only release exceptional STAMPtember collaboration goodies, but they are part of the kit that will be used in an exclusive Tim Holtz STAMPtember workshop! Click HERE to see all of the details!

If you are new to STAMPtember from Simon Says Stamp, throughout the month of September, Simon Says Stamp will have exclusive collaborations with some of our favorite stamping companies, releasing a limited edition stamp set designed in collaboration with a different company nearly every day! (Click HERE to see the Collaboration Sets page, and be sure to bookmark it!) 

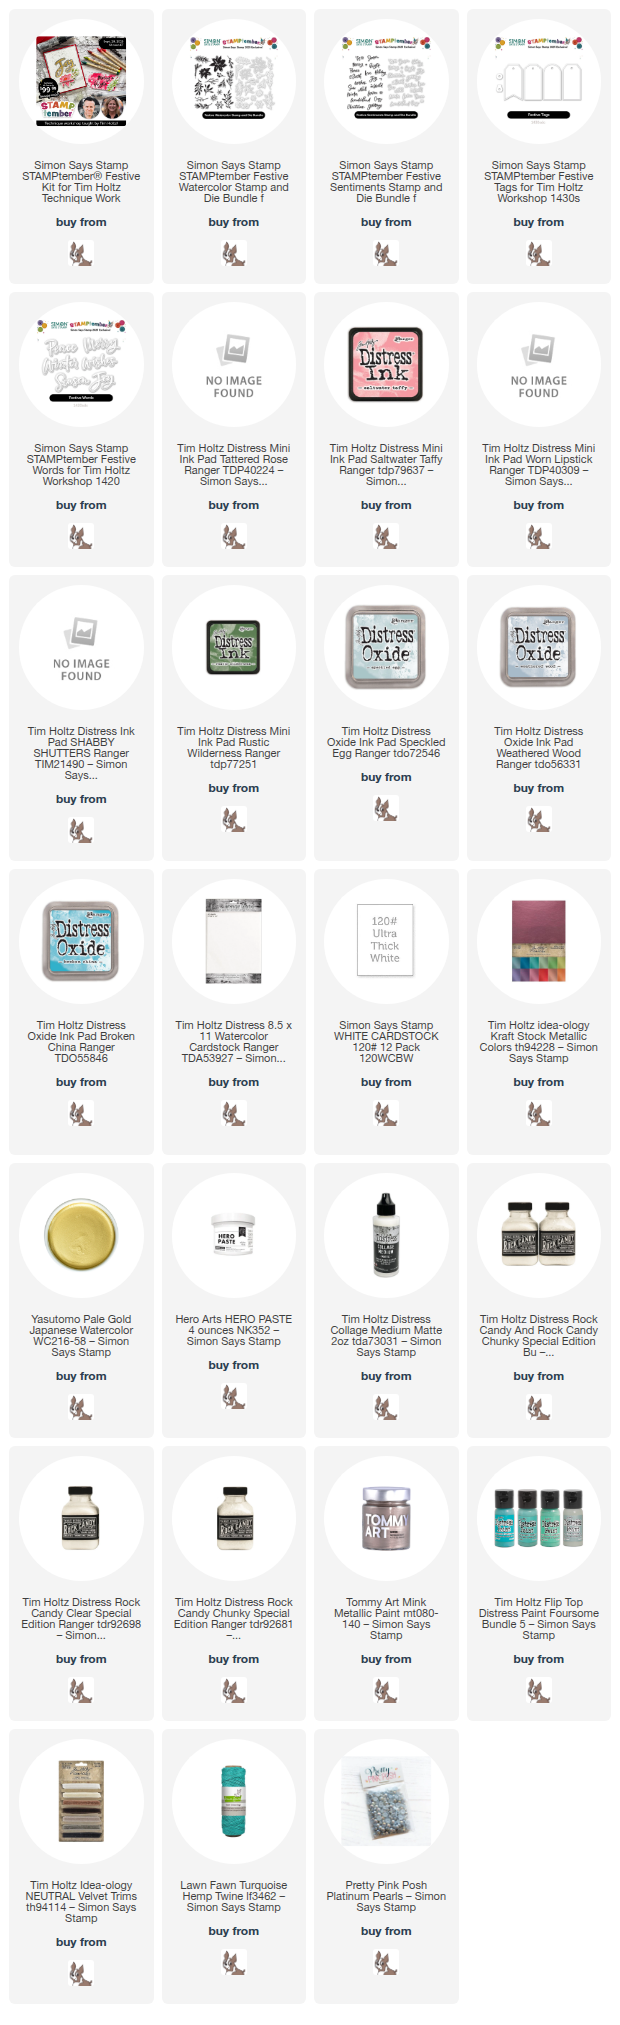
I have created several projects using these gorgeous new Festive Holidays products, so let’s get started with a quick rundown on each!

For my first projects, I decided to create a watercolored card and coordinating tag set using the new Festive Watercolor images, Festive Tags, Festive Words, and Festive Sentiments from the kit with some of my favorite Distress Ink pinks: Tattered Rose, Saltwater Taffy, and Worn Lipstick.

I stamped the floral images from Festive Watercolor onto some Tim Holtz Distress Watercolor Paper using Distress Tattered Rose. I then tapped Tattered Rose, Saltwater Taffy, and Worn Lipstick out onto my glass craft mat and picked up the color with my damp paintbrush, taking advantage of the water-based inks to create several beautiful watercolored blooms. I also stamped the greenery with Shabby Shutters, enhancing the images with some shadows painted on with Rustic Wildnerness Distress Ink. After I had finished painting, I die cut each image with it’s coordinating die.

I created a background with one of my new favorite techniques: ink swiping! I simply swiped the same pink Distress Inks on a panel of white cardstock, using a circular motion to blend the colors seamlessly. I splattered the background with gold shimmer watercolors as a nod to the mixed media king himself, then arranged all of the die cuts in a bouquet with foam adhesive, adding a gold and vellum die cut “Joy” greeting from the new Festive Words dies. I added some shimmering gems and topped everything off with a coordinating blush twine bow!

Using Tattered Rose Distress Ink as my main color, I created a coordinating gift tag, this time using gold embossing powder to add some truly luxurious gold shimmer to the project. I die cut a Festive Tags die from some Simon Says Stamp 120 lb Ultra Thick Card Stock, then swiped my Tattered Rose ink pad directly on the die cut tag, enhancing the gorgeous debossed lines around the edges of the die cut with a gold paint pen to create an elegant gilded frame around the edges. I splattered some more gold glitter watercolors on the delicate pink tag.

To adorn the pretty pink tag, I stamped some flowers and foliage using embossing ink, then added some gold embossing powder. Once I had melted the embossing powder, I die cut the finished images, and to add a little color, I swiped the Tattered Rose ink directly on the die cuts. Due to the resistant nature of the embossing, the color adhered to the white edges of the die cuts, creating solid, colorful images. I repeated the process with a couple of the sentiment stamps from the Festive Words, swiping Saltwater Taffy over the finished die cut. A glittery die cut hole reinforcer and some beautiful pink twine finished the tag off!

I couldn’t resist some gorgeous decor with the large scale images and Festive Words, so I die cut the gorgeous Peace word die from some Tim Holtz Metallic Kraft Stock, backing it with the die cut shadow cut from some pearlescent vellum. To create some fabulous, icy inspiration, I used Speckled Egg, Weathered Wood, and Broken China Distress Oxide Inks (so vibrant, but also so soft and velvety stamped on white cardstock!) to create a gorgeous floral background.

I also stamped some individual images from Festive Watercolor using the same ink colors, die cutting the images with their coordinating dies. I splattered the background with some sparkling watercolors (more hat tip to Tim the Mixed Media Master!), then arranged the die cuts on the 4×6 panel. I adhered the 4×6 panel to an inexpensive little easel frame that I purchased at the dollar store. Such a great way to create some pretty home decor using lots of the supplies that you already have! Finally, I added a few coordinating pearls, as well as twine and velvet bows.

One last project using the Festive Watercolor set! I customized this tiny wooden birdhouse that I found at my local dollar store, first by painting the entire birdhouse with some crisp white chalk paint. To make it pretty, I used some metallic pigment ink to stamp the images all over the birdhouse; the pigment ink stamps beautifully on the chalk paint. Stamping isn’t just for paper!!

I used some acrylic paints to enhance the stamped Festive Watercolor images, painting directly over the floral stamped images with metallic rose gold acrylic paint and some muted sage green for the foliage. I am obsessed with how beautifully this turned out!

Once my painted birdhouse had completely dried, I used a palette knife to add some chunky texture paste “snow drifts”, sprinkling the new Tim Holtz Chunky Rock Candy Glitter on the wet texture paste. I also applied some Collage Medium around the edges of the texture paste, adding some of the Fine Rock Candy Glitter, creating icy snow drifts and encrusting this pretty bird house with sparkling, icy glitter.

If you haven’t seen the LIVE, (click HERE to see!) Tim Holtz has shared a ton of different pieces of inspiration using the images that I used above. There is an unbelievable kit available filled with every single stamp and die set, as well as tons of other goodies, that is going to be used during the upcoming Technique Class on 9/28/25, shared on YouTube. The stamps and dies are going to also be available individually if you would prefer one or the other, and I’ll have them linked below, but the value of the kit (priced at $99.99) is more than two times than the purchase price. Incredible, incredible value!!!

However, just like all STAMPtember collaboration sets…. it’s limited edition. Don’t wait. Seriously… don’t wait. This is going to sell out ASAP.

Thanks so much for stopping by today, and happy STAMPtember!!
Filed Under: simon says stamp, tim holtz, Uncategorized Tagged With: birdhouse, distress, distress ink, distress oxide, festive sentiments, festive tags, festive watercolor, festive words, mixed media, painting, stamptember, tim holtz, watercolor

Simon Says Stamp February Card Kit of the Month!

January 14, 2025

This post was sponsored by Simon Says Stamp. Thanks, Simon!

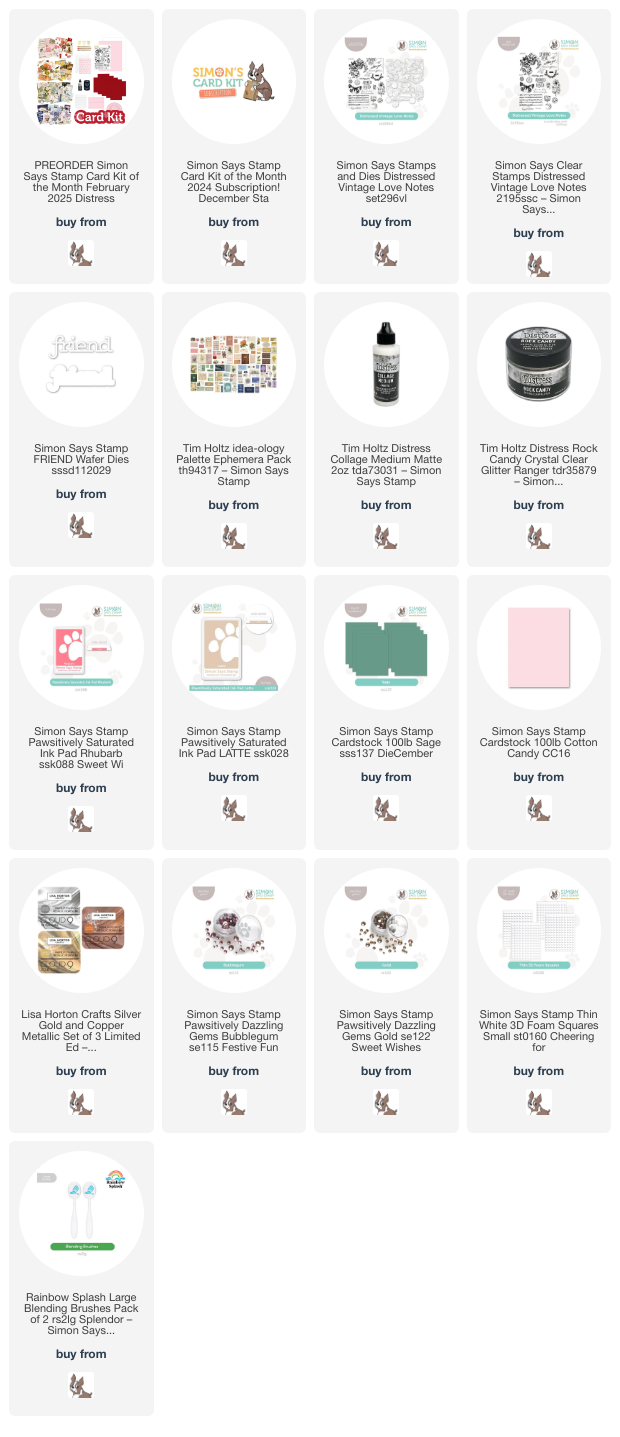
Hi friends! I have some pretty inspiration to share with you using the new Simon Says Stamp February 2025 Card Kit of the Month! These Card Kits are absolutely jam-packed with marvelous products, and the bundle of products is discounted down to make it super affordable and filled with enough products to make a wide variety of projects. All of the curated products in the kit work seamlessly together, but they can also be used (and purchased!) separately to make your crafting experience as easy and fulfilling as possible. You can check out all of the details, including individual items and more inspiration, on this month’s card kit HERE. I have two projects to share with you today created using elements of the February 2025 Card Kit of the Month as well as a few more individual products, so let’s get started with the details!

*I have gathered links to all of the products used at the bottom of the post for your convenience, using affiliate links. Thank you for shopping with my links! I truly appreciate your support for my work!*

The Simon Says Stamp February 2025 Card Kit of the Month features a gorgeous stamp set called Distressed Vintage Notes, and it has so many fabulous elements that work especially beautifully when layered together to create a dimensional, almost mixed media effect. I paired the stamp set with the gorgeous printed ephemera pack included with the kit, as well as some gold, pink, and taupe inks and other goodies from my stash to create this pair of feminine layered cards.

My first card is comprised mostly of the Tim Holtz printed ephemera pack (which I’ve linked individually below, so that you won’t hoard like I am always tempted to do-you can always buy more, Emily!). I selected a couple of the beautifully detailed images from the ephemera pack that I thought worked particularly nicely together, with similar pastel color palette and minimal distressing, then used the included Collage Medium (which is enormous and will last for quite a long time!) to strategically add some Rock Candy Glitter on both the flowers and the butterfly, adding a subtle touch of sparkle and texture to the elements. After allowing them to dry completely, which did not take long at all, I layered them on an A2 Sage card front, adhering them with foam adhesive squares in both a single and double layer for the butterfly.

For the greeting, I heat embossed the “love and affection” sentiment from the Distressed Vintage Notes stamp set using gold embossing powder on some of the Cotton Candy cardstock that was included with the kit, then cut the image out with the coordinating die. I also die cut the Friend die to enhance the sentiment, cutting the detail layer from Simon’s Matte Gold foil cardstock and the shadow layer from Simon Says Stamp Vellum, adhering the two layers together with liquid adhesive and tucking both sentiment pieces amongst the butterfly. I added some Bubblegum Pawsitively Dazzling Gems and a twine bow to finish everything off! Such a delicate card with the pretty pastels and shimmering accents.

My second card uses the large rose die cut from the ephemera pack as the focal point. I think the gorgeous image coupled with the detailed cut edge makes this beautiful printed piece exceptionally beautiful! Because the image screams “vintage” to me, I decided to pair it with a distressed mixed media feel in the background using several elements from the Distressed Vintage Notes stamp set. I used Rhubarb and Latte inks to stamp several elements from the stamp set, first stamping on a piece of scrap paper, then using the residual ink to get a lighter impression on my Cotton Candy A2 card front. After blending first Rhubarb and then Latte inks around the edge of my card front to increase the vintage feel on my card, I also used some sparkling gold pigment ink to layer some lacy florals from the stamp set, adding sparkle and texture to the background.

I popped the beautiful rose ephemera piece up on my finished background using foam squares, then used gold embossing powder to emboss the sentiments and gorgeous butterfly image. For the butterfly, I heat embossed the image on vellum to create a light and ethereal feel while also avoiding another heavy layer of cardstock. I popped up the greeting pieces with double and single layers of foam adhesive, then tucked the vellum butterfly next to the flower. Finally, I added some Gold Pawsitively Dazzling Gems and a sparkling gold twine bow for added shimmer!

Well, that’s all for my projects today. I so enjoyed stepping outside of my comfort zone to create these distressed but feminine cards. You can check out all of the details, including individual items and more inspiration, on this month’s card kit HERE. If you like the looks of the Card Kits of the Month, you can always subscribe to be able to get first dibs on these beautifully curated kits in addition to even better discounts! The value of the kits always far exceeds the individual purchase price, so it’s a great way to build your stash and get lots of bang for your buck. Thanks so much for stopping by today, and have a marvelous day!

Filed Under: simon says stamp Tagged With: card kit of the month, die cutting, distress, ephemera, ink blending, lisa horton metallic inks, metallic ink, mixed media, valentine

United We Flourish- Ellen Hutson featuring Concord and 9th!

December 17, 2017

Good morning! Today, the Where Creativity Meets C9 design team has the distinct pleasure of helping to introduce the newest installment of the Ellen Hutson United We Flourish collaboration sets: Sweet Sprinkles from Ellen Hutson and Concord and 9th!

Aren’t these images just so precious!? And I love that they can be made into a cupcake or an ice cream cone. Nobody does versatility better than Concord and 9th!

For my project, I was channeling those vintage ice cream shoppe posters that you’d see in the 50’s… the ones with the pretty pastel dollops of ice cream and distressed, vintage background. I used Distress Oxide Inks for all of my stamping today. The lovely, creamy colors lent themselves perfectly to ice cream, don’t you think?

I began by die cutting the cone and three scoops of ice cream from some cream colored card stock. Next, I stamped the cone using Wild Honey Distress Oxide ink and the ice cream scoops using Cracked Pistachio, Antique Linen, and Worn Lipstick (mint, vanilla, and strawberry!) inks. I added the sprinkles stamp to the strawberry scoop using some white pigment ink.

I trimmed down a panel of cream colored card stock to be slightly smaller than A2. I arranged my triple decker ice cream cone on the card front and adhered it with dimensional foam adhesive, then used the little heart stamps included in the Sweet Sprinkles set and more Antique Linen Oxide ink (some stamped off once to make a very subtle, almost bokeh look) to add some “confetti” in the background. I stamped the greeting using Walnut Stain Oxide ink, then added some clear embossing powder over the top to add a bit of shine to this fairly texturally flat card. I mounted the cream panel on a minty A2 card base.

Well, that’s all for my card! Aren’t those stamps just darling??! Now, a celebration deserves a giveaway!! Here are the details:

To celebrate, two randomly selected commenters will win a $30 gift certificate to the Ellen Hutson shop and two commenters will win a $30 gift certificate to the Concord & 9th shop. To enter just leave a comment on the Ellen Hutson Classroom blog and the Concord blog by 12pm PST on December 26th.

The CLASSroom

Concord & 9th

Melissa Bickford

Sharon Harnist

Kymona Tracey

Sandy Allnock

Emily Midgett—-> you are here

Lisa Adametz

Lindsey Larsen

Laurel Beard

Justin Krieger

Kittie Caracciolo

Karen Baker

Julie Ebersole

Tenia Nelson

Carolyn Peeler

Lisa Stein

Carly Tee Minner

Jessica Frost-Ballas

Carissa Wiley

Thanks so much for stopping by, and enjoy the rest of the hop! Your next stop is Lisa Adametz.

Filed Under: Concord and 9th, Ellen Hutson, Where Creativity Meets C9 Tagged With: distress, distress oxide, ice cream, united we flourish, vintage

Primary Sidebar

  • Facebook
  • Instagram
  • Pinterest
  • YouTube

Favorite Shops

Secondary Sidebar

Subscribe

Enter your email address to subscribe to this blog and receive notifications of new posts by email.

Instagram
Something is wrong.
Instagram token error.
Follow
Load More

Archives

Tags

3D embossing folder alcohol markers better press birthday birthday card blog hop card kit christmas christmas card christmas tag colored pencil copic copic coloring Daniel Smith die cutting embossing folder embroidery felt giveaway holiday holiday card hot foil ink blending karin brushmarker pro layered stencil masculine my monthly hero new release no line coloring no line watercolor OLO marker olo markers original illustration pawsitively saturated rainbow shaker card slimline stamping stamptember stencil thank you thinking of you valentine's day video watercolor

Popular Posts

Simon Says Stamp October 2026 Card Kit of the Month: Homespun Gratitude!
February 2018 My Monthly Hero Blog Hop!
Altenew Craft A Flower: Poppy Blog Hop+Giveaway!
Felted Gourd Wall Hanging with Simon Says Stamp!
Sunflower Home Decor with Simon Says Stamp!
Craft Your Life Project Kit: Feathered Lilies Blog Hop+Giveaway!
Simon Says Stamp October 2025 Card Kit of the Month!
Altenew Standalone Die Blog Hop+Giveaway!
The Ton Anniversary Release- Day 2
Altenew Build A Flower Japanese Mum Blog Hop!

Disclosure

Some affiliate links are used in my posts. This means that, should you click on one of my links and purchase something from that company, I will receive a small portion of the sale at no extra cost to you. I use the money earned from these sales to help maintain my blog. I so appreciate you visiting and, if you do choose to use one of my affiliate links, thank you so much for your support!
Copyright © 2026 ·Brunch Pro Theme · Genesis Framework by StudioPress · WordPress · Log in
Loading Comments...