• Skip to main content
  • Skip to primary sidebar
  • Skip to secondary sidebar

Sixth Street Sundries

Emily Midgett

  • Home
  • About Me
  • Contact
  • OLO Marker Color Swatch Chart
  • Shop

easter blessings

Simon Says Stamp Splendor Release Blog Hop Day 1 + Giveaway!

February 16, 2024

This post was sponsored by Simon Says Stamp. Thanks, Simon!

Hi friends! Today, I am hopping along with Simon Says Stamp for Day 1 of the Splendor Release Blog Hop. You should have arrived here from Lisa Addesa and your next stop is Cheiron Brandon. You can find the full hop list over at the Simon Says Stamp Blog in case you get lost! I have been embracing all things spring with the new Splendor release, using the beautifully buttery new Pawsitively Saturated Ink Trio 27 as my excuse to keep things light and sunny. I have some springy Easter cards to share with you today using some of the new stencils and the gorgeous new Trio 27 inks, so let’s get started with the details!

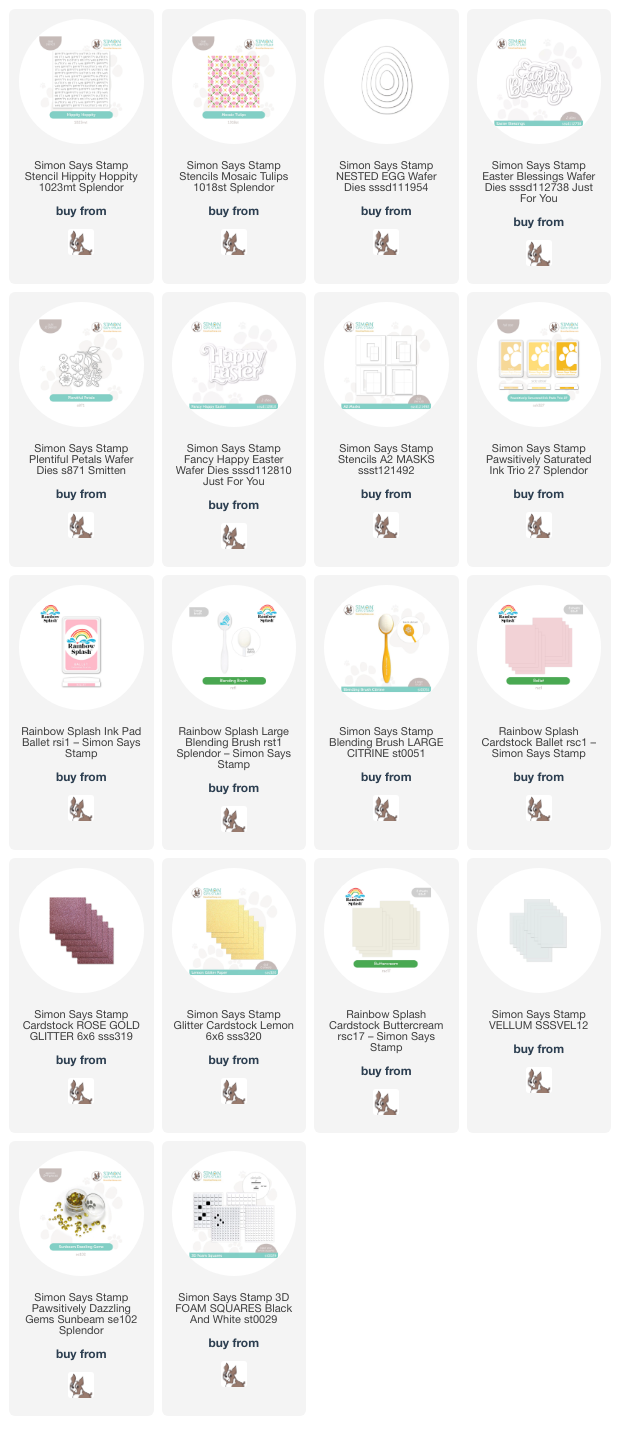
To start, I die cut several Easter eggs in three different sizes from Hammermill cardstock using the Nested Eggs dies. Using blending brushes, I blended several of the die cut eggs using the new lemon meringue inks from the Pawsitively Saturated Ink Trio 27, as well as a few eggs using Rainbow Splash Ballet Ink (using one of the new Rainbow Splash blending brushes). Concentrating the color around the edges of the eggs is lovely on its own, lending plenty of dimension and shape to these simple die cuts, but I wanted to make some of them extra special, and so used the new Hippity Hoppity stencil and Mosaic Tulips layering stencil set to add some fun patterns to a few of the eggs.

When selecting patterns to mix & match, I like to find completely contrasting patterns so that the eye does not get overwhelmed by too much busyness on the card front, instead being able to focus on each individual pattern. The close, somewhat repetitive pattern on the Hippity Hoppity stencil contrasted nicely with the open floral pattern on the Mosaic Tulips layering stencil. I also broke up the different patterned eggs by leaving some of the eggs solid, with only some ink blending around the edges.

Before arranging the eggs on my slimline card front, I used blending brushes to blend Butter ink from the Pawsitively Saturated Ink Trio 27 and Rainbow Splash Ballet Ink on the top and bottom of the card front, leaving the center white to provide some relief to the eye and to avoid creating a third color on my card by mixing the colors. I arranged the eggs on my card front, adhering the largest eggs in the background with liquid adhesive and the smaller eggs with foam squares. To accent the eggs and keep things extra springy, I die cut the Plentiful Petals dies from white, Ballet, and Rose Gold Glitter cardstock, mixing and matching the three colors to create little floral clusters with a variety of sizes, tucking the flowers and foliage amongst the egg die cuts. For the greeting, I die cut the Easter Blessings die from some more Ballet cardstock and layered it atop the egg lineup. Finally, I accented the card using some sparkling iridescent yellow gems from my stash!

After I had used the utterly gorgeous new Mosaic Tulips layering stencil on my egg die cuts, I knew that I needed to use it on a larger canvas and allow it to shine. For my next project, I paired the beautiful layering stencil with the older A2 Stencil and Masks set and the new Ink Trio 27 to create a focal point for some springy die cuts. I started by centering my A2 Stencil and Mask over my white A2 panel and lightly blending Butter ink from Ink Trio 27 around the edges, keeping the color concentrated around the edge of the rectangle. Keeping the mask in place, I placed the first layer of the Mosaic Tulips layering stencil over the open area and blended it with Butter ink, as well. I replaced each stencil layer and blended with the next darkest shade of ink from the trio until I had created this pretty background with a crisp white frame.

To accent the floral pattern, I found that the tulips in the Plentiful Petals dies perfectly match the shape of the flowers from the Mosaic Tulips stencil set. I die cut the flowers three times, once from Lemon Glitter Cardstock, once from Rainbow Splash Buttercream cardstock, and once from a panel of cardstock that I blended with residual yellow ink leftover from blending the stenciled background. I created little swags in the corners of my blended panel, mixing and matching the different textures and colors to create interesting bouquets.

For the greeting, I used some more Lemon Glitter Cardstock to die cut the detail layer of the Fancy Happy Easter die, cutting the shadow layer from vellum and adhering the two together. I popped up the greeting in the center of the stenciled area using foam squares, then added a smattering of Sunbeam Pawsitively Dazzling Gems for some sparkle!

Well, that’s all for my projects today! To celebrate the Splendor Release, Simon Says Stamp is offering a free gift with purchase: simply follow the instructions on the graphic at the top of the post to find the freebie, then enter code MRGT at checkout so that you can receive the Margot Embossing Folder free with purchase!

Simon Says Stamp is also generously sponsoring a $25 coupon for each blog to be chosen from comments left along the hop! Simply leave a comment on each blog hop stop to be entered to win! The winners will be posted on the Simon Says Stamp blog on Wednesday, February 21. Winners can email Simon Says Stamp to claim his/her prize 🙂

Your next stop on the hop is Cheiron Brandon. Thanks so much for stopping by today, and happy hopping!
Filed Under: simon says stamp Tagged With: easter blessings, easter card, hippity hoppity, ink blending, layered stencil, mosaic tulips, nested egg, plentiful petals, rainbow splash, slimline card

Simon Says Stamp Just For You Blog Hop-Day 1!

March 17, 2023

Hi there! Simon Says Stamp is celebrating their newest Just For You collection with a two-day blog hop, and today is the first day full of tons of inspiration using the amazing new products! You should have arrived here from Heather Ruwe, and your next stop is Alberto Gava. It never ceases to thrill me to see one of my illustrations come to life as a stamp set, and so it is super exciting for me to see my new Herb Labels set in the Simon Says Stamp lineup!

I designed the Herb Labels set to create customized labels for your herb garden, but since I’m a cardmaker, I wanted to make sure that there were some sentiments to create cards, as well! I added several punny sentiments, and while puns are not my normal jam, I have to say… these make me chuckle. I kept the fonts simple and classy, and I really am enjoying using them! They work for so many occasions, too…. “Mint to be” would be perfect for a wedding, engagement, or just an I love you card; “eat, drink, and be rosemary” would work for a wedding or for the holidays; “tis the seasoning” works for a holiday card; “you’re kind of a big dill” would work for tons of occasions-how cute would it be for a Father’s Day card?! (You can see another project using the herbs and other new release goodies HERE.) I had such fun creating these, and I couldn’t resist using my favorite sentiment on the card below. Let’s get started with the details!

I adore the look of colored pencils on colored cardstock, and red and kraft are just *chef’s kiss* together! I stamped my tomatoes from Herb Labels onto some Sand cardstock from Hero Arts using white pigment ink, which is the ink that I prefer to use when doing pencil work on colored cardstock. I then used colored pencils to add several shades of red and green to the tomato vine. I love how vibrant these colors are on the muted kraft cardstock.

I die cut the large label image from Herb Labels from some more Sand cardstock, then heat embossed the frame outline and the sentiment with white embossing powder. The white looks so crisp on the muted brown cardstock! I popped up the penciled, die cut tomatoes on the tag using foam adhesive, so that they look as though they’re hanging from a vine in a garden

.

When creating a card with a simplistic color scheme, I like to add lots of texture to the background, as well as lots of height with different levels of foam adhesive. To create the card base, I ran a full size A2 card front of the Sand cardstock through my die cut machine using the Spun Glass Embossing Folder from Simon Says Stamp. The repeating pattern and subtle texture were perfect for my somewhat monochromatic card front. I also popped up a white glitter die cut frame around the edge, which I cut using the A2 Thin Frames die set. I haven’t snipped my dies apart, instead leaving them as one solid die, so that when I run it through my die cut machine, I get a ton of frames in various sizes and widths and can just save the rest for a rainy day! I added the tomato label to the embossed, framed card front using foam tape, creating lots of height and texture.

My second card features the beautiful, scripty new Easter Blessings die. I have had the utterly lovely Dandy Floral Embossing Folder + Die set out on my desk for such a long time, waiting for the perfect project on which to use it. As soon as I saw the gorgeous font and generous size of the Easter Blessings die, I knew they would work beautifully together! The large flower on the Dandy Floral Embossing Folder reminds me of one of those ruffly, specialty daffodils, and what is more reminiscent of Easter and springtime than a daffodil?

I ran the Dandy Floral Embossing Folder through my die cut machine with an A2 piece of Arches cold press watercolor paper inside. I find that the Arches cold press works beautifully with these detailed embossing folders, sturdy enough to hold up to the deep embossing but also retains some of the texture that is important for (my own personal style of) watercoloring. After taping down the panel to my watercolor board, I used Daniel Smith watercolors to add lots of vibrant color. After laying down my initial layer of color, I always like to go back a second and sometimes even a third time to enhance shadows and add more vibrance. The heavy duty watercolor paper allows me the flexibility to go back in and add more pigment and water without worrying that it will start to pill or disintegrate. I find that a paintbrush with a nice, crisp point is crucial for watercoloring these embossing folder images, just as it would be for any no-line watercoloring project.

I wanted the greeting to be simple, elegant, and stand out nicely on the vibrant background, so I die cut it twice from plain white cardstock and once from the same white glitter cardstock that I used for the frame in the previous project. I adhered all of these together using liquid glue, creating a dimensional die cut. The extra height allows the greeting to stand out a bit from the super textured, colorful background, while the sparkle of the glitter cardstock adds some opulence and shimmer! I adhered the dimensional die cut to the colorful card front using plenty of liquid adhesive. I find that liquid adhesive, rather than a tape runner, works best when adhering die cuts to super textured papers. A few Milk Glass gems helped to add one last touch of sparkle!

Well, that’s all for my projects today. I have a couple more up my sleeve to share with you, but I will save them for next week!

To celebrate the Just For You release and the blog hop, Simon Says Stamp is offering a fun discount:

Use code GREEN to receive $7 off with a purchase of $40 or more! This promotion will expire 3/19 at 11:59 pm EDT.

They are also giving away a $25 coupon to every stop on the hop, selected from the comments section. The winners will be announced on the Simon Says Stamp blog on Wednesday the 22nd of March. All winners must email Simon Says Stamp to claim his/her prize, so be sure to check the blog next week!

Also-I will be attending the Simon Says Stamp CREATE event next month in Columbus, Ohio! I will be working in the Hero Arts booth and meandering around seeing all of the crafty goodness and crafty friends. There are some crazy talented instructors teaching amazing Create It, Take It classes, and tons of awesome shopping opportunities. You can find out all of the information HERE. Will I see you there?

Your next stop on the hop is the ridiculously talented Alberto Gava. And don’t forget to check out the enormously talented hoppers tomorrow on Day 2 of the hop, as well! So much inspiration-you won’t want to miss. Thanks so much for stopping by today, and happy hopping!

Filed Under: simon says stamp Tagged With: A2 thin fra, colored pencils, dandy floral, Daniel Smith, easter blessings, herb labels, no line coloring, no line watercolor, spun glass embossing folder, watercolor

Primary Sidebar

  • Facebook
  • Instagram
  • Pinterest
  • YouTube

Favorite Shops

Secondary Sidebar

Subscribe

Enter your email address to subscribe to this blog and receive notifications of new posts by email.

Instagram
Something is wrong.
Instagram token error.
Follow
Load More

Archives

Tags

3D embossing folder alcohol markers better press birthday birthday card blog hop card kit christmas christmas card christmas tag colored pencil copic copic coloring Daniel Smith die cutting embossing folder embroidery felt giveaway holiday holiday card hot foil ink blending karin brushmarker pro layered stencil masculine my monthly hero new release no line coloring no line watercolor OLO marker olo markers original illustration pawsitively saturated rainbow shaker card slimline stamping stamptember stencil thank you thinking of you valentine's day video watercolor

Popular Posts

Simon Says Stamp Joy For You Blog Hop- Day 1!
Simon Says Stamp Joy For You Release-Now Available!
Frozen Fractals All Around with New Simon Says Stamp Joy For You Release!
Shaped Holiday Shaker Card with New Simon Says Stamp Jolly Season Card Kit of the Month!
Holiday Postage with New Simon Says Stamp!
Simon Says Stamp Glory to the Newborn King Holiday Kit-Part II!
Pinkfresh Studio 5th Birthday!
Altenew Build A Flower: Fuchsia Blog Hop+Giveway!
Holiday Joy in Pink and Green with New Simon Says Stamp DieCember!
Honey Bee Stamps September Release Blog Hop!

Disclosure

Some affiliate links are used in my posts. This means that, should you click on one of my links and purchase something from that company, I will receive a small portion of the sale at no extra cost to you. I use the money earned from these sales to help maintain my blog. I so appreciate you visiting and, if you do choose to use one of my affiliate links, thank you so much for your support!
Copyright © 2026 ·Brunch Pro Theme · Genesis Framework by StudioPress · WordPress · Log in
Loading Comments...