• Skip to main content
  • Skip to primary sidebar
  • Skip to secondary sidebar

Sixth Street Sundries

Emily Midgett

  • Home
  • About Me
  • Contact
  • OLO Marker Color Swatch Chart
  • Shop

elegant ornament

Using Your Leftovers: A Two-fer with DieCember Elegant Ornament!

December 12, 2023

This post was sponsored by Simon Says Stamp. Thanks, Simon!

Hi friends! I was a in a purple mood recently after having reorganized my glitter and colored cardstocks, which refreshed my memory as to the utterly spectacular rainbow of cardstock in my stash. I was organizing them into ROY G BIV color gradient, saw these gorgeous purples next to each other, and knew that I wanted to create a project with them. My second project actually started with leftovers from my first project, so let’s get started on the details!

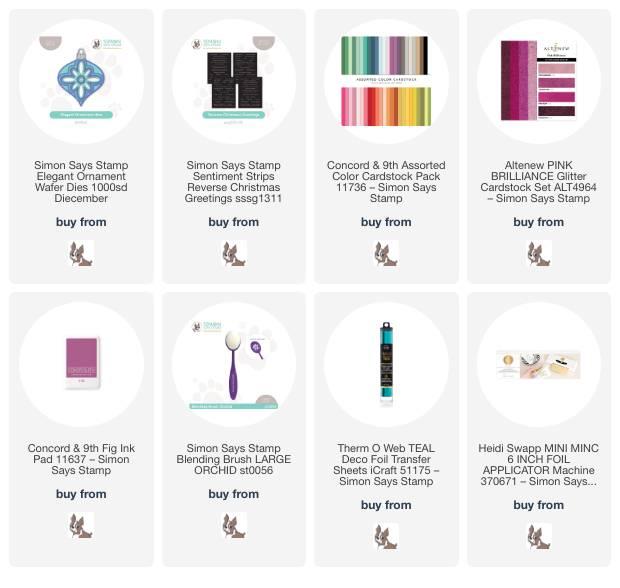
The beautiful Elegant Ornament die (which I’ve used HERE to create a simple and elegant slimline card in a similar color palette!) is so easily customized; you can create tons of different combinations by switching up your colors and which dies you choose to layer. For this first project, I used only the large background die and one of of the detail dies to create this elegant shaker tag. I die cut the more solid background die twice from deep Eggplant cardstock. When making tags, I like to cut two of the same die to layer them and keep the scratched backside of my die cuts hidden. This tag takes that a step further by adding acetate behind the open windows! Because there is no solid ornament die for this set, I simply used a sharpie to trace around the die cuts onto some acetate, then used my Everyday Scissors to cut the shapes out. I adhered the acetate to the back of each purple ornament using some super sticky double sided adhesive, added foam tape, then filled it with sequins to create a shaker tag.

To adorn this pretty ornament, I die cut some of the extras included in the Elegant Ornament die in a complementary muted magenta glitter cardstock from the Altenew Pink Brilliance Glitter Gradient cardstock pack. I added these sparkling detail die cuts to the front of my tag, then added a few coordinating gems from my stash. Finally, I added a twine loop and a custom-colored bow, which I created by coloring a silk ribbon with a matching Copic marker. I love how the tag has the sparkling shaker bits in the transparent window! Such a unique project for me, and it makes my jar of Christmas chocolates for my kiddos’ teacher so much prettier!

My second project features some of the leftovers from previous tag! I love when you can use leftovers as a jumping off point to create an entirely new project. I assembled the center medallion of the Elegant Ornament die using the reserved die cuts from the previous project, adding the outer layer cut from Concord and 9th Fig cardstock. I love the monochromatic feel to this ornament!

For my background, I die cut the new Florence Plate from Concord and 9th Eggplant cardstock and backed it with an A2 panel of Purple Rain cardstock. The iridescent shine peeking through the die cut windows of the Florence Plate is absolutely smashing! I popped up the ornament die cut using some foam adhesive, then added a fluffy coordinating bow for even more texture.

For the greeting, I die cut the background layer of the Large Joy die from more Eggplant cardstock, then the detail layer from more of the Rhodolite glitter paper in the Altenew Pink Brilliance Glitter Gradient cardstock. I also heat embossed a greeting from the Good Cheer stamp set onto a strip of Eggplant cardstock using Copper embossing powder. I popped the greeting components up with a double layer of foam adheisve, then added a few shimmering color coordinated gems for even more sparkle and shine! I’ve said it before, and I’ll say it again: Christmas is the perfect opportunity to pile on the sparkle!

Well, that’s all for my projects today. I love when leftovers can spark a completely new project! Thanks so much for stopping by today, and have a marvelous day!

Filed Under: simon says stamp Tagged With: christmas card, christmas tag, elegant ornament, florence plate, good cheer, holiday card

Regal Purple and Colorful Ornaments: More DieCember Inspiration!

December 6, 2023

This post was sponsored by Simon Says Stamp. Thanks, Simon!

Hi friends! My color-loving heart is so excited to share this card with you today. I have a Pinterest board entitled “Holiday Color Combos” (which you can see in its entirety HERE), and on it is pinned tons of unusual Christmas color schemes. After making cards with lots of traditional colors for the last several months, I found myself perusing this board for color palettes before creating my projects for the DieCember release for Simon Says Stamp. One color combination jumped out at me: deep plum, bright teal, vivid magenta, and amethyst purple. The multiple layers of the new Elegant Ornament dies were perfect for using this interesting color combination. Let’s get started with the details!

The Elegant Ornament die set includes five different dies so that you can customize the different layers in tons of unique combinations! I chose to die cut the pieces from Eggplant and Peacock solid cardstock from Concord and 9th, reserving the die cuts from each layer to be used later. I also die cut the super delicate detail layer from some magenta glitter cardstock, cutting enough to create three different ornaments.

Because none of the layers of this die are completely solid, I made sure to keep the solid center section from the super detailed top layer of Eggplant cardstock. I then added this piece behind the windows on the teal layer so that the medallion would be completely solid and there would be tons of contrast between the different layers.

The three ornaments were the perfect size for an elegant slimline card, so I trimmed down a Fig slimline card front and blended some Fig ink around the edge of the card front. I also splattered the background with some handmade iridescent watercolors to add a touch of sparkle. I popped up the ornaments on the card front using foam adhesive, then added a foiled sentiment from the Sentiment Strips Reverse Christmas Greetings with some more foam tape. For a touch of added sparkle, I placed a shimmering gem in the center of the outer two ornaments. This was quite a simple card, merely die cutting and gluing, but I think these look so elegant and sumptuous with the rich colors and textures.

Well, that’s all for my project today. Thanks so much for stopping by today, and have a marvelous day!

Filed Under: simon says stamp Tagged With: christmas card, elegant ornament, ink blending, sentiment strips, slimline, toner foil

Primary Sidebar

  • Facebook
  • Instagram
  • Pinterest
  • YouTube

Favorite Shops

Secondary Sidebar

Subscribe

Enter your email address to subscribe to this blog and receive notifications of new posts by email.

Instagram
Something is wrong.
Instagram token error.
Follow
Load More

Archives

Tags

3D embossing folder alcohol markers better press birthday birthday card blog hop card kit christmas christmas card christmas tag colored pencil copic copic coloring Daniel Smith die cutting embossing folder embroidery felt giveaway holiday holiday card hot foil ink blending karin brushmarker pro layered stencil masculine my monthly hero new release no line coloring no line watercolor OLO marker olo markers original illustration pawsitively saturated rainbow shaker card slimline stamping stamptember stencil thank you thinking of you valentine's day video watercolor

Popular Posts

Simon Says Stamp Sending Cheer Blog Hop- Day 2 + Freebie + Giveaway!
Altenew October 2026 Release Blog Hop + Giveaway!
Altenew Build A Flower Sweet Violet+Giveaway!
Floral Follies on Canvas with New Simon Says Stamp STAMPtember!
Simon Says Stamp Card Kit November 2026: Jolly Season!
Simon Says Stamp STAMPtember Tim Holtz Collaboration: Festive Holidays!
Hero Arts Partners Blog Hop: Lawn Fawn!
Rustic Monochromatic Stars for Christmas with Rainbow Splash!
Altenew March 2020 Release Blog Hop+Giveaway!
Honey Bee Stamps Bee Bold Release Blog Hop!

Disclosure

Some affiliate links are used in my posts. This means that, should you click on one of my links and purchase something from that company, I will receive a small portion of the sale at no extra cost to you. I use the money earned from these sales to help maintain my blog. I so appreciate you visiting and, if you do choose to use one of my affiliate links, thank you so much for your support!
Copyright © 2026 ·Brunch Pro Theme · Genesis Framework by StudioPress · WordPress · Log in
Loading Comments...