• Skip to main content
  • Skip to primary sidebar
  • Skip to secondary sidebar

Sixth Street Sundries

Emily Midgett

  • Home
  • About Me
  • Contact
  • OLO Marker Color Swatch Chart
  • Shop

embroidery hoop

Ahoy with New Simon Says Stamp Shine On Release!

June 25, 2026

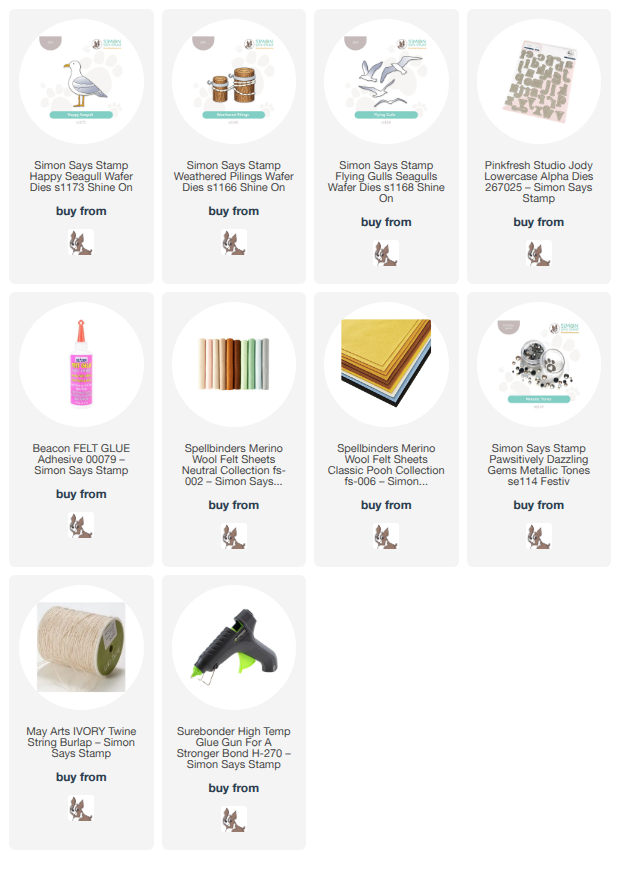
*I have gathered links to all of the products used at the bottom of the post for your convenience, using affiliate links at no extra cost to you. Thank you for shopping with my links! I truly appreciate your support for my work!*

Hi friends! Simon Says Stamp has a fabulous new release, called Shine On, and it’s available and shipping NOW! Click HERE to see the full release. It’s chock full of summertime imagery, with ocean themes, flowers, fun (and a little sassy!) sentiments, beautiful stencils…. so much crafty goodness to feast your eyes on!

I am always up for a good excuse to play with my felt and fabric, and I thought the new Happy Seagull, Weathered Pilings, and Flying Gulls dies would work so nicely together to create a cute nautical wall hanging! I pulled out a 6″ embroidery hoop, some red and white striped fabric, and my felt and got to work. Let’s get started with the details on my project!

To begin, I used a gray, white, and yellow felt to die cut the different pieces of the Happy Seagull die set, layering them together with felt glue and placing them beneath a stack of stamping blocks as they dried to ensure that the glue was distributed evenly. I also die cut the pieces for the Weathered Pilings from some light brown felt and gunmetal metallic felt. I used more felt glue to add lines of twine for “rope” around these wooden cylinders that you find on a pier or boardwalk. I also die cut a few pale gray seagull silhouettes using the new Flying Gulls die set to help finish off the scene.

Once the glue had dried on the large seagull and the pilings, I arranged the die cuts on the fabric in a dock scene, adhering them with plenty of felt glue. I also die cut a fun “ahoy” sentiment using alphabet dies to help fill in the design.

Once I had adhered all of the pieces to the hoop, I decided to add a little extra texture and interest to the scene. I added a gray gem to the eye of the large seagull, then tied a a few pieces of twine into a bow as well as a piece of silky red ribbon. I layered the two bows together and added them to the top of the hoop with my hot glue gun.

Well, that’s all for my project today! As always, the new release will be celebrated with a fabulous two day blog hop featuring tons of inspiration using these new products. You can check out the Simon Says Stamp blog to get started tomorrow morning! And you can check out the new Shine On release HERE ! Thanks so much for stopping by today, and have a marvelous day!
Filed Under: simon says stamp Tagged With: alphabet dies, decor, die cutting, embroidery hoop, felt, flying gulls, happy seagull, jody lowercase alpha

Ducklings for Babies with New Simon Says Stamp!

March 20, 2026

This post was sponsored by Simon Says Stamp. Thanks, Simon! *I have gathered links to all of the products used at the bottom of the post for your convenience, using affiliate links at no extra cost to you. Thank you for shopping with my links! I truly appreciate your support for my work!*

Hi friends! I am back with a pair of sweet baby projects featuring some darling new goodies from the  In My Heart release from Simon Says Stamp! (Click HERE to see the entire new release!) The release is filled with springtime imagery, including this absolutely precious Cute Duckling die set. I am a sucker for ducklings; their fuzzy feathers and delicate little “peeps” are so sweet! My baby shower for my big twins was duckling-themed, with “Make Way for Ducklings” as the inspiration. We even had all of the guests sign the book as a keepsake for us! I decided that I would create a sweet baby shower gift with this darling new die set: a felted embroidery hoop piece for some nursery decor and a matching card. Let’s get started with the details on my projects!

The Cute Duckling die set is only three pieces, which makes it incredibly simple to use. I thought it would be absolutely perfect to create a customized twin baby card! As someone with two sets of twins, I know firsthand how difficult it can be to find twin-themed gifts, so I knew that this die set would make the perfect twin card and coordinating gift.

To begin my card, I die cut the Cute Duckling set twice for each component, using buttery yellow and vibrant orange cardstock. I wanted to create a dark eye, and the piece for top of the head/beak helpfully provides a depression where the eye will eventually be adhered, so I used a dark gray alcohol marker to add some quick color to that spot on my orange cardstock. The assembly for this die set is super simple… score! I die cut two blue bows from the new Little Bows set and added them on my duckies’ necks. It would be super easy to customize this for whatever gender you need!!

Behind my little duckies, I added the new Garden Fence, cutting the full fence die and the detail pieces both from white cardstock. I layered them together lickety split with liquid adhesive, then popped the finished die cut up on the center of my horizontal A2 card front using foam adhesive squares. I added some pretty French country blue blooms with minty green foliage cut using dies from the Country Basket Bouquet, adhering them with both liquid and foam adhesive. I used a double layer of foam adhesive to add my duckies, finally finishing the project with a simple “congratulations” sentiment from the new A Mother’s Love stamp set, which I stamped using dark silver ink and fussy cut with my sharp scissors. Isn’t this card just darling? It could be easily customized to fit any number of babies and color palettes, too!!

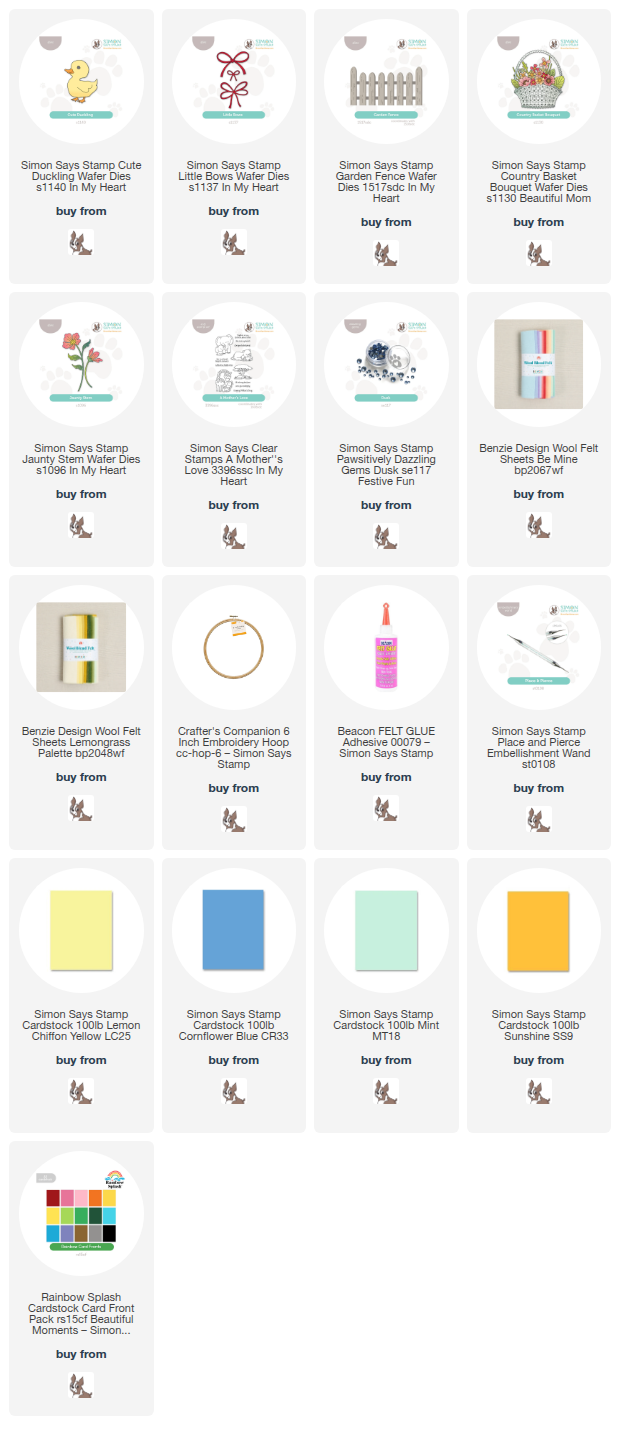
For my coordinating gift, I again die cut the Cute Duckling die set, this time using felt. I also die cut several floral accents from the same shade of French Country Blue felt, as well as minty green foliage using the new Jaunty Stem die set and the Country Basket Bouquet. I filled my embroidery hoop with some lovely blue and white toile fabric and arranged the felt pieces on the fabric, creating a fluffy bow at the top with a double layer of felt bows from the Little Bows and adding a wreath of felt florals. I used felt glue and the Place and Pierce Tool from Simon Says Stamp to adhere all of the felt pieces, finally adding a touch of sparkle with a single Dusk Pawsitively Dazzling Gem for the duck’s eye!

Well, that’s all for my projects today! The new release is absolutely smashing, right? The Simon Says Stamp Blog is also hosting the first day of the two-day blog hop with tons of inspiration using this new release; check it out HERE. Don’t forget to come back here tomorrow to see more inspiration using these new products for day 2 of the hop!! Thanks so much for stopping by today, and have a marvelous day!

Filed Under: simon says stamp Tagged With: a mother's love, baby gift, baby shower, country basket bouquet, die cutting, embroidery hoop, felt, garden fence, gift, jaunty stem, little duckling, twin

Holiday Fun With Felt: Day 4- Gingerbread!

December 11, 2025

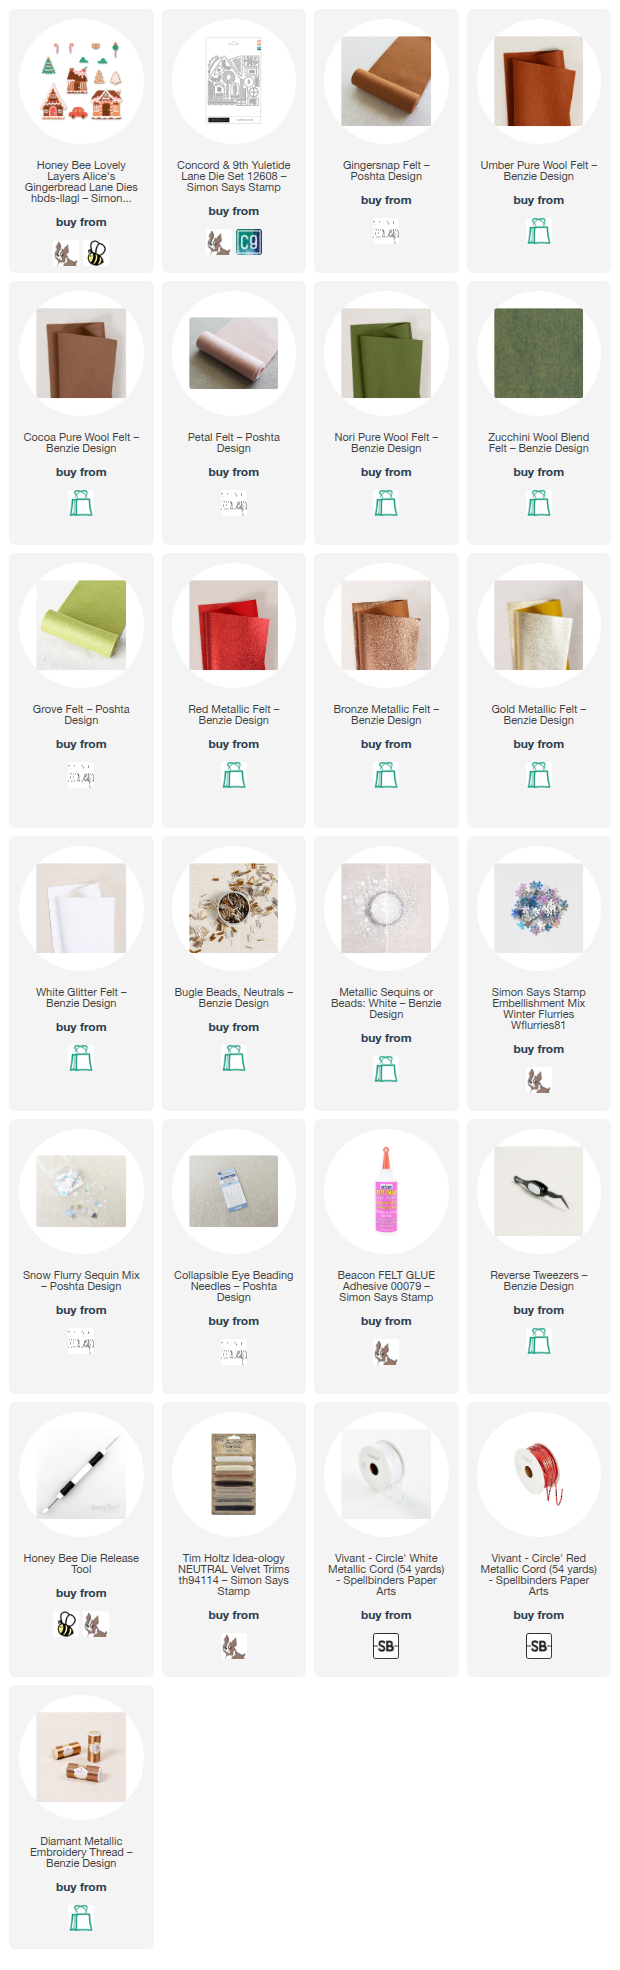
Hi friends! I have some more felt projects to share with you today, featuring the sweetest little gingerbread houses around! My first three projects were created using dies intended for stitching, with convenient little holes punched through to make the stitching process as quick and simple as can be. But, I have been collecting a variety of dies over the last 18 months~ that work beautifully for felt projects. All you need to turn a papercrafting die into a felting die is a little felt, some felt glue, and some imagination! I love a good gingerbread house filled with exquisite details, and luckily for me, gingerbread houses are super trendy right now, so these projects will fit right in to both modern and classic decor. Let’s get started with the details on my projects!

*I have gathered links to all of the products used at the bottom of the post for your convenience, using affiliate links at no extra cost to you. Thank you for shopping with my links! I truly appreciate your support for my work!*

This first project is a little bit simpler, with the majority of the work being done by the sweet chateau from Honey Bee Stamp’s Alice’s Gingerbread Lane. I die cut each of the pieces for the chateau from felt from Benzie Design and Poshta, including a gingery brown, petal pink, white glitter, and shining metallic felts in copper and red. I find that, when using smaller, more intricate dies like those of the windows and other accents, using 100% wool felt achieves good results, and metallic or coated 100% wool felt achieving the best results, as they hold their shape when die cut with minimal fraying. When working with larger die images, however, the felt blends work very nicely! I adhered all of the components with felt glue, using the fine end of a die poker tool to add glue to the delicate lines of the windows and doors.

Once I had adhered all of the felt components to the gingerbread house, I added it to my oval embroidery hoop, which is about 4.5″ x 6″ and filled with a minty green fabric from my stash. These small embroidery hoop projects are a great way to use up fabric remnants that are frequently in the clearance bin! I also have thrifted old cloth napkins, tablecloths, and handkerchiefs to use in my embroidery hoops. Once all of the felt glue had dried, I added lots of sparkling seed bead and bugle bead embellishments for snow, Christmas lights, and the pathway, stitching them individually using coordinating embroidery floss. I also added a few glass gems to my bunting and stitched a few freehand snowflakes. The final touch was a silky ribbon loop for hanging and a brown velvet bow!

My second project is a bit larger in scale, featuring the Yuletide Lane die set from Concord and 9th! This die set is intended to create a shaped accordion style card, but I decided to modify it a bit to create this detailed gingerbread house hoop. I thought that the simple and clean images would work perfectly with felt!

Before beginning my project, I selected a beautifully festive tartan fabric from my stash and filled an 8″ round embroidery hoop with it. I then selected coordinating felt shades, with a gingery brown for my house, metallic red for the door, white glitter for the snow, and three different shades of green for the greenery. I die cut the individual pieces for the house and adhered them with felt glue, again using the fine tipped end of my die cut release tool to precisely place the glue on the more delicate pieces. I arranged the assembled felt die cuts on my plaid embroidery hoop and adhered them with more felt glue.

After I had finished adhering the felt pieces to the hoop, it was time to begin embellishing with beads and other bits of sparkle! I die cut gold metallic bells and green wreaths, added different types of ribbon and trim, metallic thread bows, snowflakes, and lots of individual bugle and seed beads. I made sure when adhering my felt pieces to the hoop to use small drops of glue around the edges of the images so that my beading needle could easily pierce through the felt and fabric, making it easy to add these shimmering embellishments! I just adore how colorful and yet still elegant this project is, not to mention incredibly festive. It fits perfectly with that “Ralph Lauren Christmas” theme that I’ve seen going around social media!

Well, that’s all for my projects today! I wish that I could spend the next several weeks letting out my creative energy in felt form, because these hoops and ornament projects are just so much fun. If you haven’t looked through your standalone dies yet to see if they will work with your felting projects, I highly encourage you to do so! It’s a great way to get double duty out of your papercrafting stash! Thanks so much for stopping by today, and have a marvelous day!

Filed Under: Concord and 9th, Honey Bee Stamps Tagged With: alice's gingerbread lane, christmas, die cutting, embroidery, embroidery hoop, felt, gingerbread, stitching, yuletide lane

Pink and Red Bottle Brush Tree with Simon Says Stamp!

October 3, 2025

This post was sponsored by Simon Says Stamp. Thanks, Simon!

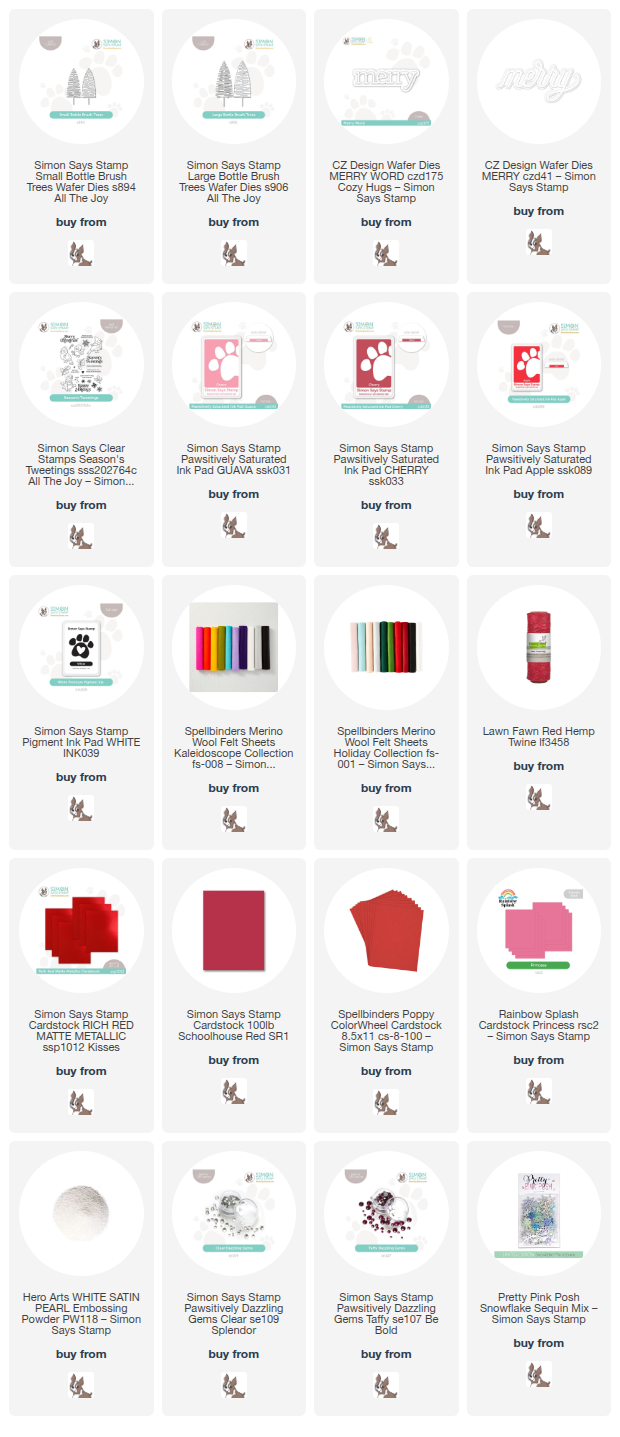
Hi friends! I am back with another non-traditional holiday project today, this time featuring vibrant magenta and deep cherry red. I had a few leftover felt bottle brush trees from a project that I posted earlier this week featuring some festive pink and red bottle brush trees, so I thought I would turn the leftovers into an entirely different felt project, this time on an embroidery hoop! I loved the hot pink and red color palette so much that I thought I would make a coordinating card so that they could be given as a gift. Don’t you just love it when everything coordinates? Let’s get started with the details on my projects!

*I have gathered links to all of the products used at the bottom of the post for your convenience, using affiliate links. Thank you for shopping with my links! I truly appreciate your support for my work!*

I had die cut several bottle brush trees from two different shades of pink felt as well as some metallic red foil felt and used this as my color palette for both projects, adding in some crisp white backdrops and some snowflakes to help enhance the holiday imagery!

I filled a medium sized embroidery hoop with some crisp white fabric with a subtle white snowflake pattern, then adhered the detail layer of these Small Bottle Brush Trees and Large Bottle Brush Trees die cuts in a row on the printed fabric using felt glue. I added a die cut Merry Word from CZ Design for Simon Says Stamp, cut using the same metallic red foil felt from my stash, beneath the row of trees, tucking a red hemp twine bow beneath it. For some additional sparkle, I added some Clear Pawsitively Dazzling Gems and a few snowflake sequins, sewn on with embroidery thread and embellished with a seed bead.

To create the coordinating card, I used blending brushes to blend Pawsitively Saturated Inks in shades of Cherry, Guava, Apple on an A2 card front, then used white pigment ink to stamp some snowflakes and a white gel pen to add some snowy dots on the blended background. I used red foil, magenta, and bright red cardstock to die cut the different components of the Small Bottle Brush Trees and Large Bottle Brush Trees, adhering the detail layer to the solid background layer with liquid adhesive.

After I had die cut the trees and put them together, I used foam adhesive to place the trio of bottle brush trees on my snowy card front, adding a glittery die cut Merry and coordinating embossed sentiment from Season’s Tweetings, which I stamped on a strip of red cardstock using Simon Says Stamp White Pigment Ink and added some White Satin Pearl embossing powder. I flagged the end of the sentiment strip and added the sentiment pieces to the card front using foam adhesive. Finally, I added a few Taffy Pawsitively Dazzling Gems for additional sparkle!

Well, that’s all for my projects today! We are heading straight into holiday crafting season (anybody know the “I’m shifting into soup mode” meme? I’m shifting into holiday mode!) so I hope you’re ready for snowflakes, sparkles, trees, bows, and poinsettias galore!! Thanks so much for stopping by today, and have a marvelous day!

Filed Under: simon says stamp Tagged With: bottle brush trees, christmas card, die cutting, embroidery, embroidery hoop, felt, holiday card, ink blending, merry, season's tweetings

Orange Blossom Blessing Embroidered Gift with New Simon Says Stamp!

June 5, 2025

This post was sponsored by Simon Says Stamp. Thanks, Simon!

Hi friends! I am always looking for new ways to incorporate my illustrations into other art forms, and I’ve been loving playing with embroidery lately. I used needle and thread on THIS project to create a pretty little meadow scene, but I thought I would play with the individual images in my new Orange Blossom Blessing stamp set to create a tiny embroidered piece, perfect for a small-but-meaningful gift to a friend. Let’s get started with the details on my project!

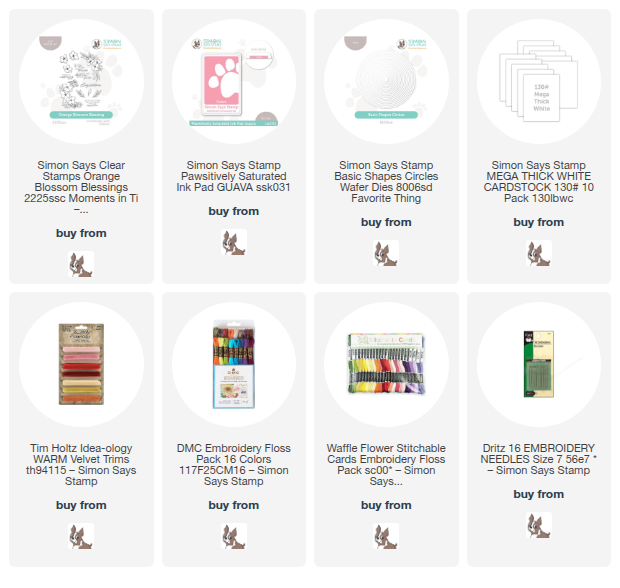
*I have gathered links to all of the products used at the bottom of the post for your convenience, using affiliate links. Thank you for shopping with my links! I truly appreciate your support for my work!*

I started by selecting a piece of blush colored fabric from my stash. I’ve slowly been adding remnants of fabric to my stash, scouring clearance sections for fabric that has a tightly woven texture and would make a lovely canvas for detailed floral work without overpowering the images. Because I don’t need huge pieces of fabric, (as one would to create a shirt or dress) I can shop the clearance remnants for a fraction of the cost! I trimmed the fabric down to fit my 4″ embroidery hoop, then used Guava ink to stamp two of the individual blooms and several pieces of foliage from my new Orange Blossom Blessing stamp set in the center of my hoop, creating a delicate floral bouquet. Because I am going to be embroidering over the top of the stamped lines, it doesn’t really matter if the images overlap, because you won’t see the stamped lines anyway!

After I had stamped my images, I selected several different shades of watermelon pink for my florals as well as some lovely teal and turquoise for the foliage. I love the contrast of the somewhat tone-on-tone flowers surrounded by the vibrant, jewel-toned leaves! I used a sharp needle to enhance those extra fine details and create smooth finished images, then added some metallic bronze stamens adorned with metallic bronze beads to the finished embroidery. I cleaned up the edges of the fabric and hot glued them around the back. To cover up the messy area on the back of my embroidery, I die cut some Simon Says Stamp 130 lb Mega Thick White Cardstock with an appropriately-sized Basic Shapes Circle Die and used my hot glue gun to adhere it to the back of the hoop. Finally, I added a velvet bow with my hot glue gun to complete this super feminine project!

Well, that’s all for my project today! Do you enjoy other crafts besides stamping? I love when I can combine my stamps with other mediums to create extra special projects! Thanks so much for stopping by today, and have a marvelous day!
Filed Under: simon says stamp Tagged With: embroidery, embroidery hoop, gift, orange blossom blessing, stitching

  • Page 1
  • Page 2
  • Go to Next Page »

Primary Sidebar

  • Facebook
  • Instagram
  • Pinterest
  • YouTube

Favorite Shops

Secondary Sidebar

Subscribe

Enter your email address to subscribe to this blog and receive notifications of new posts by email.

Instagram
Something is wrong.
Instagram token error.
Follow
Load More

Archives

Tags

3D embossing folder alcohol markers better press birthday birthday card blog hop card kit christmas christmas card christmas tag colored pencil copic copic coloring Daniel Smith die cutting embossing folder embroidery felt giveaway holiday holiday card hot foil ink blending karin brushmarker pro layered stencil masculine my monthly hero new release no line coloring no line watercolor OLO marker olo markers original illustration pawsitively saturated rainbow shaker card slimline stamping stamptember stencil thank you thinking of you valentine's day video watercolor

Popular Posts

Simon Says Stamp Sending Cheer Blog Hop- Day 2 + Freebie + Giveaway!
Altenew October 2026 Release Blog Hop + Giveaway!
Rustic Monochromatic Stars for Christmas with Rainbow Splash!
Waffleflower July Release Blog Hop!
Hero Arts Partners Blog Hop: Lawn Fawn!
March 2020 Essentials By Ellen Blog Hop+Giveaway!
December 2018 My Monthly Hero Blog Hop + Giveaway!
The Ton Stamps Summer Release: Day 1
The Ton Anniversary Release: Day 1!
Altenew Paint A Flower: Carnation Blog Hop+Giveaway!

Disclosure

Some affiliate links are used in my posts. This means that, should you click on one of my links and purchase something from that company, I will receive a small portion of the sale at no extra cost to you. I use the money earned from these sales to help maintain my blog. I so appreciate you visiting and, if you do choose to use one of my affiliate links, thank you so much for your support!
Copyright © 2026 ·Brunch Pro Theme · Genesis Framework by StudioPress · WordPress · Log in
Loading Comments...