• Skip to main content
  • Skip to primary sidebar
  • Skip to secondary sidebar

Sixth Street Sundries

Emily Midgett

  • Home
  • About Me
  • Contact
  • OLO Marker Color Swatch Chart
  • Shop

encouragement card

Love and Butterflies With Simon Says Stamp!

August 28, 2026

This post was sponsored by Simon Says Stamp. Thanks, Simon! *I have gathered links to all of the products used at the bottom of the post for your convenience, using affiliate links at no extra cost to you. Thank you for shopping with my links! I truly appreciate your support for my work!*

Hi friends! I am back with a soft, ethereal, and utterly feminine project to share with you today using up a few leftovers and some little “extras” from a Simon Says Stamp sentiment set that I chose to use as the imagery for an entire card! I love this soft color palette, with it’s pale minty green and shimmering vellum butterflies lending just a touch the subtlest rainbow shimmer. Let’s get started with the details on my project!

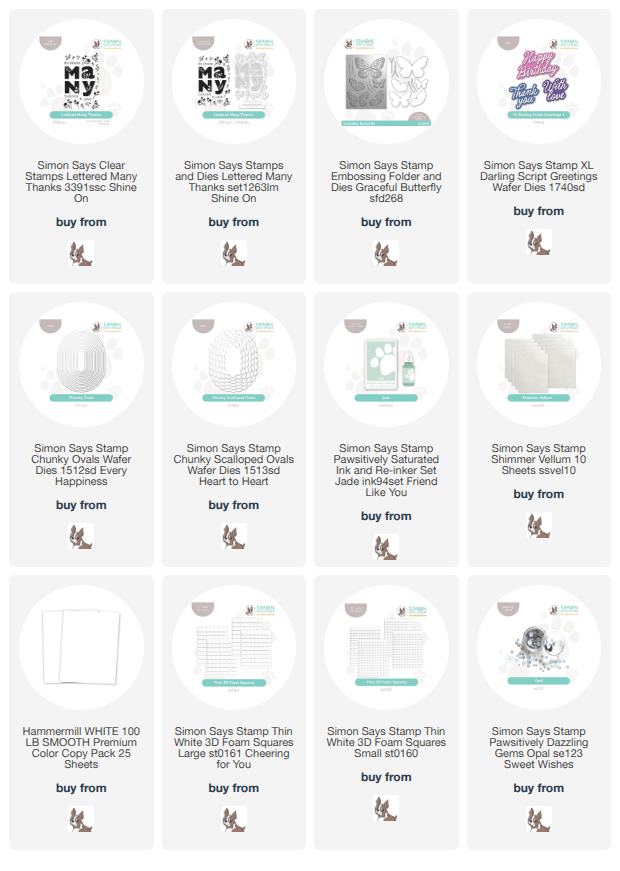
This card started out very differently than it ended up, but I am absolutely okay with it! I intended to use the large-scale sentiment from the Lettered Many Thanks, but I ended up using only the floral sprigs, stamped on the edges of a white A2 card front using Jade Pawsitively Saturated Ink. When building patterns like this, I like to start with the largest image, rotating both the stamp and the cardstock with each subsequent stamp so that I can make the pattern look as professional and continuous as possible. After stamping the largest images, I stamp the next largest, again rotating the stamp and cardstock, repeating the process down to the smallest stamp to fill in any holes left in the pattern. After I had stamped my background pattern, I also stamped lots of little sprigs on a separate piece of cardstock and used the coordinating dies to cut them out.

To cover the empty center of my stamped card front, I die cut two different ovals using the new Chunky Ovals and Chunky Scalloped Ovals. I love the unique shape of these ovals; they are slightly elongated, with straight sides, making them really eye-catching and unusual! They layer so beautifully, with the scallopes from the Chunky Scalloped Ovals just peeking out from behind the solid oval and creating a soft, feminine ground for our focal point. I placed the solid oval in the center of the scalloped oval and adhered it using thin foam adhesive squares, then placed it in the center of my stamped card front and adhered it with liquid adhesive.

Once I had adhered the ovals to the card front, I pulled out some leftover shimmer vellum butterflies from the Graceful Butterfly Embossing Folder Set and die cut the “with love” from XL Darling Script Greetings three times: once from minty green shimmer cardstock and twice from scrap white cardstock. I adhered all of the sentiment die cuts together to create extra dimension and placed it in the center of the solid oval with liquid adhesive. I arranged the butterflies and minty sprig die cuts around the sentiment, creating a visual cascade from the top right to the bottom left of my card. Finally, I added some Opal Pawsitively Dazzling Gems for a touch of added sparkle!

Well, that’s all for my project today. My über-feminine inner girlypop is in love with the softness and delicacy of this card. Those vellum butterflies look like they could just fly off of the card!! Thanks so much for stopping by today, and have a marvelous day!
Filed Under: simon says stamp Tagged With: butterflies, chunky ovals, chunky scalloped ovals, darling script greetings, encouragement card, Lettered Many Thanks, sympathy card, thinking of you, xl darling script greetings

Blending and Vellum Flowers with Simon Says Stamp!

July 2, 2026

This post was sponsored by Simon Says Stamp. Thanks, Simon! *I have gathered links to all of the products used at the bottom of the post for your convenience, using affiliate links at no extra cost to you. Thank you for shopping with my links! I truly appreciate your support for my work!*

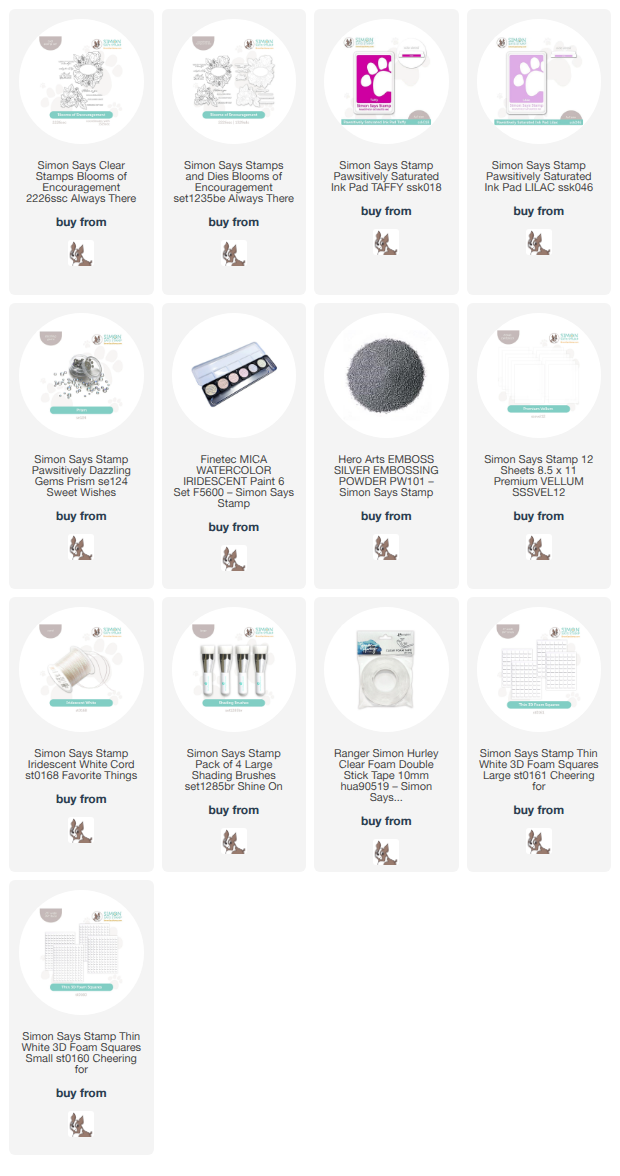
Hi friends! I have a somewhat simple card to share with you today using my newest Blooms of Encouragement stamp set. This set features two pretty floral bouquets, and this dahlia swag that I used on my project today is one of my favorite images that I’ve drawn! I wanted to showcase how nicely it works on it’s own without having to add lots of intricate coloring (in case you are not coloring-obsessed like I am!). That doesn’t mean that you don’t have to have color, though! I took advantage of the details on the image to do some heat embossing on vellum, a little blending, some sparkles, and a bit of twine for texture. Let’s get started with the details on my project!

To start, I heat embossed the dahlia image from Blooms of Encouragement a few times on some semi-transparent vellum using silver embossing powder. The super smooth surface of the vellum makes embossing super detailed images like this an absolute dream; just be sure that you don’t heat up the powder too much, or it will bubble! After I had finished embossing, I used the coordinating dies to cut out each detailed image.

For the card base, I used blending brushes to blend Pawsitively Saturated Inks in shades of Taffy + Lilac on the corner of my white A2 card front. The vibrant colors will peek through the semi-transparent vellum! To add a little extra texture and sparkle to the card front, I splattered some iridescent glittering watercolors on the blended background. I used thin strips of clear foam dimensional adhesive to add the embossed blooms to the blended card front, trimming off the excess from the edges to create clean lines along each edge.

For the greeting, I silver embossed two sentiments from the Blooms of Encouragement, then die cut them with their coordinating dies. I added a light wash of pink over the embossed greetings using the residual ink left on the Taffy blending brush. I popped the greetings up on the card front using thin foam adhesive and tucked an iridescent bow beneath the greeting. Finally, I added a few Prism Pawsitively Dazzling Gems for added sparkle!!

Well, that’s all for my project today! If you don’t love to color or maybe are short on time, I hope this project shows that floral bouquets don’t have to have super intricate coloring to make a huge impact on a card front. Thanks so much for stopping by today, and have a marvelous day!

Filed Under: simon says stamp Tagged With: blooms of encouragement, die cutting, encouragement card, heat embossing, ink blending, original illustration, vellum

Simon Says Stamp To Love and To Be Loved Release Blog Hop!

January 10, 2025

This post was sponsored by Simon Says Stamp. Thanks, Simon!

Hi friends! I am hopping along with my friends at Simon Says Stamp to celebrate not one, but two new releases! The December 2024 To Love release is the companion release to this month’s To Be Loved release, and we are celebrating with a massive blog hop! You should have arrived here from Barbara Tarayao, and your next stop is Amy Rysavy. You can also start back at the beginning at the Simon Says Stamp Blog! I have a project featuring products from both releases, including my newest stamp set called Anemone Wreath, so let’s get started with the details!

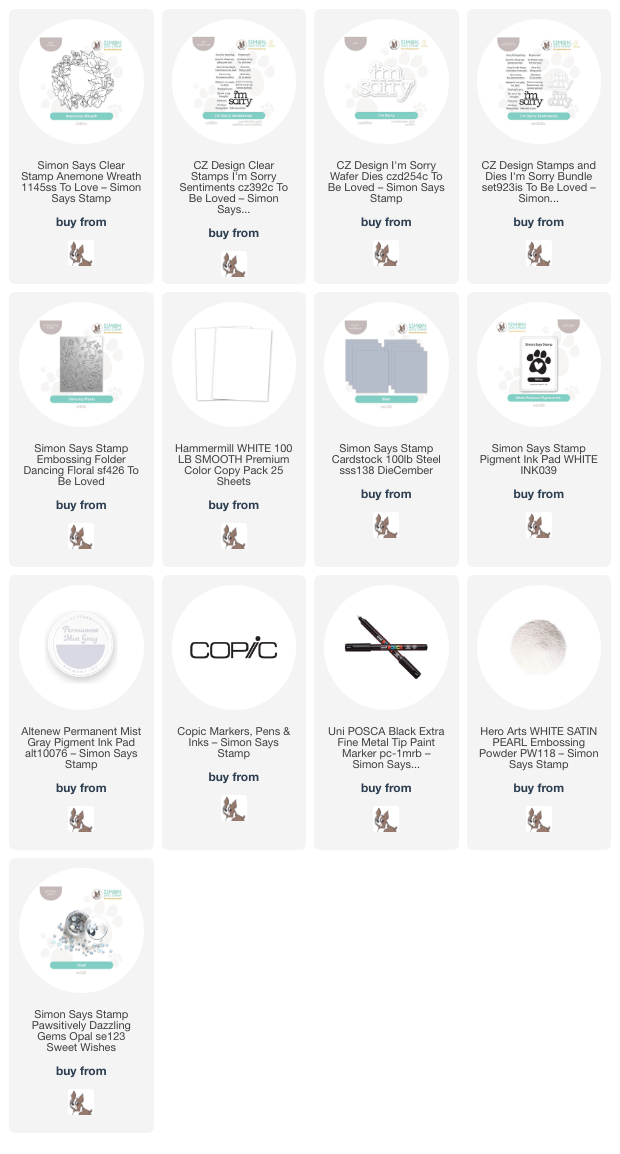
*I have gathered links to all of the products used at the bottom of the post for your convenience, using affiliate links. Thank you for shopping with my links! I truly appreciate your support for my work!*

To begin, I stamped my new Anemone Wreath stamp from the To Love release onto some white cardstock using Altenew’s Permanent Mist Gray ink, which is great for no-line coloring. I then used Copic markers in cheery shades of sunny yellow and jade green to do some no-line coloring, coloring only a couple of the blooms and foliage. I made sure to select blooms and foliage that were completely intact, not tucked behind another flower or leaf, so that I could do some fussy cutting and create a completely unique arrangement. Selectively using individual flowers is another great way to stretch this stamp set! After I had finished coloring the images, I used my sharp scissors to fussy cut the images, adding a pale gray border around the edges with a Copic marker that coordinated perfectly with the Simon Says Stamp Steel cardstock that I planned to use in the background.

For that background, I ran an A2 sized panel of the Steel cardstock through my die cutting machine using the new Dancing Floral Embossing Folder. The delicate floral pattern on this embossing folder was just neutral enough that it added beautiful texture behind my focal points without distracting from the vibrant yellow flowers!

For the greeting, I die cut the detail layer of the new I’m Sorry die from some more Steel cardstock as well as the shadow layer from some Simon Says Stamp Vellum cardstock, layering the two together with liquid adhesive. The vellum shadow helps the tone-on-tone sentiment stand out from the background a bit. I also stamped a greeting from the I’m Sorry Sentiments stamp set onto a small rectangle of Steel cardstock using Simon Says Stamp White Pigment Ink, then added some White Pearl Embossing Powder over the top of the sticky pigment ink to create a lovely and subtle pearlescent accompaniment to the chunky greeting die cut. I arranged the die cut, sentiment block, and vibrant blooms on the embossed card front, adhering them with some foam adhesive for added dimension. Finally, I added a smattering of Opal Pawsitively Dazzling Gems for a touch of shimmer. Pairing gray and yellow is such an unusual color palette for me, but I am always encouraged to use it more frequently whenever I do use it; it’s such a striking combination, perfect for these dreary gray January days!

Well, that’s all for my project today. Now for some fun giveaway information!

Simon Says Stamp is giving away a $25 coupon to every stop on the hop from your blog comment section. Winners will be selected and posted on the Simon Says Stamp blog on Wednesday the 15th of January. Winners can email the Simon team to claim his/her prize 🙂

To celebrate this release duo, Simon Says Stamp is also offering a fabulous freebie with purchase! Simply follow the instructions in the graphic at the top of the post to receive the Circle Hoops Embossing Folder for free with your order.

Your next stop is Amy Rysavy. Don’t forget to check back on the Simon Says Stamp Blog tomorrow for Day 2 of the hop for even more fabulous inspiration using these new products! Thanks so much for stopping by today, and happy hopping!

Filed Under: simon says stamp Tagged With: anemone wreath, blog hop, copic coloring, dancing floral, die cutting, encouragement card, giveaway, i'm sorry, i'm sorry sentiments, no line coloring, original illustrations, sympathy card, to be loved, to love

Vivid Neon to Send Good Vibes!

August 18, 2023

This post was sponsored by Simon Says Stamp. Thanks, Simon!

Hi friends! In a complete style switch, I have this neon and black shaker card to share with you today! I have been playing around with ombré stamping and emboss resist techniques a lot lately, and decided I would highlight the ombré stamping with some black ink blending over the top to create this super vibrant shaker card. Let’s get started with the details!

I began my project by using my MISTI to stamp the Flower Frenzy Background stamp using Peony, Peachy, and Lemonade inks. To create this ombré stamped background, my MISTI is invaluable. I begin by tapping the top of my stamp with the first color, then using my microfiber cloth to soften the line of ink so that it lightly fades away. stamped the color on my white cardstock twice, then repeated the process with the second shade, then the third. While the stamp and cardstock were still in place in my MISTI, I stamped a layer of clear embossing ink and covered it with clear embossing powder so that the ombré image would resist the ink blending on top of it! After I’d finished heat embossing, I covered the entire panel with Charcoal and Intens-ified Black using Blending Brushes.

Next, I die cut the detail layer of the Sending Good Vibes die from white cardstock and blended over the top using the same Peony, Peachy, and Lemonade inks used on the background. I cut the outline background from the black holographic cardstock in the Luxe Glitter Basic Cardstock Assortment and layered them together using liquid adhesive. I also die cut the Fab Flower die from white and black cardstock, then blended the same ink shades on the white die cuts and layered the background and outline pieces together. The background reminds me of the groovy patterns from the 1970’s, and these Fab Flowers worked perfectly!

To create my shaker, I die cut the center of a panel of black cardstock using the Hero Arts Rounded Rectangles dies, creating a frame. I backed it with some clear acetate, then filled my shaker with Trinity Black Sparkle Spots flat sequins and Simon Says Stamp’s Sunflower Sequins and Strawberry Shortcake sequins to create a color-coordinated shaker mix. I popped up the sentiment over the top of the shaker window using foam adhesive, then tucked the blended groovy flowers behind it. Finally, I added a greeting from the Reverse Yay You sentiment card set, popped up with some more foam tape.

Well, that’s all for my project today! This ombré emboss/resist technique is so much fun, and I think it creates such an impact. I hope you’ll give it a try! Thanks so much for stopping by today, and have a marvelous day!

Filed Under: simon says stamp Tagged With: emboss resist, encouragement card, fab flower, flower frenzy, ink blending, neon, ombré stamping, sending good vibes

Primary Sidebar

  • Facebook
  • Instagram
  • Pinterest
  • YouTube

Favorite Shops

Secondary Sidebar

Subscribe

Enter your email address to subscribe to this blog and receive notifications of new posts by email.

Instagram
Something is wrong.
Instagram token error.
Follow
Load More

Archives

Tags

3D embossing folder alcohol markers better press birthday birthday card blog hop card kit christmas christmas card christmas tag colored pencil copic copic coloring Daniel Smith die cutting embossing folder embroidery felt giveaway holiday holiday card hot foil ink blending karin brushmarker pro layered stencil masculine my monthly hero new release no line coloring no line watercolor OLO marker olo markers original illustration pawsitively saturated rainbow shaker card slimline stamping stamptember stencil thank you thinking of you valentine's day video watercolor

Popular Posts

Simon Says Stamp Sending Cheer Blog Hop- Day 2 + Freebie + Giveaway!
Altenew October 2026 Release Blog Hop + Giveaway!
Altenew Build A Flower Sweet Violet+Giveaway!
Floral Follies on Canvas with New Simon Says Stamp STAMPtember!
Simon Says Stamp STAMPtember Tim Holtz Collaboration: Festive Holidays!
Rustic Monochromatic Stars for Christmas with Rainbow Splash!
Altenew March 2020 Release Blog Hop+Giveaway!
Honey Bee Stamps Bee Bold Release Blog Hop!
Waffleflower July Release Blog Hop!
Altenew Paint A Flower: Carnation Blog Hop+Giveaway!

Disclosure

Some affiliate links are used in my posts. This means that, should you click on one of my links and purchase something from that company, I will receive a small portion of the sale at no extra cost to you. I use the money earned from these sales to help maintain my blog. I so appreciate you visiting and, if you do choose to use one of my affiliate links, thank you so much for your support!
Copyright © 2026 ·Brunch Pro Theme · Genesis Framework by StudioPress · WordPress · Log in
Loading Comments...