• Skip to main content
  • Skip to primary sidebar
  • Skip to secondary sidebar

Sixth Street Sundries

Emily Midgett

  • Home
  • About Me
  • Contact
  • OLO Marker Color Swatch Chart
  • Shop

felt

Holiday Fun with Felt Week- Day 2: Snowman with Simon Says Stamp!

December 9, 2025

This post was sponsored by Simon Says Stamp. Thanks, Simon!

Hi friends! I am back again with another stitching project using some of the darling new stitching dies from Simon Says Stamp’s DieCember release (Check out the full DieCember release HERE!) during my Holiday Fun with Felt Week! I love the ease of these stitching dies; the holes are punched for you, and the die sets come with everything you need to create the sweetest little snowman friends. I added another scalloped pillow ornament to my collection with today’s project, so let’s get started with the details!

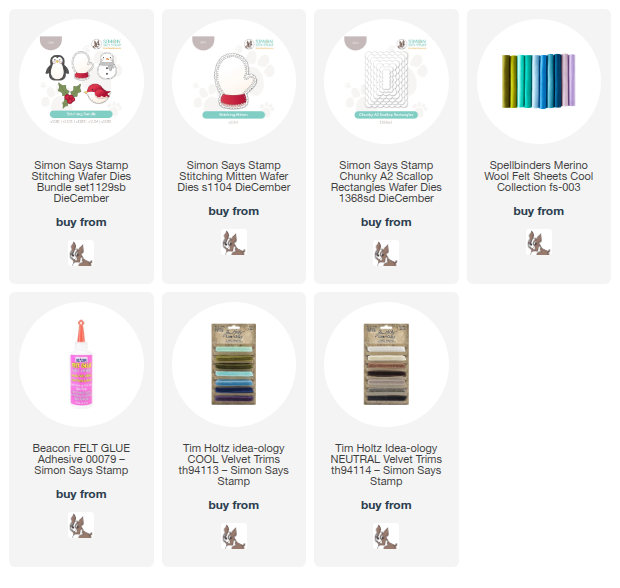
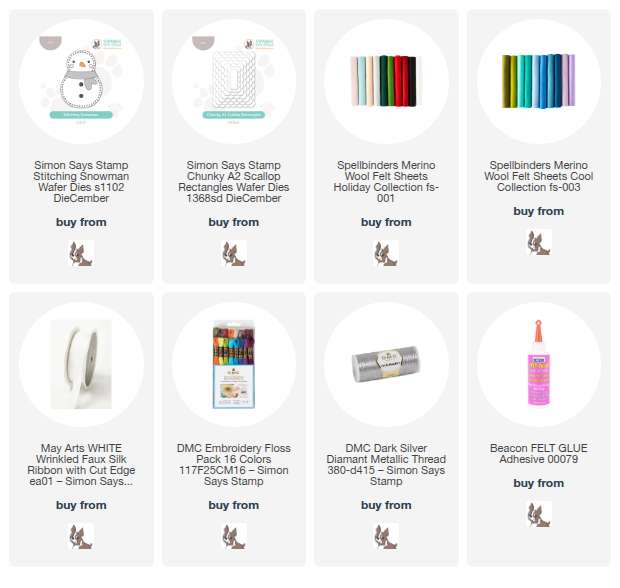
*I have gathered links to all of the products used at the bottom of the post for your convenience, using affiliate links at no extra cost to you. Thank you for shopping with my links! I truly appreciate your support for my work!*

As I shared in THIS post, I die cut the new Chunky A2 Scallop Rectangles twice from some pale blue felt. Before stitching them together, however, I die cut one of the new Stitching Snowman dies from white felt and stitched him onto one of the scalloped rectangles with some iridescent white embroidery thread from my stash. I also used felt glue to adhere the scarf, coal eyes and buttons, and carrot nose, placing them beneath a heavy glass paperweight to dry.

After the felt glue had dried completely, I added some snowy details behind my snowman with seed beads and iridescent white embroidery thread, but silver would be super pretty too! I think those little extra details make it super special!

Once I had finished all of the details, I used the same shade of pale blue thread to stitch the two scalloped rectangles together, filling the pillow with some polyfill before sealing it up and adding some white ribbon for a hanger. It’s just so darn cute hanging on a tree, don’t you think?

Well, that’s all for my felt project for today! How sweet would this be to give as a gift set or to add as a little decoration on a gift bag? Love the ease of these stitching dies! Thanks so much for stopping by today, and have a marvelous day!
Filed Under: simon says stamp Tagged With: christmas, chunky a2 scallop rectangles, diecember, felt, holiday, ornament, sewing, stitching, stitching snowman

Holiday Fun with Felt Christmas Week- Day 1: Mittens with New Simon Says Stamp!

December 8, 2025

This post was sponsored by Simon Says Stamp. Thanks, Simon!

Hi friends! In between paper crafting and blogging, I have been up to my eyeballs in holiday felt projects. I discovered the joy that felt and embroidery brings me last year, and I haven’t looked back! There’s something so satisfying about creating something tangible with felt and beads and embroidery, something that will hopefully be cherished by the recipient for more than a few weeks. Today, I am starting off a week of Fun with Felt projects using one of the darling new stitching dies that Simon Says Stamp released for DieCember: the Stitching Mitten! (Check out the full DieCember release HERE!) I created a trio of coordinating fluffy pillow ornaments using the new stitching dies (which you can purchase individually or in a bundle-love having options!), and today we’re starting off Fun with Felt Week with the sweet mittens. Let’s get started with the details!

*I have gathered links to all of the products used at the bottom of the post for your convenience, using affiliate links at no extra cost to you. Thank you for shopping with my links! I truly appreciate your support for my work!*

I love blue for Christmas; my first tree after my husband and I got married was an homage to our wedding colors, with Delft blue and white with lots of sparkles. It was so elegant and put to good use the blue Christmas lights that we’d purchased for wedding decor, ha! (Waste not, want not, right?) Blue and white has always had a special place in my heart because of our wedding, so I am always happy to use my favorite color palette to create pretty holiday decor. I used the Stitching Mitten die both on it’s own and paired with the new Chunky A2 Scallop Rectangles to create a pretty pair of ornaments to bedeck our tree!

To begin my pillow ornament, I die cut two Chunky A2 Scallop Rectangles large enough to fit my mitten from pale blue felt. I also die cut each layer of the Stitching Mitten and assembled with needle and thread before doing some freehand embellishment. I love adding simple snowflakes with both sparkling embroidery floss as well as seed beads and bugle beads. The beads add the perfect amount of sparkle, I think, as well as additional texture and general elegance! Once I had finished embellishing my mitten, I used felt glue to adhere it to one layer of the A2 Scallop Rectangles and placed it under some heavy paperweights to ensure that it dried evenly and securely. Once it had dried completely, I used tone-on-tone blue thread to stitch around the edge of the scalloped rectangles and filled it with some polyfill to create a little pillow, stitching some ribbon at the top to create my hanger. It’s just so cute!!

My second ornament features the new Stitching Mitten die on it’s own, cutting two layers of each element and stitching them together to allow that lovely scalloped shadow to “frame” the blue mitten. I again encrusted the front of my mitten with some sweet and sparkling beaded snowflakes, which I think adds just a tiny touch of icy elegance!

Once I had finished embellishing the front of my mitten, it was time to put both sections together and fill with polyfill. I thought you might like to see the back of the ornament; the running stitch that I used to neatly connect each of the pierced holes on the front looks not quite as neat and tidy in the back, but not too bad! I added a Tim Holtz Velvet Trim bow and loop to the top of my finished mitten to make for easy hanging on the tree.

Here are the two mitten ornaments together on my craft room tree and I just love how homey and yet elegant they are! The new Stitching Dies from Simon Says Stamp make for such quick and easy felt gifts that are truly made with love and can be saved to use over and over again. Handmade memories that can be customized in so many fabulous ways!!!

Well, that is all for my projects today for my first installment of Fun With Felt: Christmas Week! I can’t get enough of working with felt, and if you haven’t tried it out yet, I highly encourage you to do so. You can use so many of your papercrafting dies to create fun felt projects. I can’t wait to share more of what I’ve created! Thanks so much for stopping by today, and have a marvelous day!

Filed Under: simon says stamp Tagged With: chunky a2 scallop rectangles, embroidery, felt, ornament, stitching dies

Food Pantry RAFFLE: Every Little Bit Helps!

November 16, 2025

Hi friends! As we approach the holidays, I always feel so strongly that those who have been lucky enough to live a life filled with abundance should be happy to help those in need. With the uncertain economic situation that we face in the United States and the breathtaking cost of groceries, so many people are suffering regardless of how hard they work. In my own community, we have an unfortunately significant (and growing) population of people who have to supplement their income with food pantries, even people who work full time jobs. Times are just plain tough, especially if you have children.

I know that there are an abundance of fundraisers happening, especially around the holidays, but I have a lovely friend who runs a food assistance program for at-risk children in our school system. Our family attends the church that houses this program, called the NOW Program (Nutrition On Weekends), and our family have had the privilege to help with their fundraisers and other events. Because of all of the economic hardship facing so many people in our community, the number of families that have applied for that program has sadly increased in recent weeks.

When I asked my friend what I could do to help, she told me that she hopes to have gift cards to our local Ruler on hand for those who are in need. With this in mind, I am hoping to be able to raise money to supply her with gift cards to help those in our community who might need it by hosting a raffle of two of my art pieces!

To sweeten the deal and to thank you for your donation, I have decided to donate two completely different pieces of my artwork: one of my favorite illustrations in a framed 8×10 inch print, and a decorative holiday pennant created with felt!

This 9×9 inch pennant features metallic and glitter felt snowflakes swirling around a festive “let it snow,” cut from metallic holographic felt.

The snowy images are embellished with incredibly sparkly gems (the sparkle in real life is truly spectacular!) and fun pom-pom trim, with a ribbon hanger to allow you to hang this pennant from your door, window, or wall with ease!

The second piece included in the raffle is one of my favorite pieces of my original artwork, which I have had made into a gicleé print on high quality cardstock. It is truly remarkable how perfectly these prints match the originals!

I have mounted this 8×10 inch art print in a frame with a thin white mat around the edge. This would make an excellent Christmas gift or addition to your home or office decor!

Because this is a virtual raffle, the “tickets” will be based on your donations. For every $5 that you donate to my Venmo account, you will receive one entry in the raffle. Once the donations have been collected and the raffle closed, I will use the money to purchase Ruler gift cards to donate to the NOW Program for use in my community!

The details:

The raffle will be open from today, November 16, 2025 through midnight on November 20, 2025. To enter, simply send your donation via Venmo to @Emily-Midgett-5. For every $5 that you donate, I will add your name one time to the “hat.” So, for example, if you were to donate $15, you would have three entries to the raffle. Once the raffle has closed, I will select two winners for the art pieces shown above!

When sending your donation, please include your full name and email address so that I can contact you if you are the winner!

Please do not feel obligated to donate, but if you feel moved to do so, know that your generosity is very appreciated!

Thank you so much for your consideration! Have a lovely day, friends!

Filed Under: Uncategorized Tagged With: donation, felt, original illustration, raffle

Peaceful Rose Gold Christmas Trees with Simon Says Stamp!

November 4, 2025

This post was sponsored by Simon Says Stamp. Thanks, Simon!

Hi friends! We are past Halloween, and while Thanksgiving is our next holiday, many cardmakers are in full holiday cardmaking mode! The last year or so has added some felt and embroidery techniques into my holiday crafting repertoire; I so enjoy being able to use my papercrafting supplies to make unique handmade gifts out of felt and cloth that make the recipient feel really special. (At least, I hope they do!) With each new release, I find myself examining the dies and stamps to see which products I can pair with felt and/or embroidery to create those meaningful gifts that will last beyond this single holiday season. The gorgeous details on the newer Frosty Nordic Tree die coupled with the fact that each layer of the tree is separate makes it the perfect die to use in a variety of ways and with a variety of mediums. Let’s get started on the details for my gift set!

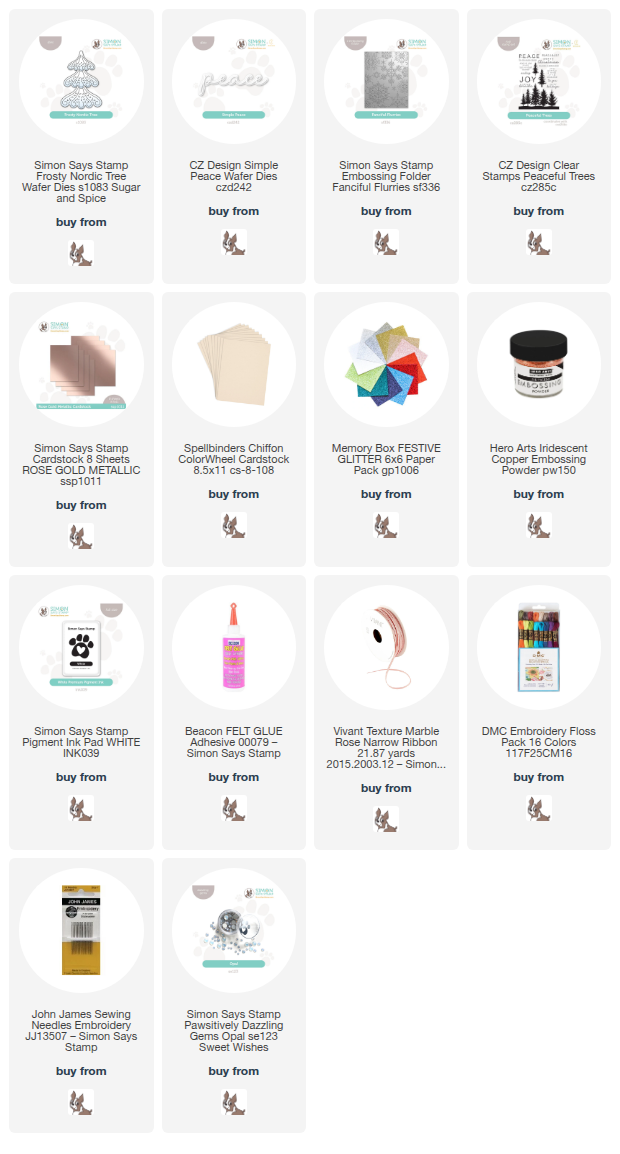
*I have gathered links to all of the products used at the bottom of the post for your convenience, using affiliate links. Thank you for shopping with my links! I truly appreciate your support for my work!*

As you all know, I can’t get enough of unique, non-traditional color palettes for the holidays, and rose gold is such an exquisitely feminine way to bring in that festive holiday shine. I found some rose gold metallic felt in my stash, along with some lovely printed snowflake fabric, and used those as the basis for my felt project, which in turn became the inspiration for the matching card. I love that the Frosty Nordic Tree die set comes in three individual dies, making it possible for you to use them in a variety of ways! While the original intention of the dies is to layer one complete die cut above another, I used die cut each layer of the tree individually, then used the die for the layer above to cut off the top of the die cut. This results in a die cut with the perfect spot into which the above die cut can snuggle neatly, creating a seamless, flat image!

Once I had adhered the felt die cut tree onto the center of my fabric in the embroidery hoop using felt glue, I used a pen to draw some flourishes around it, which I then embroidered with a satin stitch using coordinating embroidery floss. I added some Opal Pawsitively Dazzling Gems as well as a coordinating blush bow for a tree topper. For some final sparkling touches, I added a few sequins and seed beads to create “berries”! Wouldn’t this be so pretty as an ornament on a Christmas tree?

Inspired by my felt project, I decided to pair the Frosty Nordic Tree dies with one of my favorite cardstocks from Simon Says Stamp: Metallic Rose foil cardstock. Again, I took advantage of the fact that each layer of the tree is an individual die in order to create a trio of trees that are different heights and shapes. I die cut one tree as intended, with three different-sized layers, then die cut a short and squat tree with just the top two layers, then cut one tall and slim tree with only the smallest die! I adhered the layers for each tree with dots of liquid adhesive and set them aside.

Behind the trees, I wanted to create an elegant, snowy backdrop, so ran a panel of blush colored cardstock through my die cutting machine using the Fanciful Flakes Embossing Folder. I swiped the Simon Says Stamp White Pigment Ink Pad over the raised areas, adding a touch of definition to the textured snowflakes, then splattered the background with iridescent metallic watercolors. After this had dried, I mounted the textured panel in the center of a full size A2 card front, creating a white frame around the background. I arranged the trees in a trio, adhering them with liquid and foam adhesive in varying heights, then added a Simple Peace die cut for the greeting, enhanced with some embossed sentiment strips from the Peaceful Trees stamp set. Finally, I added one last touch of sparkle with some Opal Pawsitively Dazzling Gems!

Well, that’s all for my projects today! My husband’s birthday is at the end of this month and gets a little grumpy about putting up holiday decorations too early, so I will have to content myself with holiday spirit in my craft room! Have you started making your holiday cards yet? We’re getting ever closer to that big day!! Thanks so much for stopping by today, and have a marvelous day!

Filed Under: simon says stamp Tagged With: 3D embossing folder, christmas card, die cutting, embossing folder, embroidery, fanciful flurries, felt, frosty nordic tree, holiday card, peaceful trees, simple peace

Greenery for Christmas with New Simon Says Stamp!

October 20, 2025

This post was sponsored by Simon Says Stamp. Thanks, Simon!

Hi friends! I have a new project pair to share with you today that features a single die as the focal point for both of my projects today! The new Charming Berry Branch die from the Simon Says Stamp Sugar and Spice release (which you can check out HERE) is just perfect for creating simple botanical backgrounds in a variety of mediums and color palettes. For today’s projects, I kept the colors to a soothing sage green color palette, adding shimmer and sparkle with sequins and gems as well as some shining foil cardstock. I also created a coordinating felt tag/ornament for an additional gift that perhaps will outlast the card itself. Let’s get started on the details for my projects!

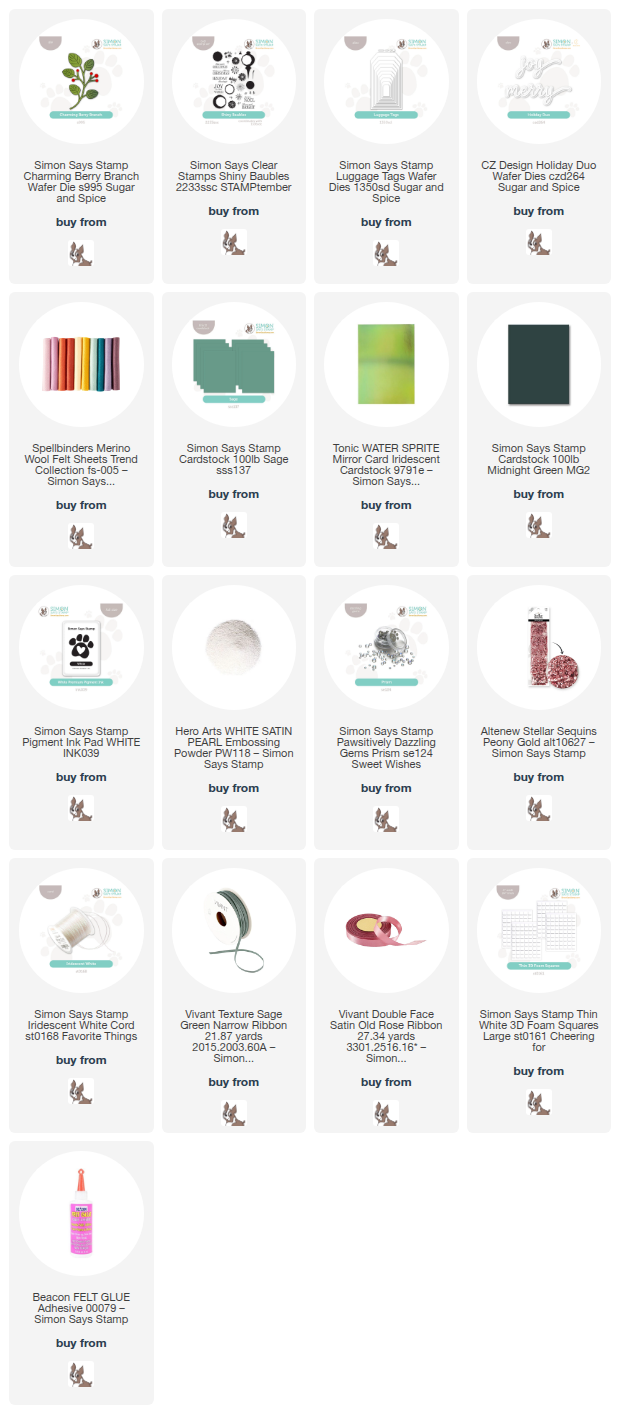
*I have gathered links to all of the products used at the bottom of the post for your convenience, using affiliate links. Thank you for shopping with my links! I truly appreciate your support for my work!*

Both of my projects today feature a lovely sage green background upon which those deep green leaves from the Charming Berry Branch could pop!

I started by die cutting as many Charming Berry Branch die cuts as I could from some deep green cardstock. I then trimmed down a panel of Simon Says Stamp’s Sage Cardstock to 3.5″ x 4.75″ and arranged the foliage die cuts in a continuous pattern on the panel, rotating each branch and tucking spare pieces amongst the bare spots so that the entire panel was covered in delicate leaves. I adhered the leaves with thin foam adhesive squares to add a touch of dimension and texture to the panel, then mounted it on an ever-so-slightly larger panel of iridescent green foil cardstock, creating a thin, shining mat around my patterned panel. This panel was placed in the center of a full sized A2 panel of the same Sage cardstock using liquid adhesive!

Rather than use die cut cardstock berries for the branches, I decided to add Simon Says Stamp’s Prism Pawsitively Dazzling Gems to the berry branches, adding some extra sparkle to the card front. I then created a sentiment strip by stamping a greeting from Shiny Baubles onto a strip of Midnight Green cardstock using Simon Says Stamp’s White Pigment Ink, then adding White Satin Pearl embossing powder over the top. The pearlescent embossing powder enhances the white stamping beautifully and allows the sentiment to pop nicely from the deep green cardstock! I flagged one end of my cardstock strip, then added it to my card front with a double layer of foam adhesive. Finally, I added bow tied with Iridescent White Cord from Simon Says Stamp to add a touch more texture.

For the matching ornament/tag, I die cut some sage green felt using the new Luggage Tags die set, cutting two of the same size. I then die cut a few more Charming Berry Branch dies from deep green felt and adhered them to one of the tags with felt glue, again rotating the images to create a continuous pattern. I embellished the berry branches, stitching rose gold sequins and beads to each berry, then added a rose gold die cut “joy,” cut using metallic rose gold felt and the new Holiday Duo die set. I used coordinating embroidery floss to stitch the two felt tags together so that the messy back of the patterned tag would be neatly hidden. I then added a ribbon loop for hanging and a coordinating mauve bow to the top of the tag. Wouldn’t this be so pretty adorning the neck of a wine bottle or gift basket?

Well, that’s all for my projects today! I love the versatility of standalone dies; taking a single, relatively small die and repeating it to create a custom patterned background is such a fun way to stretch the use of your dies. Thanks so much for stopping by today, and have a marvelous day!

Filed Under: simon says stamp Tagged With: charming berry branch, christmas card, die cutting, embroidery, felt, holiday card, holiday duo, luggage tags

  • « Go to Previous Page
  • Page 1
  • Page 2
  • Page 3
  • Page 4
  • Page 5
  • Page 6
  • Go to Next Page »

Primary Sidebar

  • Facebook
  • Instagram
  • Pinterest
  • YouTube

Favorite Shops

Secondary Sidebar

Subscribe

Enter your email address to subscribe to this blog and receive notifications of new posts by email.

Instagram
Something is wrong.
Instagram token error.
Follow
Load More

Archives

Tags

3D embossing folder alcohol markers better press birthday birthday card blog hop card kit christmas christmas card christmas tag colored pencil copic copic coloring Daniel Smith die cutting embossing folder embroidery felt giveaway holiday holiday card hot foil ink blending karin brushmarker pro layered stencil masculine my monthly hero new release no line coloring no line watercolor OLO marker olo markers original illustration pawsitively saturated rainbow shaker card slimline stamping stamptember stencil thank you thinking of you valentine's day video watercolor

Popular Posts

Simon Says Stamp October 2026 Card Kit of the Month: Homespun Gratitude!
February 2018 My Monthly Hero Blog Hop!
Altenew Craft A Flower: Poppy Blog Hop+Giveaway!
Felted Gourd Wall Hanging with Simon Says Stamp!
Sunflower Home Decor with Simon Says Stamp!
Craft Your Life Project Kit: Feathered Lilies Blog Hop+Giveaway!
Simon Says Stamp October 2025 Card Kit of the Month!
Altenew Standalone Die Blog Hop+Giveaway!
The Ton Anniversary Release- Day 2
Altenew Build A Flower Japanese Mum Blog Hop!

Disclosure

Some affiliate links are used in my posts. This means that, should you click on one of my links and purchase something from that company, I will receive a small portion of the sale at no extra cost to you. I use the money earned from these sales to help maintain my blog. I so appreciate you visiting and, if you do choose to use one of my affiliate links, thank you so much for your support!
Copyright © 2026 ·Brunch Pro Theme · Genesis Framework by StudioPress · WordPress · Log in
Loading Comments...