• Skip to main content
  • Skip to primary sidebar
  • Skip to secondary sidebar

Sixth Street Sundries

Emily Midgett

  • Home
  • About Me
  • Contact
  • OLO Marker Color Swatch Chart
  • Shop

felt

Fun with Felt: Traditional Holiday Imagery Using New Honey Bee Stamps Dies!

December 22, 2024

Hi friends! My dear friends over at Honey Bee Stamps very kindly sent me some of their exquisite new holiday products from the Cozy Christmas release with which to play, and I went a little nutty creating some felt home decor and ornaments. Working with anything sewing-related has always been incredibly intimidating to me, but I recently discovered that you can use felt and felt glue in almost exactly the same way that you can use paper and regular glue! It seriously has opened up a whole new world (and new shopping opportunities) for me! I learned a few (very simple) stitches to add some bead and sequins adornments, and dug out my hot glue gun and ribbons to create some lovely gifts to accompany our annual cookie boxes for friends and family. I wanted to share them here to hopefully inspire you to try something new, even if it is a bit intimidating! Let’s get started with the details on this first round of projects (because, like I said earlier, I went a bit nutty!).

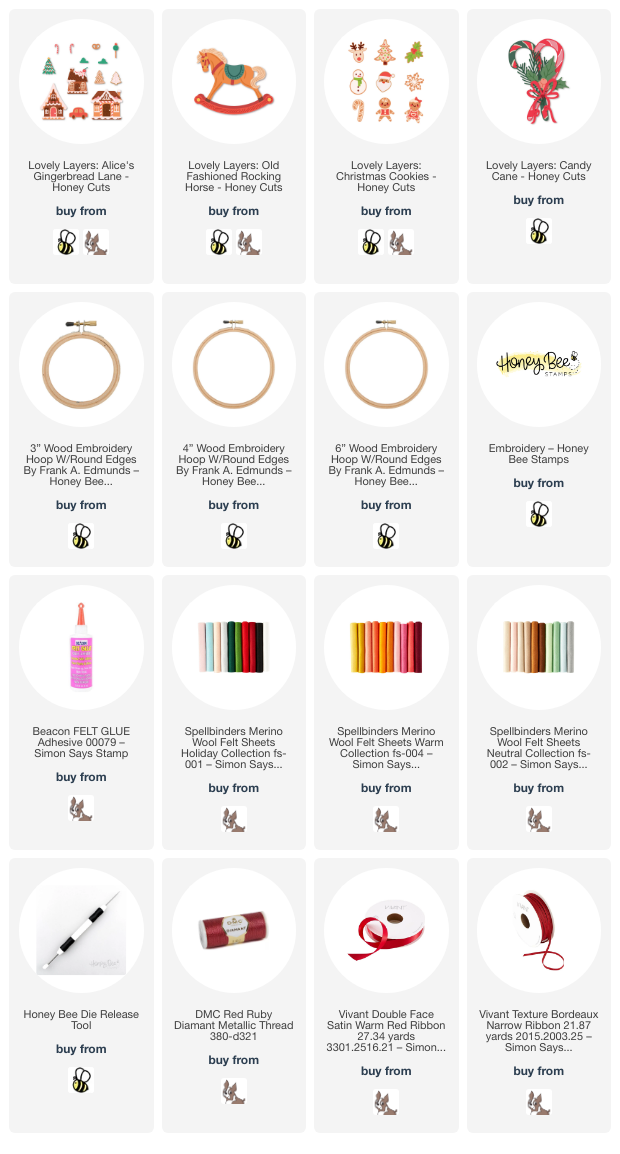
*I have gathered links to all of the products used at the bottom of the post for your convenience, using affiliate links. Thank you for shopping with my links! I truly appreciate your support for my work!*

The absolutely darling Alice’s Gingerbread Lane dies were up first; I couldn’t resist creating some adorable embroidery hoop ornaments and home decor pieces with these exquisitely detailed dies! The die set contains a ton of different pieces for each house, but with the handy color guide included with each die set and the debossed details on the die cuts themselves, each of these houses are super simple to assemble. I have been acquiring felt in lots of different shades lately, but thought that it would be best to be as traditional as possible with these little houses, sticking to that cinnamon brown for the gingerbread itself with lots of white, red, and green, with a few touches of baby pink!

After I had loaded up my 4″ embroidery hoop with some textured linen material in a natural white color, I used felt glue to adhere the felt die cuts to their appropriate spot. For the super delicate pieces, I did find it easier to place a blob of glue on a piece of scrap paper and use the super fine tip on the die release tool to “paint” the glue on to these super thin pieces, like the windows. I added some stitched details to the door and the roof of the gingerbread house, then used seed beads to add some extra little details and lovely texture to the house and tree, as well as some clear glass snowflakes to the background. I used some gorgeous red ribbon from Vivant to add a loop to create my ornament as well as a bright red bow, which I adhered with my trusty hot glue gun. I am absolutely in love with how this one turned out!

My second house is on a larger 6″ hoop to accommodate the height on the gingerbread house from the Alice’s Gingerbread Lane dies. I again die cut each of the layers from different colors of felt, this time adding in some metallic bronze felt for the eaves and base of the house and some metallic red felt for the garland on the tree. I adhered all of the pieces together with the same felt glue and added the finished pieces to my embroidery hoop with felt glue. To add the beads and stitched stars/snowflakes, I used some gorgeous metallic red embroidery thread. While most of my felt pieces were made to be given away for Christmas gifts, I definitely decided to keep this one for myself to put on my own mantle! It’s so cute!

My next projects featured some ornaments a bit simpler in design using some new and one older die sets. I always make a huge variety of cookies to give out to friends and family in tins, and this year I wanted to include a little something handmade. These dies were perfect for creating a little handmade gift to decorate the top of the tins and, hopefully, our loved ones’ Christmas trees!!

After placing some adorable polka dotted fabric in my 3″ embroidery hoop, I used felt in traditional taupe and cream to create the horse from the adorable Lovely Layers: Old Fashioned Rocking Horse, adding some light blue and red accents for a bit of color. I used some embroidery floss and a satin stitch over the top of the reins, bridle, and saddle to make them a bit neater and secure them down more permanently. I have found that the teeny felt die cuts fray a bit more easily, but you can make them a bit more sturdy with some glue or by adding stitching over the top.

For my next project, I used the tree from the Lovely Layers: Christmas Cookies die set with some green felt and lots of seed beads and sequins to create this festive and sparkling Christmas tree. So much sparkle and detail on this one!

Finally, I created another 4″ ornament with the accents from Lovely Layers: Candy Cane, an older die set that features not only a beautifully detailed layered candy cane image, but also some gorgeous foliage, berries, and a fluffy bow. I cut the foliage from two different shades of green, adhering them with dabs of felt glue; I again used the tip of my die release tool to “paint” the delicate pine sprigs with glue to securely adhere them to my textured linen fabric. I added the fluffy bow to my foliage arrangement, cut from some more metallic red felt, finally adding some stitched details to the holly leaves and some sequins and beads. I finished this one off with another loop of ribbon for the hanger and a fluffy bow at the top!

Well, that’s all for my projects today. I have a few more blog posts planned using these marvelous new dies, so stay tuned! A whole new stitching world has been opened to me, along with a new artistic medium to learn in my spare time. Thanks so much for stopping by today, and have a marvelous day!
Filed Under: Honey Bee Stamps Tagged With: alice's gingerbread lane, christmas, embroidery, felt, gift, holiday, home decor, lovely layers: candy cane, lovely layers: christmas cookies, lovely layers: old fashioned rocking horse, stitching

Holiday Joy in Pink and Green with New Simon Says Stamp DieCember!

December 6, 2024

This post was sponsored by Simon Says Stamp. Thanks, Simon!

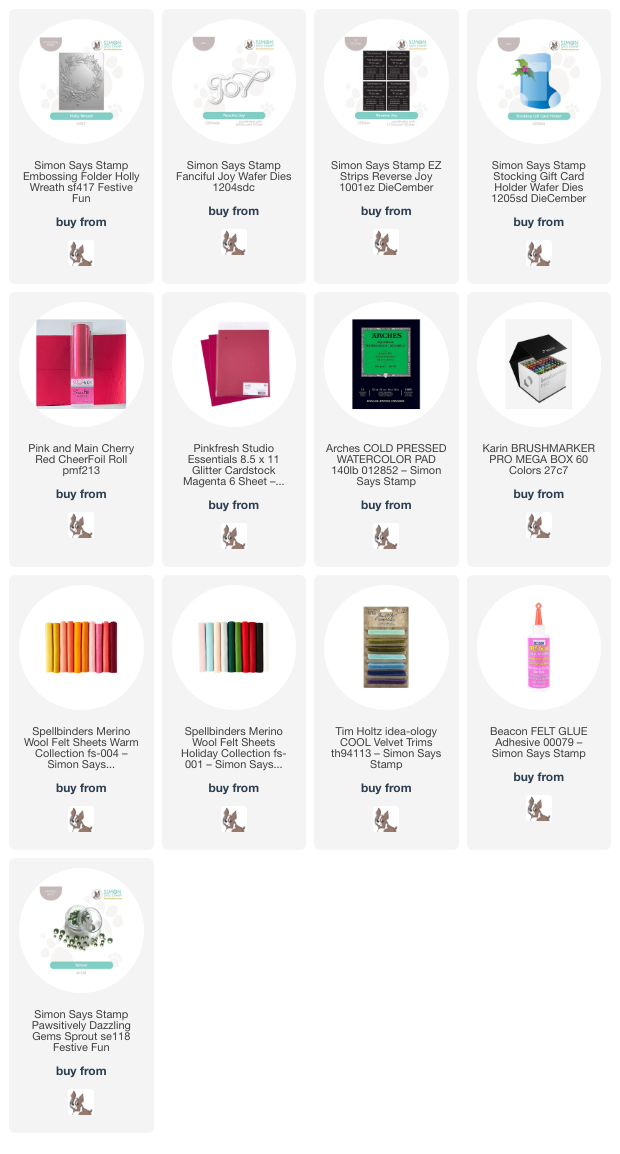
Hi friends! With the Simon Says Stamp DieCember release and celebration of all things die cutting, I have been having so much fun with die cutting lately, pushing myself to move outside of my typical cards and wanting to do something with my newest obsession: felt! I recently fell down a felt and stitching rabbit hole, and so I am looking for any and all excuses to felt everything up. (I used felt with some of the new DieCember dies HERE to create the sweetest cardinal holiday ornament!) One of the reasons that I have been looking to expand outside of paper is that paper just feels so…. disposable, you know? Something that people can throw away without much afterthought. Felt and fabric feel a bit more permanent, something that has the power to last a bit longer, at least in my opinion. For my projects today, I paired a fun hot pink and lime color palette with a newer embossing folder and some dies to create this pretty gift set. Let’s get started with the details!

*I have gathered links to all of the products used at the bottom of the post for your convenience, using affiliate links. Thank you for shopping with my links! I truly appreciate your support for my work!*

I love watercoloring on embossed images using various watercolor mediums. The depth and dimension that you can achieve when pairing watercoloring with the 3D texture of the embossing folders is unmatched in my opinion! I love using Karin Brushmarker Pro Watercolor Markers with these embossing folders; their vivid color palette creates are wonderful to create unique and super colorful cards. I carried that hot pink and green color palette into my stocking gift card holder, as well, finding felt in my stash that matched beautifully!

I began by running an A2-sized panel of Arches Cold Press watercolor paper through my die cutting machine using the newer Holly Wreath Embossing Folder. The texture on the Arches Cold Press works beautifully with these deeply etched embossing folders. It’s amazing how much detail this heavy duty watercolor paper picks up! I used the Karin Brushmarker Pro Watercolor Markers with a damp paintbrush to add lots of vivid color to the images. When working with watercolor markers, I like to scribble the color onto my glass work surface, then pick up the color with my damp paintbrush. This allows me a bit more control over the concentration of the color while also helping to create the contrast needed to create definition on the images for this no-line coloring style of painting. After I had painted the main images, I pulled out my handmade shimmer watercolor palette and added some sparkling green to the pine boughs and some shimmering splatters around the edges. It’s so difficult to capture the sparkle and shine on this card in photos!

For the greeting, I paired the new Fanciful Joy die set with the coordinating greetings in the Reverse Joy EZ strips. These user-friendly strips are printed with toner, and so can be paired with toner foil and a Minc or a laminator to create super shiny foiled sentiment strips that you can use to create buildable sentiments. I used Pink & Main Cherry Red Cheerfoil to add foil to these sentiments (don’t you just love that font?) and cut the detail layer of the Fanciful Joy die from some Pinkfresh Studio Magenta Glitter Cardstock and the shadow layer from vellum. I layered the sentiment pieces over the wreath, popping them up with some foam adhesive. I added a coordinating glitter accent strip and a pretty pink bow to accent the wreath and add additional texture. Finally, I added a few Sprout Pawsitively Dazzling Gems for even more sparkle!

For my second project, I used the new Stocking Gift Card Holder with some deep pink felt to create this sweet little gift card holder that can be used as an ornament after it’s fulfilled its gift-giving purpose! I am really enjoying using non-stitching dies to create fun stitched projects lately. I’m finding that my biggest limitation is my creative imagination!! I die cut the main stocking portion twice from deep pink felt and added the top portion using some white felt. Before stitching the two stocking die cuts together, I added some holly leaves and berries, adding some stitching details to the veins on the leaves with coordinating tone-on-tone floss. I also added some sequins and beads to the pale pink berries to add extra texture. I am in love with these pretty colors and the luxurious texture of the felt!

After I had stitched the berries and leaves onto my stocking, I used coordinating pink embroidery floss to stitch the stocking together, adding an olive green velvet ribbon loop to the top corner. I used felt glue to add the white “fur” to the top of the stocking; the felt glue keeps things nice and clean. I’ve been using felt glue a lot lately, making it super simple to put fun felt scenes together as easily as with paper and glue! For one last feminine touch, I added a coordinating olive green velvet bow next to my holly berries. Wouldn’t this be so cute hanging from a Christmas tree or embellishing a pretty Christmas gift?

Well, that’s all for my projects today! I still have so many fun things to share with you using the new DieCember release… if you’d like to receive an email each time I post, you can sign up to become an email subscriber so that you don’t miss any inspiration! I appreciate all of you very much! Thanks so much for stopping by today, and happy DieCember!

Filed Under: simon says stamp Tagged With: cheerfoil, christmas card, christmas tag, felt, gift card, gift card holder, holiday card, holly wreath, karin brushmarker pro, minc, no line coloring, reverse joy, stitching, stocking gift card holder, watercolor

Simon Says Stamp DieCember Blog Party + Fabulous Freebie!

December 1, 2024

This post was sponsored by Simon Says Stamp. Thanks, Simon!

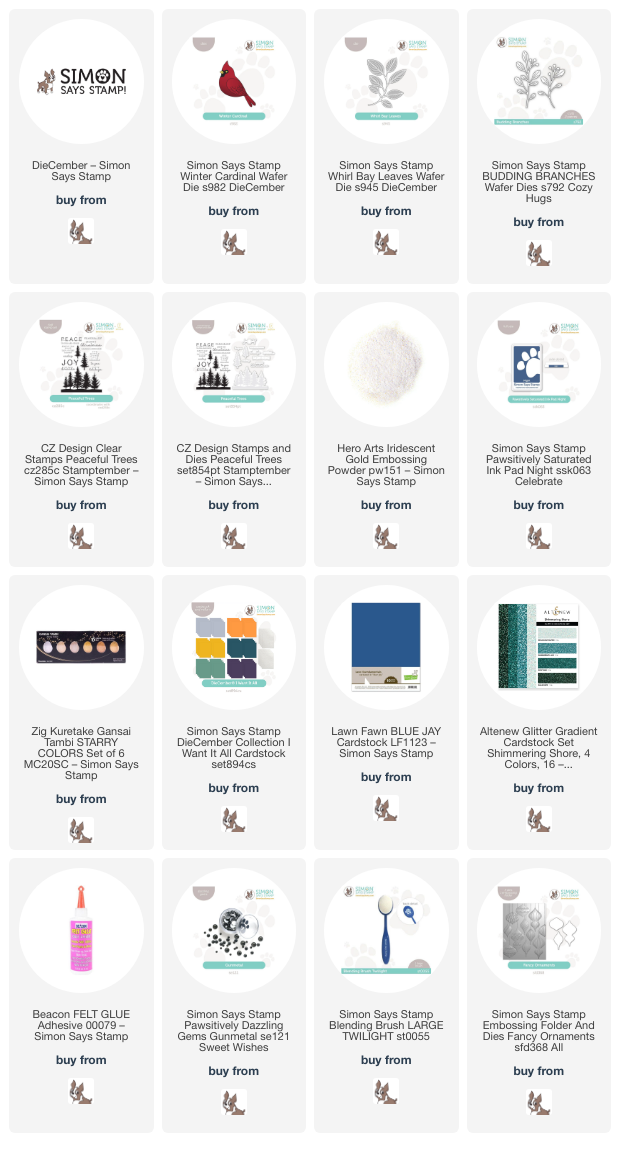
Hi friends! So remember the crazy amount of fun we had in STAMPtember? Well, we’re about to turn our attention to that other, incredibly versatile and wonderful product that we all love to use in our craft rooms: dies! Yes, it’s time for the marvelous DieCember release with Simon Says Stamp, in which we celebrate all things dies and die cutting! I love stamping, of course, which inevitably led to die cutting with coordinating dies for stamped images, but I have grown to love standalone dies almost as much as I adore stamping. You can use standalone dies in so many ways and with so many techniques; they’re wonderful for creating vibrant, color-saturated projects when paired with brightly colored cardstock, but I have also been loving pairing them with felt lately to create a completely different and gorgeously textured finished product. I have a pair of projects to share with you today using some of the marvelous new products from the Simon Says Stamp DieCember release, so let’s get started with the details!

I have always had a special place within my heart for cardinals being from St. Louis, and I have really loved seeing them out in my yard especially since I lost both of my grandparents. I am sure you’ve heard that “cardinals are visitors from heaven,” so I always like to think of them as my Grammy and Papa stopping by to say hi. When I saw the beautiful new Winter Cardinal dies, I knew that I wanted to use it straightaway. I recently have become obsessed with using felt to create projects that will last a little longer than just a card made of paper, so I pulled out some beautiful shades of red felt and a few stitching supplies, as well as some coordinating cardstock to create a beautiful ornament and matching card.

To start, I die cut the different layers of the Winter Cardinal from some cherry red and deep maroon felt, adding accents of black and pale yellow for the face on the cardinal. My stitching skills are still something upon which I am working, so I used felt glue to adhere the layers together to create a lovely layered cardinal. I also used glue to attach a shimmering Gunmetal Pawsitively Dazzling Gem for the cardinal’s eye.

To create the ornament, I filled a small embroidery hoop with navy blue fabric. I used some sage green felt from my stash to die cut the new Whirl Bay Leaves die, then adhered it to the navy blue fabric in my embroidery hoop using more felt glue. I nestled the cardinal amongst the leafy branch with the fabric glue, then used a needle and thread to add some sequins and beads to the little scene, tying in some more red to the color palette and adding a bit of shine and sparkle. Finally, I added a coordinating sage green velvet bow with my glue gun and a sage green velvet loop to be able to hang the ornament on the Christmas tree! This is going to be a perfect gift for my mom as she recovers from a shattered ankle injury; she needs some encouragement right now, and my grandparents (her parents) always helped to give her the support that she needed.

To create the matching card, I die cut the Winter Cardinal again, this time from some incredibly vivid red cardstock. I think that this shade of red perfectly matches the vibrant crimson of the real cardinals that I just saw in abundance today; they really stand out so beautifully amongst the dreary winter landscape! I also die cut the new Whirl Bay Leaves die twice from some of the new Simon Says Stamp Sage cardstock. (The new cardstock colors are absolutely luscious and coordinate so beautifully with the Pawsitively Saturated Inks! So thick and luxurious and super smooth!) To add a bit of variety to my foliage bouquet, I die cut the older Budding Branches die from some deep green glitter cardstock from the Altenew Shimmering Shores Glitter cardstock pack. The combination of large and small leaves really helps make a full and lush “bouquet” of foliage amongst which I can nestle my regal cardinal!

After I had die cut all of the different components for my card, I used a blending brush to blend Night Pawsitively Saturated Ink on an A2 panel of Lawn Fawn Blue Jay cardstock, helping to add some interest behind my foliage bouquet. Before adhering my die cuts, I also splattered the blended background with some gold watercolor to add some shimmer to the card, as well as to mimic the tiny golden beads that I sewed amongst the leaves of my ornament. For the greeting, I heat embossed a sentiment from Peaceful Trees onto some more Blue Jay cardstock using Hero Arts Iridescent Gold Embossing Powder. I love how shimmery this gold embossing powder is; it’s so unique and full of shine, especially compared to other gold embossing powders. I adhered the die cut sentiments to the little scene, tucking a golden thread bow beneath it and adding a few iridescent red “berries” to the berry stems for added sparkle!

Well, that’s all for my projects today. To celebrate the start of DieCember, Simon Says Stamp is giving you a fabulous freebie! Simply follow the instructions on the graphic at the top of this post to receive the truly elegant Fancy Ornaments embossing folder, which is a $24.99 value. The addition of the coordinating die really makes this free gift an excellent and versatile addition to your craft room…. and who doesn’t love a freebie?

We aren’t doing a traditional blog hop today, but instead having a blog party. You can check out the wealth of inspiration using the excellent new DieCember release HERE on the Simon Says Stamp blog. Thanks so much for stopping by today, and have a marvelous day!

Filed Under: simon says stamp Tagged With: budding branches, christmas card, die cutting, diecember, embroidery, felt, holiday card, ink blending, ornaments, peaceful trees, stitching, whirl bay leaves, winter cardinal

Simon Says Stamp Gingermas Wonder Box Projects!

November 11, 2024

This post was sponsored by Simon Says Stamp. Thanks, Simon!

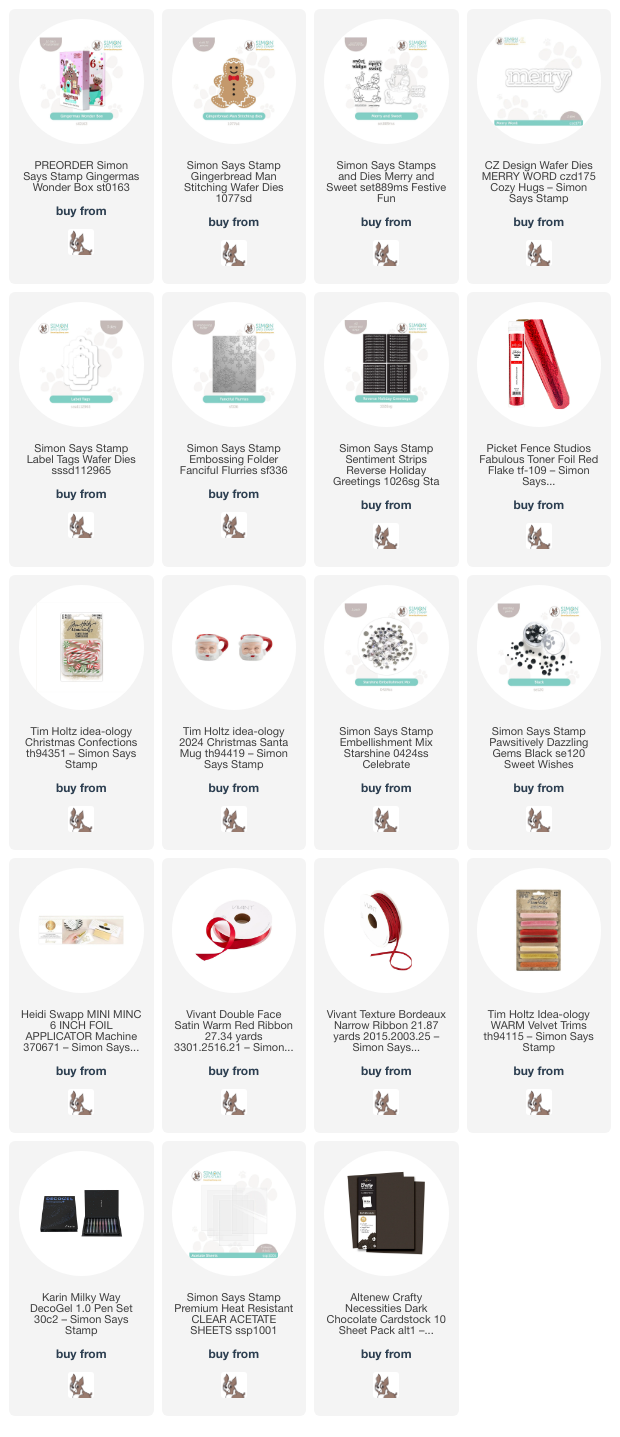
Hi friends! I have some super fun and sweet (pun intended) inspiration to share with you using products found in the Simon Says Stamp Gingermas Wonder Box, which is a 12 day crafty advent calendar filled with the most delightful assortment of coordinated goodies. If you’re curious about all of the different products included in this super fun box (that makes for a great gift!), you can see each day revealed below, including Day 3 from me, myself, and I!

You can see the adorable little treat box that I created, embellished with several items from the Gingermas Wonder Box, including a darling tag created with products from Day 1 and Day 2 of the box, as well as the sweet vintage Santa mug from Day 3, which I embellished with some red velvet Tim Holtz trim and a loop of white silk ribbon, which can easily be removed from the box and added to your Christmas tree!

*I have gathered links to all of the products used at the bottom of the post for your convenience, using affiliate links. Thank you for shopping with my links! I truly appreciate your support for my work!*

Since my project above focused primarily on the items from days 1, 2, and 3, I decided to use a few more of the products in the Gingermas Wonder Box to create a pair of gingerbread-themed projects!

I have recently fallen down the stitching rabbit hole, and so I was super excited to see the adorable Gingerbread Man die included in the Gingermas Wonder Box! I knew that I needed to make some decor with my newfound felt and embroidery floss collection, and naturally I had to add a coordinating card.

I have been slowly collecting items to use for embroidery, including small embroidery hoops and plain cloth that is easily stitched! I created a blank canvas upon which I could add my sweet gingerbread man, which I die cut from some deep brown felt. (He almost looks a little burnt, but I was going for a chocolate brown, poppy red, and white color palette!) I used coordinating deep brown embroidery floss to stitch him onto the white fabric in my embroidery hoop, then added the frosting details, his buttons (made from Black Pawsitively Dazzling Gems), and bowtie with liquid fabric glue.

After I had finished my gingerbread man, I die cut the Merry Word die from some black felt and adhered it to the embroidery hoop with some more fabric glue. To further embellish, I mimicked Gingy’s little bow tie with some red and white polka dot ribbon from my stash, sewing the bow just beneath the “merry” sentiment. I had a mishap with some hot glue as I was trying to clean up the fabric sticking out around the edges on the back of the embroidery hoop, so I decided to embellish around the edges of my hoop with the little Tim Holtz Christmas Confections candies that came in the Gingermas Wonder Box to cover it up. Finally, I added a touch of sparkle with some Peppermint Pawsitively Dazzling Gems! Wouldn’t this be adorable placed on a mantle or with a loop of ribbon as a wall hanging? I just love it!

Of course, I had to show a card option with the Gingerbread Man die, because not everybody likes to stitch! I used the negative space to create a shaker card, first by die cutting Gingy from the center of a panel of coordinating deep brown cardstock, slightly smaller than A2 sized, then backing that window with some clear acetate. I die cut the frosting details from white glitter cardstock and his little bowtie from some leftover red felt scraps that I had from my felt wall hanging above. I adhered the details to the acetate window and allowed them to dry.

To create the shaker portion of the card, I used Simon’s 3D Foam Strips to create a seamless border around the back side of the window. I used a second panel of the same deep chocolate brown cardstock to back my shaker window. I filled the shaker with Simon’s Starshine Embellishment Mix and sealed the shaker up. I added a simple greeting from the Reverse Holiday Greetings that I had foiled using Red Flake Toner Foil and my Minc machine. These sentiment cards are a great way to add a simple and elegant greeting very quickly to your card! If you’re mass-producing anything, you should definitely take a look at them! Finally, I used a white gel pen to add some simple stitching details to the edge of the shaker window panel, to add one more little touch of white and break up the monochromatic background.

Well, that’s all for my projects today! If you are interest the Gingermas Wonder Box, don’t wait to purchase it, because it is almost sold out!! Luckily, Simon Says Stamp has each of the individual products included in the box in their store, so you can pick and choose what you would like to purchase if you don’t want the entire thing. Options are always a good idea, right? Thanks so much for stopping by today, and have a marvelous day!

Filed Under: simon says stamp Tagged With: christmas card, christmas confections, christmas santa mug, christmas tag, decor, fanciful flurries, felt, gingerbread, gingermas, holiday card, label tags, merry and sweet, minc, pawsitively dazzling, reverse holiday greetings, ribbon, tim holtz, toner foil

A Final Ode to Pumpkins with Simon Says Stamp!

October 31, 2024

This post was sponsored by Simon Says Stamp. Thanks, Simon!

Hi friends! I am back with my final post for the month of October, just in the nick of time, too! I will be helping my kiddos get their Halloween costumes on as soon as I’m done: Sally from Nightmare Before Christmas, Harry Potter, and two firemen! (If you’ve never checked out the Halloween costumes from Costco, they are legit! The firemen costumes are incredible and were very reasonably priced.) For my last project for the month, I thought I’d do one final “ode to a pumpkin.” I don’t do spooky, and I’m not great a cute, so pumpkins are basically my favorite imagery for autumn and Halloween. They can be fun and playful, or they can be elegant, especially when paired with foliage and florals. I have been collecting more felt and embroidery items, and so I was itching for a project on which to use them. This autumnal wall hanging was the perfect project to start my obsession! Let’s get started with the details.

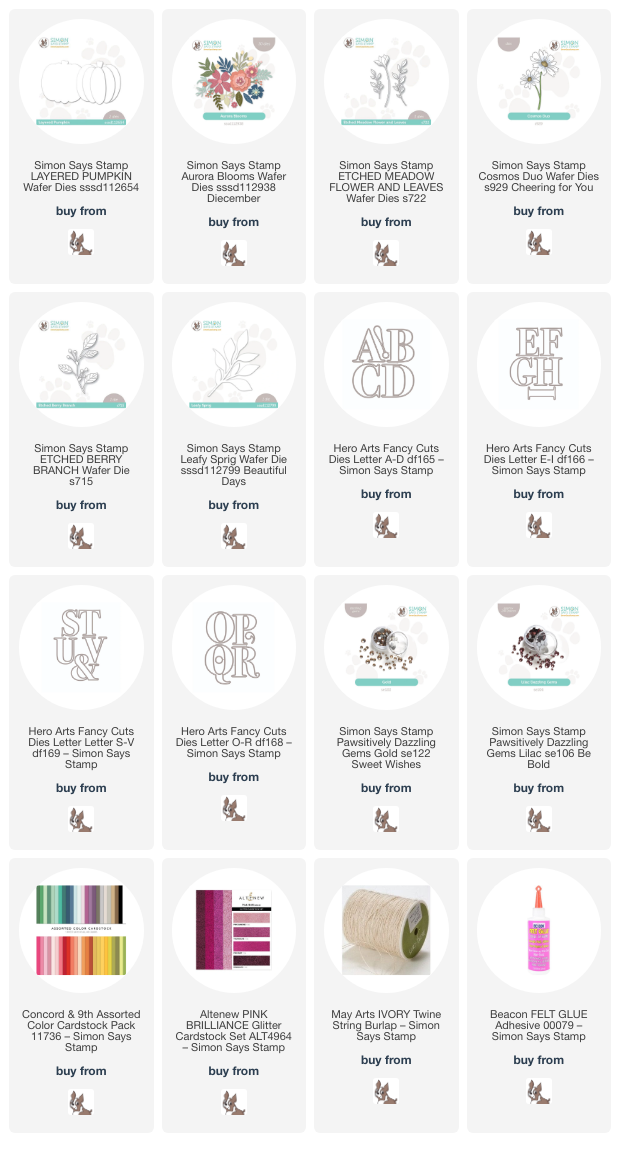
*I have linked all of the products used at the bottom of the post using affiliate links for your convenience. Thank you for shopping with my links! I truly appreciate your support for my work!*

For both of my projects, I paired the Aurora Blooms, Etched Meadow Flower & Leaves, Cosmos Duo, Etched Berry Branch, Layered Pumpkin, and Leafy Sprig dies. I wanted to create some decor with felt as well as with paper, so I scoured my local dollar stores and big box craft stores for some fun “blanks” that I could decorate. I found this canvas wall hanging and little chalkboard easel, and I think they both are just perfect for embellishing with die cuts!

For the wall hanging, I began by die cutting all of the images from the die sets listed above using high-quality colored felt. I used a somewhat non-traditional color palette, pulling some deep, somewhat muted oranges together with cranberry and autumn rose, with touches of lime green and hunter green. I used some needle and thread with sequins and seed beads to adorn the center of some of the flowers, adding a touch of sparkle and additional texture to the felt images. I also die cut the word “gather” using the large-scale Hero Arts Alphabet Dies. I adore these alphabet dies; they’re perfect for creating banners and home decor (I used them to create a banner for my office Christmas tree last year!) and are such a great size.

For the pumpkin, I used some fabric glue to assemble the individual pieces from the Layered Pumpkin die set, then used a coordinating shade of orange to do a (very) simple blanket stitch around the edges of each piece of rind. This additional stitching around the edges adds some texture as well as helping to differentiate one segment from the next, so that it doesn’t look too flat.

After I had die cut and assembled the different components, I began to create my arrangement. I used a piece of ribbon to line up my letters, adhering them to the banner with some fabric glue, then began arranging my pumpkin, flowers, and foliage in a swag beneath my letters. I stitched some more sequins and seed beads to create “berries” amongst my floral arrangement, helping to fill in any gaps in the flowers. After completing the arrangement on the bottom, I felt that the area above the letters was a bit too bare, so added another, simpler arrangement above the letters as well. I think it will look so pretty hanging from my front door for Thanksgiving!

Since I haven’t been working with felt for very long, I decided to make another home decor project using my more typical cardstock, using the same color palette! I die cut the same images from the Aurora Blooms, Etched Meadow Flower & Leaves, Cosmos Duo, Etched Berry Branch, Layered Pumpkin, and Leafy Sprig die sets. I used some sparkling cranberry glitter cardstock from Altenew to create the Etched Meadow Flower & Leaves blossoms. I think this color palette is so pretty; it is definitely autumnal, but not super orange-y!

I found this little easel chalkboard at my local dollar store! They have them in both black chalkboard and white dry erase board; this black backdrop was perfect for adorning with colorful die cuts. After I had adhered all of the die cuts in a little arrangement on the front of the easel, I used a double layer of twine, wrapping it around the top of the easel multiple times, then added a fluffy bow. I used some glue to hold the bow down and prevent it from being untied.

After I had finished arranging the die cuts and adding my twine bow, I added some Gold and Lilac Pawsitively Dazzling Gems to the berry stems and flower centers, adding a touch of sparkle and texture to this piece of decor. I think this would look so sweet on a desk at work or perhaps on a piano or mantelpiece at home!!

Well, that’s all for my projects today. I am having such fun branching out from my typical cardmaking, and I hope you’re enjoying it too. It’s fun to try new things, right? Thanks so much for stopping by today, and have a marvelous day!

Filed Under: simon says stamp Tagged With: alphabet dies, aurora blooms, banner, canvas, cosmos duo, die cutting, etched berry branch, etched meadow flower and leaves, felt, home decor, home deocr, layered pumpkin, leafy sprig, wall hanging

  • « Go to Previous Page
  • Page 1
  • Interim pages omitted …
  • Page 4
  • Page 5
  • Page 6

Primary Sidebar

  • Facebook
  • Instagram
  • Pinterest
  • YouTube

Favorite Shops

Secondary Sidebar

Subscribe

Enter your email address to subscribe to this blog and receive notifications of new posts by email.

Instagram
Something is wrong.
Instagram token error.
Follow
Load More

Archives

Tags

3D embossing folder alcohol markers better press birthday birthday card blog hop card kit christmas christmas card christmas tag colored pencil copic copic coloring Daniel Smith die cutting embossing folder embroidery felt giveaway holiday holiday card hot foil ink blending karin brushmarker pro layered stencil masculine my monthly hero new release no line coloring no line watercolor OLO marker olo markers original illustration pawsitively saturated rainbow shaker card slimline stamping stamptember stencil thank you thinking of you valentine's day video watercolor

Popular Posts

Simon Says Stamp October 2026 Card Kit of the Month: Homespun Gratitude!
February 2018 My Monthly Hero Blog Hop!
Altenew Craft A Flower: Poppy Blog Hop+Giveaway!
Felted Gourd Wall Hanging with Simon Says Stamp!
Sunflower Home Decor with Simon Says Stamp!
Craft Your Life Project Kit: Feathered Lilies Blog Hop+Giveaway!
Simon Says Stamp October 2025 Card Kit of the Month!
Altenew Standalone Die Blog Hop+Giveaway!
The Ton Anniversary Release- Day 2
Altenew Build A Flower Japanese Mum Blog Hop!

Disclosure

Some affiliate links are used in my posts. This means that, should you click on one of my links and purchase something from that company, I will receive a small portion of the sale at no extra cost to you. I use the money earned from these sales to help maintain my blog. I so appreciate you visiting and, if you do choose to use one of my affiliate links, thank you so much for your support!
Copyright © 2026 ·Brunch Pro Theme · Genesis Framework by StudioPress · WordPress · Log in
Loading Comments...