• Skip to main content
  • Skip to primary sidebar
  • Skip to secondary sidebar

Sixth Street Sundries

Emily Midgett

  • Home
  • About Me
  • Contact
  • OLO Marker Color Swatch Chart
  • Shop

flower shoppe

Simon Says Stamp March 2025 Card Kit Release!

February 14, 2025

This post was sponsored by Simon Says Stamp. Thanks, Simon!

Hi friends! The new Simon Says Stamp March 2025 Card Kit is now available for preorder, and let me just say, it features some absolutely darling components that get your springtime mojo going!! The new Tweet Friend stamp set included with the kit is truly precious, featuring lots of beautiful little singing birdies and several components with which you can build scenes on your card fronts. The March 2025 Card Kit also features scrumptious patterned papers that work beautifully with the other elements of the kit. I’ve paired some of the patterned paper with the stamp set and some other goodies to create this coordinated gift set. Let’s get started with the details!

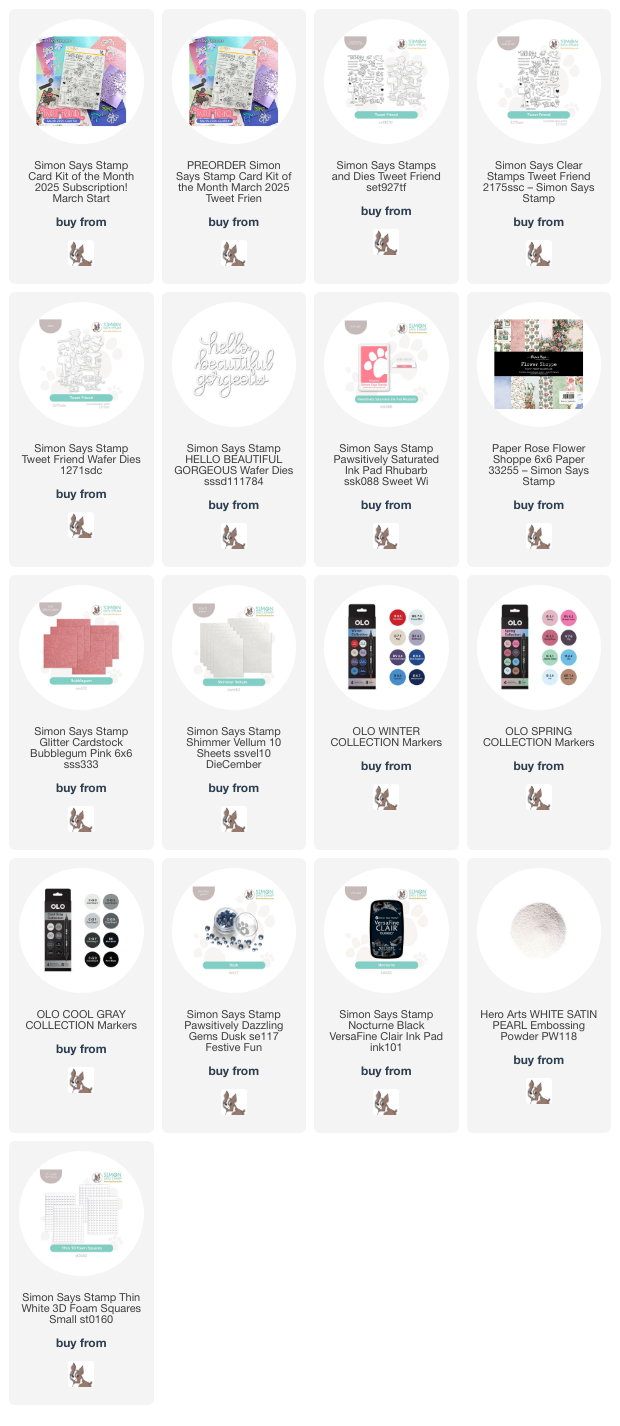
*I have gathered links to all of the products used at the bottom of the post for your convenience, using affiliate links. Thank you for shopping with my links! I truly appreciate your support for my work!*

I was so entranced by the beautiful patterned papers included with this month’s Card Kit that I decided to use them as a focal point for my projects today. The beautiful floral garden scene worked perfectly as a backdrop for my birds, and the floral wreath was exquisite as a focal point for a framed decor piece! The Card Kit is a great value, with the individual components being worth far more than the very economical kit price, and bonus, the elements all work beautifully together as well as separately!

For my first project, I began by using my sharp scissors to fussy cut the flower garden scene from the patterned paper included with the Card Kit so that I could layer it on my colored cardstock, creating a lovely backdrop for my singing birds. I blended Rhubarb ink at the top of a very pale blush A2 card front, creating a blushing haze upon which I could layer the garden scene. I adhered the fussy cut patterned paper with liquid adhesive, then popped up a strip of the mint green foil cardstock included in the Card Kit to create some “grass” beneath my stamped images.

After I had created the background for my scene, I stamped several of the images from the Tweet Friends stamp set included with the Card Kit using Simon Says Stamp’s Nocturne Ink, which I softened by adding White Satin Pearl Embossing Powder over the top to create a pearlescent charcoal. I colored the images using my OLO markers, creating some sweet bluebirds and pretty pink blooms, then used the coordinating dies to cut all of the pieces out. I popped them up with thin foam adhesive squares, tucking the individual blooms amongst the other pieces to create an ethereal garden. I love the sentiment, too, with the beautiful font and uplifting greetings! Finally, I added some Dusk Pawsitively Dazzling Gems for a bit of added sparkle, as well as adding another element of blue to tie into the bluebirds and beautiful blue blooms!

I also created this piece of decor using the beautiful wreath patterned paper included with the kit. It covers most of the 6×6 panel, and I couldn’t bear to cut it up to fit on a card front, so I decided to keep it intact and frame it! I used an inexpensive frame that I purchased at the local dollar store, covering the glass front with a 6×6 panel of the minty green foil cardstock and popping up the fussy cut wreath in the center with foam adhesive. With the decor that I’ve been creating over the last few months, I have been scouring my word die stash for sentiments that would outside of a card greeting, and the Hello Beautiful Gorgeous work really well for both cards and for this piece of inspirational home decor! I am going to give this to my daughter to put in her redecorated bedroom later this year. I think it’s perfect for a tween, and this color palette fits perfectly with what she’s chosen for her room. I die cut the detailed sentiment dies from the Bubblegum glitter cardstock included in the card kit, then adhered it to a panel of the Simon Says Stamp Shimmer Vellum and used sharp scissors to fussy cut around the edges. The vellum shadow allows the pink glitter sentiment to stand out a bit from the colorful floral background. Finally, I added a pretty pink bow and some more Dusk gems for added texture and sparkle!

Well, that’s all for my projects today. One of the best things about the Simon Says Stamp Card Kit releases is the ability to customize to your heart’s content. You can purchase each Card Kit a la carte, meaning that you choose to preorder the kit at a great value on release day of each month if you like the kit’s contents; you can select the Card Kit Subscription, which gives you a discount and even better bang for your buck; or you can simply purchase the individual items that you want, albeit at full price. The kits themselves are limited edition, so once they’re sold out, that incredible value is no longer available, but the individual components are available for a long time to purchase!

Thanks so much for stopping by today, and have a marvelous day!
Filed Under: simon says stamp Tagged With: card kit of the month, flower shoppe, hello beautiful gorgeous, home decor, ink blending, OLO marker, paper rose, patterned paper, tweet friend

Concord and 9th-For the Record, Greatest Hits, and Little Crate *plus* a Giveaway!!

March 17, 2023

Hi friends! I am back with my last post as a guest for Concord and 9th. I had such a wonderful time playing with these beautiful, clever new products from the March Release, and I’m so grateful to have been asked to be a guest for March. Now, settle in, because this is a long post. I have several projects to share using the new For the Record, Greatest Hits, and Little Crate bundles! Let’s get started with the details.

For my first project, I took to Pinterest to get some inspiration on how to use the new For the Record stamp and die bundle. This set features a record background turnabout, which is stamped in multiple steps so that you can get a variety of colors on your background! I stamped the background using Aqua Sky, Ballet Slipper, and Mushroom inks. I love this color combo; it totally gives me 50’s soda shoppe vibes!

I saw a photo on Pinterest of a room with an entire wall of vinyl records that had been decorated with silk flowers and thought that it was a perfect mashup of the new For the Record and my first love: flowers! I am unabashedly feminine in my cardmaking, and I will add flowers or pink if at all possible, ha. I die cut lots of the little posies from the Flower Shoppe companion die set using Ballet Slipper cardstock, adding some teeny little leaves cut from Aqua Sky cardstock.

For the greeting portion of the card, I die cut the “record” die from the For the Record die set from some more Ballet Slipper cardstock, and lightly blended some Ballet Slipper ink towards the top of the die cut to create a pale pink ombré sentiment die cut. I backed it with a Mushroom cardstock outline, creating lots of contrast for the pale pink letters. I die cut the “for the” from some more Mushroom cardstock, backing it with some white cardstock to help the sentiment stand out, then heat embossed a greeting from the For the Record stamp set on a small rectangle of Mushroom cardstock. I arranged all of the sentiment pieces on a vellum oval die cut (included in the For the Record die set) to give them a bit more of a neutral ground from the busy patterned card front. I accented the sentiment with some pale pink flowers from the In the Meadow die set. A girly take on this For the Record bundle, to be sure!

For my second card, I created a sentiment collage using lots of bright colors and the new Greatest Hits Bundle! I started by created my color blocked background. I trimmed some strips of Honeysuckle, Marmalade, and Oceanside colored cardstock, as well as a couple of thinner strips of white glitter cardstock. Using some scrap white cardstock, I adhered all of the pieces together to create one panel, then popped the strips up in the center of my white A2 card base.

With my background complete, I turned my attention to the sentiment. So many fun sentiments in fabulous fonts and shapes=sentiment collage! I selected all of the sentiments that would work nicely together, then stamped them on more white cardstock using Honeysuckle, Marmalade, and Oceanside inks. I die cut them all using the coordinating dies, though I did fussy cut the You Rock sentiment, as there wasn’t any coordinating die for that particular sentiment. I popped all of the sentiments up on the striped card base using foam adhesive. I die cut several of the little stars included in the coordinating die set from some silver holographic cardstock and scattered them across the stripes for an added element of shine!

My final project for this month’s guest spot features the darling new Little Crate die set. This was designed to work perfectly with the pocket die from the Greatest Hits dies to create a milk crate full of vinyl records (how darn creative is that, right?) but…. you know I had to put my own girly spin on it. I thought the crate would be the perfect holder for an array of miniature cards. I created an homage to aqua, using only the Peacock, Oceanside, and Aqua Sky product bundles, accented with crisp white. The crate itself was crazy easy to assemble; you die cut the large die twice and layer them together perpendicular to each other. The dies also cut the strips for the top and bottom. These are used to add extra sturdiness to the crate as well as some extra dimension and texture. You could even cut these in different colors if you wanted to get fancy! I added a few flowers, die cut tag, and some crisp white twine to the front of the crate to zhuzh it up.

I created three little envelope pockets using the Greatest Hits dies, cutting and assembling an aqua ombré trio of pockets. These were so intuitive and easy to assemble; I do recommend using super strong double sided tape to create a very secure pocket. I used the Woven Stripes stamp with the coordinating ink shades to add a little texture to the fronts of each of the pockets, lightly ink blending around the edges of each pocket with the same coordinating ink shade to give it a bit of a vintage, distressed feel. I adhered a white “for you” die cut to the front of each pocket, as well, cut using the sentiment die from the Little Crate die set.

I created a trio of miniature cards by folding three A2 card fronts in half. These fit perfectly inside of the little pockets, and gave the tiniest, sweetest canvas on which to decorate with my favorite C9 products that I’ve been saving for a rainy day! On the Aqua Sky card, I embellished it with an Oceanside Plaid Card Front-Thin die cut, adding a sentiment from Greatest Hits Bundle embossed in white on vellum. I accented it with a few flowers from the Delicate Blossoms die set. I created an Oceanside version, again using the Delicate Blossoms die set and the three different shades of aqua cardstock. The final mini-card uses such a fun technique, one which I will probably create a full sized project and do a post on by itself because I loved it so much. I stamped the base layers of the Painted Peony stamps on Peacock cardstock using white pigment ink, which acted as a barrier for the subsequent layers of colorful ink to keep it from sinking into the deep teal cardstock. I added a die cut greeting from the Greatest Hits dies, backing it with some white cardstock to make it pop.

These little mini-cards are the perfect size to hold a gift card. Wouldn’t a little crate of these cards and envelopes, wrapped in a little cellophane bag and tied with some pretty twine, make a lovely gift?

Now, to celebrate the new March Release, Concord & 9th is providing each guest with a $25 gift card to give away! All you need to do to enter is be a blog follower and leave a comment on this post telling me which of the new products from the March Release were your favorite. I will select a winner on Monday, 3/20, and then Concord & 9th will email you the gift card.

Thanks so much for stopping by today, and thank you tons and tons to the folks at Concord & 9th for asking me to be your guest this month! It was my pleasure to work with these marvelous products. Have a marvelous day, friends!

Filed Under: Concord and 9th Tagged With: delicate blossoms, flower shoppe, for the record, greatest hits, in the meadow, little crate, painted peony, plaid card front, woven stripes

Fashion Shoppe and Flower Shoppe with Concord & 9th!

March 14, 2023

Hi there! I’m so thrilled to be a guest for Concord and 9th this month, and I’m back again with another set of cards using new goodies from their March release. I posted a project yesterday using the new Pop Up Shoppe dies (you can check it out HERE in case you missed it), and today I have a few projects using the basic Pop Up Shoppe dies with their adorable add-ons: Fashion Shoppe and Flower Shoppe! Let’s get started with the details.

This first pair of cards features the absolutely darling new Fashion Shoppe Bundle, which features an add-on die set to create the most adorable little boutique, as well as a small stamp set to add simply darling sentiments and accents. I modeled these two cards after one of my own favorite boutiques. The owner, Audrey, is a friend and has done an absolutely spectacular job refurbishing a turn-of-the-century storefront into a smashing, chic boutique. The aqua, pink, and teal color scheme makes my heart sing and make it such fun to shop there!

I began by creating the main boutique using the Pop Up Shoppe dies, cutting the background from Aqua Sky cardstock, accents from plain white cardstock, and the plants for the planters from Oceanside cardstock. I also added a few accents using Dove cardstock and built my card front on a Dove base. The super sweet bicycle was cut from Ballet Slipper cardstock. So darn cute! I wanted a gray and white striped awning, so I used the same technique that I used for my first pop up shoppe card to do some quick masking with thin masking tape at intervals along my awning die cut, then used a blending brush to blend Dove ink. Removing the masks were so fun; masking is almost as magical a technique to me as heat embossing!

The Fashion Shoppe dies have a ton of sweet little accessories to create your boutique, including dress forms, tables, a mirror, chandelier, clothes, purses, shoes, even hats! I die cut several elements from the Fashion Shoppe die set in coordinating shades of teal, aqua, and pink, with a silver chandelier to boot! I also die cut the intricate Boutique sign from some Peacock cardstock. I backed the windows with some heavy duty acetate to make sure that I could easily adhere the door and windows to the front, and the accessories to the back.

I put everything together using some strong double sided tape and liquid glue. I love that these fold nicely to fit inside an A2 envelope! I might use a 5×7 envelope just to make sure that everything fits comfortably, because there is a lot of foam tape and heavy cardstock layers here, but if you keep things simple, it definitely fits inside an A2 envelope!

When I’m die cutting tiny little pieces like these, I tend to die cut a ton of pieces in different colors and put everything together before I start adhering the final card together, so after assembling my boutique card, I had several little bits leftover that I decided to turn into a cute little card! To create some “wallpaper” for my boutique (or fancy closet!) I stamped the totally gorgeous In Bloom flowers on Aqua Sky cardstock using Oceanside ink. I trimmed it down to be slightly smaller than A2 size, then matted it with a full size Ballet Slipper card front.

I had die cut the little fashionable clothes and accessories from the Fashion Shoppe using Ballet Slipper and Peacock solid cardstock, and die cut the details using several little bits of specialty cardstock that I had in my stash! I used matte silver foil cardstock for the mirror, purses, and shoes, iridescent white cardstock for the chandelier, and some super fun disco ball glitter cardstock for the skirt. I also added some gems to the shirt on the dress form to create the most adorable outfit… I want one in my size, haha! I arranged all of the pieces on a rectangle of vellum, which helps create a ground for my little scene and soften the busy floral “wallpaper” background.

I white embossed a greeting from the Fashion Shoppe stamp set onto a strip of Peacock cardstock and laid it beneath the fashionable scene on my vellum panel. I flipped the panel over and added some pieces of foam adhesive behind the solid die cuts to hide the adhesive. I removed the release paper, then added it to the patterned panel. I just adore that sentiment!

My next card features the new Flower Shoppe Dies, another companion set to work with the Pop Up Shoppe dies. I kept this project super bright, with a Honeysuckle store front, Ballet Slipper awning, and muted Dove and Mushroom accents, again backing my window with the sturdy acetate to provide a strong spot for my little flower shop accessories. I backed the window panes on the door with some heavyweight vellum to give a frosted look to my shop door. So fun to customize these pieces!

The Flower Shoppe dies allowed me to cut the most adorable little containers of flowers, potted plants, and even the most precious garden cart and teeny watering can! It’s like playing with furniture and accessories for a Victorian dollhouse; I can’t believe all of the things they have made so tiny and cute. I kept the color scheme bright and springy with my flower shop, using minty Sea Glass cardstock for the plants and Ballet Slipper, Honeysuckle , and Cranberry cardstock for the flowers.

To create some more bold wallpaper for the walls of my shop, I again stamped the gorgeous In Bloom flowers on some Ballet Slipper cardstock using Honeysuckle ink. I absolutely love this look and wish I could have a life-sized version for my craft room’s walls! I adhered all of the components to the wallpapered background, adding the accessories with a mixture of foam tape and liquid adhesive. All this card needs is a sweet sentiment inside, and the Flower Shoppe stamp set has so many cute sentiments!

Well, that’s all for these projects today. I have more to share with you using the new March release from Concord & 9th, so I hope you’ll stop by again! You can check out the other super talented guest designers’ projects on the Concord & 9th Instagram page. Thanks so much for stopping by today, and have a marvelous day!

Filed Under: Concord and 9th Tagged With: fashion shoppe, flower shoppe, in bloom, pop up shoppe

Primary Sidebar

  • Facebook
  • Instagram
  • Pinterest
  • YouTube

Favorite Shops

Secondary Sidebar

Subscribe

Enter your email address to subscribe to this blog and receive notifications of new posts by email.

Instagram
Something is wrong.
Instagram token error.
Follow
Load More

Archives

Tags

3D embossing folder alcohol markers better press birthday birthday card blog hop card kit christmas christmas card christmas tag colored pencil copic copic coloring Daniel Smith die cutting embossing folder embroidery felt giveaway holiday holiday card hot foil ink blending karin brushmarker pro layered stencil masculine my monthly hero new release no line coloring no line watercolor OLO marker olo markers original illustration pawsitively saturated rainbow shaker card slimline stamping stamptember stencil thank you thinking of you valentine's day video watercolor

Popular Posts

Simon Says Stamp October 2026 Card Kit of the Month: Homespun Gratitude!
February 2018 My Monthly Hero Blog Hop!
Altenew Craft A Flower: Poppy Blog Hop+Giveaway!
Felted Gourd Wall Hanging with Simon Says Stamp!
Sunflower Home Decor with Simon Says Stamp!
Craft Your Life Project Kit: Feathered Lilies Blog Hop+Giveaway!
Simon Says Stamp October 2025 Card Kit of the Month!
Altenew Standalone Die Blog Hop+Giveaway!
The Ton Anniversary Release- Day 2
Honey Bee Stamps Cheerful Love Blog Hop!

Disclosure

Some affiliate links are used in my posts. This means that, should you click on one of my links and purchase something from that company, I will receive a small portion of the sale at no extra cost to you. I use the money earned from these sales to help maintain my blog. I so appreciate you visiting and, if you do choose to use one of my affiliate links, thank you so much for your support!
Copyright © 2026 ·Brunch Pro Theme · Genesis Framework by StudioPress · WordPress · Log in
Loading Comments...