• Skip to main content
  • Skip to primary sidebar
  • Skip to secondary sidebar

Sixth Street Sundries

Emily Midgett

  • Home
  • About Me
  • Contact
  • OLO Marker Color Swatch Chart
  • Shop

gender neutral

Hero Arts My Monthly Hero April 2024 Release Blog Hop + Giveaway!

April 1, 2024

Hi friends! I am happy to be hopping along with this month’s My Monthly Hero release for my friends at Hero Arts. You can find the full hop list on the Hero Arts Blog! This month, Hero Arts has released a collection of gorgeous and unique folk-themed products that you can use for so many different occasions!! (Click HERE to see the whole release!) Here’s a peek at this month’s My Monthly Hero Classic Kit:

And here’s a peek at the My Monthly Hero Premium Kit, which contains all of the components of the Classic Kit plus a bunch of marvelous coordinating products:

I have created a trio of projects using lots of different goodies from this release, so let’s get started with the details!

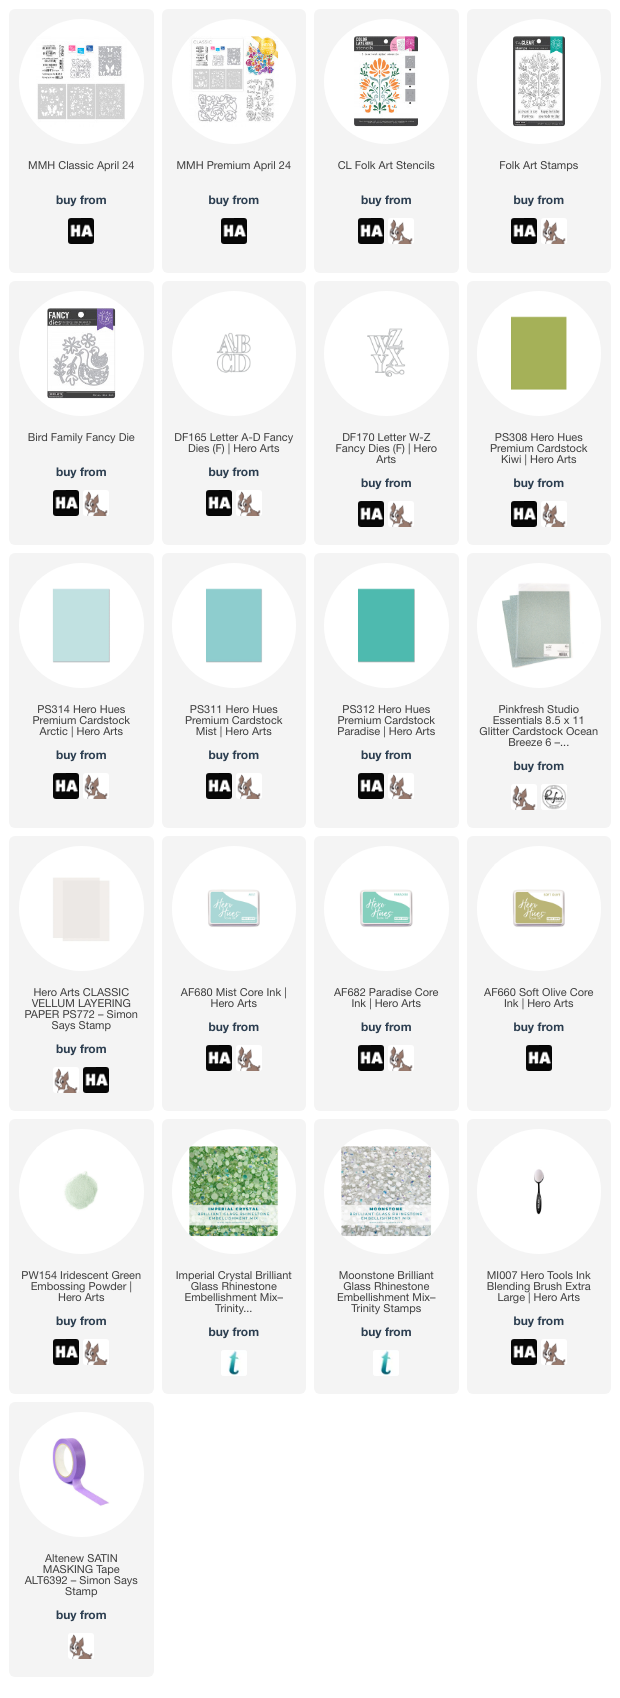
If you have followed my blog at all, you’ll know that I struggle with masculine cards, preferring instead to make basically every project pretty, pink, and covered in flowers. Well, the graphic images in this month’s kit may contain flowers, but when paired with the right color combination, I think these Scandinavian-inspired images create excellent gender-neutral cards! Whenever I am starting a card set, I like to set my color palette first, so I pulled out Mist, Paradise, and Soft Olive ink and lots of different coordinating shades of cardstock and got to work!

For my first project, I paired the new My Monthly Hero Classic Kit with Mist, Paradise, and Soft Olive ink, first die cutting the intricate cover plate die, which only cuts partial outlines so that the entire piece stays intact. I then used blending brushes to blend Mist, Paradise, and Soft Olive with the included layering stencils, centering the images with their die cut outlines. So simple and so fast! I think these stencils would be so fun to use with glitter paste or even some DecoFoil gel and add some shining foil accents. Stencils are such a workhorse for your craft room!

After I had finished blending the pretty folk patterns on the die cut background, I used the standalone dies included in the Classic Kit to die cut some vellum butterflies and floral accents from colored cardstock, layering the floral accents on top of the vellum butterflies to help make them extra special and to help them be even more visible amongst the busy background. I think vellum and butterfly dies were made for each other; the semi-transparent vellum definitely conveys the lightness of fluttering butterflies! For the greeting, I stamped one of the sentiments from the Classic Kit onto some Mist cardstock using Paradise ink, then stamped it again using embossing ink and covered it with the new Iridescent Green Embossing Powder. This embossing powder adds such a beautiful, luminous shimmer to my sentiment and helps it to stand out from the Mist cardstock so well! I matted the sentiment strip on some Paradise cardstock, then popped up the greeting with some foam adhesive and added the butterflies using some tiny dots of liquid adhesive. Such a pretty kit with so many different elements that you can mix & match!

My next card uses the same shades of ink, this time paired with the new Folk Art Stamp and coordinating layering stencil. I first stamped the new Folk Art Stamp onto some white cardstock using embossing ink, then used the Iridescent Green Embossing Powder to emboss the image. Using the Iridescent Green Embossing Powder alone without any colorful ink beneath creates almost a tone-on-tone effect, very subtle, but beautiful when the light catches it just right. After embossing, I used the coordinating Folk Art layering stencil to blend Mist, Paradise, and Soft Olive inks.

After my focal point was finished, I trimmed the panel down and matted it on a slightly larger panel of Pinkfresh Studio Ocean Breeze glitter cardstock, creating a super delicate glittery border around my stenciled background. I adhered it to a full size A2 panel of Kiwi cardstock using liquid adhesive. For the greeting, I kept things super simple, heat embossing a “happy birthday” sentiment onto some more Kiwi cardstock using white embossing powder and matting the greeting with some Paradise cardstock. I popped the sentiment up with some foam adhesive, then added a few Trinity Stamps Imperial Crystal Rhinestone amongst the embossed and stenciled pattern. I love that this pattern is symmetrical, a hallmark of Scandinavian folk art. It makes my symmetrical-loving, right angled design brain happy!

For my last card, I used the adorable new Bird Family Fancy Die set to create a baby card! I stuck with the same color palette, allowing the pretty aquas to be the star of the show on this project, which I think are basically gender-neutral at this point and can be used for both boys and girls. I die cut the momma and baby bird from some iridescent white shimmer cardstock to make them extra special, then die cut the flowers and foliage from the Bird Family Fancy Die set using iridescent white mirror cardstock and some scraps of Kiwi and Paradise cardstock.

For the greeting, I used some of the recently-released A-D Alphabet dies and W-Z Alphabet Dies to create a large “BABY” word die cut. I cut these larger letters from Arctic cardstock, and because these letters are so large, they suit an A7 card beautifully! I trimmed down an A7 panel of Mist cardstock, then used some masking tape to mask the edges of one corner and blended some Paradise ink in just one corner. I also stamped and embossed an appropriate greeting from a stamp set that has sadly been discontinued. I popped all of the different die cut elements up on my blended background, using the bottom blended line as my guide for my die cut letters to keep them nice and straight. Finally, I added some Moonstone rhinestones for extra sparkle. This would be a super easy card to customize for twins or multiples! (those cards are so difficult to find; ask me how I know haha!!)

Well, that’s all for my projects today. Now for some fun giveaway information:

Hero Arts will give away a $50 gift card, drawn from the comments left across the hop. Enter by Sunday, April 7th at 11:59pm Pacific, and the winner will be announced on the Hero Arts blog the following week.

You can see the full hop list on the Hero Arts Blog. Thanks so much for stopping by today, and happy hopping!
Filed Under: Hero Arts Tagged With: alphabet dies, baby card, birthday card, folk art, gender neutral, layered stencil, masculine, my monthly hero

Thankful For Your Friendship & Care with Simon Says Stamp Season of Wonder!

October 10, 2023

This post was sponsored by Simon Says Stamp. Thanks, Simon!

Hi friends! I am back with another muted autumnal project today using goodies from the new Simon Says Stamp Season of Wonder release. I am embracing the more muted colors of autumn these days, appreciating the beauty in a less vivid color palette. I realized that I had not really done anything with the Rainbow Splash Caramel cardstock and thought it would work beautifully with the new Wooden Planks Embossing Folder. Let’s get started with the details on my project!

I began by running an A2 sized panel of Rainbow Splash Caramel cardstock through my die cutting machine using the Wooden Planks Embossing Folder. The details on this embossing folder are so fine and so beautifully crisp! Such a unique folder. I used a blending brush to blend coordinating Rainbow Splash Caramel ink around the edge of the embossed panel, creating a vignette for my focal point.

To accent the details on the woodgrain background, I die cut the new Lovely Leaves die twice: once from brown glitter cardstock from Hero Art’s Fall Glitter Cardstock pack and once from a deep maroon cardstock from my stash. I thought that the juxtaposition of the detailed embossed background worked so well with the simplicity of the foliage arrangement!

For the greeting, I heat embossed and cut out two sentiments from the new Thankful & Grateful stamps + dies using Brass embossing powder onto some more of the deep mahogany cardstock. I love the contrast of colors between the rich metallic brass and the deep maroon of the cardstock! I arranged the foliage die cuts on the blended and embossed card front, offsetting them slightly to create a fuller “bouquet.” I tucked the greeting die cuts amongst the foliage and finally added a few shimmering gems for more sparkle!

This card is so full of fun textures and finishes between the embossed background and the different types of shine and sparkle. I love pairing interesting finishes to create a unique project! Thanks so much for stopping by today, and have a marvelous day!

Filed Under: simon says stamp Tagged With: caramel, embossing folder, gender neutral, ink blending, lovely leaves, rainbow splash, thankful and grateful, wooden planks

Man Card Monday with Simon Says Stamp!

July 10, 2023

This post was sponsored by Simon Says Stamp. Thanks, Simon!

Hi there! How about another project (or two) for Man Card Monday? I love flowers, and I don’t deny that my blog is lots of flowers lots of the time, but at least once a month, I post a card with decidedly masculine overtones. This helps jumpstart my creativity a little by making me think outside of my normal floral, super feminine box as well as hopefully provide you with a little inspiration for that elusive man card! Last month, I shared some super graphic inspiration, featuring bold cool colors, lots of texture, and a few metallic elements. This month, I have changed things up with these subtle cards that feature a serene color palette and lots of greenery. I think greenery on it’s own is a perfect “neutral” that can be used for both men and women alike. Let’s get started with the details!

I kept my color palette very muted this month, with some warm gray/platinum and lovely greens created with Pine, Sage, and Aspen Pawsitively Saturated Inks from Simon Says Stamp. I have had the unfortunate need for sympathy and “thinking of you” cards for men recently, and so I wanted to offer encouraging sentiments without going over the top. The Well Wishes stamps and dies by CZ Design from Simon Says Stamp provide poignant sentiments with bold, graphic fonts that work perfectly for these gender neutral projects.

For my first card, I used the Pine, Sage, and Aspen inks to stamp the Leaf Edges in an ombré on my white A2 card front. Using my MISTI stamping tool, I stamped the top with the lightest ink, dabbing the edge of the ink line with my microfiber cloth to let it fade away a bit, which helps the ink colors blend into each other more seamlessly without adding harsh lines. I stamped the middle of the stamp with the middle color, again dabbing the edges with the cloth, then the darkest color at the bottom.

Once I had added all three ink colors to the stamp, I stamped the entire image again with embossing ink and covered it with clear embossing powder, giving me the ability to blend over the top without compromising the crispness of the stamped image. I also blended lightly in the corner using Aspen ink and a blending tool. Such a lovely, serene background!

Next, I die cut two Sword Fern die cuts from white cardstock, leaving them in place in the negative die cut space. I flipped them over and added a few pieces of Simon’s Very Very Low Tack Tape to the back to hold these delicate die cuts in place while I blended Pine ink in the center and Aspen ink on the edges. Despite a plethora of options for colored cardstock amongst my stash, I did not have an exact match for these unique shades of green, so creating my own custom colored cardstock was super easy with some ink pads and blending tools! I die cut a Nested Domed Arches die cut from some heavyweight vellum to soften the area behind the die cuts and sentiment. I popped up the blended ferns and embossed greeting from Well Wishes on top of the vellum arch. I used some neutral twine to add a a fun textural element to the card, as well.

For my second card of the set, I began by blending the detailed stencil from the Dimensional Cubes Stencils using Cozy ink. I did spray the super delicate stencil with some Pixie spray first to make sure that the stenciled lines stayed nice and crisp. I trimmed the stenciled background panel down slightly and matted with some Midnight Green cardstock from Simon Says Stamp to create a thin, super dark green frame around the edge. I also die cut some Windswept Leaves foliage dies, again from white cardstock, then blended Pine ink in the center and Aspen ink on the edges, keeping these delicate die cuts in place with Very Very Low Tack Tape on the back of the negative die cut piece.

Next, I die cut the Circle Thin Frames dies from some white cardstock. I like to leave these frame dies together, though they can be snipped apart, so that I can run them all through my machine at once and have tons of leftover frames to use for future projects! I backed one of the white frames with a vellum die cut circle, again to soften the busy background pattern, and adhered it to the patterned background with liquid adhesive dots on the solid portion of the frame. I arranged the leaf die cuts around the embossed sentiment die cuts from Well Wishes and adhered them to the card front. To avoid adding feminine “sparkle” to the card front, I added a few white enamel dots for a bit of extra textural interest.

Well, that’s all for my Man Card Monday project today! Thanks so much for stopping by today, and have a marvelous day!

Filed Under: Man Card Monday, simon says stamp Tagged With: circle thin frames, dimensional cubes stencil, foliage, gender neutral, leaf edges, man card monday, masculine, nested domed arches, stencil, sword fern, vellum, well wishes

Oh Happy Day with New Simon Says Stamp Ink Cubes!

June 28, 2023

This post was sponsored by Simon Says Stamp. Thanks, Simon!

Hi friends! I am back again with another project using some new goodies from the Simon Says Stamp Out Of This World release! Have you tried the Pawsitively Saturated ink line from Simon Says Stamp? Let me tell you, I thought that I had enough ink to last me until my fingers gave out, but I absolutely adore the Pawsitively Saturated inks. The super springy foam pad makes them extra juicy, perfect for stamping, ink blending, and a whole host of other techniques! They come in a full range of full size pads, and now they’ve started adding ink cubes, as well, so as to make sure that you can try these wonderful inks out even if you are low on storage space. They released two new ink cube sets during the Out Of This World release: Yellow Sunsets and Green Meadows. I’ve created a totally gender-neutral project using the Yellow Sunsets ink cubes and the new Oh Happy Day sentiment die. Let’s get started with the details!

I began by blending an orange gradient on two A2-sized panels of white cardstock using the Sherbet, Cantaloupe, and Melon inks from the Yellow Sunsets and some blending brushes. I then used the Fab Floral Plate cover plate die to die cut one of the blended panels, popping it up on the second blended panel using some thin strips of foam adhesive. I love using this technique to create a monochromatic textured background; it’s so simple (you might get an arm workout from blending two full panels though, ha) but I think it creates such an impact! You could also easily turn this into a shaker card by adding some acetate and sequins.

For the greeting, I die cut the Oh Happy Day sentiment die once from Simon Says Stamp’s Luxe Glitter Basics cardstock and twice from plain white cardstock scraps, layering them together to create a dimensional die cut greeting. I also trimmed down a greeting from the Reverse Birthday Wishes sentiment card set, which I think works perfectly with the die cut greeting.

After I adhered the two sentiment components, the only thing left was to add one last bit of sparkle. I added some Melanite Magic gems, which are a translucent dark gray with iridescent coating. The dark gray isn’t quite black to complete the “rule of three” with the black accent elements, but I think it’s close!

Well, that’s all for my project today. Even though the cover plate is technically a floral background, the overall pattern is so chunky and graphic that I think this card definitely would have worked for Man Card Monday. Thanks so much for stopping by today, and have a marvelous day!

Filed Under: Man Card Monday, simon says stamp Tagged With: fab floral plate, gender neutral, ink blending, masculine, oh happy day, pawsitively saturated

Primary Sidebar

  • Facebook
  • Instagram
  • Pinterest
  • YouTube

Favorite Shops

Secondary Sidebar

Subscribe

Enter your email address to subscribe to this blog and receive notifications of new posts by email.

Instagram
Something is wrong.
Instagram token error.
Follow
Load More

Archives

Tags

3D embossing folder alcohol markers better press birthday birthday card blog hop card kit christmas christmas card christmas tag colored pencil copic copic coloring Daniel Smith die cutting embossing folder embroidery felt giveaway holiday holiday card hot foil ink blending karin brushmarker pro layered stencil masculine my monthly hero new release no line coloring no line watercolor OLO marker olo markers original illustration pawsitively saturated rainbow shaker card slimline stamping stamptember stencil thank you thinking of you valentine's day video watercolor

Popular Posts

Simon Says Stamp Sending Cheer Blog Hop- Day 2 + Freebie + Giveaway!
Joyful Snowman with New Simon Says Stamp Sending Cheer Release!
Simon Says Stamp Sending Cheer Release: Now Available!
Altenew October 2026 Release Blog Hop + Giveaway!
February 2018 My Monthly Hero Blog Hop!
Altenew March 2020 Release Blog Hop+Giveaway!
Special Release: Simon Says Stamp Limited Edition STAMPtember Christmas Card Kit!
Simon Says Stamp Cozy & Bright Inspiration, Part Two!
Waffleflower December Release Blog Hop!
Altenew Build A Flower Japanese Mum Blog Hop!

Disclosure

Some affiliate links are used in my posts. This means that, should you click on one of my links and purchase something from that company, I will receive a small portion of the sale at no extra cost to you. I use the money earned from these sales to help maintain my blog. I so appreciate you visiting and, if you do choose to use one of my affiliate links, thank you so much for your support!
Copyright © 2026 ·Brunch Pro Theme · Genesis Framework by StudioPress · WordPress · Log in
Loading Comments...