• Skip to main content
  • Skip to primary sidebar
  • Skip to secondary sidebar

Sixth Street Sundries

Emily Midgett

  • Home
  • About Me
  • Contact
  • OLO Marker Color Swatch Chart
  • Shop

gift set

Inspirational Pouch and Card Gift Set with New Simon Says Stamp!

July 17, 2026

This post was sponsored by Simon Says Stamp. Thanks, Simon! *I have gathered links to all of the products used at the bottom of the post for your convenience, using affiliate links at no extra cost to you. Thank you for shopping with my links! I truly appreciate your support for my work!*

Hi friends! My mom always instilled in me a love of gift-giving. She always did such an incredible job of creating the loveliest, coordinating gift sets for us, matching themes and color palettes, even on such a limited budget. It became emblematic of her care of us, that she took such time and made such effort to curate thoughtful birthday and Christmas gifts. As a creative adult, I love to do the same when curating a gift for a friend, trying to match themes and color palettes that I feel represent the essence of the recipient. I created this matching gift set with some new (and older!) goodies from the Simon Says Stamp Shine On release! (click HERE to see the full release!). Let’s get started with the details!

Both of the pieces of my gift set started with the older Beautiful Flowers stamp set, which recently received a bit of a glow-up during the Shine On release with the addition of some simple stencils, so that you can enjoy this set with or without coloring mediums! It’s so detailed that the images stand beautifully on their own, but the addition of the stencils really helps to add another level of customization to your projects without adding a ton of time to your crafty session.

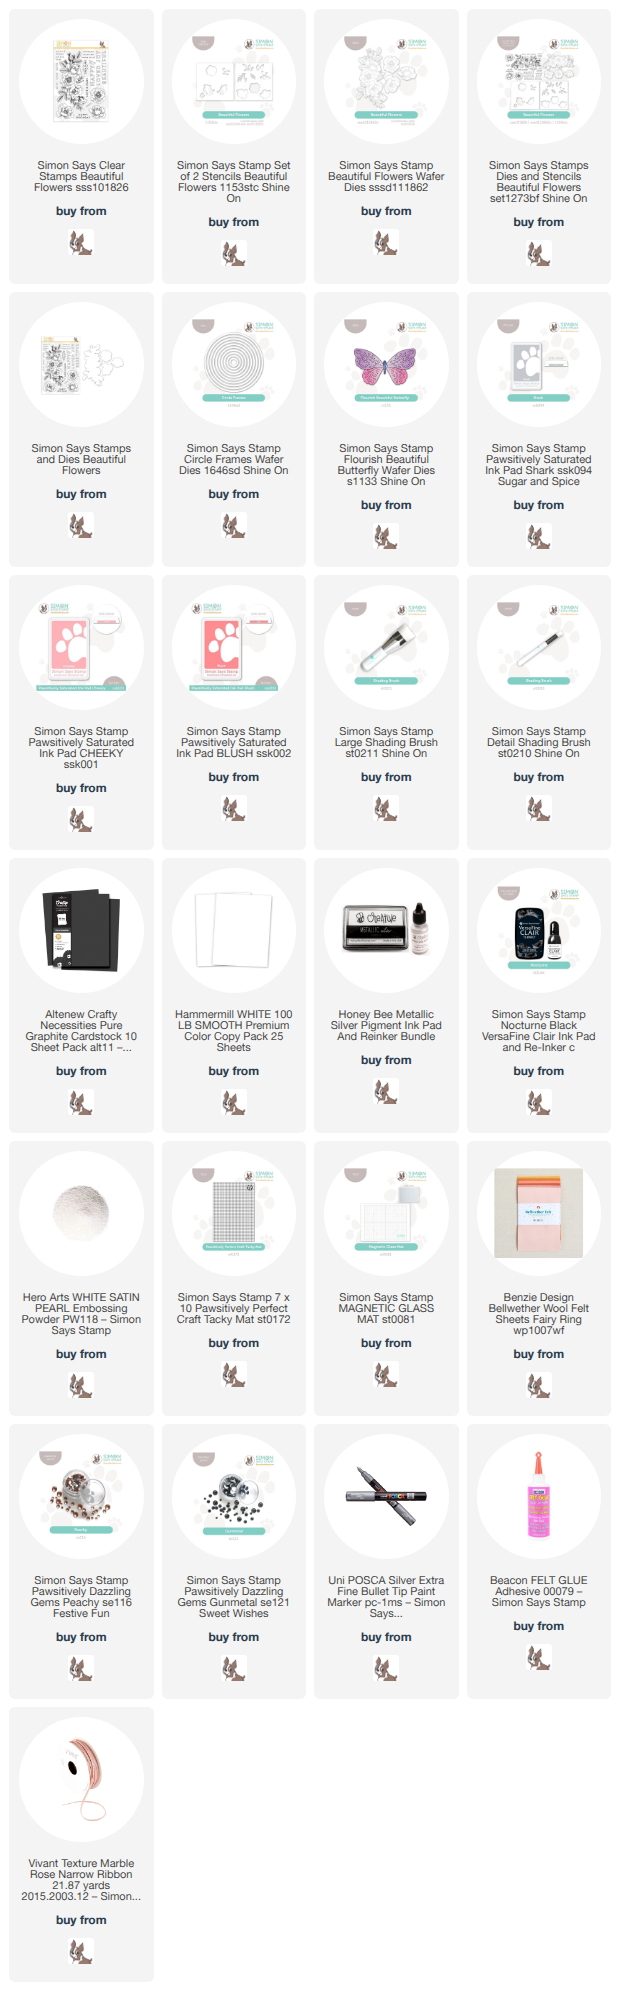
For the card, I stamped the large floral swag from Beautiful Flowers onto some white cardstock using Nocturne black pigment ink, then added some White Satin Pearl embossing powder over the top to create a lovely pearlescent charcoal effect. Once I had finished stamping, I used the new Beautiful Flowers Stencils with Pawsitively Saturated Inks in shades of Shark, Cheeky, and Blush to add some lovely blush to the blooms and silvery gray to the foliage. (Do you like to use non-traditional colors for foliage? I find it so striking!) Stenciling is super easy with my Stencil Station; I keep a Craft Tacky Mat on a Magnetic Glass mat at all times, just waiting for my next stenciling project. After everything was finished, I used the coordinating dies to die cut the large floral swag.

To create the card base, I die cut some of the new Circle Frames from some coordinating deep gray cardstock, then adhered two of them to the white card front, offsetting them slightly so that they partially hung over the edge. I trimmed the excess with my scissors, then cut my floral swag in half and arranged the blooms around the circle die cuts, creating a Secret Garden-esque background for my sentiment. For the greeting, I stamped some of the sentiment stamps from the Beautiful Flowers stamp set using the same black pigment ink/pearlescent embossing powder combination and trimmed them down with my trimmer. I popped the sentiments up with a double layer of foam adhesive to give them extra height, then added some sparkling Peachy Pawsitively Dazzling Gems to finish everything off!

For the pouch, I began by stamping several of the individual blooms from Beautiful Flowers onto a plain canvas zippered pouch using both silver pigment and black pigment inks, creating a lovely floral backdrop upon which I could layer my felt butterflies! I die cut two of the new Flourish Beautiful Butterfly from some blushy felt and adhered them to the canvas pouch with felt adhesive, placing some heavy glass paperweights atop the butterflies while they dried to ensure that they were securely attached to the canvas.

After the butterflies were dry, I added some Gunmetal Pawsitively Dazzling Gems to the flourishes on the butterflies’ wings, then added an inspirational sentiment from Beautiful Flowers with black pigment ink. Finally, I added a simple loop of ribbon to the zipper to create a coordinating blush-colored zipper pull.

Well, that’s all for my projects today! Creating coordinating gift sets like these is one of my favorite ways to use my crafting supplies. It’s such an exhilarating feeling to be able to say “I made that!”, and hopefully the recipient feels loved as they see the hard work that went into creating their gift. Thanks so much for stopping by today, and have a marvelous day!
Filed Under: simon says stamp Tagged With: beautiful flowers, beautiful flowers stencils, canvas pouch, circle frames, die cutting, felt, flourish beautiful butterfly, gift set, ink blending, stencil

Simon Says Stamp Always There Blog Hop, Day 2 + Free Gift!

May 30, 2026

This post was sponsored by Simon Says Stamp. Thanks, Simon! *I have gathered links to all of the products used at the bottom of the post for your convenience, using affiliate links at no extra cost to you. Thank you for shopping with my links! I truly appreciate your support for my work!*

Hi friends! It’s Day 2 of the Simon Says Stamp Always There Blog Hop, celebrating the fabulous Always There release! (Click HERE to see the entire collection!) You should have arrived here from Barbara Tarayao, and your next stop is Nichol Spohr. You can check the full hop list over on the Simon Says Stamp Blog. As always, there is a fun freebies to celebrate the release and the blog hop!

This month’s release is an ode to springtime with gorgeous flowers and greenery in stamp, stencil, and die form, and I am so happy that I have designed two different sets for this release: Keep Palm (click HERE) and Blooms of Encouragement (click HERE). I love coloring large scale images, and the flowers in Blooms of Encouragement are some of my favorite flowers that I’ve illustrated. I created this gift set featuring a fun framed painting on glass and a coordinating card made with layered stamped blooms from the new Heirloom Roses. Let’s get started on the details for my projects!

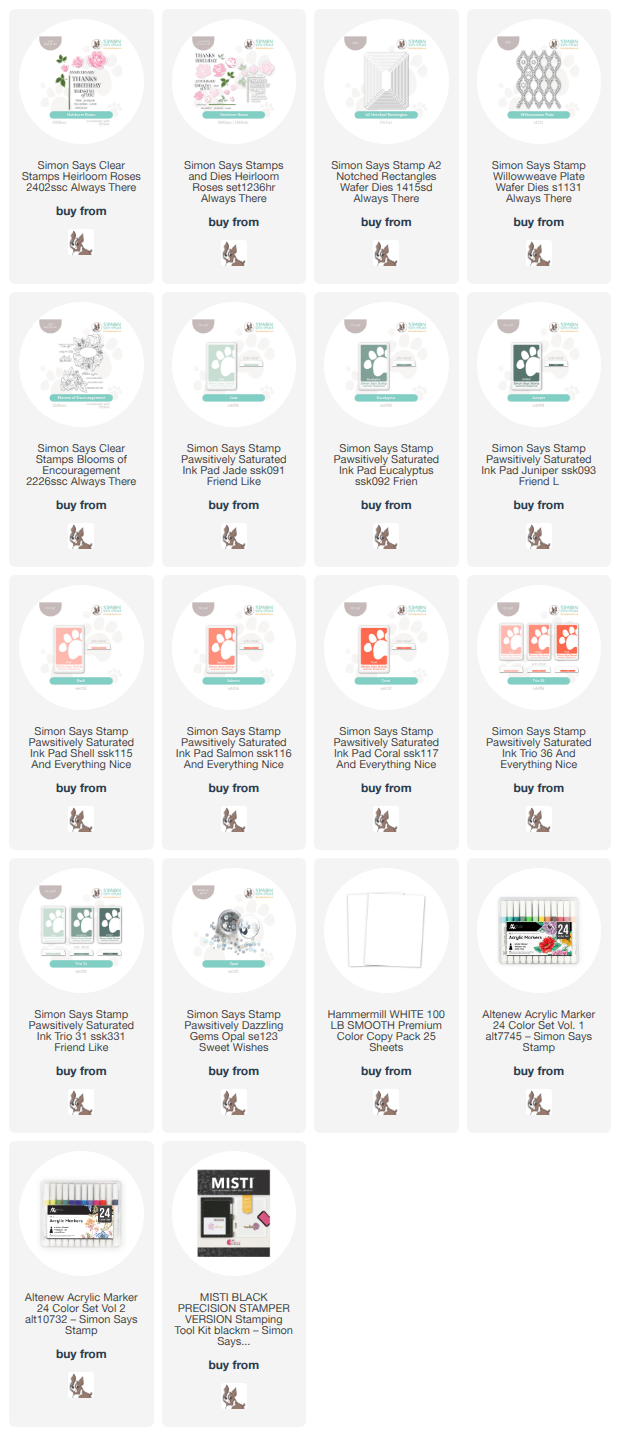
To begin my card, I stamped the gorgeous blooms and foliage from Heirloom Roses using Pawsitively Saturated Inks in shades of Jade, Eucalyptus, Shell, Salmon, Coral. These colors are so beautifully springy to me, with that bright pop of coral juxtaposed with the soft minty greens. I used the coordinating dies to cut the stamped images out, as well as a greeting from Heirloom Roses stamped using Juniper ink on crisp white cardstock.

Behind the blooms and sentiment, I wanted to create some tone-on-tone texture using the new Willowweave Plate. I die cut the plate from white cardstock, as well as a frame using the new A2 Notched Rectangles, nestling two of the nested dies together to create the frame. I added adhesive on the back of the Notched Rectangle die cut, then placed the Willowweave die cut on it, creating a decorative framed backdrop for the flowers. I trimmed off any excess foliage from the Willowweave die cut, then popped up the frame on my A2 card front. The extra texture that these vines of foliage add behind the blooms is just so pretty, I think! I added the blooms and sentiment die cuts over the framed backdrop with more foam adhesive, then added a few Opal Pawsitively Dazzling Gems for a bit of sparkle.

For the gift portion of the set, I used the pretty dahlia image from Blooms of Encouragement to create this framed painted artwork. I used a technique that was quite new to me. I started by stamping the bouquet on a piece of cardstock, then placing the glass from a 4×4 inch frame that I purchased from the local dollar store over the stamped image, taping it to the panel with some washi tape. I didn’t want to stamp the image directly to the glass, so I took advantage of the clear glass to use it as a guide to create this pretty painted bloom.

I used acrylic paint markers to add color to the glass, following the lines of the stamped image on the paper. This method of painting is quite forgiving; as long as you start with the parts of the image that are closest to you, mistakes are minimal. The opacity of the markers ensures that the images painted first are the ones that are visible when the painting is flipped over to the proper side. The markers moved like a warm knife through butter over the glass, and I was so impressed with how the painting turned out!

I did use a dry paintbrush to blend some some of the petals a bit, creating a smoother transition between colors for shadows and shape. Once I had completed the painting, I used a hot glue gun to securely place the glass back in the frame, allowing the clear glass to remain safely in the frame without having to add the backer which which the frame was purchased. To protect the painting from potential scratches, I also hot glued a piece of clear acetate on the back, cut to fit the glass frame. Finally, since the frame back that I discarded contained the hanger for the frame, I decided to hot glue some coordinating satin ribbon to the frame. I can’t wait to hang this in my new craft room and am so excited to experiment more with this technique. A simple dollar store frame can be so much more with a little creativity!

Well, that’s all for my projects today! This release is fantastic, right? So gorgeous! And Simon Says Stamp is offering the adorable gift-with-purchase that you see in the graphic at the top of the post with any purchase from the Always There release! (Click HERE to see the entire collection!)

Don’t forget to check out Day 1 of the blog hop, as well! (Click HERE to see the full list from yesterday’s hop!)Your next stop on the hop is Nichol Spohr. Thanks so much for stopping by today, and happy hopping!

Filed Under: simon says stamp Tagged With: a2 notched rectangles, acrylic paint, acrylic paint marker, blog hop, blooms of encouragement, die cutting, gift set, heirloom roses, no line coloring, picture frame, willowweave plate

More Simon Says Stamp Bright Christmas Card Kit!

November 15, 2025

This post was sponsored by Simon Says Stamp. Thanks, Simon!

Hi friends! I am back with some more inspiration using the beautiful new Bright Christmas Card Kit of the Month from Simon Says Stamp! (Click HERE to see the full kit!) These kits always come filled with supplies to create tons of projects, from patterned papers, stamps and dies, cardstock, and embellishments! I love creating coordinating gift sets, and who doesn’t love a coordinating card and tag gift set at Christmas? Giving something handmade that the recipient can put to good use is such a fulfilling way to use our supplies! Let’s get started with the details on my projects.

*I have gathered links to all of the products used at the bottom of the post for your convenience, using affiliate links at no extra cost to you. Thank you for shopping with my links! I truly appreciate your support for my work!*

For today’s project suite, I filled a glassine bag with a group of gift tags, a gift card envelope, and a simple-but-elegant coordinating A2 card, embellishing the bag with some vibrant red cardstock and the beautiful linocut illustrations in the card kit!

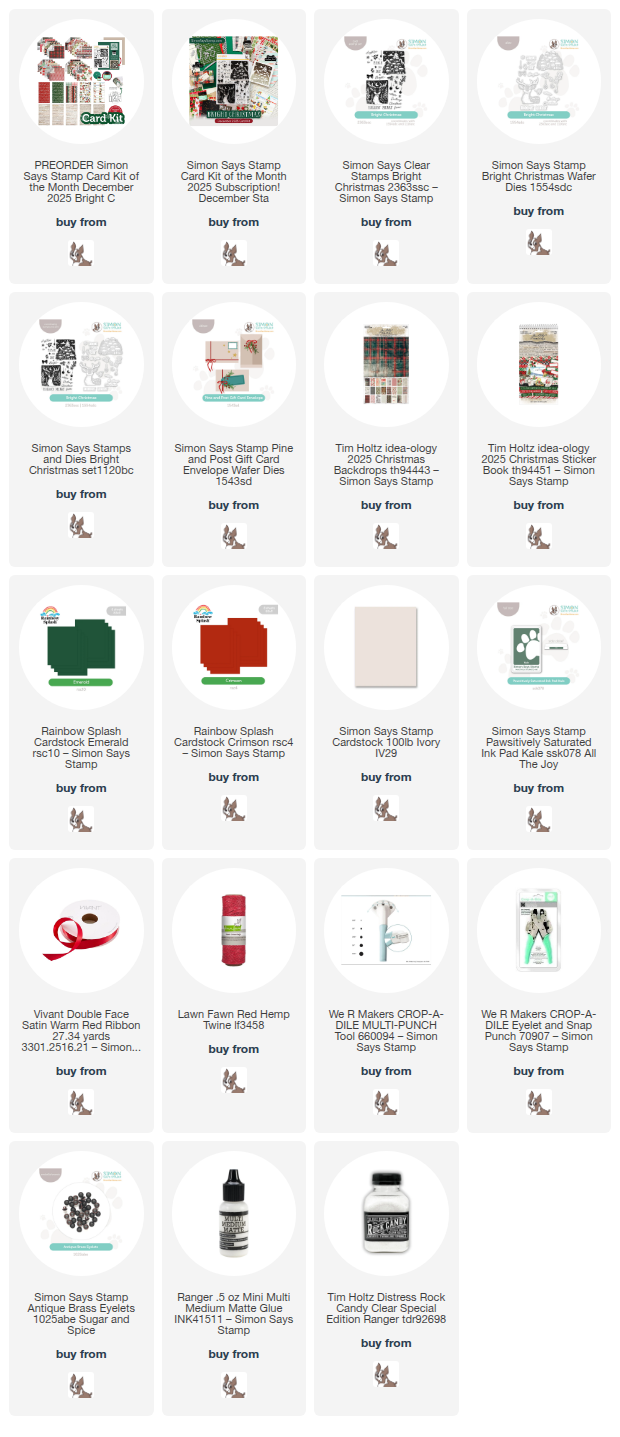
To create my cigar band for the gift bag, I used a strip of red 12×12 cardstock, folding it over the folded bag and connecting the ends with one of the linocut images, stamped on Simon Says Stamp Ivory Cardstock with Kale Pawsitively Saturated Ink. To make this cigar band a touch more festive, I added some Distress Medium Matte and Rock Candy Glitter to the tops of the trees and the roofs of the houses, then adhered a red satin bow with my glue gun!

For the coordinating card, I stamped the gorgeous deer image from the Bright Christmas set again using Kale ink, trimming the edges down and mounting it on a slightly larger panel of red cardstock, creating a crisp red mat. I also stamped some of the individual sentiments on a separate strip of Ivory cardstock, trimming them down and mounting them on another, slightly larger strip of red cardstock. I popped both of these red framed stamped images up on my A2 Ivory card base, then added a touch of whimsy and texture with a red hemp twine bow on the deer’s neck! A simple, elegant card that was super simple to make and simple to mail!

For the hang tags, I used my trimmer to trim down the Emerald cardstock to 3″ x 6″ strips, folding them in half to create square tags. I used my hole punch to add some small holes in the corner, then threaded some loops of red twine through. I used the included cardstock stickers and patterned papers to add simple embellishments to the front of the tags! These simple tags add just a touch of handmade affection to your gifts without taking up a ton of your time! It makes my heart hurt a bit to see tags upon which I’ve worked painstakingly tossed in the trash, so it makes me feel better to make such quick work of these tags with the help of the patterned papers and cardstock stickers!

Finally, I used the marvelous new Pine and Post Gift Card Envelope die set included in the kit with some patterned paper, twine, an eyelet, and a cardstock sticker to create a fun coordinating gift card holder! I die cut the envelope from some green plaid patterned paper, then assembled the envelope and adhered the flaps with strong double sided tape. I added one of the cardstock stickers that reminds me of vintage gift tags as the perfect spot for the gift-giver to write their to/from information!

To keep the gift card safely tucked inside the envelope, I used one of Simon Says Stamp’s newer Antique Brass Eyelets to add some red twine, which I wrapped around the envelope twice before tying in a pretty bow!

Well, that’s all for my projects today! I loved this month’s Card Kit so much that I created two different suites of coordinating projects, perfect for gift-giving! It’s such a joy to give handmade gifts, and these card kits make it super easy to create coordinating gifts, tags, and cards with the gorgeous goodies included in the kit.

The Simon Says Stamp Card Kits are such an incredible value; the value of the individual elements of each kit equals far more than the $44.99 price tag, so you’re getting incredible bang for your buck. If you are consistently interested in the Simon Says Stamp Card Kit of the Month, you can sign up HERE to become a subscriber for an even bigger discount on these carefully curated products. As always, Simon also makes each individual element of the kits available a la carte, so that you can pick and choose what you would like to purchase if buying the entire kit isn’t really your thing. Who can say no to such incredible value though, right?

Thanks so much for stopping by today, and have a marvelous day!

Filed Under: simon says stamp Tagged With: bright christmas, card kit of the month, christmas, christmas card, christmas tag, eyelet, gift card, gift set, glitter, holiday card, ideaology, pine and post, rocky candy, tim holtz

Christmas In July with Simon Says Stamp!

July 21, 2025

This post was sponsored by Simon Says Stamp. Thanks, Simon!

Hi friends! It’s Christmas In July week here on my blog, and I have some super fun holiday projects to share with you that are perfect for jumpstarting your holiday crafting! I know, it’s maybe a little early, but my holiday projects from earlier this month started the holiday wheels turning in my head and I couldn’t resist pulling out some favorite supplies. It also gave me an opportunity to use some products that I didn’t have a chance to play with last year! I thought I would start with some vibrant jewel tones that are a bridge between summer colors and holiday imagery. I also have been itching to paint the gorgeous poinsettia bouquet from my Holiday Blossoms stamp set that was released a few years ago. It’s one of my favorite holiday sets that I’ve illustrated, and I always love a chance to work with my own illustrations in a new way. I have a two-fer for you today that would make the prettiest gift set, so let’s get started with the details!

*I have gathered links to all of the products used at the bottom of the post for your convenience, using affiliate links. Thank you for shopping with my links! I truly appreciate your support for my work!*

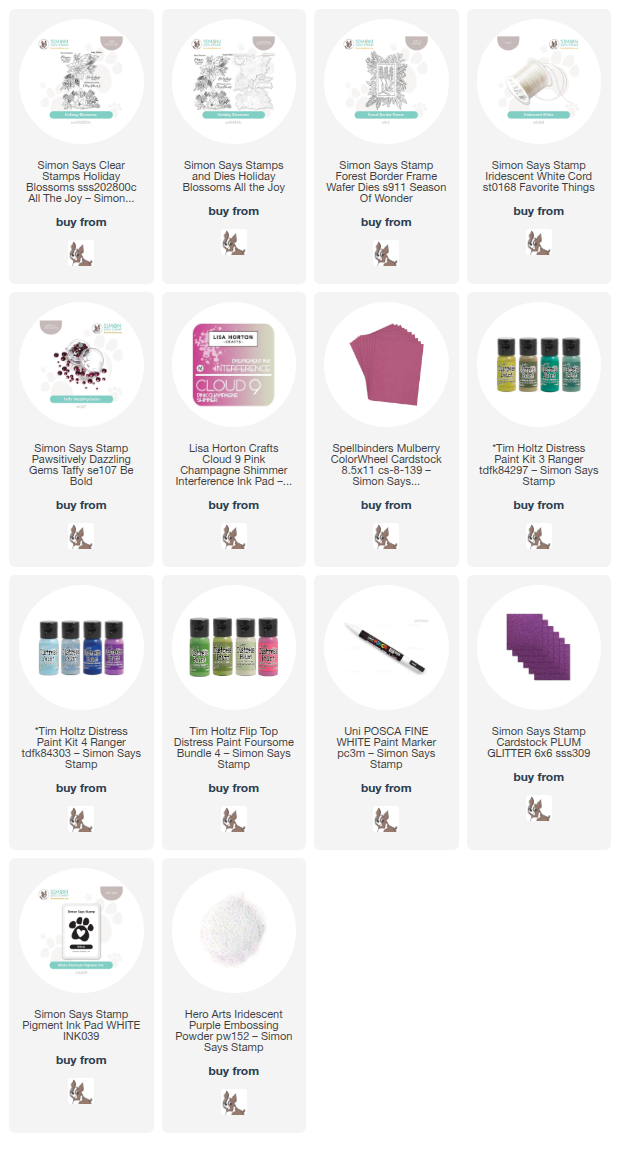
Poinsettias come in such a wide variety of colors, so I jumped at the opportunity to use some incredibly vibrant colors as my initial holiday project. I selected some vibrant magenta cardstock, pretty Plum Glitter Cardstock, Lisa Horton Pink Champagne Shimmer, and Taffy Pawsitively Dazzling Gems, along with some fun coordinating acrylic paint colors to create a sweet miniature canvas art piece!

To begin my gift set, I stamped the poinsettia bouquet from Holiday Blossoms onto my mini canvas using gold pigment ink, the color of which worked nicely to keep the ink lines subtle, while the pigment ink formulation also stamps cleanly on the canvas. I found this little mini canvas and easel at my local dollar store and thought it was perfect to practice my acrylic painting! I have not worked with acrylic paints very much, so this was a fun practice exercise. I just love how it turned out! After I had completed the painting, I knew that I needed to make a coordinating card to go along with it using the same vibrant fuchsia color palette.

To create my card, I stamped the same poinsettia bouquet image from Holiday Blossoms onto some deep magenta cardstock using Lisa Horton Pink Champagne Shimmer, which creates a subtle tone-on-tone effect while also adding exquisite shimmer to the card front. I rotated the stamp on the card front, allowing it to spill off of the sides to keep the pattern continuous throughout the card front.

After I had finished creating the subtly shimmering background, I die cut the Forest Border Frame from some Simon Says Stamp Plum Glitter Cardstock, which worked beautifully with the magenta cardstock to create a monochromatic effect. I adhered the frame to the bottom right of the card front with foam adhesive squares, trimming off the excess with sharp scissors. I created a greeting from Holiday Blossoms using white pigment ink and Hero Arts Iridescent Purple Embossing Powder and die cutting it with the coordinating die. I popped the sentiment up with a double layer of foam adhesive, then tucked a bow tied with Simon Says Stamp Iridescent White Cord beneath the sentiment, finally finishing the project off with some Taffy Pawsitively Dazzling Gems for added sparkle.

Well, that’s all for my first post for Christmas In July Week! I hope you’re as ready for some elegant and festive projects as I am! Happy Christmas In July, and have a marvelous day!

Filed Under: simon says stamp Tagged With: acrylic paint, christmas card, christmas in july, forest border frame, gift set, holiday blossoms, holiday card, iridescent white cord, lisa horton pink champagne, painting

Primary Sidebar

  • Facebook
  • Instagram
  • Pinterest
  • YouTube

Favorite Shops

Secondary Sidebar

Subscribe

Enter your email address to subscribe to this blog and receive notifications of new posts by email.

Instagram
Something is wrong.
Instagram token error.
Follow
Load More

Archives

Tags

3D embossing folder alcohol markers better press birthday birthday card blog hop card kit christmas christmas card christmas tag colored pencil copic copic coloring Daniel Smith die cutting embossing folder embroidery felt giveaway holiday holiday card hot foil ink blending karin brushmarker pro layered stencil masculine my monthly hero new release no line coloring no line watercolor OLO marker olo markers original illustration pawsitively saturated rainbow shaker card slimline stamping stamptember stencil thank you thinking of you valentine's day video watercolor

Popular Posts

Simon Says Stamp Sending Cheer Release: Now Available!
Joyful Snowman with New Simon Says Stamp Sending Cheer Release!
Autumn Legs with Colorado Craft Company and Catherine Pooler!
February 2018 My Monthly Hero Blog Hop!
Altenew Paint A Flower: Carnation Blog Hop+Giveaway!
Altenew March 2020 Release Blog Hop+Giveaway!
Special Release: Simon Says Stamp Limited Edition STAMPtember Christmas Card Kit!
Pinkfresh Studio 5th Birthday!
Pinkfresh Studios June Washi and Stamp Release Blog Hop!
Studio Katia September Release Blog Hop!

Disclosure

Some affiliate links are used in my posts. This means that, should you click on one of my links and purchase something from that company, I will receive a small portion of the sale at no extra cost to you. I use the money earned from these sales to help maintain my blog. I so appreciate you visiting and, if you do choose to use one of my affiliate links, thank you so much for your support!
Copyright © 2026 ·Brunch Pro Theme · Genesis Framework by StudioPress · WordPress · Log in
Loading Comments...