• Skip to main content
  • Skip to primary sidebar
  • Skip to secondary sidebar

Sixth Street Sundries

Emily Midgett

  • Home
  • About Me
  • Contact
  • OLO Marker Color Swatch Chart
  • Shop

gift tag

Simon Says Stamp STAMPtember Exclusive: Honey Bee Stamps!

September 11, 2026

Hi friends! I am back with another STAMPtember Collaboration Release today, and we’re celebrating Honey Bee Stamps in all of it’s gorgeously vintage glory today! I have gotten to know Melissa, the owner and caretaker of Honey Bee Stamps, as a member of her Design Team and as a friend over the last several years, and she is genuinely one of my favorite people in the crafty world. She is so kind and warm and such a talented human in so many ways! The STAMPtember collaboration product is just like her: filled with beautiful details and with a touch of vintage charm. Here’s a sneak peek:

The Holly Jolly Frames (click HERE to check it out!) product suite features a variety of intricate frames and holiday imagery with which to fill the openings. I thought that the gorgeous filigree frames would be absolutely perfect to create some elegant gift tags, and so pulled out my deepest Christmas red cardstock, gold embossing powder, and some jewels and created these pretties:

Don’t the gold embossed frames just look stunning against that vibrant red cardstock? Talk about festive and oh, so elegant! For each frame, I stamped the image on Rainbow Splash Scarlet cardstock using embossing powder, then added the luminous gold embossing powder and heated it. I love how those details pop so perfectly against that deep red. After embossing each frame, I used the coordinating dies to cut them out.

Because the dies come with detachable center circles, you can cut the detailed frames with a center opening or you can leave the center circle out and cut the solid image. I die cut one more of each frame from the same Scarlet cardstock, this time leaving off the center circle die and cutting a solid backer that would fit perfectly behind the frames. I used a blending brush to blend Cherry ink on the edges of each solid die cut, adding some vintage “distressing” to the background.

To adorn the center of each frame, I heat embossed some of the holiday imagery included with Holly Jolly Frames with the same opulent red and gold color palette and die cut them with their coordinating dies. I adhered the frames to their solid, blended backers with thin foam adhesive squares, then added the holiday icons in the center of each frame, turning the frames on the diagonal so that they were diamond-shaped instead of squares. I used my Crop-A-Dile to cut a hole at the top of each diamond, then threaded some sparkling gold twine through to create the loop to easily attach the tag to a gift. Finally, I added some sparkling Cherry Pawsitively Dazzling Gems for extra sparkle and luxury!! I think these look like they came directly from the North Pole!

Well, that’s all for my projects today. Wouldn’t these be so pretty in a variety of Christmas colors and given as a gift? Or as a collage on an A7 card front? So many possibilities with these pretty frames!!

Important note: these fabulous and exclusive STAMPtember collaboration sets are limited edition, meaning that once they sell out, they won’t be restocked. Don’t wait on these! You won’t want to miss out! Thanks so much for stopping by today, and happy STAMPtember!!

Filed Under: Honey Bee Stamps, simon says stamp Tagged With: christmas card, christmas tags, die cutting, gift tag, holiday card, holiday tag, honey bee stamps, ink blending, stamptember

Fun With Felt: Stitched Bunny Tag with New Simon Says Stamp!

March 12, 2026

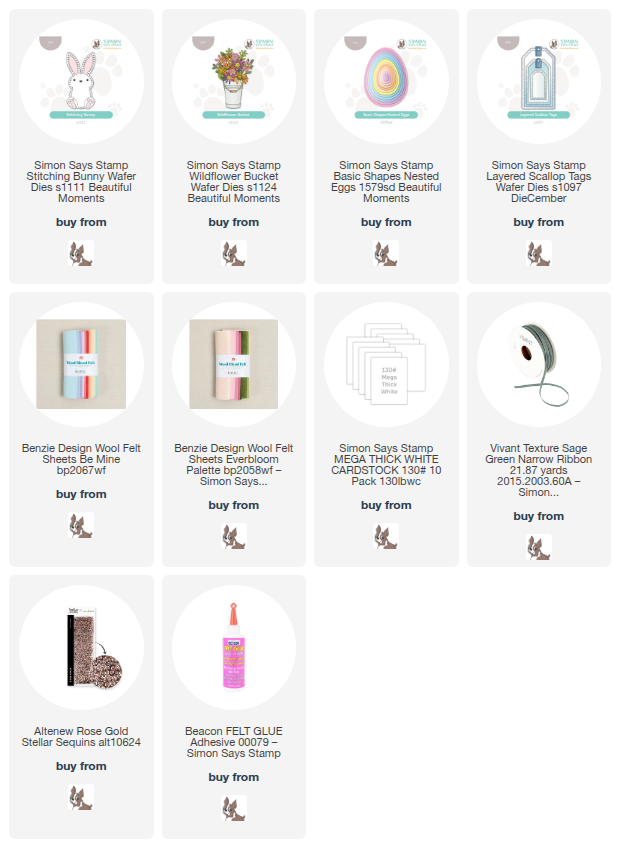
This post was sponsored by Simon Says Stamp. Thanks, Simon! *I have gathered links to all of the products used at the bottom of the post for your convenience, using affiliate links at no extra cost to you. Thank you for shopping with my links! I truly appreciate your support for my work!*

Hi friends! I am back today with a sweet little gift tag that I created using some springtime felt colors and the new Stitching Bunny die set from the Simon Says Stamp Beautiful Moments release! (Check out the full Beautiful Moments release HERE!) I love using my felt to create handmade gifts, and this little tag could be an ornament, a door hanger, or just a little snippet of springtime decoration after being used to adorn a gift bag or basket. Using felt rather than just cardstock makes it feel more permanent, at least to me. Let’s get started on the details!

To begin, I die cut the components of the new Stitching Bunny from cream and blush felt. I also die cut a rosy felt egg using the new Basic Shapes Nested Eggs. Before placing my bunny on the egg, I used felt glue and embroidery floss to add the extras: sequined eyes, floss whiskers, and the pink toe beans and ears. Once I had finished adding all of the extras, I stitched the bunny to the egg in the center, leaving the head unattached so that I could add a small amount of fluff to help the bunny pop up nicely!

Because I had placed my bunny in the center of my generously-sized felt egg, I had some room on either side to add some embellishment. I die cut a flower and some foliage from Wildflower Bucket twice each, using the same pale pink for the flower that I’d used for the ears to provide continuity for each element. I adhered these felt die cuts to the egg using felt glue. I added a bit of shimmering embellishment with some stitched sequins and beads, as well.

Once I had finished adhering all of the felt die cuts to the front of the egg, I die cut a backer using the same size of egg die from Simon Says Stamp Mega Thick cardstock. This 120 lb weight cardstock is perfect for adding extra stability to your tags! I adhered it to the back of the felt egg with more felt glue, then created a tag hanger with one of the dies from the Layered Scallop Tags set, which I cut from metallic felt twice. I sandwiched the felt/cardstock egg between the two tag hangers, adding plenty of felt adhesive to make sure that it stayed put, and placed it under a heavy glass paperweight to dry. Once dry, I added a coordinating sage green ribbon hanger and bow and added the to and from information on the back before hanging it on my gift bag!!

Well, that’s all for my project today! How adorable would these be on Easter baskets?? A decoration and keepsake all in one little felt package! Thanks so much for stopping by today, and have a marvelous day!

Filed Under: simon says stamp Tagged With: bunny, easter, felt, gift tag, nested eggs, stitching, stitching bunny, tag, wildflower bucket

Special Holiday Gift Box with Custom Stamped Wrapping with Simon Says Stamp!

December 24, 2025

This post was sponsored by Simon Says Stamp. Thanks, Simon!

Hi friends! I have a sweet decorated gift box that is perfect for those special gifts, made even more festive with some stamping and glittery cardstock. I am always on the lookout for fun items that I can make more special with the addition of a little papercrafting magic, and these little papier mâche boxes that I found at the dollar store were perfect for turning into a pretty holiday gift box. Let’s get started with the details on my project!

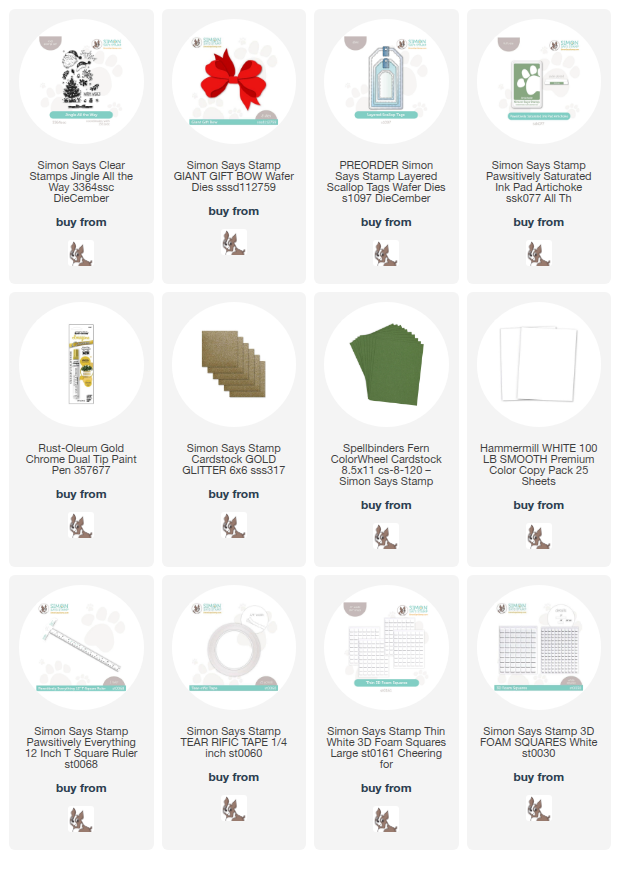
*I have gathered links to all of the products used at the bottom of the post for your convenience, using affiliate links at no extra cost to you. Thank you for shopping with my links! I truly appreciate your support for my work!*

To begin, I used my T-square to measure the sides of the box, then trimmed down some white cardstock to fit each side. To create the custom “wrapping paper,” I used the individual stamps from Jingle All the Way with Artichoke Pawsitively Saturated Ink to stamp a unique holiday pattern all over each panel. To add some shimmering details, I used a gold paint pen to add shiny gold baubles to the Christmas trees, berries, and snowflakes on each panel. Once the panels had been completed, I adhered them to each side of the gift box with Simon Says Stamp Tear-rific Tape.

After I had securely adhered each stamped piece to the sides and top of the gift box, I die cut a gorgeous, fluffy Giant Gift Bow from gold glitter cardstock. I used foam squares to adhere the components, helping to increase the dimension and visibility of each die cut section. I also used my trimmer to trim down some strips of gold glitter cardstock to create the “ribbon” for the box topper. I added the bow to the center of the box topper with some more foam adhesive. I love how festive and sparkly this little gift box is!

To create a coordinating gift tag, I first die cut one of the smaller pierced tags from the new Layered Scallop Tags die set using white cardstock. I used the same Artichoke Pawsitively Saturated Ink to stamp some little holly berries from the Jingle All the Way stamp set. I added a coordinating green tag topper die cut and tucked it beneath the glittering bow with some more foam adhesive squares to finish it off!

Well, that’s all for my project today! I hope you’re all ready for the big day tomorrow. Feeling puny for almost 2 weeks straight right before Christmas was not on my bingo card for this year, so I’m feeling the heat trying to get everything done in time! I still have some more holiday projects to share with you, but I feel like the Christmas holiday lasts at least throughout Epiphany, so we’re just going to keep celebrating here on my blog. Thanks so much for stopping by today, and Merry Christmas Eve!!

Filed Under: simon says stamp Tagged With: christmas card, christmas tag, gift box, gift tag, holiday card, holiday tag, jingle all the way, layered scallop tags

Beaded Christmas Garland with Simon Says Stamp DieCember Dies + Bonus Tag!

December 21, 2025

This post was sponsored by Simon Says Stamp. Thanks, Simon!

Hi friends! I have another holiday decor project to share with you today, this time featuring some darling new dies from the Simon Says Stamp DieCember release! (Check out the full DieCember release HERE!) I love finding ways to incorporate my papercrafting items into customizable home decor, and these sweet little bird and snowflake dies were perfect to create this kitschy and fun beaded garland. I saw a video on Instagram of a woman who used square beads from the dollar store to create a neat garland with pre-cut holiday foam shapes. The foam shapes were, let’s be honest, not the best, but I knew that I could take it one step further with some beautiful and intricate dies to create this sweet garland. Let’s get started with the details!

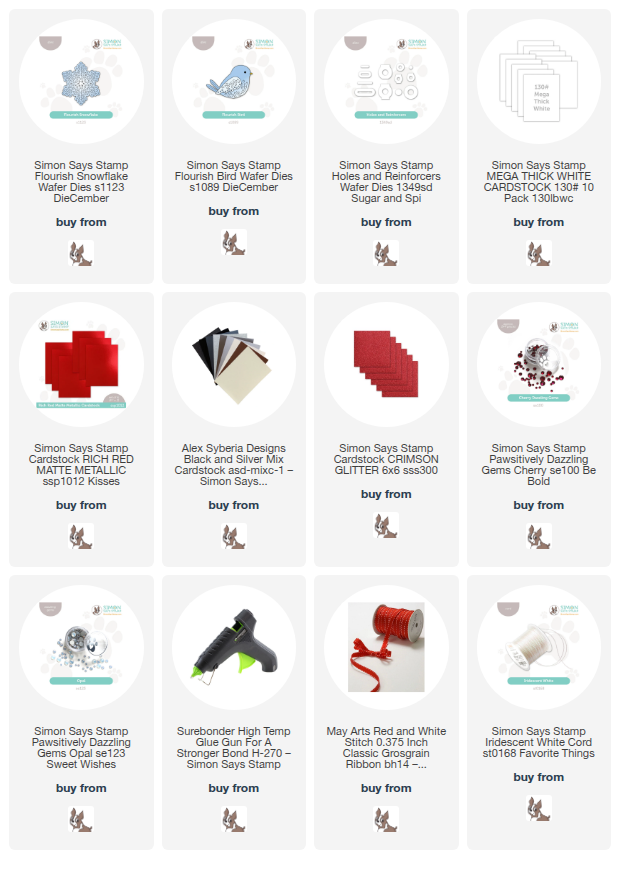
*I have gathered links to all of the products used at the bottom of the post for your convenience, using affiliate links at no extra cost to you. Thank you for shopping with my links! I truly appreciate your support for my work!*

To create my garland, I began by die cutting the new Flourish Snowflake and Flourish Bird dies several times. I used White 130 lb stock to add some heft and sturdiness to the birds; I sandwiched one square bead between each bird, adhering them with hot glue and ensuring that the hole in the center of the bead was facing the same direction for both beads. You can see this detailed in the photo below:

I also tied several fluffy bows using some red and white ribbon that I had in my stash from several years ago. I sometimes get overwhelmed when perusing my craft stash, but this project is a reminder of why sometimes it’s good to keep things even if you don’t have an immediate use for them! After I had tied the fluffy bows, I used the hot glue gun to add some more of the square beads to the back to allow for easy stringing.

I also die cut several birds and snowflakes from Rich Red Metallic cardstock and some white holographic mirror cardstock that I found in my stash. These coated cardstocks pick up the flourish details beautifully on both dies! I also die cut the wings for the birds from red glitter cardstock to add some extra holiday shimmer.

After I had adhered the decorative layers to the snowflake and bird “beads” I added lots of Pawsitively Dazzling Gems in Cherry & Opal to the flourish accents to add even more festive shimmer!

I strung all of the completed beads on a length of twine, adding plain round wooden beads between to create space and complete the pattern! Doesn’t it look so pretty on my office Christmas tree?

I had a few leftover metallic snowflake die cuts, so I thought I would turn them into shaped tags!

To create these shaped, folded tags, I folded over some scrap cardstock into a small card, then used the solid shadow die on it’s own, making sure to overlap the folded edge of the card base with the edge of the die when running it through my die cutting machine.

After I had created the tag base, I adhered the full metallic snowflake to the front, then used my hole punch to add a 1/8″ hole. I strengthened the hole with a die cut created using the Holes and Reinforcers dies, then threaded a loop of Iridescent White Cord through the hole to make for easy attachment to the gift!

Well, that’s all for my projects today! I am so excited to try this technique of creating “beads” with paper die cuts to create fun garlands for home decor. I can’t wait to share more with you! Thanks so much for stopping by, and happy holidays!

Filed Under: simon says stamp Tagged With: die cutting, diecember, flourish bird, flourish snowflake, garland, gift tag, holes and reinforcers, holiday, home decor, tag

Snowy Poinsettias with New Simon Says Stamp DieCember Goodies + Free Gift With Purchase!

December 4, 2025

This post was sponsored by Simon Says Stamp. Thanks, Simon!

Hi friends! Have you checked out the absolutely incredible Simon Says Stamp DieCember release? It’s absolutely filled to the brim with that most versatile of products: standalone dies! (Click HERE to see all of the fun goodies!) Not only do we have masses of fun new dies to play with, but we also have some super fun new embossing folders, including the truly stunning new Blooming Poinsettia 3D Embossing Folder and coordinating die! I am a sucker for these floral and botanical embossing folders, filled with exquisite details and texture that take a card from wow to WOW so easily. Let’s get started with the details on my project for today! (Keep reading all the way to the bottom to see information and inspiration with the Tim Holtz Freebie!)

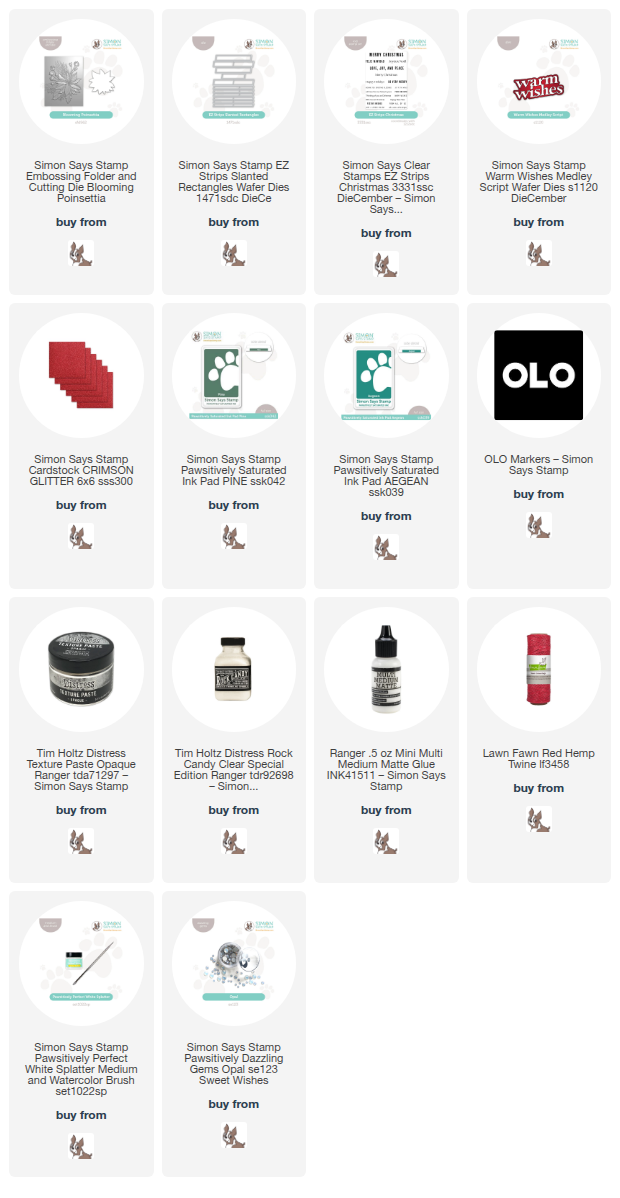
*I have gathered links to all of the products used at the bottom of the post for your convenience, using affiliate links at no extra cost to you. Thank you for shopping with my links! I truly appreciate your support for my work!*

To begin, I ran a panel of white cardstock through my die cutting machine using the new Blooming Poinsettia embossing folder. I wanted the holiday bouquet to be a bit offset, rather that smack in the center of my card, so I placed my cardstock slightly farther to the side within the folder so that the poinsettia was nestled in the corner. Once I had added the detailed and textured embossed image, I used my OLO Markers to add some super vibrant red and teal to the images embossed into the card. I just love how much the alcohol marker coloring enhances the details on these cards!

After I had finished coloring the images, I wanted to add some extra wintry details and enhance the white background. I used blending brushes to blend first Aegean Pawsitively Saturated Ink as close as I could get it to the colored bouquet, blending lightly the closer I got to the bouquet so as not to cause muddiness on the vivid red poinsettia. I added some Pine Pawsitively Saturated Ink around the very edge of the card, creating a super vibrant ombré that perfectly matched the greens and blues in my colored bouquet! I splattered some Simon Says Stamp Pawsitively Perfect White Splatter Medium on the blended edges, then used Distress Opaque Texture Paste and Multi Medium Matte to add snowy Rock Candy Glitter to the poinsettia bloom.

For the greeting, I embossed the new multi-sentiment EZ Strips Christmas onto some deep red cardstock using white embossing powder, then die cut all of the sentiments in one fell swoop using the new EZ Strips Slanted Rectangles, saving the rest of the sentiments for a rainy day! I also die cut the new Warm Wishes Medley Script, cutting the detail layer from some sparkling Simon Says Stamp Crimson Glitter cardstock and the shadow layer from vellum. I popped up the sentiment die cuts on the card front with foam adhesive squares, then tucked a red twine bow beneath the sentiments and added a few Opal Pawsitively Dazzling Gems for additional sparkle!

Now for some fun freebie information! To celebrate DieCember, Simon Says Stamp is offering a super fun freebie from Tim Holtz valued at $30 with any $30 Tim Holtz purchase! Check out All Things Tim Holtz!

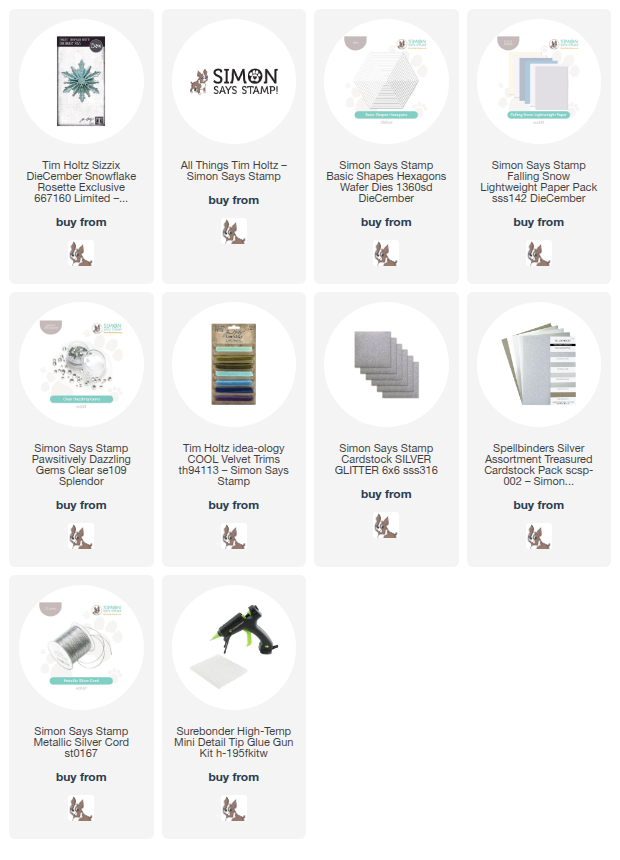
I used the new Snowflake Rosette die freebie to create two different projects: a silvery gift tag/ornament and a gift box! The three dimensional finished product is perfect for non-card projects like these; the gorgeous snowflake makes the gift box and tag extra special and unique, I think! Simply die cut 3-4 of the Snowflake Rosette dies (depending on how tightly you want your snowflake rosette to be put together) and use either strong double sided tape or hot glue, as I did, to assemble them!

I mounted my Snowflake Rosette on a silver pearl Hexagon die cut, adding silver glitter accents and lots of Clear Pawsitively Dazzling Gems for added sparkle! This would be so pretty adorning a package or even on a Christmas tree!

For the gift box, I die cut four of the Snowflake Rosette die cuts from white pearl paper and adhered them together with my glue gun to create the snowflake.

To increase the fancy factor for the box, I used pale blue paint to add color to a small papier mâche box that I found at the dollar store, adding some silvery snowflakes to the bottom portion of the box with a silver paint pen. I also added a velvet ribbon around the edge of the box top and some extra gems on the edges for additional sparkle. Wouldn’t this make such a pretty gift box for some jewelry or a even just a gift card? So fun personalizing gift wrap like this!

You can receive this fabulous Snowflake Rosette die (a $30 value!) for free with any Tim Holtz purchase of $30 or more! You can click HERE to see all of the items included in this gift-with-purchase sale. Some of my favorites: Rock Candy Glitter, Velvet Trims, Multi Medium Matte, and Distress Re-inkers for watercoloring!

Well, that’s all for me today! Be sure to come back tomorrow for Day 1 of the two-day DieCember Blog Hop that is sure to have tons of inspiration, prizes, and possibly a fun freebie! Thanks so much for stopping by today, and Happy DieCember!

Filed Under: simon says stamp Tagged With: alcohol markers, blooming poinsettia, christmas card, christmas tag, diecember, embossing folder, EZ strips, ez strips christmas, gift tag, glitter, holiday card, olo markers, rock candy, snowflake rosette, tim holtz, warm wishes medley script

  • Page 1
  • Page 2
  • Go to Next Page »

Primary Sidebar

  • Facebook
  • Instagram
  • Pinterest
  • YouTube

Favorite Shops

Secondary Sidebar

Subscribe

Enter your email address to subscribe to this blog and receive notifications of new posts by email.

Instagram
Something is wrong.
Instagram token error.
Follow
Load More

Archives

Tags

3D embossing folder alcohol markers better press birthday birthday card blog hop card kit christmas christmas card christmas tag colored pencil copic copic coloring Daniel Smith die cutting embossing folder embroidery felt giveaway holiday holiday card hot foil ink blending karin brushmarker pro layered stencil masculine my monthly hero new release no line coloring no line watercolor OLO marker olo markers original illustration pawsitively saturated rainbow shaker card slimline stamping stamptember stencil thank you thinking of you valentine's day video watercolor

Popular Posts

Simon Says Stamp Sending Cheer Blog Hop- Day 2 + Freebie + Giveaway!
Altenew October 2026 Release Blog Hop + Giveaway!
Rustic Monochromatic Stars for Christmas with Rainbow Splash!
Hero Arts Partners Blog Hop: Lawn Fawn!
Waffleflower July Release Blog Hop!
December 2018 My Monthly Hero Blog Hop + Giveaway!
March 2020 Essentials By Ellen Blog Hop+Giveaway!
The Ton Anniversary Release: Day 1!
The Ton Stamps Summer Release: Day 1
Altenew Paint A Flower: Carnation Blog Hop+Giveaway!

Disclosure

Some affiliate links are used in my posts. This means that, should you click on one of my links and purchase something from that company, I will receive a small portion of the sale at no extra cost to you. I use the money earned from these sales to help maintain my blog. I so appreciate you visiting and, if you do choose to use one of my affiliate links, thank you so much for your support!
Copyright © 2026 ·Brunch Pro Theme · Genesis Framework by StudioPress · WordPress · Log in
Loading Comments...