• Skip to main content
  • Skip to primary sidebar
  • Skip to secondary sidebar

Sixth Street Sundries

Emily Midgett

  • Home
  • About Me
  • Contact
  • OLO Marker Color Swatch Chart
  • Shop

graduation

Here’s to What’s Next, Grad x2 with Simon Says Stamp!

June 12, 2026

Hi friends! Graduation season is starting to wind down here, and so I thought I’d share some fun options for graduation cards that are not only quick to create but easily customizable to fit your school’s colors! Our school colors are maroon, silver, and white, and so I pulled out several different options of colored and specialty cardstock from my stash to create this pair of projects perfect for a graduate. Let’s get started with the details!

The key component for both of these is the Grad Cover Plate, which is an older cover plate die but so classy and timeless that it works beautifully for guys and gals! I used this die as the focal point to create a simple flat shaker card as well as a more involved paper inlaid card with a little blending and lots of bling.

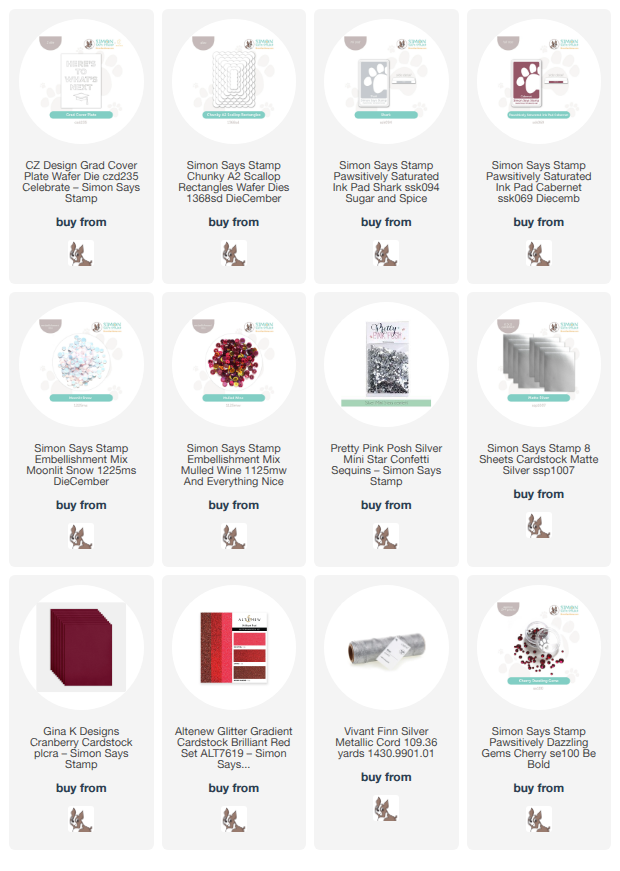
For the flat shaker, I began by die cutting the Grad Cover Plate from some brushed silver cardstock, reserving the inner pieces of the letter R, O, and A. I trimmed down a piece of maroon cardstock to A2 sized, then created a flat shaker pocket with some leftover stamp packaging and Tear-rifically Tacky Tape. I filled the shaker pouch with Moonlit Snow and Mulled Wine Embellishment Mixes, as well as some silver star sequins, creating a beautiful shaker mixture that coordinates perfectly with the colors of the card! Once I had sealed up the shaker pouch, I adhered the silver cover plate die cut to the front of the shaker with liquid adhesive and added the entire panel to an A2 card front. Super clean and perfectly festive for a graduating student, not to mention easy to customize to the proper school colors!

My second card is a bit more involved. I began by die cutting the main focal point cover plate from that same deep maroon cardstock. I cut down a panel of white cardstock to the same dimensions as the cover plate die cut, then used blending brushes to lightly blend Shark and Cabernet Pawsitively Saturated Ink at the top and bottom of the panel, allowing the blended sections to peek out behind the die cut letters when placed behind it! I also cut the graduation cap using some deep maroon glitter cardstock and inlaid these glittery pieces within the negative space of the main die cut, adding a tiny silver bow for a bit of extra texture. I adhered this panel to a silver Chunky A2 Scallop Rectangles die cut, creating a pretty frame around the main focal point. This was popped up on a full size A2 panel of the same maroon cardstock, adding one final layer of cardstock. The final touch was a ton of gorgeous and sparkling Cherry Pawsitively Dazzling Gems! This card has several more elements to it, and is quite a bit heavier than the previous card, so definitely one to deliver by hand, perhaps at a graduation party!

Well, that’s all for my projects today! It’s always smart to have a few graduation card ideas in your back pocket, right? Our kiddos aren’t at that age for graduation yet, but I foresee having lots of these on hand to give out in about 5 years! (I don’t even want to think about my big kids actually graduating yet, so in my head these are for their friends, ha!) Thanks so much for stopping by today, and have a marvelous day!
Filed Under: simon says stamp, Uncategorized Tagged With: chunky A2 scallop, chunky a2 scallop rectangles, die cutting, Grad Cover Plate, graduate, graduation, ink blending, shaker card

Congrats, Grad + Last Day of Simon Says Stamp Memorial Day SALE!

May 25, 2026

This post was sponsored by Simon Says Stamp. Thanks, Simon! *I have gathered links to all of the products used at the bottom of the post for your convenience, using affiliate links at no extra cost to you. Thank you for shopping with my links! I truly appreciate your support for my work!*

Hi friends! I have a colorful graduation card to share with you today. Graduation season is in full swing here in the Midwest, and we are at the age where several of our friends’ kids are taking that next step in their journey to adulthood. (Though the prospect of these kiddos that we knew as babies graduating high school does make me feel a tad ancient!) I have a fun, playful, super colorful graduation card to share with you today featuring some older graduation-themed products and a pretty rainbow of inks. Let’s get started with the details on my project!

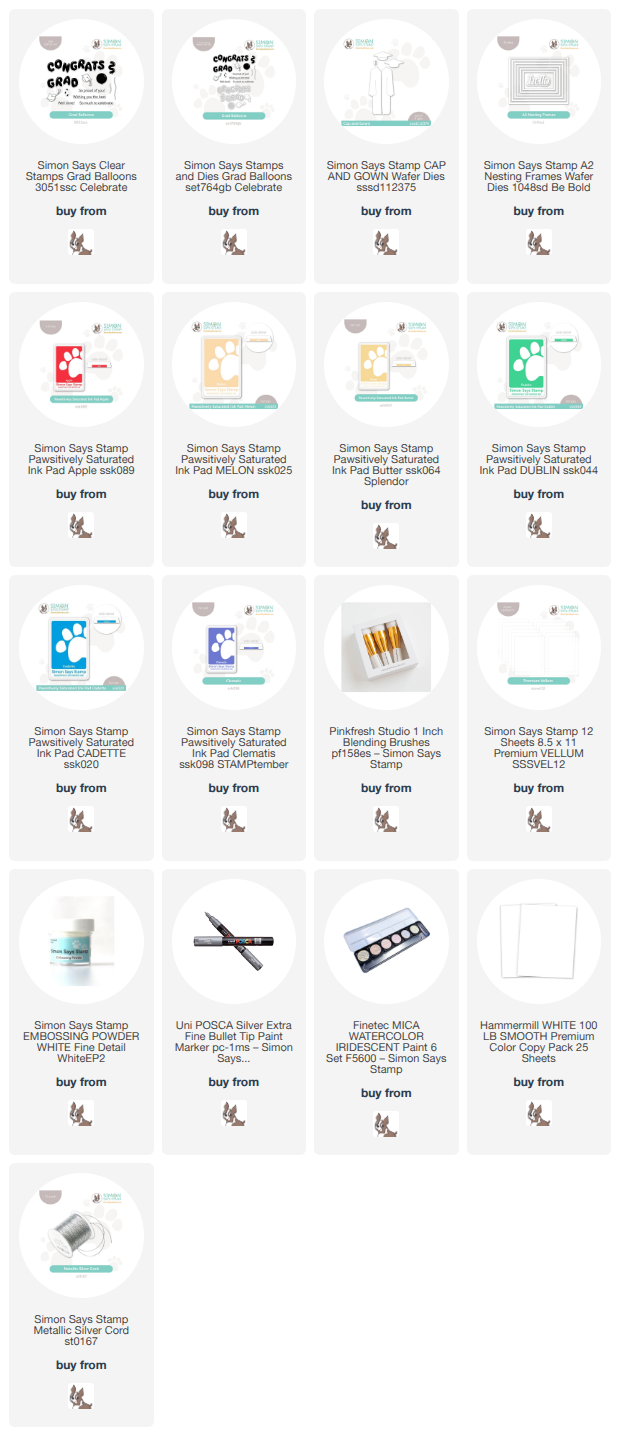
To begin, I heat embossed the “Congrats Grad” from Grad Balloons onto some heavyweight vellum using white embossing powder. I love embossing on vellum, particularly with things that “float” like balloons or butterflies, simply because the semi-sheer nature of the vellum helps enhance that illusion of floating as well as keeping the card front from adding additional visual weight with regular cardstock. I used the coordinating dies to die cut the embossed sentiment images and set them aside.

After I had created the main focal point, it was time to dress up the background. I wanted something colorful and fun, so I selected a rainbow of Pawsitively Saturated Inks in shades of Apple, Melon, Butter, Dublin, Cadette, Clematis. This could easily be adapted to the color palette of the school from which the graduate is matriculating! (how’s that for a $2 word? haha!) I blended the inks in ROY G BIV order on the card front using blending brushes, then splattered the background with some gorgeous iridescent glitter watercolors to add texture and shimmer behind the celebratory balloons.

After I had completed the background, I added thin strips of foam adhesive behind the solid embossed areas of the vellum die cuts, then adhered both die cuts to the rainbow background. I drew some balloon strings with a silver paint pen, then added a graduation cap from the Cap and Gown die set, popped up at a jaunty angle on top of the vellum sentiment. I framed in the entire focal point with a white A2 Nesting Frame, encapsulating the focal point a bit and helping to draw the eye to the center of the card front. The final touch was a Silver Cord bow for the balloon bouquet, adding a bit more texture and one last touch of silver to the card!

Well, that’s all for my project today! I think this is such a fun card to give to a graduate with a gift card or maybe even some cash inside. It doesn’t take a huge time investment (appropriate for a teenager who might not appreciate a handmade card) and it can be customized to a wide variety of color palettes.

Just FYI: the Simon Says Stamp Memorial Day Sale ends tonight!!

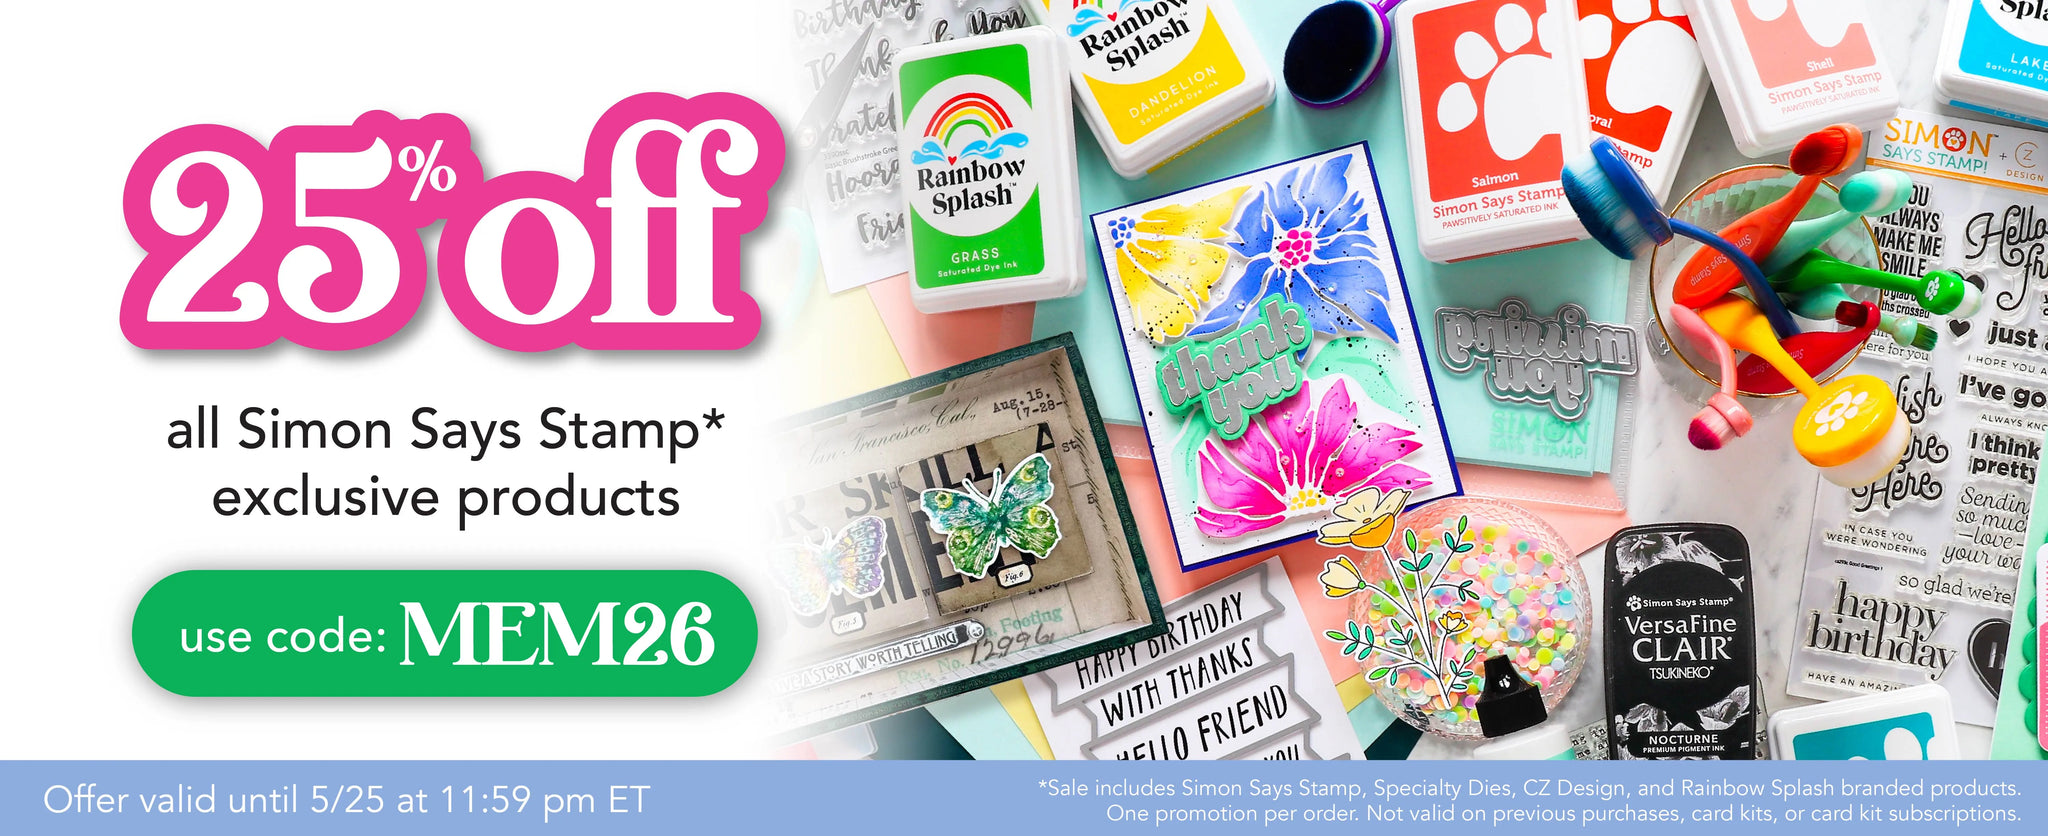
Take 25% off of all Simon Says Stamp branded products, including the fabulous Pawsitively Saturated Inks that I’ve used for today’s project. It’s a great opportunity to stock up on inks, re-inkers, cardstock, and any of the fabulous Simon Says Stamp tools that you’ve had your eye on!

Thanks so much for stopping by today, and have a marvelous day!

Filed Under: simon says stamp Tagged With: die cutting, grad balloons, graduate, graduation, ink blending, rainbow

More Cardstock Stripes for End of School with Simon Says Stamp!

May 12, 2026

This post was sponsored by Simon Says Stamp. Thanks, Simon! *I have gathered links to all of the products used at the bottom of the post for your convenience, using affiliate links at no extra cost to you. Thank you for shopping with my links! I truly appreciate your support for my work!*

Hi friends! We are eight days away from school beginning to let out here in my neck of the woods, and so that means it’s time for teacher thank you cards, graduation card, and teacher retirement cards! I think one of the best parts of being a cardmaker is being able to customize your project to perfectly suit the colors of your event. Wedding card? Make it match the invitation! Birthday card? Recipient’s favorite shades! Graduation card? School colors! One of our local schools has a royal blue and yellow color palette that is just so pretty, so I thought I’d make some fun and bold cards using the cardstock strip method from THIS project and THIS project, inspired by the projects in my CITI booth from Simon Says Stamp’s CREATE event! I even made a simple teacher retirement card using the same colors, this time with ink blending to make it go super quick. Let’s get started with the details!

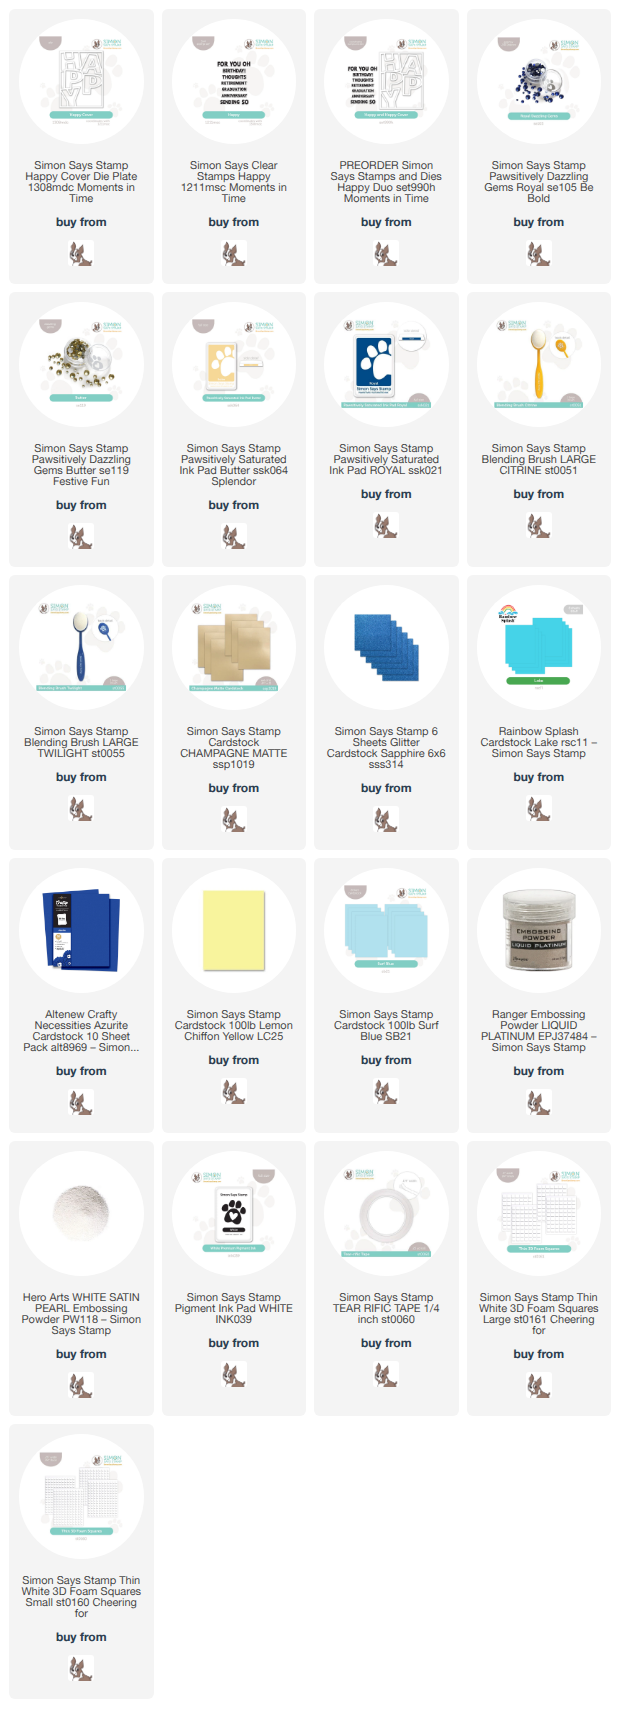
To create this bold pair of cards, I used the Happy Cover die and it’s coordinating stamp set, aptly called Happy. The large cover plate die leaves the perfect space for a stamped sentiment from the mini stamp set, and makes it super easy to do paper piecing in your choice of colors!

For my first card, I die cut the Happy Cover die from Simon Says Stamp’s Sapphire Glitter Cardstock as well as Lemon Chiffon. Before paper piecing, I selected a variety of blue cardstock shades and trimmed them into strips of different thicknesses using my guillotine trimmer, as well as some Lemon Chiffon strips. Using the same technique from THIS post, I laid down three strips of adhesive vertically on my card base, then laid the strips horizontally all down the front of my card in my selected pattern. The different widths of the strips add some interest behind the bold die cut sentiment! After I had finished adhering all of the strips and trimmed off any excess, I adhered the glittering cover plate die cut directly over the top with liquid adhesive. I inlaid the individual die cut Lemon Chiffon letters, popping them up with thin foam adhesive squares, then added a heat embossed sentiment and some Butter Pawsitively Dazzling Gems for added sparkle!

My second card features the same yellow and blue color palette, this time putting those glittering blue letters to work inside the cover plate die cut. Waste not, want not! I blended Pawsitively Saturated Inks in shades of Butter and Royal on a white A2 card front, keeping the two colors separate with a section of white in the center so as not to create green. (Those color mixing lessons from gradeschool are definitely important ones to remember!) I adhered my Matte Champagne Foil cardstock Happy outline die cut on my blended card front with liquid adhesive, then placed the leftover blue glitter letters in their appropriate space. To complete the greeting, I thought a teacher’s retirement card would be a perfect occasion for a card with these colors! It’s even more fun to receive something so personalized, right? I added the embossed sentiment strip with thin foam adhesive squares for the tiniest bit of height, then added some Royal Pawsitively Dazzling Gems to the card fron for added sparkle.

Well, that’s all for my projects today! Are you churning out graduation and teacher thank you cards? I know that I am!! We’re getting to the age that our friends’ children are starting to graduate from high school…. and boy does that make me feel old! Yikes! Thank so much for stopping by today, and have a marvelous day!

Filed Under: simon says stamp Tagged With: cardstock stripes, die cutting, graduation, happy, happy cover die, ink blending, retirement

Here’s To What’s Next, Grad!

April 22, 2024

This post was sponsored by Simon Says Stamp. Thanks, Simon!

Hi friends! I have a pair of projects to share with you today using some of the new graduation-themed goodies from the Simon Says Stamp Celebrate release from last week! Graduation season is upon us, and we have reached the age where relatives who were tiny kids when my husband and I met are now full-fledged adults (well, sort of, ha) and are graduating from high school and college! (Off to check out the white hairs sparkling at my temples, be right back!) Our local high school colors are maroon and white, and so I thought I would create a pair of projects using the new Grad Cover Plate and the new Grad foil transfer cards. Let’s get started on the details!

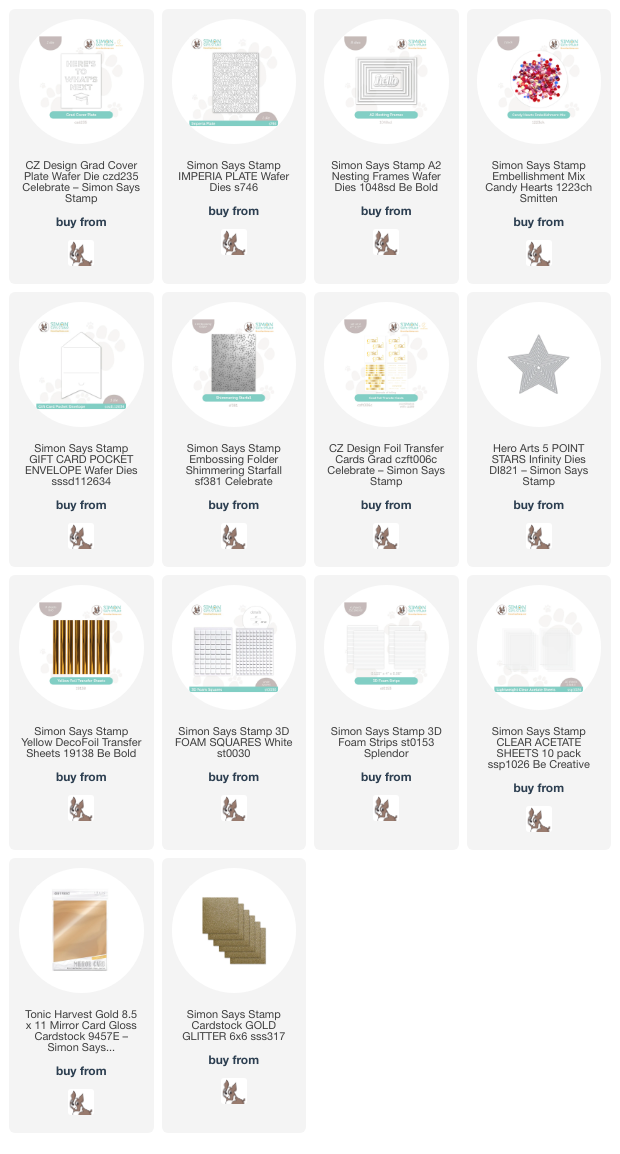
Who doesn’t love a shaker card, right? Even a teenager might be tempted to shake shake shake when presented with some shiny sequins (and some cash)! The new Grad Cover Plate cuts the letters out of a die cut rectangle, creating a negative space that is perfect for use with tons of different techniques. Paper piecing, ink blending, stenciling, etc! I chose to back my white die cut with some acetate, creating a perfect window for a shaker. This card would be super simple to customize to your graduate’s school colors, too!

I started by die cutting the Grad Cover Plate from some plain white cardstock, reserving the center of the R, O, and A die cuts. I adhered some clear acetate behind my die cut and used Simon Says Stamp Foam Adhesive Strips to add some foam adhesive in a continuous line around the edge of the the back of the die cut, which creates the space to fill my shaker card with sequins. I added a shimmering frame, cut using the A2 Nesting Frames dies with gold glitter cardstock, then accented it with some Hero Arts 5 Point Star Infinity Die cuts cut from gold mirror cardstock.

To add a little extra texture behind the shaker window die cut, I ran a panel of deep marron cardstock through my die cut machine with the Imperia Plate. This plate pierces a textured pattern into the cardstock, which makes it a beautiful and simple way to embellish a plain background, adding a little extra interest behind your focal point. I filled my shaker with Candy Hearts sequins, which coordinated beautifully with my color scheme. Simon Says Stamp stocks so many different colors of confetti sequin packs that you are sure to find a color that coordinates with your graduate’s school colors! I love the simplicity of this card… you could even mass produce this one for a graduation announcement, simplifying it by removing the shaker part and just having the die cut window. So many different options!

What graduate doesn’t like a little extra cash or gift card? I created this gift card holder by first die cutting the Gift Card Pocket Envelope from some plain white cardstock, then cutting a separate cardstock rectangle the same size as the front panel and running it through my die cutting machine with the new Shimmering Starfall embossing folder. Using a separate panel of cardstock helps to add that texture without making the gift card holder difficult to fold and put together. I ran the new Grad foil transfer cards through my Minc machine with Simon Says Stamp’s Yellow DecoFoil toner foil and used my sharp scissors to cut them out. I added another gold glitter cardstock frame cut with the A2 Nesting Frames dies on top of the embossed background panel, then popped up the greeting pieces with some foam squares. I added a few more shiny gold foil stars cut using the Hero Arts 5 Point Star Infinity Dies and gold mirror cardstock to finish the project off!

Well, that’s all for my projects today. I love the simplicity of cards made using only die cuts; they’re so easy to customize and would be super simple to mass produce, which is perfect for an occasion like high school graduation! Thanks so much for stopping by today, and have a marvelous day!
Filed Under: simon says stamp Tagged With: A2 Nesting Frames dies, foil transfer cards, gift card holder, Grad Cover Plate, graduation, imperia plate, shaker card, shimmering starfall embossing folder

Congrats-You’re A Star!

July 7, 2023

This post was sponsored by Simon Says Stamp. Thanks, Simon!

Hi there! We are winding down on graduation season, but it never hurts to have a congratulatory card in your stash, right? I have paired a bunch of products from Simon Says Stamp to create this celebratory card that would be perfect for graduation or any achievement worth noting, really! And the cool colors work perfectly for any gender, too.

I began by blending Pawsitively Saturated Royal and Cadette inks on a white A2 card front. I then ran the blended panel through my die cut machine using the Dimensional Stars embossing folder from Simon Says Stamp. To emphasize the stars and make the background super festive and celebratory, I painted the dimensional stars using handmade metallic silver glitter watercolors, also splattering the background to create tons of interest to the card front!

I wanted to add some more sparkle and shine to the card front, so I die cut the Basic Box Card Stars from some silver Simon Says Stamp Luxe Glitter paper, reserving the box card front itself for later and keeping the intact star cutouts! (Love when I can get double duty out of one die cut, especially with one of those papers that I normally would be hoarding forever!) I also die cut a vellum star using a Nested Star die.

For the greeting, I heat embossed a sentiment from Yay You onto some dark blue cardstock using silver embossing powder. How perfectly does that little star on the “congrats” sentiment coordinate with the stars in the background!? I die cut the sentiment with the coordinating die and trimmed the smaller sentiment to a thin strip. I adhered the sentiment pieces to the vellum star, then flipped the entire thing over and added foam adhesive behind the solid die cuts to hide the adhesive and keep the vellum nice and clean. I added the glittery silver star die cuts on the card front with some more foam tape, creating a variety of silver textures and dimension on the card!

Well, that’s all for my project today! Thanks so much for stopping by, and have a marvelous day!


Filed Under: simon says stamp Tagged With: basic box card stars, congrats, congratulations, dimensional stars, embossing folder, graduation, ink blending, man card monday, masculine, nested stars, stars

  • Page 1
  • Page 2
  • Go to Next Page »

Primary Sidebar

  • Facebook
  • Instagram
  • Pinterest
  • YouTube

Favorite Shops

Secondary Sidebar

Subscribe

Enter your email address to subscribe to this blog and receive notifications of new posts by email.

Instagram
Something is wrong.
Instagram token error.
Follow
Load More

Archives

Tags

3D embossing folder alcohol markers better press birthday birthday card blog hop card kit christmas christmas card christmas tag colored pencil copic copic coloring Daniel Smith die cutting embossing folder embroidery felt giveaway holiday holiday card hot foil ink blending karin brushmarker pro layered stencil masculine my monthly hero new release no line coloring no line watercolor OLO marker olo markers original illustration pawsitively saturated rainbow shaker card slimline stamping stamptember stencil thank you thinking of you valentine's day video watercolor

Popular Posts

Simon Says Stamp Sending Cheer Blog Hop- Day 2 + Freebie + Giveaway!
Altenew October 2026 Release Blog Hop + Giveaway!
Rustic Monochromatic Stars for Christmas with Rainbow Splash!
March 2020 Essentials By Ellen Blog Hop+Giveaway!
December 2018 My Monthly Hero Blog Hop + Giveaway!
The Ton Stamps Summer Release: Day 1
Waffleflower July Release Blog Hop!
Hero Arts Partners Blog Hop: Lawn Fawn!
Simon Says Stamp STAMPtember Tim Holtz Collaboration: Festive Holidays!
Simon Says Stamp August 2026 Card Kit of the Month: Made to Flourish!

Disclosure

Some affiliate links are used in my posts. This means that, should you click on one of my links and purchase something from that company, I will receive a small portion of the sale at no extra cost to you. I use the money earned from these sales to help maintain my blog. I so appreciate you visiting and, if you do choose to use one of my affiliate links, thank you so much for your support!
Copyright © 2026 ·Brunch Pro Theme · Genesis Framework by StudioPress · WordPress · Log in
Loading Comments...