• Skip to main content
  • Skip to primary sidebar
  • Skip to secondary sidebar

Sixth Street Sundries

Emily Midgett

  • Home
  • About Me
  • Contact
  • OLO Marker Color Swatch Chart
  • Shop

halloween card

Simon Says Stamp STAMPtember Collaboration Set with InkOn3!

September 23, 2026

Hi friends! The new InkOn3 Witch Cat Collaboration Set (click HERE to see all of the details!) for STAMPtember is now available, and it’s so dang cute…. I can never resist a cute kitty! I was first introduced to InkOn3 a long time ago when they released their Fadeout Ink (click HERE), which is absolutely perfect for no-line watercoloring and alcohol marker coloring with your stamps. It makes it super easy to look like you can draw as well as color beautifully! I’ve tried other brands of no-line coloring ink and I always come back to the original. (The full sized pad is currently sold out, but the cube and re-inker are still in stock!) This sweet Witch Cat collaboration set features a huge kitty with a sassy witch’s hat and semi-spooky moon. Here’s a peek at this exclusive, limited edition set:

I just love the style of the kitty, with a storybook illustrative style that makes no-line coloring super fun. I created a magical all-purpose card with my OLO Markers and some sparkling additions, so let’s get started with the details on my project!

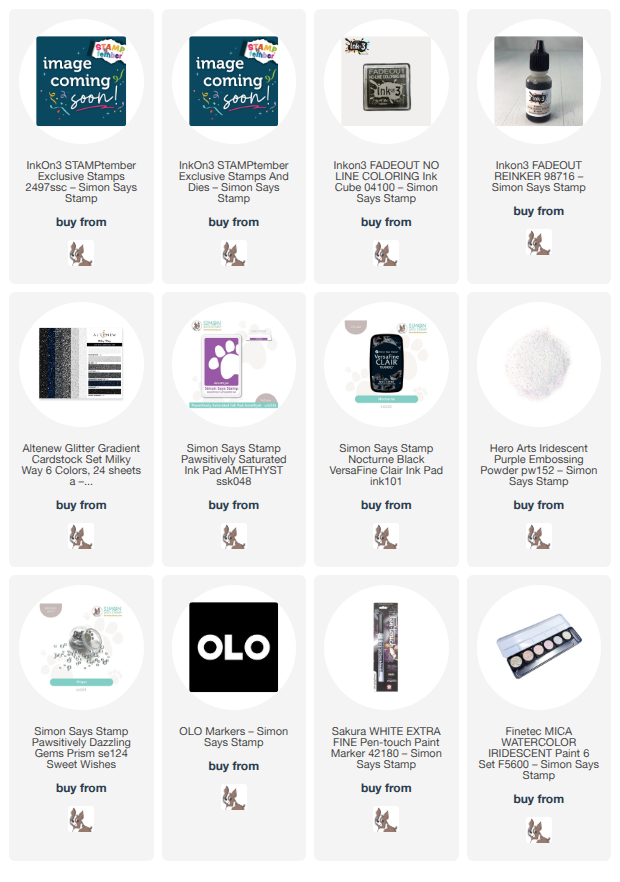
I began by stamping the Witch Cat image on some plain white cardstock using InkOn3’s Fadeout Ink. This ink fades beautifully into the background when alcohol marker is applied to the image, making it look as though you have some serious artistic skills! I used my OLO Markers to add vibrant color to the pumpkins and moon, then decided to go completely classic Halloween and create a black kitty. I kept true to the illustration, using the “fluff lines” as a guide for where to put my shadows and highlights. I added some white paint pen to the jade green eyes, nose, and whiskers, as well as a bit of sparkling silver watercolor to the buckle on the witch hat for some special details! Once I had completed the coloring process, I used the coordinating die to cut out the generously-sized image.

After I had finished coloring and die cutting the stamped image, I wanted to keep the color palette as seamless as possible between elements. I had selected a lavender card front for the background, blended with Amethyst Pawsitively Saturated Ink in the corner, so I selected a coordinating shade of purple OLO Marker from my stash and colored around the edges of the entire die cut image. It looks much lighter in the photo, for some reason, but in reality that die cut edge matches quite nicely with the background!

Before assembling the card, I splattered that blended corner with some sparkling iridescent watercolors to add to the magical aesthetic. I love how the water spots and the watercolors add such texture and interest to the background! For the greeting, I stamped the “you’re simply magical” sentiment from Witch Cat onto some more lavender cardstock using Nocturne ink, then added some Iridescent Purple Embossing Powder over the top, creating a fabulous iridescent embossed sentiment. I used the coordinating die to cut out the greeting, then began assembling the elements of the card. I cut down some shimmering iridescent gray glitter cardstock into a flagged strip, layering it behind the kitty die cut on the splattered background. I added the sentiment over the top with some more foam adhesive squares, finally finishing everything off with some Prism Pawsitively Dazzling Gems!

Well, that’s all for my project today! Remember: these STAMPtember Collaboration sets are exclusive to Simon Says Stamp and Limited Edition, so don’t wait. All of the collaboration sets have sold out thus far, so you won’t want to miss out on this adorable kitty! Thanks so much for stopping by today, and Happy STAMPtember!
Filed Under: ink on 3, simon says stamp, Uncategorized Tagged With: die cutting, halloween card, ink blending, no line coloring, OLO marker, olo markers, stamptember, witch cat

It’s Just a Bunch of Hocus Pocus!

September 21, 2023

This post was sponsored by Simon Says Stamp. Thanks, Simon!

Hi friends! I have something unusual to share with you today… I rarely make Halloween cards, because I think my Grammy was the only person from whom I’ve ever received a card for Halloween, and to be honest, I don’t do “spooky” very well. However!! I could not resist the darling little witches in the marvelous new Hocus Pocus set, illustrated by my friend Alberto Gava! He illustrates the most adorable stamp sets, and while I don’t do cutesy very well, I absolutely adored all of the cute little witches, pumpkins, and that precious little kitty! My daughter is going to be a witch for Halloween, so this set is just perfect to make a little card or tag for her, too! Let’s get started with the details.

To start, I stamped several of the images from the Hocus Pocus stamps set onto some Hammermill cardstock using Intense Black ink. I then used OLO markers to add color to the images, creating these orange pumpkins, black kitty, and a witch that looks just like my little girl in her Halloween costume! I die cut the finished images using the coordinating dies (purchase as a bundle HERE). I also stamped the darling greeting using Altenew Obsidian Pigment Ink, embossing it with clear embossing powder before using the coordinating die to cut it out.

One of the reasons that I don’t do “cute” very well is that my imagination doesn’t seem to stretch to creating scenes very easily. To get around this, I like to create a smaller “canvas” upon which I can build my scene, making a less intimidating space to have to fill with images. I placed one of the Simon A2 Stencil Masks over the top of my A2 Hammermill cardstock card front, then used blending brushes to blend Cayenne, Clementine, and Nectar inks from Concord & 9th in a smooth ombré down the front of the card, creating a pretty ombré background that matched the colored pumpkins beautifully! While the Simon A2 Stencil Mask was still in place, I splattered some coordinating metallic watercolors on the background to add extra sparkle to the card.

After removing the mask, I arranged all of the colored and die cut elements on the blended area, adhering them with both liquid and foam adhesive to create extra dimension and interest. I love how the kitty looks like he’s pointing at the sentiment! Finally, I added a few shimmering gems for some more sparkle and texture.

Well, that’s all for today’s project! If you’re like me and find yourself creating with the same style of stamps each time you craft, I encourage you to go take a look at stamp sets that are outside of your typical wheel house. It’s such fun to stretch your creative legs with something new, especially when the results are this cute! Thanks so much for stopping by today, and have a marvelous day!

Filed Under: simon says stamp Tagged With: A2 stencil mask, halloween card, hocus pocus, ink blending, olo markers, witch

Spellbinders Small Die of the Month!

September 5, 2018

Good morning! Today, I have a special Halloween card for you made using the September Small Die of the Month kit from Spellbinders! This month’s kit is darling and has several smaller dies that are great for building a little scene on your card front. Best of all, it’s super affordable at only $12.50! Here’s this month’s kit:

Adorable, right? That little kitty! I know he’s supposed to be spooky, but I think he’s super cute haha! I created a shaker card today featuring several of the die cuts from the kit and some Distress Oxide ink blending. Let’s get started with the details!

I began by ink blending Distress Oxide inks in shades of Wilted Violet, Candied Apple, and Pumpkin Orange to create a spooky autumnal sunset. Next, I die cut several of the dies included in this month’s Small Die of the Month kit from plain black card stock.

To create the shaker portion of the card, I used a panel of orange polka dot card stock from my stash to die cut a circle and backed the panel with acetate. I also added a black glitter frame around the edge of the polka dot panel to create a bit of contrast between the orange panel and the blended panel. I added foam adhesive all around the edge of the circle to create a good seal, then filled it with a variety of purple, orangey-yellow, and graphite star sequins.

On the front of the card, I adhered the black cat, die cut greeting, and bats using liquid adhesive, finally adding a bit of Crystal Lacquer to the die cut greeting to emphasize it further.

Well, that’s all for me today! My daughter was so intrigued by the kitty on the card and the sparkly sequins that she begged me to make another shaker card for her to add to her “clection” (aka, piles of seemingly uninteresting “stuff” that she finds fascinating haha!). I hope you enjoyed this project! The Spellbinders Small Dies of the Month club is a fantastic value, so I would encourage you to investigate it! Thanks for stopping by, and have a marvelous day!


Filed Under: spellbinders Tagged With: distress oxide, halloween card, ink blending, shaker card, small die of the month

Primary Sidebar

  • Facebook
  • Instagram
  • Pinterest
  • YouTube

Favorite Shops

Secondary Sidebar

Subscribe

Enter your email address to subscribe to this blog and receive notifications of new posts by email.

Instagram
Something is wrong.
Instagram token error.
Follow
Load More

Archives

Tags

3D embossing folder alcohol markers better press birthday birthday card blog hop card kit christmas christmas card christmas tag colored pencil copic copic coloring Daniel Smith die cutting embossing folder embroidery felt giveaway holiday holiday card hot foil ink blending karin brushmarker pro layered stencil masculine my monthly hero new release no line coloring no line watercolor OLO marker olo markers original illustration pawsitively saturated rainbow shaker card slimline stamping stamptember stencil thank you thinking of you valentine's day video watercolor

Popular Posts

Simon Says Stamp Sending Cheer Blog Hop- Day 2 + Freebie + Giveaway!
Altenew October 2026 Release Blog Hop + Giveaway!
Rustic Monochromatic Stars for Christmas with Rainbow Splash!
Waffleflower July Release Blog Hop!
Hero Arts Partners Blog Hop: Lawn Fawn!
March 2020 Essentials By Ellen Blog Hop+Giveaway!
December 2018 My Monthly Hero Blog Hop + Giveaway!
The Ton Stamps Summer Release: Day 1
The Ton Anniversary Release: Day 1!
Altenew Paint A Flower: Carnation Blog Hop+Giveaway!

Disclosure

Some affiliate links are used in my posts. This means that, should you click on one of my links and purchase something from that company, I will receive a small portion of the sale at no extra cost to you. I use the money earned from these sales to help maintain my blog. I so appreciate you visiting and, if you do choose to use one of my affiliate links, thank you so much for your support!
Copyright © 2026 ·Brunch Pro Theme · Genesis Framework by StudioPress · WordPress · Log in
Loading Comments...