• Skip to main content
  • Skip to primary sidebar
  • Skip to secondary sidebar

Sixth Street Sundries

Emily Midgett

  • Home
  • About Me
  • Contact
  • OLO Marker Color Swatch Chart
  • Shop

holes and reinforcers

Beaded Christmas Garland with Simon Says Stamp DieCember Dies + Bonus Tag!

December 21, 2025

This post was sponsored by Simon Says Stamp. Thanks, Simon!

Hi friends! I have another holiday decor project to share with you today, this time featuring some darling new dies from the Simon Says Stamp DieCember release! (Check out the full DieCember releaseĀ HERE!) I love finding ways to incorporate my papercrafting items into customizable home decor, and these sweet little bird and snowflake dies were perfect to create this kitschy and fun beaded garland. I saw a video on Instagram of a woman who used square beads from the dollar store to create a neat garland with pre-cut holiday foam shapes. The foam shapes were, let’s be honest, not the best, but I knew that I could take it one step further with some beautiful and intricate dies to create this sweet garland. Let’s get started with the details!

*I have gathered links to all of the products used at the bottom of the post for your convenience, using affiliate links at no extra cost to you. Thank you for shopping with my links! I truly appreciate your support for my work!*

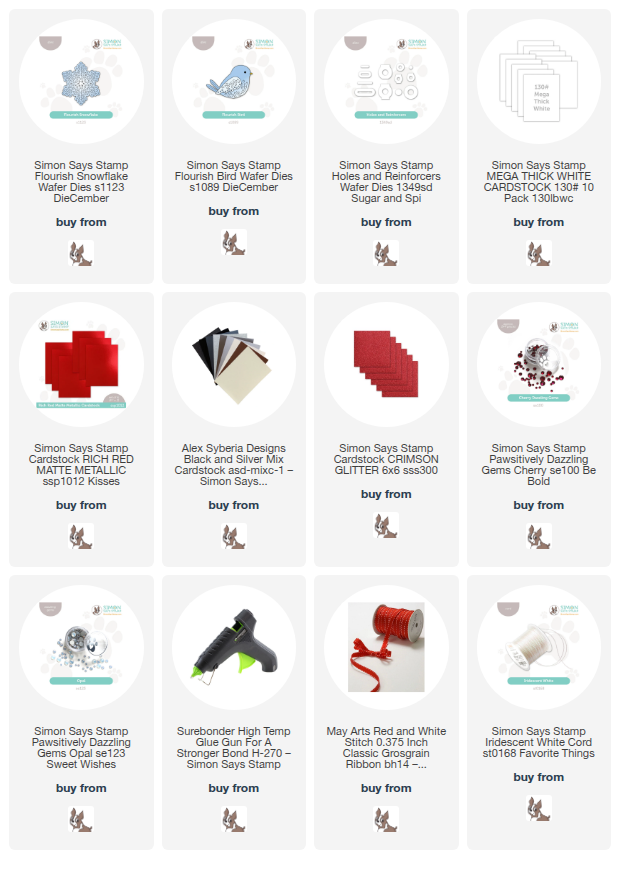
To create my garland, I began by die cutting the new Flourish Snowflake and Flourish Bird dies several times. I used White 130 lb stock to add some heft and sturdiness to the birds; I sandwiched one square bead between each bird, adhering them with hot glue and ensuring that the hole in the center of the bead was facing the same direction for both beads. You can see this detailed in the photo below:

I also tied several fluffy bows using some red and white ribbon that I had in my stash from several years ago. I sometimes get overwhelmed when perusing my craft stash, but this project is a reminder of why sometimes it’s good to keep things even if you don’t have an immediate use for them! After I had tied the fluffy bows, I used the hot glue gun to add some more of the square beads to the back to allow for easy stringing.

I also die cut several birds and snowflakes from Rich Red Metallic cardstock and some white holographic mirror cardstock that I found in my stash. These coated cardstocks pick up the flourish details beautifully on both dies! I also die cut the wings for the birds from red glitter cardstock to add some extra holiday shimmer.

After I had adhered the decorative layers to the snowflake and bird “beads” I added lots of Pawsitively Dazzling Gems in Cherry & Opal to the flourish accents to add even more festive shimmer!

I strung all of the completed beads on a length of twine, adding plain round wooden beads between to create space and complete the pattern! Doesn’t it look so pretty on my office Christmas tree?

I had a few leftover metallic snowflake die cuts, so I thought I would turn them into shaped tags!

To create these shaped, folded tags, I folded over some scrap cardstock into a small card, then used the solid shadow die on it’s own, making sure to overlap the folded edge of the card base with the edge of the die when running it through my die cutting machine.

After I had created the tag base, I adhered the full metallic snowflake to the front, then used my hole punch to add a 1/8″ hole. I strengthened the hole with a die cut created using the Holes and Reinforcers dies, then threaded a loop of Iridescent White Cord through the hole to make for easy attachment to the gift!

Well, that’s all for my projects today! I am so excited to try this technique of creating “beads” with paper die cuts to create fun garlands for home decor. I can’t wait to share more with you! Thanks so much for stopping by, and happy holidays!
Filed Under: simon says stamp Tagged With: die cutting, diecember, flourish bird, flourish snowflake, garland, gift tag, holes and reinforcers, holiday, home decor, tag

More Pink and Green Gift Tags with New Simon Says Stamp!

December 20, 2025

This post was sponsored by Simon Says Stamp. Thanks, Simon!

Hi friends! I am back today with another set of tags, this time with a few more intricate details to help dress up your holiday gifts and make them extra special! Architecture is having a moment in the design world, with doors, windows, houses, and city streets all the rage, and even better if they’re all dressed up for the holidays! The gorgeous new Wrapped with Love stamp and die suite features a large, gorgeous door image with a variety of ways to dress it up for the holidays. The die suite gives you multiple options for customization, allowing you to die cut the solid door image or use the interior die images to allow the doors to actually swing open! I created two different versions of a decorated holiday door for today’s projects, one super involved and detailed and one a little less intricate, but no less lovely. Let’s get started with the details!

*I have gathered links to all of the products used at the bottom of the post for your convenience, using affiliate links at no extra cost to you. Thank you for shopping with my links! I truly appreciate your support for my work!*

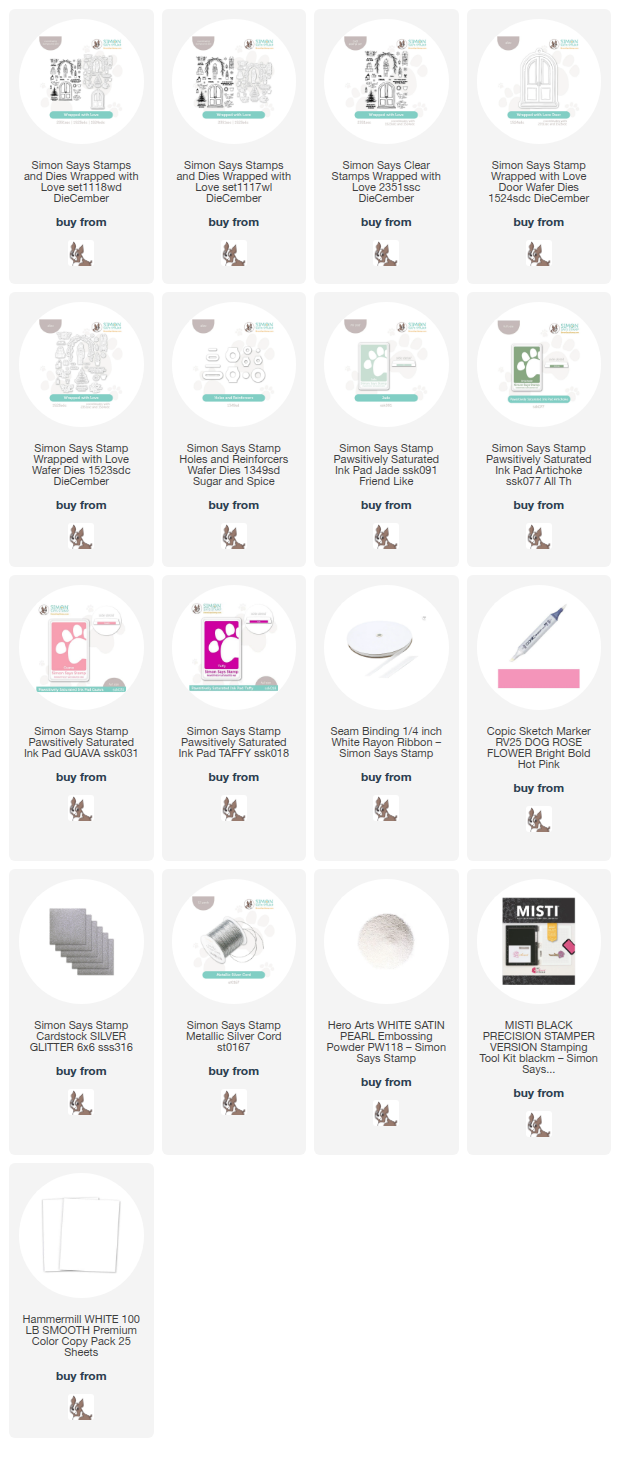
Both of my tags features the door from Wrapped with Love stamped in Pawsitively Saturated Ink in Guava, which is a lovely, vibrant pink. I die cut each of these doors with the solid die so that I could use these images as the base for my tags. You could die cut one solid image and one with the swinging doors to create an interactive tag, but I was going for semi-simplicity!

For this first tag, I went all out, stamping the pine boughs, bow-bedecked wreaths, and gifts using Pawsitively Saturated Inks in shades of Jade, Artichoke, Guava, Taffy. I used a vibrant pink alcohol marker to color in the bows on the gift tower and wreath, then used the same alcohol marker to add color to some plain white ribbon, customizing it to match my color palette perfectly. I added all of the decor to the door using foam adhesive, then added a sentiment that I stamped in Artichoke ink, then again with embossing ink and melted White Satin Pearl embossing powder over the top to create a pearlescent green sentiment that perfectly matches the color scheme!

For both of my tags, I die cut some silver glitter Holes & Reinforcers that I adhered at the top of the tags. It was through these die cuts that I looped the Simon Says Stamp Silver Cord to make for easy hanging on the gifts!

The second tag was much simpler- just some pale minty green pine boughs, a green poinsettia swag with quick alcohol marker coloring added for color, and a simple stamped greeting. This tag came together super quickly and still looks lovely, but won’t cause any guilt when the recipient tosses it with the rest of the wrappings!

Well, that’s all for my projects today! I hope you’re more ready for the big day than I am… I still have mountains of things left to do on my list! Thanks so much for stopping by today, and happy holidays!

Filed Under: simon says stamp Tagged With: christmas card, christmas tag, diecember, gift wrapping, holes and reinforcers, holiday, wrapped with love

Primary Sidebar

  • Facebook
  • Instagram
  • Pinterest
  • YouTube

Favorite Shops

Secondary Sidebar

Subscribe

Enter your email address to subscribe to this blog and receive notifications of new posts by email.

Instagram
Something is wrong.
Instagram token error.
Follow
Load More

Archives

Tags

3D embossing folder alcohol markers better press birthday birthday card blog hop card kit christmas christmas card christmas tag colored pencil copic copic coloring Daniel Smith die cutting embossing folder embroidery felt giveaway holiday holiday card hot foil ink blending karin brushmarker pro layered stencil masculine my monthly hero new release no line coloring no line watercolor OLO marker olo markers original illustration pawsitively saturated rainbow shaker card slimline stamping stamptember stencil thank you thinking of you valentine's day video watercolor

Popular Posts

Simon Says Stamp Sending Cheer Blog Hop- Day 2 + Freebie + Giveaway!
Altenew October 2026 Release Blog Hop + Giveaway!
Rustic Monochromatic Stars for Christmas with Rainbow Splash!
March 2020 Essentials By Ellen Blog Hop+Giveaway!
December 2018 My Monthly Hero Blog Hop + Giveaway!
The Ton Stamps Summer Release: Day 1
Waffleflower July Release Blog Hop!
Hero Arts Partners Blog Hop: Lawn Fawn!
Simon Says Stamp STAMPtember Tim Holtz Collaboration: Festive Holidays!
Simon Says Stamp August 2026 Card Kit of the Month: Made to Flourish!

Disclosure

Some affiliate links are used in my posts. This means that, should you click on one of my links and purchase something from that company, I will receive a small portion of the sale at no extra cost to you. I use the money earned from these sales to help maintain my blog. I so appreciate you visiting and, if you do choose to use one of my affiliate links, thank you so much for your support!
Copyright © 2026 ·Brunch Pro Theme · Genesis Framework by StudioPress · WordPress · Log in
Loading Comments...