• Skip to main content
  • Skip to primary sidebar
  • Skip to secondary sidebar

Sixth Street Sundries

Emily Midgett

  • Home
  • About Me
  • Contact
  • OLO Marker Color Swatch Chart
  • Shop

holiday

Holiday Fun with Felt-Day 3: Holly Berries!

December 10, 2025

This post was sponsored by Simon Says Stamp. Thanks, Simon!

Hi friends! I am back with another installment of my Holiday Fun With Felt series, this time finishing off my trio of pillow ornaments using several of the new stitching dies from the Simon Says Stamp DieCember release! (Check out the full DieCember release HERE!) As soon as I saw the stitching dies, I knew that I wanted to create a little coordinating ornament suite, because as much as I love kitschy, eclectic Christmas trees, I also love a beautifully curated themed tree! (We actually have one of each-a family tree with colorful lights and popsicle stick ornaments, and one sparkling, crystalline white tree with pearls and white velvet!) Let’s get started on the details for the last of my stitching die ornaments!

*I have gathered links to all of the products used at the bottom of the post for your convenience, using affiliate links at no extra cost to you. Thank you for shopping with my links! I truly appreciate your support for my work!*

To begin, I die cut one of the smaller Chunky A2 Scallop Rectangles twice from some pale blue felt. These scalloped rectangle dies are not technically intended for felt crafts, but I have found that basically all of the dies that we use for papercrafting can be used for felt, as well! It makes for such versatility and can be such a lovely creative palate cleanser from paper to work with felt, thread, and needle.

Before stitching the two scalloped rectangles together, I used felt glue and thread to add the new Stitching Holly & Berries die cuts to one of the rectangles, adding embellishments with seed beads and silver thread. I stitched up the scalloped rectangles with coordinating pale blue thread, adding some silky white ribbon to create the hanger for my ornament.

Here are all three of the ornaments together, and I just think they look so sweet as a group! I love creating coordinating, but not necessarily matching, decor. It’s super easy to create cohesive sets by keeping the color palette simple and consistent throughout each individual project. These can easily be customized to fit your own holiday color palette, as well!

Here they are on my super skinny craft room Christmas tree. Don’t they look so cute together?

Well, that’s all for my trio of felt ornaments! I have been felting up a storm, though, and have some more projects to share with you that combine tons of different companies. Those projects combine dies that are not created specifically for stitching, and I am so excited to share the versatility! Thanks so much for stopping by today, and have a marvelous day!

Filed Under: simon says stamp Tagged With: christmas, chunky a2 scallop rectangles, die cutting, diecember, felt, holiday, ornament, stitching, stitching holly and berries

Holiday Fun with Felt Week- Day 2: Snowman with Simon Says Stamp!

December 9, 2025

This post was sponsored by Simon Says Stamp. Thanks, Simon!

Hi friends! I am back again with another stitching project using some of the darling new stitching dies from Simon Says Stamp’s DieCember release (Check out the full DieCember release HERE!) during my Holiday Fun with Felt Week! I love the ease of these stitching dies; the holes are punched for you, and the die sets come with everything you need to create the sweetest little snowman friends. I added another scalloped pillow ornament to my collection with today’s project, so let’s get started with the details!

*I have gathered links to all of the products used at the bottom of the post for your convenience, using affiliate links at no extra cost to you. Thank you for shopping with my links! I truly appreciate your support for my work!*

As I shared in THIS post, I die cut the new Chunky A2 Scallop Rectangles twice from some pale blue felt. Before stitching them together, however, I die cut one of the new Stitching Snowman dies from white felt and stitched him onto one of the scalloped rectangles with some iridescent white embroidery thread from my stash. I also used felt glue to adhere the scarf, coal eyes and buttons, and carrot nose, placing them beneath a heavy glass paperweight to dry.

After the felt glue had dried completely, I added some snowy details behind my snowman with seed beads and iridescent white embroidery thread, but silver would be super pretty too! I think those little extra details make it super special!

Once I had finished all of the details, I used the same shade of pale blue thread to stitch the two scalloped rectangles together, filling the pillow with some polyfill before sealing it up and adding some white ribbon for a hanger. It’s just so darn cute hanging on a tree, don’t you think?

Well, that’s all for my felt project for today! How sweet would this be to give as a gift set or to add as a little decoration on a gift bag? Love the ease of these stitching dies! Thanks so much for stopping by today, and have a marvelous day!

Filed Under: simon says stamp Tagged With: christmas, chunky a2 scallop rectangles, diecember, felt, holiday, ornament, sewing, stitching, stitching snowman

More Inspiration using the Simon Says Stamp Warmth and Wonder Limited Edition Holiday Kit!

October 1, 2025

This post was sponsored by Simon Says Stamp. Thanks, Simon!

Hi friends! I am back today with some more inspiration using the new, limited edition Simon Says Stamp Warmth and Wonder Holiday Card Kit! (Click HERE to see the whole kit!) This limited edition kit was one of the last fun surprises for the month-long STAMPtember celebration, and it is available for preorder right now with the intent to ship later in October. The kit comes absolutely jam-packed full of goodies to make your holiday cardmaking a breeze: two stamp sets, a fancy standalone die, embossing folder + die set, stencil set, ink cubes, patterned papers and coordinating ephemera, cardstock, envelopes… everything you need to create tons of marvelous coordinating-but-not-matching holiday cards! Some people love to mass produce, but some others, like myself, get a bit bored with creating the same card over and over again. To keep things simple but still creatively interesting, each of the elements of this card kit work beautifully in concert or individually, making your creative process a breeze! I created no less than six different projects using this card kit and barely made a dent in the goodies; when you add in dies, inks, and cardstock from your own stash, it stretches even further! For yesterday’s projects, I focused mainly on the marvelous patterned papers included in the kit. (Click HERE to see that post.) Let’s get started on the details for my projects today, which focus on the amazing stamps and other non-consumable items in the kit.

*I have gathered links to all of the products used at the bottom of the post for your convenience, using affiliate links. Thank you for shopping with my links! I truly appreciate your support for my work!*

Using the colors of some of the patterned paper as my inspiration point, I selected Pawsitively Saturated Inks in shades of Brick, Apple, Artichoke, Pine, Eucalyptus, and Mocha, which create a rich, vibrant holiday color palette!

I used some plaid patterned paper and ephemera bits to create this fun little gift bag, die cutting the Gift Bag die from Midnight Green cardstock and adding the ephemera bits with foam adhesive.

I also created this coordinating festive, detailed card using both of the stamp sets included in the Warmth and Wonder kit, using the coordinating dies to cut out the stamped images. I love how the simplicity of the solid stamped images from the Warmth and Wonder stamp set work so beautifully with the layered foliage branch from the Sparkle Season stamp set!

I ran a panel of Dark Chocolate cardstock through my die cutting machine with the new Winter Season embossing folder, then swiped the Simon Says Stamp White Pigment Ink Pad directly over the raised areas to enhance the imagery quickly and simply. I then trimmed a strip of red foil cardstock to be 4.75″ long, notching the ends with my sharp scissors to create a flag, and arranged the stamped die cuts around the red foil flag strip, popping everything up with lots of foam adhesive. The final touch was to add a few sparkling Cherry Pawsitively Dazzling Gems for some holiday shine!

Finally, I created this simple and elegant tag using the layered sleigh image from the Warmth and Wonder stamp set along with some foliage and that gorgeous stamped bow. I stamped the sleigh using Apple and Mocha ink, the foliage using Pine ink, and the bow using Apple and Brick inks. I die cut two Large Standard Tags from Chocolate cardstock, adhering the scratched sides together so that the outward sides were both clean, then adhered the sleigh and foliage die cuts to the front. I added a red seam binding loop to the tag for a simple and elegant gift adornment!

Well, that’s all for my projects today! You can’t go wrong with this kit; the value is over $100, but Simon Says Stamp has priced these fabulous kits at only $69.99. As always with Simon Says Stamp kits: you can purchase individual items outside of the kits when it sells out or if you would like duplicates (like that fabulous ephemera and patterned paper!). Don’t wait to purchase this kit at an incredible value! Thanks so much for stopping by today, and have a marvelous day!

Filed Under: simon says stamp Tagged With: card kit, christmas, christmas card kit, christmas tag, embossing folder, gift bag, holiday, holiday card kit, holiday tag, limited edition, patterned paper, sparkle season, warmth and wonder, winter season

Pinkfresh Studio Create & Connect: Holiday!

September 20, 2025

Hi friends! I am thrilled to be part of another Pinkfresh Studio event, this time with my absolute favorite crafting season: Christmas! (Click HERE to see all of the details!) I’ve said it before, and I’ll say it again: if I could work with Christmas product the whole year, I would willingly do so! I can never get enough snowflakes, poinsettias, sparkles, bows, texture, bold color palettes, icy, light color palettes… the holiday possibilities and styles are endless, and I love them all!

Not only am I thrilled to be working with holiday products, but I am also incredibly honored to be teaching alongside these illustrious creative minds. The kit is jam-packed with the stunning and elegant products that embody Pinkfresh Studio’s signature style, many of which are exclusive to the class kit, and the classes are going to send your holiday spirits soaring and inspire you to get your fingers inky and sparkling!!

You can see a sneak peek of one of the projects that you can create in my class in the photo below. I pulled out all of my favorite techniques and bold colors to create some projects full of shimmer, texture, and holiday imagery.

As always with the kits for the Pinkfresh Studio Create and Connect classes, the value of the kit far exceeds the price tag, and when you take into account the exclusive classes taught by some of your favorite crafty instructors… the value just skyrockets, in my opinion!

Click HERE to get your kit and register for your spot in the Holiday Create & Connect Class on October 11-12, 2025! I believe the kit is more than 75% sold, so don’t hesitate if you want to join us for a weekend of inky, sparkly fun!

Filed Under: pinkfresh studio Tagged With: christmas, create and connect, die cutting, holiday, holiday card, ink blending, virtual cardmaking event

Simon Says Stamp Happy Camper Release Blog Hop-Day 2!

August 2, 2025

This post was sponsored by Simon Says Stamp. Thanks, Simon!

Hi friends! I am hopping along with Simon Says Stamp to share some inspiration using the new Happy Camper release. You should have arrived here from Lisa Addesa, and your next stop is Heather Ruwe. You can also start at the beginning at the Simon Says Stamp Blog! I was so inspired by my Christmas in July series from last month that I couldn’t resist adding some festive flair to my card for today’s hop, pulling in an ombré holiday color palette to work perfectly with the new Dual Diamonds Cover Plate. Let’s get started on the details of my project!

*I have gathered links to all of the products used at the bottom of the post for your convenience, using affiliate links. Thank you for shopping with my links! I truly appreciate your support for my work!*

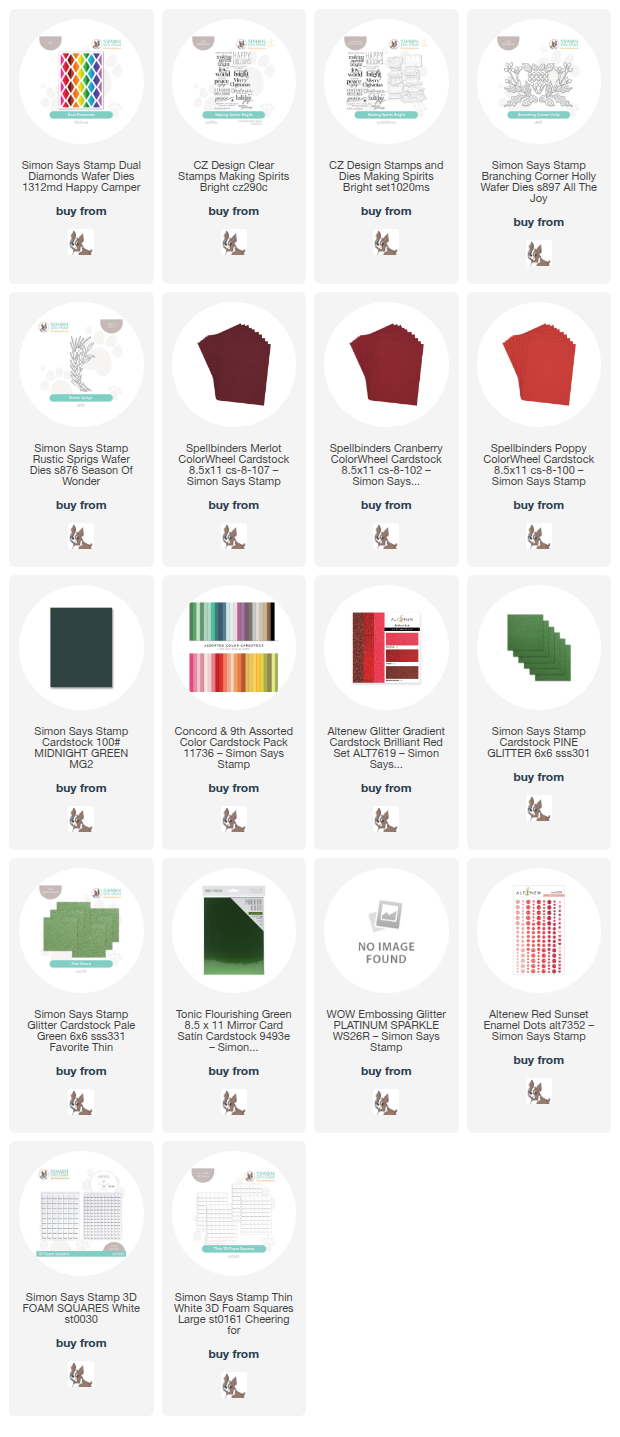
To begin, I selected sixteen (yes, sixteen!!) different shades of red and green cardstock to create my ombré color palette, bridging the gap between the complementary colors with a deep maroon glitter cardstock and equally intense Midnight Green cardstock, which I think work so nicely next to one another! I pulled out my scrap envelopes, which I have organized by color family, and selected strips about 1/2″ wide, working from a light coral-red to vibrant peridot green. I first die cut the black diamond outlines from the Dual Diamonds Cover Plate and adhered it to my card front, then die cut the individual strips of colored cardstock with the cover plate, adhering each row to the card base as I went to make sure that none of the pieces were lost. This definitely was a bit fiddly and required me to pay strict attention to my project, but I think it was totally worth it in the end!

I selected a holiday color palette so that I had an excuse to use the marvelous new Making Spirits Bright sentiment set. These sentiments are absolute perfection; the font pairings and generous size of the sentiments, as well as the delicate sentiment strips, make this set so versatile and useful for holiday cards! I heat embossed the two greetings on some deep wine cardstock using Platinum Sparkle embossing powder, then used the coordinating die cut and my trimmer to cut the sentiments out. I popped them up on the ombré card front with some foam adhesive, staggering them slightly.

To accent my sentiment focal point, I die cut the older Branching Corner Holly and Rustic Sprigs dies from some green cardstock, the same green that I used on two of the ombré strips. I adhered them to the card front with liquid and foam adhesive, creating a holiday foliage “bouquet” around my sentiment. I accented the greenery with some red enamel dots for berries, adding another element of texture and dimension to the card.

Well, that’s all for my project today! Now for some fun giveaway information:

Simon Says Stamp is giving away a $25 coupon to every stop on the hop from each blog’s comment section. Winners will be selected and posted on the Simon Says Stamp blog on Wednesday the 6th of August. Winners can email us to claim his/her prize! The more comments you leave along the hop, the more chances you have to win!

Simon Says Stamp is also offering a fabulous freebie with each purchase from the new Happy Camper release! You don’t need to do anything special; the lovely (and not-yet-released) Sunflower Dance stamp set will be automatically added to your order with any purchase from the Happy Camper release. Click HERE to see the entire release!

Don’t forget to check out Day 1 of this two-day blog hop for even more inspiration and prizes! Click HERE to start at the beginning on the Simon Says Stamp Blog.

Your next stop on the hop is Heather Ruwe. Thanks so much for stopping by today, and happy hopping!

Filed Under: simon says stamp Tagged With: branching corner holly, christmas, christmas card, die cutting, dual diamonds, holiday, holiday card, rustic sprigs

  • « Go to Previous Page
  • Page 1
  • Page 2
  • Page 3
  • Page 4
  • Interim pages omitted …
  • Page 16
  • Go to Next Page »

Primary Sidebar

  • Facebook
  • Instagram
  • Pinterest
  • YouTube

Favorite Shops

Secondary Sidebar

Subscribe

Enter your email address to subscribe to this blog and receive notifications of new posts by email.

Instagram
Something is wrong.
Instagram token error.
Follow
Load More

Archives

Tags

3D embossing folder alcohol markers better press birthday birthday card blog hop card kit christmas christmas card christmas tag colored pencil copic copic coloring Daniel Smith die cutting embossing folder embroidery felt giveaway holiday holiday card hot foil ink blending karin brushmarker pro layered stencil masculine my monthly hero new release no line coloring no line watercolor OLO marker olo markers original illustration pawsitively saturated rainbow shaker card slimline stamping stamptember stencil thank you thinking of you valentine's day video watercolor

Popular Posts

Simon Says Stamp Joy For You Blog Hop- Day 1!
Watercolor Poinsettia Card and Tag with Tim Holtz and Simon Says Stamp!
Cottagecore Christmas Framed Artwork with New Simon Says Stamp!
Fluted Frames and Tags with New Simon Says Stamp!
Simon Says Stamp Glory to the Newborn King Holiday Kit-Part II!
Warmth and Love at Christmastime with New Simon Says Stamp!
Cottagecore Canvas with New Simon Says Stamp Shine On Release!
Honey Bee Stamps 4th Anniversary Celebration!
Shaped Holiday Shaker Card with New Simon Says Stamp Jolly Season Card Kit of the Month!
Simon Says Stamp Card Kit November 2026: Jolly Season!

Disclosure

Some affiliate links are used in my posts. This means that, should you click on one of my links and purchase something from that company, I will receive a small portion of the sale at no extra cost to you. I use the money earned from these sales to help maintain my blog. I so appreciate you visiting and, if you do choose to use one of my affiliate links, thank you so much for your support!
Copyright © 2026 ·Brunch Pro Theme · Genesis Framework by StudioPress · WordPress · Log in
Loading Comments...