• Skip to main content
  • Skip to primary sidebar
  • Skip to secondary sidebar

Sixth Street Sundries

Emily Midgett

  • Home
  • About Me
  • Contact
  • OLO Marker Color Swatch Chart
  • Shop

ink blending

Simon Says Stamp and Concord & 9th Stamptember Collaboration!

September 9, 2017

Good evening! I have something super exciting to share with you at this late hour…. I’m sure everyone knows about the fabulousness that is Stamptember. Basically, Simon Says Stamp has collaborated with several different companies to create several gorgeous stamp sets. They’re limited edition, and they’re fantastic. Today, I have the pleasure of helping to debut the Stamptember collaboration between Simon Says Stamp and one of my absolute favorite companies: Concord & 9th: Oh Hello!

Isn’t this set just so versatile!?? I can’t wait to play with it more. There are so many awesome possibilities. My first thought when I saw it was bokeh. That round stamp was just screaming for a bokeh technique. I started by cutting a white A2 panel, then using Tim Holtz blending sponges and Frosty Pink, Coral Berry, and Ruby Red inks from Altenew blended a pretty background.

After blending my background panel, I used the circular stamp in Oh Hello to stamp random circles using the same inks that I had used to blend the background, stamping off once with the darker of the two colors. I then stamped a few more circles using white pigment ink to further create the bokeh look.

The collaboration set has some beautiful sentiments included in with the brushstroke images. I stamped the “happy everything” onto some pale pink card stock using gold glitter embossing powder, then fussy cut it out. I also stamped and embossed the “wishing you” and “friend” using the same embossing powder onto some thin strips of the same pink card stock. I trimmed the bokeh panel down and matted it on both a pink foil panel and a gold glitter panel. I popped up the sentiment cuts with dimensional adhesive, and finally added a few Blossom sequins from Lucy Abrams.

Well, that’s it! I’m so grateful to Heidi from Simon Says Stamp for allowing me to be part of this awesome collaboration. Concord and 9th is definitely one of my most favorite companies, so that makes this even more exciting and special to me. 🙂  Don’t forget, if you love Oh Hello, I’d advise getting it ASAP, because these Stamptember sets are limited edition. If you’re on the fence, better to just jump off and treat yourself! As a wise friend recently told me, you only regret the things in life that you didn’t do.

Have a marvelous evening, friends!

Filed Under: altenew, Concord and 9th, simon says stamp Tagged With: bokeh, cardmaking, heat embossing, ink blending, papercrafting, stamping

Christmas In July!

July 25, 2017

Good morning! Christmas in July has been eeeeeeverywhere lately. I really need to start working on holiday cards, but we’ve been so busy that it hasn’t even crossed my mind until I saw the Christmas in July sale from Ellen Hutson and thought maybe I should take a look at the (many) holiday stamp sets I purchased during the after Christmas sales last year haha! I had forgotten about this absolutely gorgeous ornament set from Birch Press Designs, and I knew that I needed to make a card with it to celebrate Christmas in July!

I started by die cutting the pretty Classic Ornament set from plain white card stock, then heat embossed the pretty decorative ornament stamps from the coordinating Beaded Ornament stamp set using silver embossing powder. I then used my foam blending tools to blend Caribbean Sky, Puffy Heart, and Lavender Fields ink on the edges of the ornaments. (For some reason, my holiday cards before October always are in pastel shades. My brain can’t seem to leave summer behind until then!)

I then cut the beautiful Winter Floral cover plate die from Papertrey Ink using some hunter green card stock. I trimmed off the solid edge and smaller floral cluster, leaving just the larger floral cluster intact. I arranged the ornaments beneath the floral cluster to create the illusion that they were hanging on the branches of a Christmas tree, then blended the same ink colors (Caribbean Sky, Puffy Heart, and Lavender Fields) lightly on the corner of the card base. I was trying to give the impression of lights in the Christmas tree bouncing off of the shimmery glass ornaments… I hope that came across!

For the greeting, I used the lovely Believe die from Ellen Hutson’s holiday release last year. I die cut it first from some pink glitter paper, then twice more from regular white card stock and adhered them all together to create a dimensional die cut. The final step was to add some sequins here and there and under the foliage of the Christmas tree branches to add some sparkle.

I hope you enjoyed this project! I have far too many holiday stamp sets that have been untouched… I think I should try to set a goal of one holiday card a week for awhile. What do you think? Have you started on your holiday cards yet?

Hope you have a marvelous day, friends!

Filed Under: altenew, birch press design, Ellen Hutson, Papertrey Ink, simon says stamp Tagged With: christmas card, christmas in july, holiday card, ink blending

Miss you.

July 17, 2017

Good morning! Happy Monday! I hope the weather was as beautiful for you as it was here… low humidity, bearable temperatures… gorgeous. I think things are going to go back to more normal July temps this week though. 🙁

I told you last week that I’m fairly obsessed with the new Southern Summer Florals 1 and 2 from the new Wplus 9 release, so much so that I sat down and cranked out two cards in about 1.5 hours (totally doable since hubs had taken the kiddos over to his grandpa’s to ride the tractor! Score!) I loved the first card, which you can see here, created with my limited colors of Oxide inks on colored card stock. Can’t wait to experiment more when the new Oxides come. But this card uses regular dye inks and I love it just as much.

I started by die cutting the Southern Summer Florals 1 (with coordinating dies) and Southern Summer Florals 2 (also with coordinating dies) from plain white card stock. I stamped several of the blooms using different ink combinations of Altenew’s Red Cosmos ink quartet, as well as the Summer Afternoon quartet.

After stamping all of my blooms, I die cut a circle from some A2 sized masking paper using my Double Stitched Circle dies from The Ton. I placed my masking paper on my white card front, then blended Frosty Pink, Coral Berry, and Ruby Red ink from Altenew in an ombre over the masking paper. (A nice little surprise when I pulled up the masking paper: the stitched outer circle was cut so cleanly that the ink blending came through on it, creating a blended stitched border! Not what I was intended, but still a fun development!) I arranged my blooms in a pretty swag, then adhered them using both liquid adhesive and dimensional adhesive.

For the greeting, I die cut Simon Says Stamp’s “miss you” from some plain black card stock, (isn’t that font just stunning?) adhered it, and covered it with (a new to me product) Nuvo Crystal Glaze. I also added some to the black center of the large focal flower to add extra dimension. The final step was to add a few dots of Oyster Grey Nuvo Drops here and there around my floral swag.

Well, that’s all for me today! I am loving these new stamps from Wplus9, and I hope you aren’t sick of seeing them, because I might have another card up my sleeve! 😉 Have a fantastic Monday, friends!
 

Filed Under: altenew, simon says stamp, Wplus9 Tagged With: altenew ink, die cutting, ink blending, miss you, stamping

Where Creativity Meets C9: Layers!

June 9, 2017

If you’re looking for my Blog Hop post for The Ton’s Summer 2017 release, please click here. 

Good morning again! Today also marks the start of a new challenge over on the Where Creativity Meets C9 blog! This month, the challenge is:

Create something layered using your Concord and 9th products! For my project, I used the Pretty Petals stamps and dies to create a layered, dimensional project. I started by die cutting the main flower die from some plain white card stock, then using my blending tools to blend Worn Lipstick and Spiced Marmalade Distress Oxide inks on the die cut, adding some shimmer spray over the top to create the “velvety” effect achieved with the Oxide inks. I stamped the detail layer using Versamark ink, then sprinkled holographic embossing powder over the top and heated it with my heat gun. The pink center really pops even more with the added sparkly heat embossing! I also die cut the center of the Pretty Petals die from some sparkly gold glitter card stock and adhered it to the center with some dimensional adhesive.

For the greeting, I used the pretty new All About You dies to cut “thank you” from some aqua card stock. I stamped some of the flower centers from the Pretty Petals stamp set onto the white card base using Delicata Gold ink, then adhered the flower with dimensional adhesive. I finally added yet another layer by adhering the sentiment die cuts with more dimensional adhesive.

It’s a little outside of my normal color scheme and style, but I like the sunny, happy colors! Definitely something different. Now, it’s your turn! Create a project with at least two layers using your Concord and 9th products, then be sure to link it up to our blog to be entered to win the $25 gift certificate generously donated by Concord and 9th!

Filed Under: Concord and 9th Tagged With: concord and 9th, distress ink, distress oxide, ink blending

A Blog Named Hero and Chibitronics!

June 5, 2017

 If you’re looking for The Ton’s Summer Release, Day 1 post, please click here. 

 Good morning, again! I’m back with my second post for today! Today marks the beginning of a new challenge for A Blog Named Hero. This month, we are teaming up with Chibitronics, those wonderful purveyors of lights for your crafty projects! Our theme for June is “interactive.” For my card today, I chose to use these fabulous little lights to create an interactive night sky scene with some great Hero Arts products. Let’s get started on the details of how I created this card!

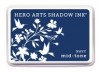
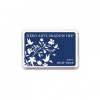
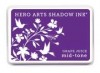
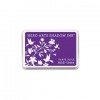
I started by creating my night sky. I used an A2 sized panel of white card stock, then used my blending sponges to blend Hero Arts’s True Navy, Grape Juice, and Raspberry Jam down the front to create a beautiful summer night sky. Next, I heat embossed my sentiment (from Hero Arts’s Dreams Are Made) along with the pretty star clusters using silver embossing powder. Next, I added some more stars from the same stamp set, but for a more subtle look, I stamped them first in silver Delicata ink, then brushed some Perfect Pearls over the top to add a bit more shimmer. I punched out three holes, then backed them with vellum to create a pretty glow. The last step was to add a die cut bridge using some pretty glossy black card stock. After the card front was finished, I punched some holes in the front so that I could begin my light construction on the card base using the Chibitronics starter kit.

I’m not going to lie, I was a tad intimidated by these fantastic little lights. My husband is an electrician, and when he talks about specifics from his job, my eyes start to kinda glaze over in boredom, because it’s so far outside of my realm of expertise that I have utterly NO clue what he’s talking about. (Love you, mean it, buddy!) I asked him if he would mind being on standby in case my complete right-brain-ness took over and I was unable to complete the circuits for my project. However!!! I am pleased to report that after watching a few videos on YouTube (namely this one from fellow teammate Jessica and this one from the ever helpful Jennifer McGuire), I was able to create my project without his help! Using my holes as a guide, I created a template on my card base, complete with a map of where to put my circuits and which direction to place the positive and negative stickers, then added the copper tape and battery (I found the battery “house” tip from Jennifer McGuire’s video extremely helpful!). Hooray!!!

I will say, that in Jennifer McGuire’s video, she recommends using 3 layers of foam tape as the “walls” for her battery house so that you have to push down on the battery to complete the circuit, thus creating the “interactive” element, but my tape must be slightly thinner than hers, as my lights stay on by themselves if the stars are aligned right and I don’t breathe directly on it haha. Next time I will use four layers of foam tape. 🙂 Hindsight is 20/20.

Here is the finished product with the lights off. Amazing how bright those tiny little lights are!! Love it.

Now, it’s your turn! Create an interactive card using your Hero Arts products, then be sure to link it up to our blog post to be entered to win a prize from our fabulous sponsor, Chibitronics!

InLinkz.com


Good luck!! Thanks for stopping by!

Filed Under: A Blog Named Hero, Hero Arts Tagged With: chibitronics, Hero Arts, ink blending, interactive

  • « Go to Previous Page
  • Page 1
  • Interim pages omitted …
  • Page 83
  • Page 84
  • Page 85

Primary Sidebar

  • Facebook
  • Instagram
  • Pinterest
  • YouTube

Favorite Shops

Secondary Sidebar

Subscribe

Enter your email address to subscribe to this blog and receive notifications of new posts by email.

Instagram
Something is wrong.
Instagram token error.
Follow
Load More

Archives

Tags

3D embossing folder alcohol markers better press birthday birthday card blog hop card kit christmas christmas card christmas tag colored pencil copic copic coloring Daniel Smith die cutting embossing folder embroidery felt giveaway holiday holiday card hot foil ink blending karin brushmarker pro layered stencil masculine my monthly hero new release no line coloring no line watercolor OLO marker olo markers original illustration pawsitively saturated rainbow shaker card slimline stamping stamptember stencil thank you thinking of you valentine's day video watercolor

Popular Posts

Simon Says Stamp Sending Cheer Blog Hop- Day 2 + Freebie + Giveaway!
Altenew October 2026 Release Blog Hop + Giveaway!
Altenew Build A Flower Sweet Violet+Giveaway!
Floral Follies on Canvas with New Simon Says Stamp STAMPtember!
Simon Says Stamp STAMPtember Tim Holtz Collaboration: Festive Holidays!
Rustic Monochromatic Stars for Christmas with Rainbow Splash!
Altenew March 2020 Release Blog Hop+Giveaway!
Honey Bee Stamps Bee Bold Release Blog Hop!
Waffleflower July Release Blog Hop!
Altenew Paint A Flower: Carnation Blog Hop+Giveaway!

Disclosure

Some affiliate links are used in my posts. This means that, should you click on one of my links and purchase something from that company, I will receive a small portion of the sale at no extra cost to you. I use the money earned from these sales to help maintain my blog. I so appreciate you visiting and, if you do choose to use one of my affiliate links, thank you so much for your support!
Copyright © 2026 ·Brunch Pro Theme · Genesis Framework by StudioPress · WordPress · Log in
Loading Comments...