• Skip to main content
  • Skip to primary sidebar
  • Skip to secondary sidebar

Sixth Street Sundries

Emily Midgett

  • Home
  • About Me
  • Contact
  • OLO Marker Color Swatch Chart
  • Shop

jewel heart

Fun with Felt: Elastic Bookmark with Simon Says Stamp!

February 5, 2026


This post was sponsored by Simon Says Stamp. Thanks, Simon! *I have gathered links to all of the products used at the bottom of the post for your convenience, using affiliate links at no extra cost to you. Thank you for shopping with my links! I truly appreciate your support for my work!*

Hi friends! I have another Fun With Felt project for you today, one upon which I’ve been ruminating for a few weeks! My daughter loves to read. As a shy child, I always found escaping into a book to be such a comfort, and I am so glad that she has developed a love of reading, as well! I want to nurture and encourage that as much as possible, so I decided to make her a pretty bookmark that she can use to keep her library books neat. I saw a neat bookmark using etched leather and a piece of elastic on Etsy, and I thought that I would try to create my own verson using felt and dies. Let’s get started with the details!

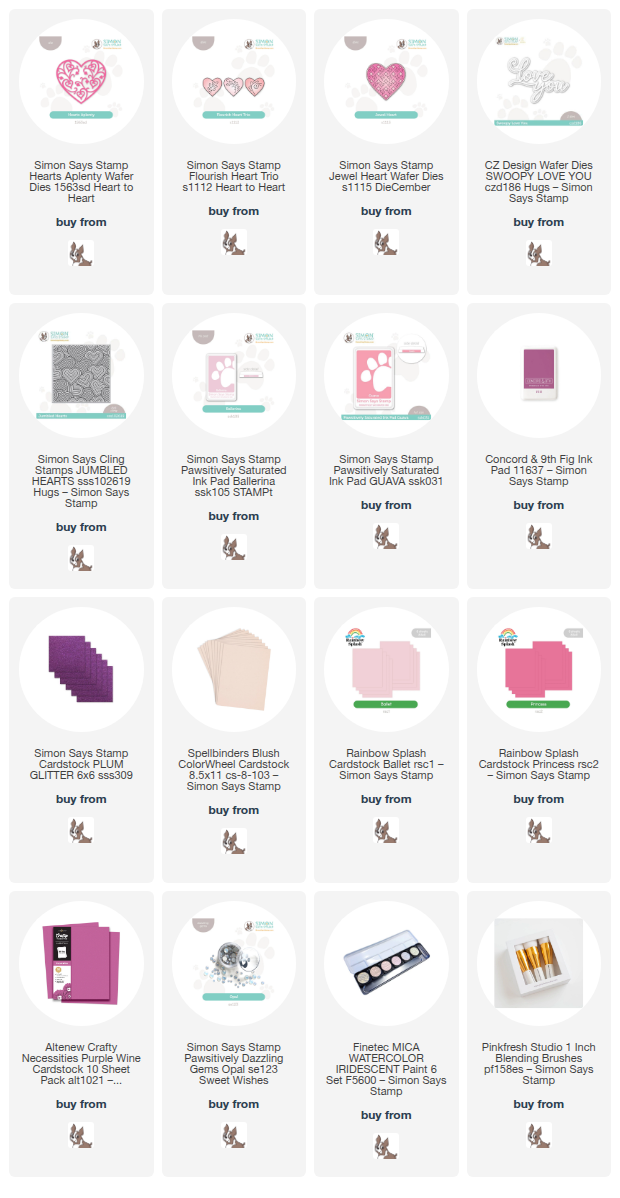
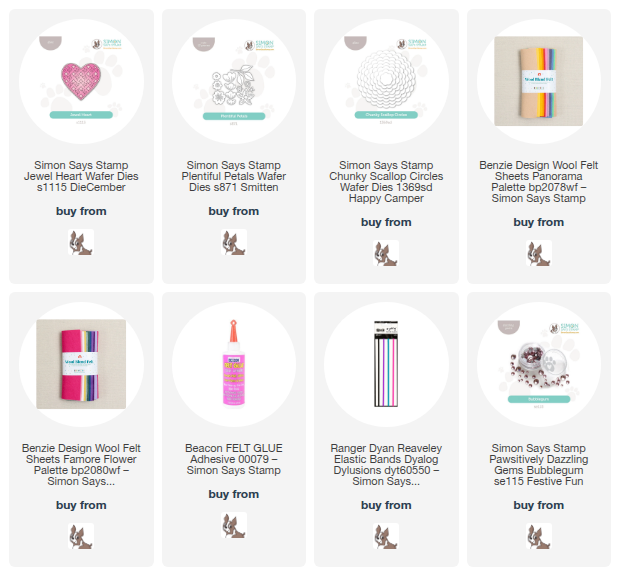
For today’s project, I began by die cutting one of the Chunky Scallop Circle dies from the Heart to Heart Release from Simon Says Stamp (click HERE to check out the entire release!) three separate times from pale pink felt. I used felt glue to adhere two of the felt pieces together and left them beneath a heavy glass paperweight, then while they were drying began to cut my other pieces. I die cut the Plentiful Petals floral dies from pink and green felt, then die cut the detail layer of the new Jewel Heart die set from some metallic pink felt as well.

On the remaining pale pink scalloped circle die cut, I used more felt glue to adhere the metallic heart in the center of the circle, then added a few bubblegum pink blooms, tucking vibrant green foliage amongst the flowers. I love the contrast of the muted blush scalloped circle and metallic heart with those vibrant flowers and greenery!

After I had finished adhering all of the die cuts to the top layer, I used the felt glue to adhere the top scalloped circle to the bottom layers, sandwiching a long strip of elastic from my stash between the layers with a bit more glue. I used that glass paperweight to hold everything together securely while drying, then used some coordinating pale blush thread to add some extra security to the elastic, hopefully keeping it firmly in place while holding the place in a book.

Well, that’s all for my project today! It’s such fun to find new ways to use my dies for items that can be super useful and pretty at the same time! If you haven’t tried felt, I highly encourage you to choose one of the fun new felt palettes from Benzie Designs (click HERE to see them) that are new at Simon Says Stamp. They’re super affordable and such fun to play with. Thanks so much for stopping by today, and have a marvelous day!
Filed Under: simon says stamp Tagged With: bookmark, chunky scallop circles, die cutting, embroidery, felt, fun with felt, jewel heart, plentiful petals

Textured Hearts with New Simon Says Stamp!

January 29, 2026


This post was sponsored by Simon Says Stamp. Thanks, Simon! *I have gathered links to all of the products used at the bottom of the post for your convenience, using affiliate links at no extra cost to you. Thank you for shopping with my links! I truly appreciate your support for my work!*

Hi friends! I have some new inspiration for you today featuring some beautiful new heart dies from the Heart to Heart Release  from Simon Says Stamp (click HERE to check out the entire release!). The release featured lots of beautiful stamps and dies to use to create your valentines, and I just couldn’t resist pairing some of them to create these pretty valentines in a lovely blush/pink/magenta color palette, with just a touch of rich plummy pink thrown in! I had enough die cuts to create two different cards, which makes it even better… so let’s get started with the details!

I loved the color palette that I used for THIS card, so I pulled several different scraps of coordinating colored cardstock to use for my standalone die cuts. The details on the new heart dies from the Heart to Heart release are so exquisite and definitely deserve to be center stage!! I used the scraps of cardstock to die cut Hearts Aplenty, Flourish Heart Trio, and Jewel Heart as many times as I could from each color, so that I would have plenty of die cuts to use to create my cards.

Before arranging the die cuts on my card front, I used blending brushes to very lightly blend Concord and 9th Fig ink and Pawsitively Saturated Ink in shades of Ballerina + Guava on my white A2 card front. I kept the blending very subtle to keep the background from overpowering the heart die cuts, just a suggestion of coordinating color. I also splattered the blended background with some iridescent glitter watercolors for added shimmer!

Once my background had dried, I used a mixture of liquid adhesive and foam adhesive squares to add the hearts in a random pattern, making sure to get a good mixture of sizes and colors throughout the card front. For any hearts hanging over the edge, I simply used some sharp scissors to snip off any excesses. I added a glitter die cut Swoopy Love You to the solid pink heart, selecting a lighter shade of pink for that heart and then creating a contrasting deep purple glitter die cut sentiment. Making this sentiment the darkest color on the card front ensures that the greeting pops off of the card. Finally, I added a few Opal Pawsitively Dazzling Gems for additional sparkle!

My second card primarily uses the “leftovers” from the first project. Because the Flourish Heart Trio is a single die that cuts three individual shapes, I had several left and decided to use them all on their own! I created a couple of strips of glitter cardstock, then decided to use those to create a barrier for a patterned strip on the exterior edge. I stamped the Jumbled Hearts background with Ballerina Pawsitively Saturated Ink just on the edge of my A2 card front. I adhered the glitter cardstock strips over the seam between the white cardstock side and the patterned side with liquid adhesive, then popped up the hearts in a neat line on top of the strips using foam adhesive squares. No sentiment required for this clean and simple notecard!!

Well, that’s all for my project today! Do you make lots of valentines for those special people in your life? I am going to try to have a handmade valentine for each of my kiddos and my husband this year! Thanks so much for stopping by today, and have a marvelous day!

Filed Under: simon says stamp Tagged With: die cutting, flourish heart trio, hearts aplenty, ink blending, jewel heart, jumbled hearts, love you, pawsitively saturated ink, swoopy love you, valentine, valentine's day

Primary Sidebar

  • Facebook
  • Instagram
  • Pinterest
  • YouTube

Favorite Shops

Secondary Sidebar

Subscribe

Enter your email address to subscribe to this blog and receive notifications of new posts by email.

Instagram
Something is wrong.
Instagram token error.
Follow
Load More

Archives

Tags

3D embossing folder alcohol markers better press birthday birthday card blog hop card kit christmas christmas card christmas tag colored pencil copic copic coloring Daniel Smith die cutting embossing folder embroidery felt giveaway holiday holiday card hot foil ink blending karin brushmarker pro layered stencil masculine my monthly hero new release no line coloring no line watercolor OLO marker olo markers original illustration pawsitively saturated rainbow shaker card slimline stamping stamptember stencil thank you thinking of you valentine's day video watercolor

Popular Posts

Simon Says Stamp Sending Cheer Blog Hop- Day 2 + Freebie + Giveaway!
Altenew October 2026 Release Blog Hop + Giveaway!
Rustic Monochromatic Stars for Christmas with Rainbow Splash!
December 2018 My Monthly Hero Blog Hop + Giveaway!
March 2020 Essentials By Ellen Blog Hop+Giveaway!
The Ton Stamps Summer Release: Day 1
Hero Arts Partners Blog Hop: Lawn Fawn!
Waffleflower July Release Blog Hop!
Simon Says Stamp STAMPtember Tim Holtz Collaboration: Festive Holidays!
The Ton Anniversary Release: Day 1!

Disclosure

Some affiliate links are used in my posts. This means that, should you click on one of my links and purchase something from that company, I will receive a small portion of the sale at no extra cost to you. I use the money earned from these sales to help maintain my blog. I so appreciate you visiting and, if you do choose to use one of my affiliate links, thank you so much for your support!
Copyright © 2026 ·Brunch Pro Theme · Genesis Framework by StudioPress · WordPress · Log in
Loading Comments...