• Skip to main content
  • Skip to primary sidebar
  • Skip to secondary sidebar

Sixth Street Sundries

Emily Midgett

  • Home
  • About Me
  • Contact
  • OLO Marker Color Swatch Chart
  • Shop

joyful greetings

Altenew December 2023 Inks & Marvelous Monthly Series Blog Hop + Giveaway ($300 in Total Prizes!)

December 13, 2023

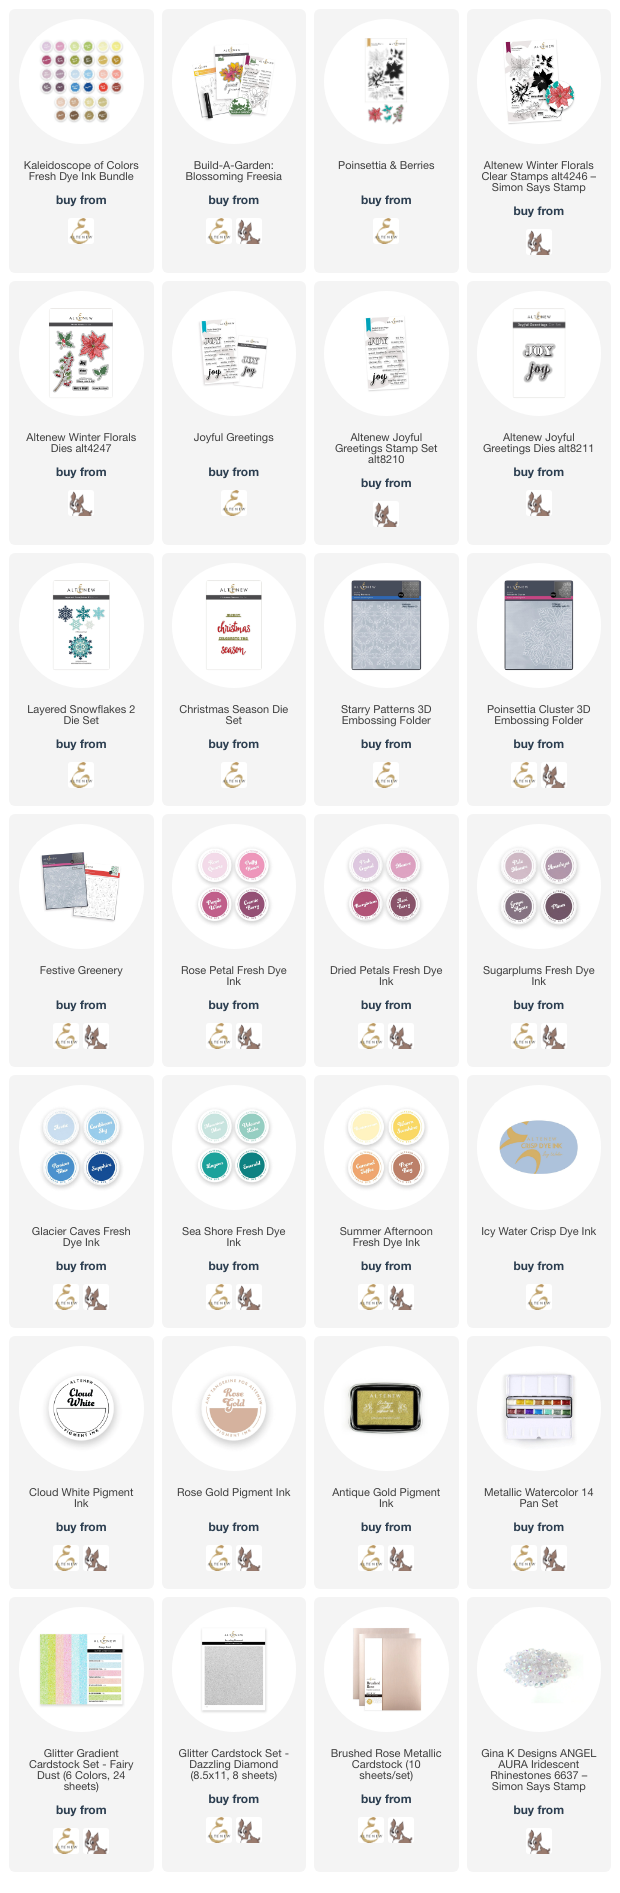
Hi friends! Today, Altenew is celebrating their December “super release” with a blog hop! You should have arrived here from Caly, and your next stop is Agnieszka. You can also start back at the beginning at the Altenew Blog. I have four projects to share with you today using the beautiful new Build-A-Garden: Blossoming Freesia and the stunning new Kaleidescope of Colors Fresh Dye Inks! Let’s get started with the details.

I began my first project by stamping the outline image of the beautiful new Build-A-Garden: Blossoming Freesia twice on my A2 card panel using very pale pink ink from the Rose Petal Fresh Dye Ink bundle. I used the layering stencils included with the new Build-A-Garden: Blossoming Freesia with the Rose Petal Fresh Dye Ink bundle, Buttercream, and Lagoon inks to create these lovely, vibrant, cool pink blooms on my card front.

After I had blended all of the images with the layering stencils, I used the included mask stencil to cover my images so that I could do some blending for the background. I placed the mask over the top of the image and blended Icy Water ink in the background, adding some touches of pale pink around the edges of the card front to create an ethereal effect. I also splattered some shimmering pink watercolor from the Metallic watercolor set to add even more ethereal magic to the card front!

For the greeting, I heat embossed a sentiment strip from the Build-A-Garden: Blossoming Freesia set in silver on a strip of white cardstock. I also die cut the included “friend” die from some coordinating blue glitter paper from the Fairy Dust Glitter Cardstock pack, backing it with a die cut vellum bubble layer. I popped up the greeting pieces using foam adhesive, then added a few iridescent gems for sparkle!

My next trio of cards is an homage to some of the absolutely stunning new additions to the Fresh Dye Ink line. The new Kaleidescope of Colors Fresh Dye Inks feature some older color families in the new Fresh Dye Ink formulation, and there are also four new color families to add to your ink collection! I love ink blending with embossing folders; I think it is such a simple way to make a huge impact with your card front, so I pulled out lots of different holiday products and some beautiful inks to create a trio of simple Christmas cards.

My first project is an homage to the new Glacier Caves Fresh Dye Ink bundle. I started this icy project by ink blending the beautiful blues in this Fresh Dye Ink family around the edges of a white A2 cardstock panel, then running the blended panel through my die cut machine using the Starry Patterns embossing folder. To enhance the embossed pattern on the card front, I swiped the Cloud White pigment ink over the raised areas, allowing the snowflakes to stand out a bit from the colorful blue background, also adding some iridescent white shimmer watercolor splatters. I stamped the greeting from the Joyful Greetings stamps and die set using the darkest blue from the Glacier Caves Fresh Dye Ink bundle, heat embossing over the top of it with some pearlescent white embossing powder. I added a few glittering snowflakes cut using the Layered Snowflakes 2 die set from Dazzling Diamond glitter paper. A few sparkling white gems finished it off!

My second card features the brand new Dried Petals Fresh Dye Ink bundle, one of the four new color families in this release. I blended a beautiful pink ombré down the front of my A2 card front using the Dried Petals Fresh Dye Ink bundle and ran the panel through my die cutting machine using the Poinsettia Cluster embossing folder. These large blooms make such a statement on your card front with so little extra work required! I ran my Rose Gold pigment ink pad over the top of the raised areas, highlighting them and adding some luxurious metallic accents, then splattered some rose gold metallic watercolor over the entire panel. I die cut a greeting from the Christmas Season die set using Rose Gold metallic cardstock, which I adhered to a strip of vellum. I folded one edge of the vellum behind the card panel and added some super strong double sided adhesive tape, then added tiny dots of liquid adhesive behind the solid die cuts. Some shiny pink gems finished it off!

Finally, I used the Sugarplums Fresh Dye Ink bundle to create this unique diagonal blended background. Blending the colors on the diagonal reminds me of a purple Tiger’s Eye gemstone! After blending the Sugarplums inks on my A2 card panel, I ran the piece through my die cutting machine using the Festive Greenery embossing folder. I swiped the raised areas with my Antique Gold pigment ink pad and splattered the entire piece with more metallic gold watercolors. I heat embossed some images from Winter Florals onto a piece of heavyweight vellum using gold embossing powder, then snipped the individual berry clusters off of the long branch to create a custom arrangement. I die cut a deep plum greeting from the Christmas Season die set and arranged all of my die cuts on my blended and embossed background. Finally, I added a few coordinating sparkling gems!

Well, that’s all for my projects today. Now for some fun giveaway information:

$300 in total prizes! To celebrate this release, Altenew is giving away a $100 gift certificate to 1 lucky winner and a $50 gift certificate to 4 winners! Please leave a comment on the Altenew Card Blog and/or each designer’s blog post on the blog hop list below by 12/19/2023 for a chance to win. Altenew will draw 5 random winners from the comments left on each stop of this blog hop and announce the winners on the Altenew Winners Page on 12/21/2023.
*The winner of the $100 gift certificate will be chosen from comments left on the Altenew blog. 

Here’s the full hop list in case you get lost:

You are invited to the Inlinkz link party!

Click here to enter

Thanks so much for stopping by today, and happy hopping!
Filed Under: altenew Tagged With: 3D embossing folder, build a garden, christmas season, ink blending, joyful greetings, layered snowflakes, marvelous monthly, poinsettia & berries, poinsettia cluster, winter florals

Simon Says Stamp DieCember(R) Release Blog Hop!

December 2, 2023

This post was sponsored by Simon Says Stamp. Thanks, Simon!

Hi friends! The spectacular DieCember release has finally arrived, and we are celebrating and inspiring you with Day 1 of our DieCember blog hop! You should have arrived here from Barbara Tarayao, and your next stop is Keisha Charles. You can also start back at the beginning at the Simon Says Stamp Blog. You can check out tons of inspiration on the  DieCember® release gallery (and maybe add some inspiration of your own, too!).

Every year, I create tons of cards with traditional color schemes, sometimes with slight variations or additions to modernize things a bit, and because I make holiday cards for several months, traditional red and green can get a bit boring to me. To combat my color palette doldrums, almost all of the cards that I created for this month’s DieCember release featured non-traditional color palettes, including this pair of blue and champagne projects for today’s hop! Let’s get started with the details.

To start my first project, I die cut the Corner Pine Frame using Matte Champagne cardstock. This beautiful champagne cardstock is a lovely alternative to traditional gold; it has a bit cooler undertones and so it works beautifully with cool blues and greens. To create an interesting background for my detailed pine sprigs, I used a blending brush to blend Galaxy Pawsitively Saturated ink on the top corners of an A2 Cornflower blue cardstock panel. I splattered the blended area with some coordinating champagne glitter watercolors from IUILE. After my panel was dry, I mounted the corner die cut over the blended area using liquid adhesive. I think the contrast of the Champagne matte foil with the deep blue background is simply splendid!

Next, I heat embossed some greeting stamps from the new Joyful Greetings stamp set using Platinum sparkle embossing powder onto some heavyweight vellum. I die cut the large sentiment piece using the previously-released Joyful die outline, though the Joyful Greetings set with more detailed word die is also available. I arranged the extra pine branch die cut behind the greeting die cuts, then adhered the sentiments over the top with some foam tape. Finally, I added a fewChampagne glitter drops from Pinkfresh Studio. The color combination makes for a unique Christmas card, to be sure!

My second card features the utterly scrumptious new Florence Plate. The detail on this plate is amazing and would work for so many different cards, not just holiday projects! I die cut the Florence Plate from Cornflower blue cardstock, then backed it with a piece of champagne Luxe Glitter Cardstock. The sparkle on this background is unreal and so difficult to capture in a photograph. (If you haven’t picked up the Luxe Glitter Cardstock yet, I highly encourage you to try some. The sparkle is out of this world!)

I die cut the new Fancy Holiday Cheer die from some dark blue shimmer paper that I found in my stash of specialty papers, backing it with the solid bubble piece cut from more vellum. I die cut the marvelous new Aurora Blooms dies from Rainbow Splash Buttercream, Soft Navy, and Matte Champagne cardstock. I already can tell that these spectacular blooms are going to be a favorite in my craft room! You can make them as simple or as elaborate as you like. I popped up the die cut greeting with foam adhesive, then arranged the flowers and foliage around the large-scale sentiment die cut. This card might be my favorite out of all of the projects that I created for this release!

Well, that’s all for my projects today. Now, to celebrate the new DieCember release, Simon Says Stamp is offering a gorgeous freebie die with any purchase! *Follow the instructions on the graphic at the top of the post to find the Aidan Snowflake die, then use code FLURRY at checkout to receive the die for free.* The gift with purchase promotion will expire at 11:59 EST on 12/8 or while supplies last.

Simon Says Stamp is also giving away a $25 coupon at every stop on the blog hop! Simply leave a comment on each stop on the hop for maximum entries into the giveaway. Winners will be selected and announced on the Simon Says Stamp blog on Wednesday, December 13. Winners must email Simon Says Stamp to claim his or her prize!

Your next stop on the hop is Keisha Charles. Don’t forget to check out the second part of the blog hop on 12/8!! More fantastic inspiration and more prizes to be had. Thanks so much for stopping by today, and happy hopping!

Filed Under: simon says stamp Tagged With: christmas card, corner pine frame, die cutting, diecember, fancy holiday cheer, florence plate, holiday card, ink blending, joyful greetings

Altenew October Stamp & Die Release Blog Hop + Giveaways: $300 in Prizes!

October 4, 2023

Hi friends! Welcome to the Altenew October 2023 Release Blog Hop! You can check out the full hop list at the end of the post or HERE on the Altenew Card Blog. The October 2023 Collection is absolutely fabulous, featuring lots of beautiful, classic holiday imagery, coupled with the elegance Altenew does so well! We are also introducing three beautiful new ink families into the Fresh Dye Ink line today. I have a bold, dramatic card to share with you today, so let’s get started with the details!

I love intense, gorgeous colored cardstock paired with metallic details that really pop, and I knew as soon as I received the gorgeous Festive Greenery products that I wanted to create a bold project with hints of sparkle and tons of texture. I began by running an A2 panel of super deep indigo blue cardstock through my die cutting machine using the Festive Greenery embossing folder. The coordinating stencils for the Festive Greenery product suite work beautifully with or without the embossing folder, but I wanted to create something with a bit more non-traditional color palette and super intense color. After embossing my panel of deep blue cardstock, I trimmed it down a bit and used a blending tool to blend Tanzanite ink around the edges of the embossed panel to enhance some of the embossed details and add interest to the panel. I also gently swiped the Antique Gold metallic pigment ink pad over the raised areas, adding some gilded edges to the embossed images.

For the greeting, I heat embossed two sentiment pieces from the new Joyful Greetings stamp and die set on the same deep blue cardstock using gold embossing powder to coordinate with the gilt edges of the embossed panel. I trimmed the sentiment strip down with my trimmer and die cut the larger JOY sentiment with the coordinating die.

Once I had completed the sentiment pieces, I die cut several golden sprigs using the Itty Bitty Branches dies. I cut berries from gold glitter cardstock and, to change up the texture a bit, cut the leaves from gold shimmer cardstock. I adhered the blended, embossed panel to a full size A2 panel of the same deep navy cardstock using foam adhesive, then popped up the greeting pieces using more foam adhesive. I tucked the branches and berries behind the greeting components to create a pretty, festive arrangement. The final touch was a few shimmering gems for sparkle!

Well, that’s all for my project today! Now for some fun giveaway information:

$300 in total prizes! To celebrate this release, Altenew is giving away a $100 gift certificate to 1 lucky winner and a $50 gift certificate to 4 winners! Please leave a comment on the Altenew Card Blog and/or each designer’s blog post on the blog hop list below by 10/10/2023 for a chance to win. Altenew will draw 5 random winners from the comments left on each stop of this blog hop and announce the winners on the Altenew Winners Page on 10/12/2023.
*The winners of the $100 gift certificate will be chosen from comments left on the Altenew blog. 

Here’s the full hop list in case you get lost:

You are invited to the Inlinkz link party!

Click here to enter
Loading Comments...