• Skip to main content
  • Skip to primary sidebar
  • Skip to secondary sidebar

Sixth Street Sundries

Emily Midgett

  • Home
  • About Me
  • Contact
  • OLO Marker Color Swatch Chart
  • Shop

layered stencils

Pinkfresh Studio “Sunshine & Smiles” Release Blog Hop + Giveaway!

May 20, 2025

Hi friends! I am hopping along with Pinkfresh Studio today to share inspiration using their gorgeous new Sunshine and Smiles release that just went live! You can see the full hop list at the bottom of this post. I have a pair of lovely and soft springtime cards using several of the new press plates and dies. Let’s get started with the details on my projects!

*I have gathered links to all of the products used at the bottom of the post for your convenience, using affiliate links. Thank you for shopping with my links! I truly appreciate your support for my work!*

For both of my projects, I kept the color palette light and airy, pulling Ballet Slipper, Sparkling Rose, Soft Lilac, Mint, Meadow, Emerald City, and Slumber Pinkfresh Studio inks. These colors work so beautifully together, and I am so pleased with the results of this pairing with these new press plates, stencils, and dies!

For my first project, I thought I would take advantage of the generous size on the new Timeless Tulips Press Plate, Stamps, and Dies product suite to create an A7 birthday card! I used Meadow Ink to press the Timeless Tulips image once into a panel of A7 Porcelain Better Press cardstock and again on a separate panel of cardstock, then used the 1″ Blending Brushes and the coordinating stencils with Ballet Slipper, Sparkling Rose, Soft Lilac, Mint, Meadow, and Emerald City inks. I think this image is so beautiful and graceful! After I had stenciled both images, I used the coordinating Timeless Tulips die to cut one of the images out. I also used Lilac and Slumber inks to create a lovely and soft blended background behind my pastel tulips, splattering the entire blended panel with some shimmering handmade watercolors.

Once I had finished blending the images, I used those same shimmering watercolors to add some sparkling highlights to the edges of the tulips and the center of each leaf. It’s such a pretty effect, but so difficult to capture in a photo!

For the greeting, I used a sweet sentiment from the new Sunshine and Smiles stamps and die product suite, stamping it on white cardstock using Emerald City ink, then again with embossing ink and adding Iridescent Lavender Embossing Powder over the top to add extra gorgeous shimmer to the sentiment. I die cut the greeting with it’s coordinating die, then used the Fancy Edgers dies to die cut a lacy strip of Pinkfresh Studio Glacier glitter cardstock. I adhered this lacy edge to a strip of Simon Says Stamp Vellum, which reminds me of a lovely handkerchief, and mounted the sentiment die cut in the center of the “hankie” with some foam adhesive squares. I adhered the die cuts to the card front with more dimensional foam adhesive squares. The vellum behind the sentiment helps soften the images on the card front so that the sentiment can pop a bit better, while also not adding any additional visual weight to the card front! I finished the card off with some Iridescent Bubble Drops and a delicate white silk bow for added texture.

For my second project, I kept the color palette similarly soft and feminine, pairing the soft Blush cardstock from Spellbinders with Simon Says Stamp Mint cardstock to create a vintage jadeite effect. I began by ink blending the bottles from the Keepsakes of the Heart product suite onto the Mint cardstock using Mint and Meadow inks. I also stamped the blooms and foliage sprigs from the coordinating stamp set onto some more Mint cardstock using Meadow ink, then used the coordinating stencils to blend Ballet Slipper, Sparkling Rose, Mint, Meadow on the images. The tone-on-tone blending on the minty cardstock reminds me so much of my vintage jadeite pieces! I used the coordinating dies to die cut the finished stenciled images.

For the background, I used the trick that I demonstrate in THIS video to impress the new Garden Medley press plate into Spellbinders Blush cardstock with Ballet Slipper ink. I love the spectacularly detailed texture that this adds to my card front! I die cut one of the new Stitched Rectangle Dies from some Simon Says Stamp Vellum and used that piece to ground my floral vase arrangement on the textured background. I die cut “love” from the now-discontinued Julieta Alpha dies from some Pinkfresh Studio Glacier glitter cardstock (I have linked some alphabet dies that would work well in place of the older Julieta set!) and arranged them in the corner, tucking them amongst the foliage and flowers with liquid and foam adhesive. I added a greeting from the Keepsakes of the Heart stamp set, stamping it on some deep emerald green cardstock using white pigment ink, then adding more iridescent lavender embossing powder to add some extra shimmer. I adhered the sentiment on the card front with a double layer of foam adhesive, then added a few Blossom Glitter Drops for added shimmer and sparkle!

Well, that’s all for my projects today! Now for some fun giveaway information:

To celebrate this release, Pinkfresh Studio will be giving away the full release on the Pinkfresh blog and YouTube channel. They will also give away TEN $50 gift cards along the hop. The winners will be selected from the comments, at random. The more comments you leave along the hop, the more chances you have to win! Winners will be selected and posted on May 28, 2025, on our GIVEAWAY PAGE. Winners must check that page and claim their prize within two weeks

Here’s the full hop list:

You are invited to the Inlinkz link party!

Click here to enter

Thanks so much for stopping by today, and happy hopping!

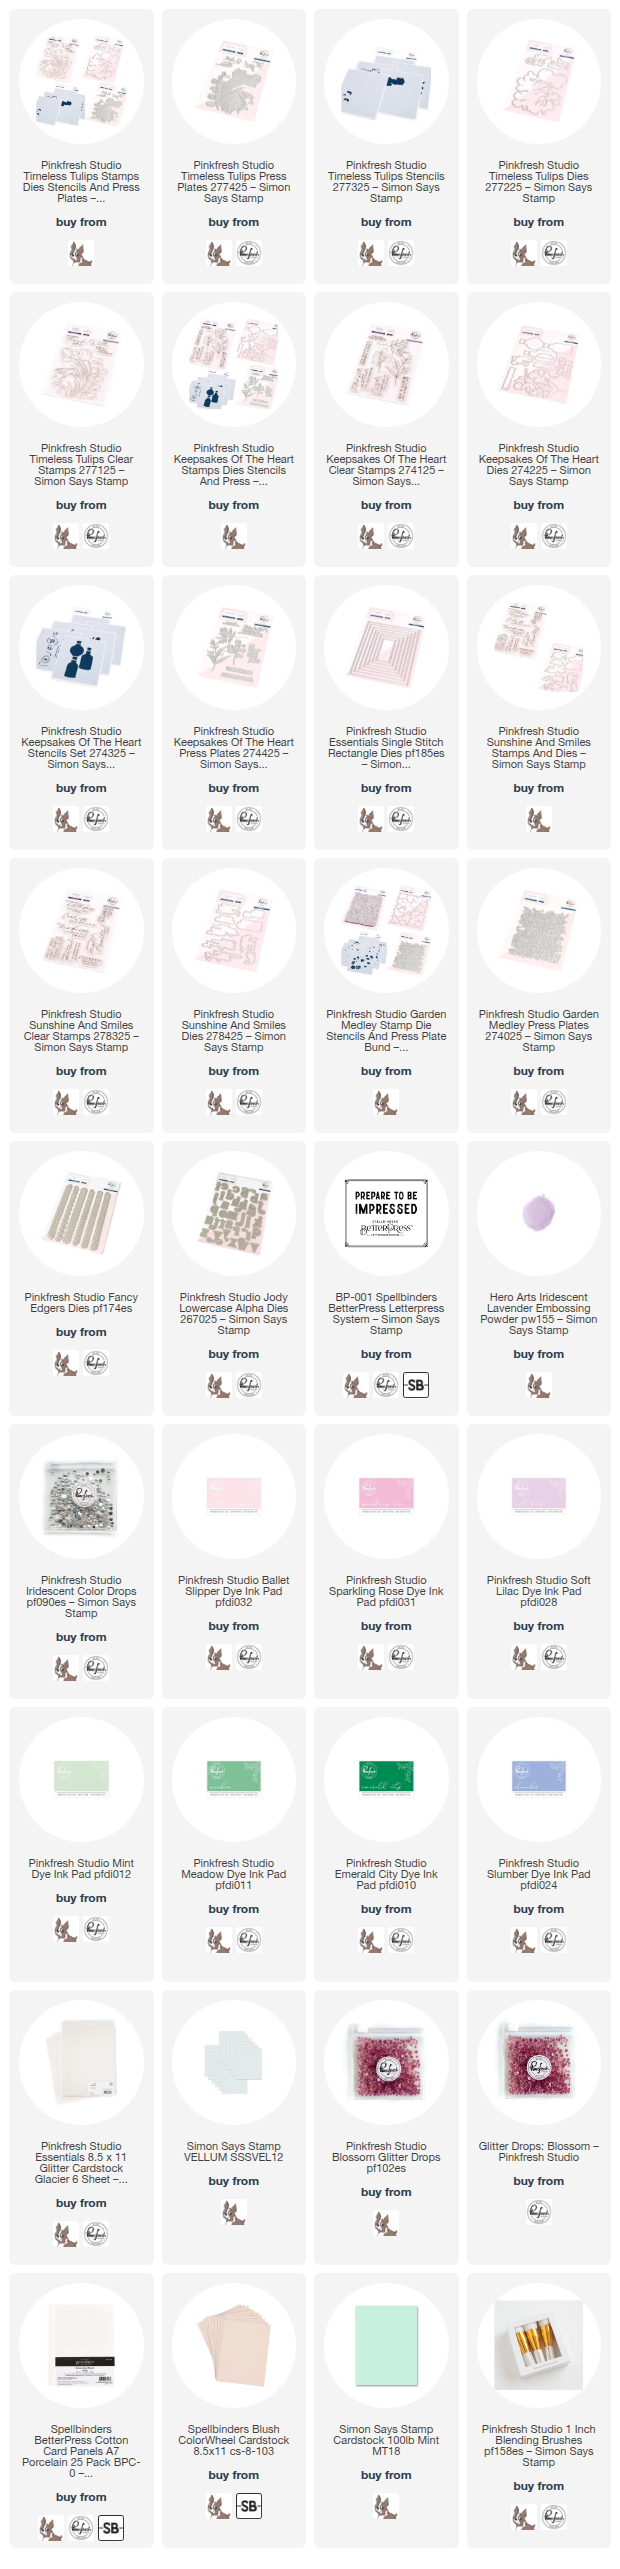
Products used:
Filed Under: pinkfresh studio Tagged With: better press, betterpress, essentials single stitch rectangles, fancy edgers dies, garden medley, ink blending, keepsakes of the heart, layered stencils, press plates, sunshine and smiles, timeless tulips

Fuchsia Flowers for Valentine’s Day with Simon Says Stamp!

January 15, 2025

This post was sponsored by Simon Says Stamp. Thanks, Simon!

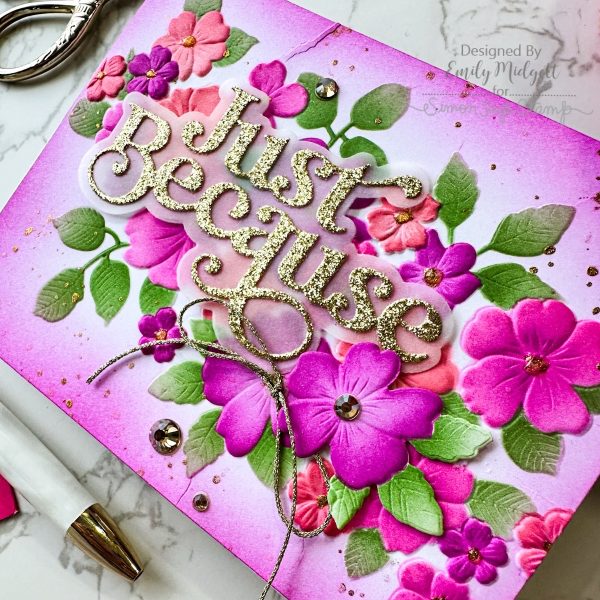
Hi friends! Is it bitterly cold where you are located? We’ve had almost two solid weeks of exceptionally cold and snowy weather, which is very unusual for our area in southern Illinois anymore. When I was a kid, we used to experience truly winter weather throughout the winter, frequently with snow (maybe not much, but still enough to count!) on Christmas. These days, though, it’s more likely to be in the 40’s and 50’s for most of the winter season, and it makes me somewhat sad. I love bundling into our warm house when it’s cold outside, and bonus… the colder the temps, the more bugs die! Ha! (I am not outdoorsy and bugs are my nemesis when I am outside.) For today’s post, I thought I would brighten things up with some vibrant pink projects using the gorgeous Tumbling Flowers embossing folder and coordinating stencil set from Simon Says Stamp. Let’s get started with the details!

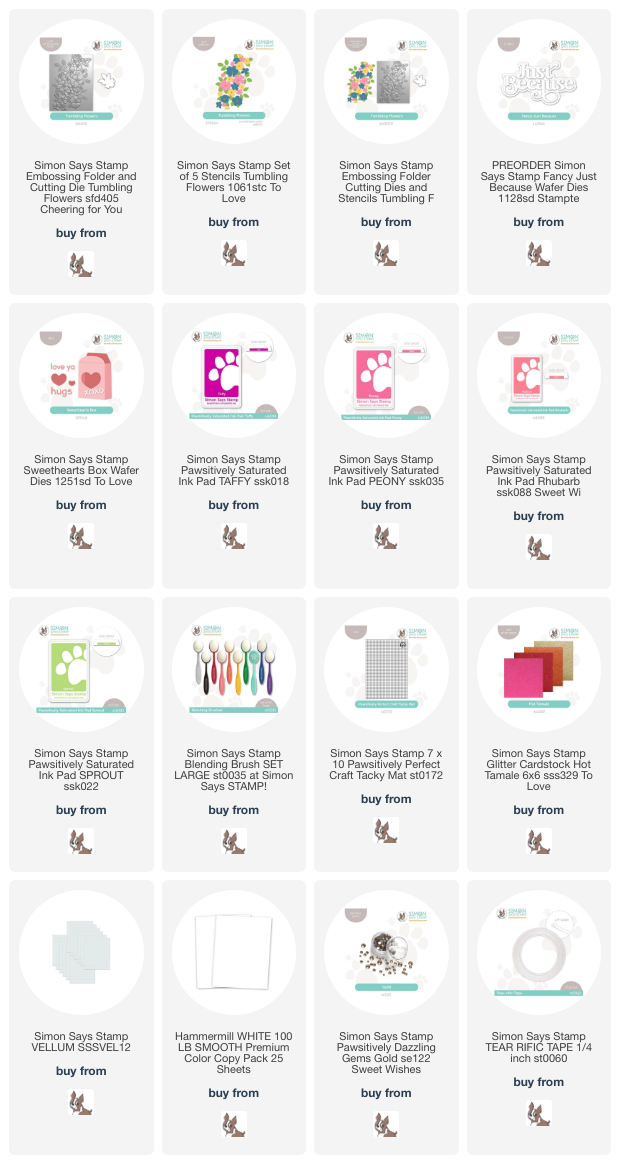
*I have gathered links to all of the products used at the bottom of the post for your convenience, using affiliate links. Thank you for shopping with my links! I truly appreciate your support for my work!*

Out of the huge array of luscious colors in the Simon Says Stamp Pawsitively Saturated Ink line, I find myself constantly reaching for Taffy ink. It’s cool, vibrant pink works splendidly with so many different color palettes, blended lightly or more intensely, swiped or stamped. I decided to make Taffy ink the focus for my color palette today to add some vibrant color into these dreary winter days!

To start my card, I ran an A2 sized panel of white cardstock through my die cutting machine using the Tumbling Flowers Embossing Folder. I then placed my embossed panel on a Pawsitively Perfect Craft Tacky Mat and used blending brushes and the coordinating Tumbling Flowers Stencils to blend Taffy, Peony, Rhubarb, and Sprout Pawsitively Saturated Inks on the gorgeous cluster of blooms. The combination of layering stencils and fantastic dimension on the embossed panel creates such a uniquely textured, dimensional project! After blending the flower images, I used residual Taffy ink left on the blending brush to blend around the edges of the card front and splattered some gold glitter watercolors around the edges, as well.

For the greeting, I die cut the detail layer of the Fancy Just Because die using gold glitter cardstock from the new Hot Tamale Glitter cardstock and the shadow layer from Simon Says Stamp’s Vellum. I adhered the two layers together using liquid adhesive, then adhered the sparkling sentiment to the card front using thin strips of foam adhesive squares. I added a die cut and stenciled flower next to the sentiment die cuts, created using the coordinating die from the Tumbling Flowers product suite. I tucked a shimmering gold bow next to the standalone flower and added some Gold Pawsitively Dazzling Gems to the flower centers for some added sparkle!

I wanted to create a coordinating gift box to hold a gift card, some candy, or a small gift, so I used white cardstock to die cut the new Sweethearts Box and adhered everything together using the super strong Tear-rifically Tacky Tape, which works perfectly for 3-dimensional objects like the Sweethearts Box. I trimmed off some 3/8″ strips of glitter cardstock from the orange, pink, and gold Hot Tamale Glitter cardstock pack and adhered them at an angle on the front of the gift box.

After I had created the box, I die cut the XOXO included with the Sweethearts Box die set from some magenta foil cardstock. I adhered it at an angle on the strips of glitter cardstock, then arranged a few die cut and stenciled flowers created with the Tumbling Flowers Embossing Folder and stencil suite. I popped the flowers up with some foam adhesive and added a Valentine’s greeting heat embossed in gold on white cardstock. Such a vibrant and pretty little gift box, with a bit of a unique color palette to keep things fresh and modern!

Well, that’s all for my projects today. I love injecting some vibrant color into these long and gray January days by playing with vivid inks and sparkling cardstocks. Thanks so much for stopping by today, and have a marvelous day!

Filed Under: simon says stamp Tagged With: die cutting, embossing folders, fancy just because, gift box, ink blending, layered stencils, pawsitively saturated inks, sweethearts box, tumbling flowers

Pinkfresh Studio “Kindness in Bloom” Release Blog Hop

October 8, 2024

Good morning friends! I am hopping along with Pinkfresh Studio today to share inspiration using some of the gorgeous new goodies from the Kindness In Bloom release! This new release is filled with stunning florals in all forms: stamps, dies, stencils, and press plates, but we also have some marvelous new Essentials dies that are going to be staples in your craft room, as well. I have two projects using some beautiful blue tones, so let’s get started with the details!

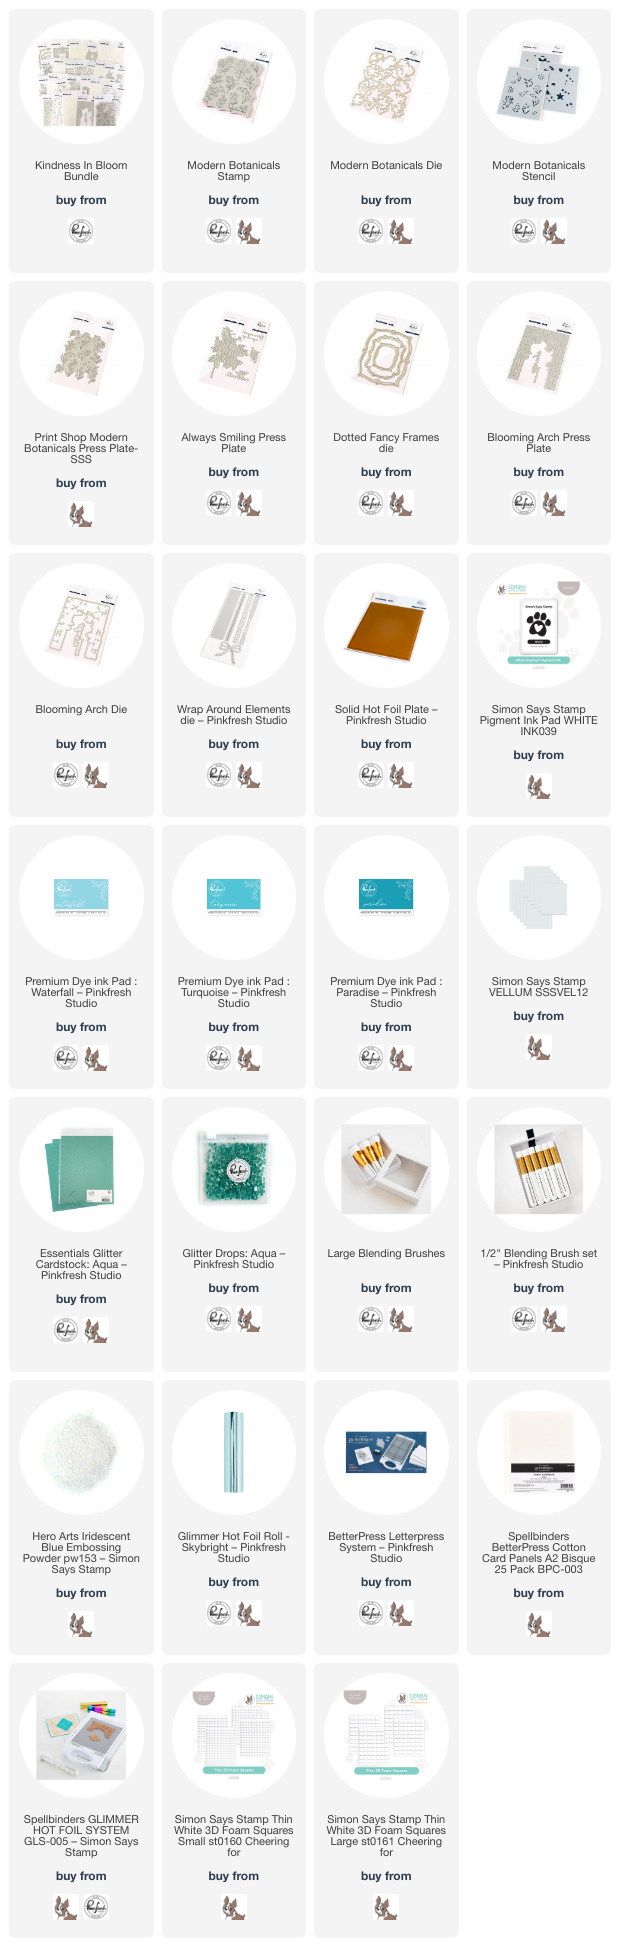
*I have linked all of the products used at the bottom of the post for your convenience using affiliate links. Thank you for shopping with my links! I truly appreciate your support for my work!*

For both of my projects today, I used the new Print Shop Modern Botanicals stamp, die, and stencil product suite (there is also a coordinating Press Plate, but I focused on the stamp set today so that I could do some heat embossing!). To start, I stamped the beautiful Print Shop Modern Botanicals cling stamp twice onto some pale aqua cardstock from my stash using white pigment ink, which I then covered with Iridescent Blue embossing powder to create a shimmery, iridescent, almost tone-on-tone embossed outline. I embossed two of these floral panels in this way: one to use as a background and one to die cut to use as accents for another card!

Before die cutting one of the panels, I used the coordinating stencils with Waterfall, Turquoise, and Paradise inks to add some beautiful monochromatic details to the floral images. After I had finished blending, I used the fabulous one-pass die to die cut all of the flowers in one fell swoop. So convenient!

For my first card, I created a beautifully textured background by pressing the floral bouquet into some more of the lovely pale aqua cardstock. To achieve the textured letterpress look on colored cardstock, I tried a technique that I saw the incredibly talented Carissa Wiley demonstrate. I placed a piece of letterpress paper behind my A2 panel of colored cardstock and used some light washi tape to temporarily adhere the two pieces together. I then used my Better Press system to impress the beautiful bouquet from the new Always Smiling product suite into the corners of my panel. The thick cotton letter press cardstock allows the cushion for the Press Plate to impress the images into the regular colored cardstock! Isn’t that ingenious? Carissa is amazingly clever! After removing the washi tape and letterpress panel, I used a blending brush to blend Turquoise ink around the edges of the panel, enhancing the beautifully detailed letter press images.

To further enhance my card front, I die cut the largest frame from the new Dotted Fancy Frames Essentials die set, placing it in the center of an A2 sized panel of Pinkfresh Studio Aqua Glitter Cardstock. I reserved the die cut frame itself for the next project and instead used foam adhesive to pop up the negative space around the edges of my textured background panel, creating a tone-on-tone glittery shaped frame. I tucked a vellum Dotted Fancy Frame die cut on the bottom right corner of the card and arranged my stenciled Print Shop Modern Botanicals die cuts around a greeting from the Always Smiling Press Plate set, which I foiled onto some more aqua cardstock using Spellbinders’s Skybright foil and die cut with the coordinating die. Finally, I embellished my bouquet with some shiny foil “twine” cut using the older Wrap Around Elements dies and added a few coordinating Aqua Glitter Drops for added sparkle!

My second card is a bit simpler, using some of the leftovers from my first project to create this dainty, monochromatic card. I embellished the full A2 embossed and stenciled Print Shop Modern Botanicals background panel with the leftover Aqua Glitter Dotted Fancy Frames Essentials die cut, adhering it around the edges of the background with some liquid adhesive. I think it is such a pretty addition to the subtle floral background! I also used the smallest die from the Dotted Fancy Frames Essentials die set to cut a piece of vellum, upon which I would build my focal point.

For my focal point, I hot foiled my greeting from the new Blooming Arch Press Plate set, which I created by first hot foiling the sentiment Press Plate, then hot foiling the leftover foil panel using Pinkfresh Studio’s Solid Hot Foil Plate and cutting with the coordinating die. (It looks black in the photo because hot foiled images are so difficult to photograph accurately, but I promise the sentiment is a coordinating pale aqua!) I popped up the sentiment in the center of the vellum piece using foam adhesive, then arranged some leftover Print Shop Modern Botanicals die cuts behind the sentiment. I flipped over the vellum piece and added some thin foam square adhesive behind the solid die cuts in order to keep my vellum piece clean. Finally, I added a few more Aqua Glitter Drops for added sparkle!

Well, that’s all for my projects today! Now for some fun giveaway information:

Pinkfresh Studio will be giving away the full release on the Pinkfresh blog & YouTube channel.  They will be giving away a total of TEN $25  gift cards along the hop. The winners will be selected from the comments, so the more comments you leave along the hop, the more chances you have to win!.
Winners will be selected and announced on October 16, 2024 on our GIVEAWAY PAGE. Winners must check that page & claim their prize within 2 weeks.

Here’s the full hop list in case you get lost:

You are invited to the Inlinkz link party!

Click here to enter

Thanks so much for stopping by today, and happy hopping!

Filed Under: pinkfresh studio Tagged With: always smiling, blooming arch press plate, die cutting, dotted fancy frames, giveaway, ink blending, kindness in bloom, layered stencils, letterpress, modern botanicals, monochromatic, press plate, solid hot foil plate, stencil, wrap around elements

Stencils and Masks for Valentine’s Day with Simon Says Stamp!

February 8, 2024

This post was sponsored by Simon Says Stamp. Thanks, Simon!

Hi friends! I am back today with a pair of cards that almost make you want to get your sunglasses out! I love that the Hearts in a Heart stencil set has both a heart stencil and mask, in addition to the layering stencils that create the heart pattern inside the heart. Having the option to blend both inside the heart and around the edges of the heart gives you so many ways to use this stencil set! I wanted to showcase two uses today, so let’s get started with the details!

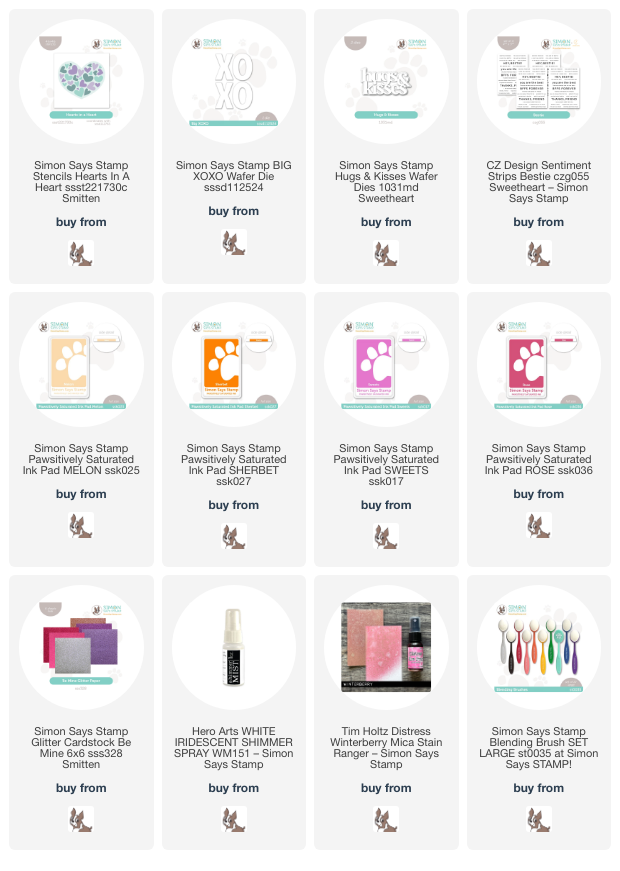
For both of my cards today, I used lots of pretty inks from the Pawsitively Saturated Ink line: Melon, Sherbet, Sweets, Taffy, and Rose. I wanted to use traditional pinks that screamed “Valentine’s Day,” but since I intended these to be more for “Galentine’s Day,” I thought that the peach and orange inks would make them super unique and just slightly different from the typical Valentine colors!

For my first card, I began by placing the solid heart mask from the Hearts in a Heart stencil on my white card front, adhering it with some light-tack tape that I’d folded over. I then used a blending brush to bledn Taffy ink around the masked heart, covering the entire background of a white A2 card front. I removed the mask (it’s like magic!) and replaced it with the different layered patterned stencils, then used Pawsitively Saturated Inks: Melon, Sherbet, Sweets, Taffy, and Rose to blend some vibrant hearts-within-the-heart, leaving a white outline around the pattern to make it stand out! I also spritzed some Hero Arts Iridescent White shimmer spray over the entirety of the card front, adding some subtle shimmer to the background before adding my sentiment.

For the greeting, I die cut the Big XOXO die from the dark pink glitter paper in the Be Mine Glitter Pack. I adhered just one of the “XO” pairs over the stenciled patterned heart using foam squares to add extra dimension. To enhance the greeting, I used one of the new Bestie Sentiment Strips to add a little “hey bestie hey!” over the top of my glittery “XO.” I popped the sentiment strip up with a double layer of foam adhesive so that it had even more height and making it extra visible amongst the busy, colorful background. Finally, I added a few coordinating peach gems from my stash.

For my second card, I put to use both the solid mask and the outline stencil from the Hearts in a Heart stencil set. I first placed the stencil in the center of my A2 card front, then used blending brushes to blend Melon, Sherbet, Sweets, and Rose ink in the center of my card front, creating a unique sunset ombré heart. I removed the stencil and replaced it with the solid heart mask, then blended Rose ink around the ombré heart, covering the entire background of my A2 card front. While the mask was still in place, I spritzed some Winterberry Mica Stain from Tim Holtz to add some shimmer to my otherwise-flat background!

While I was waiting for my background panel to dry, I die cut the new Hugs & Kisses die from some pink glitter paper found in the Be Mine Glitter Pack. This particular pink has several different shades of pink, yellow, and peach glitter, which helped it coordinate beautifully with the overall color palette for my project! I also trimmed down another tiny sentiment strip from the Bestie Sentiment Strips, popping both the die cut greeting and the sentiment strip up with some foam squares in the center of my ombré heart. A smattering of peachy gems finished the project off!

Well, that’s all for my projects today! I am hard at work creating with the new release from Simon Says Stamp, so be on the lookout for some fabulous new goodies coming your way next week! Thanks so much for stopping by today, and have a marvelous day!

Filed Under: simon says stamp Tagged With: bestie, big xoxo, galentine's day, hearts in a heart, hugs & kisses, ink blending, layered stencils, mask, mica stain, sentiment strips, shimmer spray, stencil, valentine

Alex Syberia Designs-Instagram Hop!

November 22, 2023

Good morning, friends! I am back with some more inspiration using the new Alex Syberia Designs November Release! In my previous release post, I shared a monochromatic homage to aqua with lots of layers and textural elements, and for today’s Instahop, I thought I’d share a pretty-in-purple project using the gorgeous new Midnight Blooms hot foil plate (ASD | SSS). Let’s get started with the details!

I began my project by hot foiling the absolutely stunning Midnight Blooms hot foil plate (ASD | SSS) using Speckled Aura hot foil onto some Hammermill white cardstock. I then used blending brushes with the Midnight Blooms Layering Stencil set (ASD | SSS) to blend Fig, Grape Soda, and Eggplant inks from Concord & 9th for the flowers, then used Tidepool, Juniper, and Peacock to blend the foliage on each bloom. (I will link all of the inks used in the link list below) I used the Midnight Blooms coordinating dies (ASD | SSS) to cut out the completed images.

After I had finished blending and die cutting, I used a blending brush to blend Fig ink in the center of a panel of white cardstock. I also splattered the panel with some shimmering iridescent purple and gold watercolor. To create a festive and interesting background, I also used the small starburst stamps from the Midnight Blooms stamp set (ASD | SSS) with Altenew’s Enchanted Gold pigment ink. It’s very subtle, but I think that extra step adds so much interest and shimmer to the background for my blended flowers!

After my background was complete and dried, I arranged the two floral stems on the card front and adhered them with foam adhesive to add extra dimension. I also added a twinkling gold twine bow for extra texture. For the greeting, I heat embossed a sentiment from the Midnight Blooms stamp set (ASD | SSS) using Hero Arts Iridescent Gold embossing powder, then die cut it with the coordinating die included in the Midnight Blooms coordinating dies (ASD | SSS). (Absolutely love when companies incldude dies for the sentiments!) A few sparkling amethyst gems added one final touch of sparkle!

Well, that’s all for my project today. I am taking part in a fabulous Instagram Hop today, and there are tons of prizes and a wealth of inspiration to be had amongst the participants using the wonderful projects from the Alex Syberia Designs November 2023 Release, so I hope you’ll hop over and take a peek! Thanks so much for stopping by today, and have a marvelous day!

Filed Under: alex syberia designs Tagged With: happy new year, hot foiling, layered stencils, midnight blooms

  • Page 1
  • Page 2
  • Page 3
  • Interim pages omitted …
  • Page 5
  • Go to Next Page »

Primary Sidebar

  • Facebook
  • Instagram
  • Pinterest
  • YouTube

Favorite Shops

Secondary Sidebar

Subscribe

Enter your email address to subscribe to this blog and receive notifications of new posts by email.

Instagram
Something is wrong.
Instagram token error.
Follow
Load More

Archives

Tags

3D embossing folder alcohol markers better press birthday birthday card blog hop card kit christmas christmas card christmas tag colored pencil copic copic coloring Daniel Smith die cutting embossing folder embroidery felt giveaway holiday holiday card hot foil ink blending karin brushmarker pro layered stencil masculine my monthly hero new release no line coloring no line watercolor OLO marker olo markers original illustration pawsitively saturated rainbow shaker card slimline stamping stamptember stencil thank you thinking of you valentine's day video watercolor

Popular Posts

Simon Says Stamp Sending Cheer Blog Hop- Day 2 + Freebie + Giveaway!
Altenew October 2026 Release Blog Hop + Giveaway!
Rustic Monochromatic Stars for Christmas with Rainbow Splash!
Hero Arts Partners Blog Hop: Lawn Fawn!
Waffleflower July Release Blog Hop!
December 2018 My Monthly Hero Blog Hop + Giveaway!
March 2020 Essentials By Ellen Blog Hop+Giveaway!
The Ton Anniversary Release: Day 1!
The Ton Stamps Summer Release: Day 1
Autumn Legs with Colorado Craft Company and Catherine Pooler!

Disclosure

Some affiliate links are used in my posts. This means that, should you click on one of my links and purchase something from that company, I will receive a small portion of the sale at no extra cost to you. I use the money earned from these sales to help maintain my blog. I so appreciate you visiting and, if you do choose to use one of my affiliate links, thank you so much for your support!
Copyright © 2026 ·Brunch Pro Theme · Genesis Framework by StudioPress · WordPress · Log in
Loading Comments...