• Skip to main content
  • Skip to primary sidebar
  • Skip to secondary sidebar

Sixth Street Sundries

Emily Midgett

  • Home
  • About Me
  • Contact
  • OLO Marker Color Swatch Chart
  • Shop

lilac clusters

Floral Flashback Week: Mother’s Day Tulips, Take Two with Simon Says Stamp!

February 22, 2025

This post was sponsored by Simon Says Stamp. Thanks, Simon!

Hi friends! I am back with a final installment of this week’s Floral Flashback Week, this time with another project featuring my older Mother’s Day Tulips stamp set that I illustrated for Simon Says Stamp. When I was working on my first project for this week featuring the Mother’s Day Tulips set, I initially had intended to layer the two colored die cuts together to create a very full tulip bouquet, or perhaps even a field. However, when I went to put the two colored die cuts together, I didn’t want to cover up quite so much of my hard-earned no-line coloring tulips, so I decided to just use each die cut to create their own individual cards! While THIS tulip project was clean and bright white, I decided to do something a bit more dramatic and unique with this project, pairing the vivid coral tulips with some luxurious chocolate brown cardstock. Let’s get started with the details!

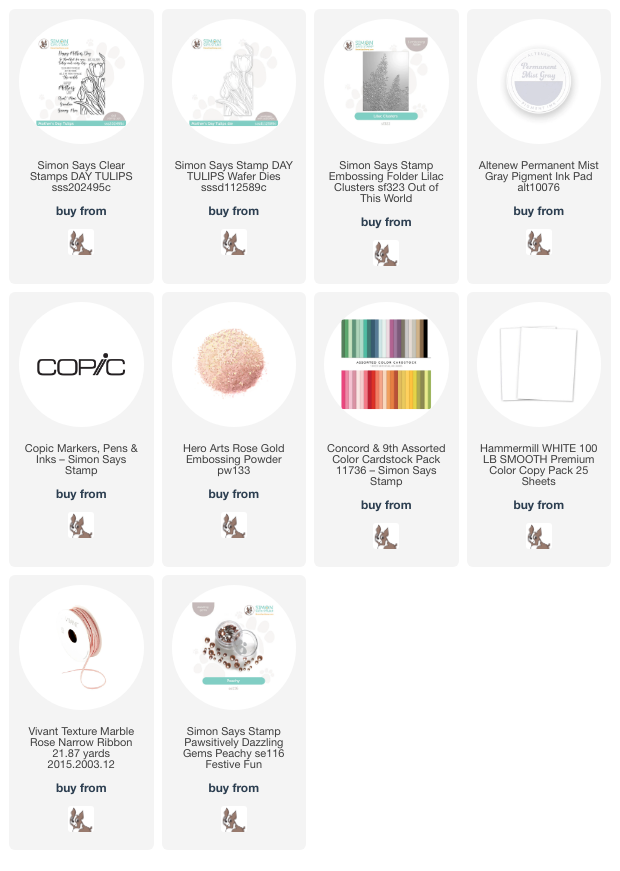
*I have gathered links to all of the products used at the bottom of the post for your convenience, using affiliate links. Thank you for shopping with my links! I truly appreciate your support for my work!*

I began my project by stamping the main image from my Mother’s Day Tulips stamp set using Permanent Gray Ink from Altenew so that I could do some no-line coloring, then selected gorgeous shades of coral and lime green from my Copic collection to add some fabulous depth and dimension to these pretty tulips. I feel like some flowers are just the embodiment of spring, and tulips definitely rank high among them! Their vibrant blooms are always a harbinger of lovely mild spring weather and are the first pops of color against the sleepy winter landscape.

To intensify that illusion of vibrant colors against a bland landscape, I decided to create a background for my tulips with the Lilac Clusters Embossing Folder and some luscious brown cardstock from Concord & 9th. I embossed the lovely lilac blooms (also an embodiment of springtime around here!) onto the A2 card front, then used a coordinating brown Copic marker around the edges of the die cut tulip image, making the tulips truly pop off of the somewhat drab background. The gorgeously detailed embossing folder adds an element of spectacular texture behind the vibrant blooms! I popped up the colorful die cut tulips with some foam adhesive, trimming off any excess that was hanging over the edge.

After I had finished creating the background and the focal point, I used some rose gold embossing powder to heat emboss a sentiment from the Mother’s Day Tulips stamp set, to which I made sure to add a variety of sentiments that could be used outside of Mother’s Day, as well. I fussy cut the sentiment, then popped it up with a double layer of foam adhesive. Finally, I added a coordinating bow and some Peachy Pawsitively Dazzling Gems for some added texture!

Well, that’s all for my project today. I hope you enjoyed meandering down my stamp illustrations from the past with me this week! I am so excited about things to come, as well, and I hope you love them as much as I do. Thanks so much for stopping by today, and have a marvelous day!
Filed Under: simon says stamp Tagged With: 3D embossing folder, copic coloring, die cutting, embossing folder, lilac clusters, mother's day tulips, no line coloring

Adding Shimmer and Detail with Karin Star Spark Pens!

September 18, 2023

This post was sponsored by Simon Says Stamp. Thanks, Simon!

Hi friends! In the midst of my newfound rainbow craze using the new Rainbow Splash products from Simon Says Stamp’s STAMPtember release, I have found myself itching to get back into my more typical color palette as sort of a palate cleanser. (Don’t worry if you were enjoying the rainbows; I have more Rainbow Splash inspiration to share with you later this week!) I’ve spent most of my creative time this month creating projects that are a little more simplistic, a little more approachable, so as to be easily replicated by both new and seasoned crafters alike. Today’s project combines some simple techniques to create a really vivid, eye-catching card using the gorgeous Lilac Clusters Embossing Folder. Let’s get started with the details!

I began by running an A2 panel of Hammermill cardstock through my die cutting machine using the Lilac Clusters Embossing Folder from Simon Says Stamp. This 3D embossing folder creates such incredibly beautiful details that easily can speak for themselves on your card front. My initial instinct with these gorgeous floral folders is always to reach for my favorite coloring mediums to make as immersive and dimensional a card as possible, but today I thought I’d simplify the process and the amount of time spent by doing some ink blending. For the sky, I blended Cadette and Ocean Pawsitively Saturated inks, the combination of which creates the most luscious, summery blue sky. On the flowers themselves, I blended first Lilac ink with a larger blending brush, then blended Orchid ink with a smaller brush in some of the more shadowed places on the blooms. Using the lighter and darker inks helps to add a little extra interest and dimension to the flowers. I blended some Pearfection ink on the foliage, keeping things simple.

To accent the somewhat simplistic blended “coloring” on my lilac images, I used the new Karin Star Spark pens to add extra details to the individual flower petals, stems, and veins on the leaves. These pens are so shimmery and are basically opaque, so they make adding details on top of your stamped or colored images super easy! I accented the pretty purple blooms with a frame cut from purple foil using my favorite A2 Thin Frames dies, which I popped up using foam adhesive.

For the greeting, I used the Fancy Giving Thanks die, cutting the detail layer from deep purple cardstock and the outline background from heavyweight vellum. I also trimmed down a greeting from the Sassy T-day sentiment cards and lightly blended the strip with some residual purple ink left on my blending brush to help it work more cohesively with my super colorful card front. The final touch was a few shimmering gems for even more sparkle!

Well, that’s all for my project today! I hope you enjoyed this foray back into my more usual world of secondary colors (instead of primary rainbow colors, haha!). Thanks so much for stopping by today, and have a marvelous day!

Filed Under: simon says stamp Tagged With: 3D embossing folder, A2 thin frames, fancy giving thanks, ink blending, karin star sparks, lilac clusters, pawsitively saturated ink

Primary Sidebar

  • Facebook
  • Instagram
  • Pinterest
  • YouTube

Favorite Shops

Secondary Sidebar

Subscribe

Enter your email address to subscribe to this blog and receive notifications of new posts by email.

Instagram
Something is wrong.
Instagram token error.
Follow
Load More

Archives

Tags

3D embossing folder alcohol markers better press birthday birthday card blog hop card kit christmas christmas card christmas tag colored pencil copic copic coloring Daniel Smith die cutting embossing folder embroidery felt giveaway holiday holiday card hot foil ink blending karin brushmarker pro layered stencil masculine my monthly hero new release no line coloring no line watercolor OLO marker olo markers original illustration pawsitively saturated rainbow shaker card slimline stamping stamptember stencil thank you thinking of you valentine's day video watercolor

Popular Posts

Simon Says Stamp Sending Cheer Blog Hop- Day 2 + Freebie + Giveaway!
Joyful Snowman with New Simon Says Stamp Sending Cheer Release!
Simon Says Stamp Sending Cheer Release: Now Available!
Altenew October 2026 Release Blog Hop + Giveaway!
Special Release: Simon Says Stamp Limited Edition STAMPtember Christmas Card Kit!
February 2018 My Monthly Hero Blog Hop!
Altenew March 2020 Release Blog Hop+Giveaway!
Simon Says Stamp Cozy & Bright Inspiration, Part Two!
Essentials By Ellen September Blog Hop!
Waffleflower December Release Blog Hop!

Disclosure

Some affiliate links are used in my posts. This means that, should you click on one of my links and purchase something from that company, I will receive a small portion of the sale at no extra cost to you. I use the money earned from these sales to help maintain my blog. I so appreciate you visiting and, if you do choose to use one of my affiliate links, thank you so much for your support!
Copyright © 2026 ·Brunch Pro Theme · Genesis Framework by StudioPress · WordPress · Log in
Loading Comments...