• Skip to main content
  • Skip to primary sidebar
  • Skip to secondary sidebar

Sixth Street Sundries

Emily Midgett

  • Home
  • About Me
  • Contact
  • OLO Marker Color Swatch Chart
  • Shop

lisianthus

April Showers Bring May Flowers: Peony Edition!

May 7, 2024

This post was sponsored by Simon Says Stamp. Thanks, Simon!

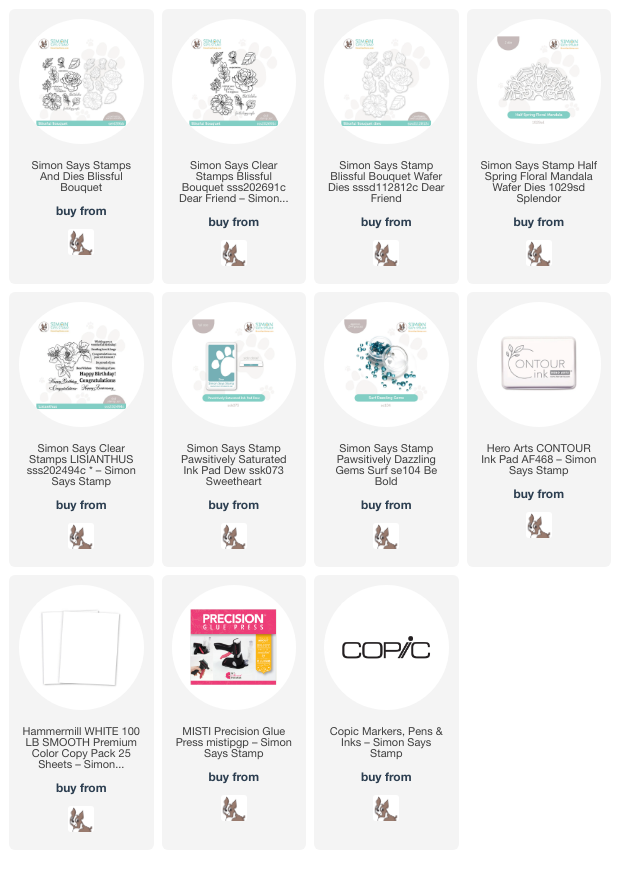
Hi friends! I am back with another project for my April Showers Bring May Flowers series, this time featuring the Blissful Bouquet stamp set that I illustrated for Simon Says Stamp. This stamp set features individual large dahlia and peony blooms, accompanied by several different types of “filler flowers” and a few options for foliage so that you can create super elaborate and lush bouquets, or you can create smaller floral swags, as I’ve done for today’s project! I’ve had this white glitter Half Spring Floral Mandala die cut on my desk for a few months just waiting for the right project, and I thought it was the perfect foil for some intricately-colored flowers. I selected a springy lavender-pink, aqua, and white color palette to create this vibrant birthday card. Let’s get started with the details!

The Half Spring Floral Mandala die reminds me of a lacy doily, but with a bit more updated and modern feel than a traditional doily that you might see at your grandma’s house. Flowers and lace go hand in hand in my book, perhaps reaching back to when I was obsessed with all things shabby chic right after I got married, or perhaps they’re synonymous because of lacy wedding dresses. Regardless, these pretty blooms from my Blissful Bouquet stamp set which I illustrated for Simon Says Stamp work beautifully with the lacy Half Spring Floral Mandala. I stamped the large peony and coordinating bud stamp, as well as some of the intricate foliage stamps using Contour Ink onto Hammermill white cardstock. I used my Copic markers to add vibrant color to the flowers and foliage for some intricate floral images, then die cut the finished images with the coordinating dies.

To help make my glittery white lace die cut pop and coordinate with the aqua foliage of my bouqet, I used a blending brush to blend some Dew Pawsitively Saturated Ink on the edge of my white A2 card base, keeping to roughly the same size and shape of the Half Spring Floral Mandala die cut. I adhered the die cut directly over the top of the blended area with liquid adhesive, then arranged my bouquet of flowers around the edge of the die cut, adhering them with foam squares.

For the greeting, I silver heat embossed a couple of sentiments from another of the stamp sets which I’ve illustrated for Simon Says Stamp: Lisianthus. I like to make sure that the sentiments included in my stamp sets are simple but meaningful, so that they can be used for lots of different purposes. I silver embossed the greetings onto some vellum, then used my sharp scissors to fussy cut the detailed Happy Birthday sentiment and trimmer to trim the longer sentiment strip. I folded and tucked the end of the sentiment strip behind the card front panel and added some tiny dots of adhesive behind the solid embossed areas to adhere the greetings to the card front. A few Surf Pawsitively Dazzling Gems finished everything off and added some extra sparkle!

Well, that’s all for my project today. I am headed to Ohio to work at CREATE in a couple of days, Simon Says Stamp’s big crafty event. If you see me, be sure to stop by and say hi!! I am so excited to see everyone and have some crafty fun! Thanks so much for stopping by today, and have a marvelous day!
Filed Under: simon says stamp, Uncategorized Tagged With: blissful bouquet, bouquet builder, copic coloring, half spring floral mandala, lisianthus, no line copic coloring, original illustration

Last Gasps of Summer with Lisianthus and an Autumnal Color Palette!

September 26, 2023

Hi friends! I have had the distinct pleasure of illustrating several stamp sets for Simon Says Stamp, and the Lisianthus stamp set is one of my absolute favorites. These fluffy blooms look like a cross between a rose and a peony, two of the prettiest flowers in existence (in my opinion, anyway!). I’d never seen any in real life, just in photos, and was always enchanted with them. A few weeks ago, my husband very sweetly brought me a bouquet of these gorgeous blooms from a local grower, and my obsession was renewed!! I immediately set out to create an end-of-summer-beginning-of-fall card with a more autumnal color palette, featuring deep magenta and vivid plum as the two main colors. As frequently happens in my craft room, I ended up with enough components to make two separate projects, but I’m not complaining! Let’s get started with the details!

When I started stamping the Lisianthus stamp, I stamped a background pattern on a piece of 5×7 cardstock as well as a separate Lisianthus on a separate piece of cardstock, intending to color all of the images and use them on one card. That ended up looking a bit too busy for my taste, so I created two different cards!

For my first project, I stamped a background pattern on a panel of 5×7 Hammermill cardstock using Intense Black ink from Hero Arts. I then colored the images using Copic markers in a vivacious magenta, lovely jade green, and delicate lavender color palette. I used a very dark maroon and black Copic to color the background, as well, and I just love the subtleties of the maroon and black blending into each other! The warm maroon makes the black a little less stark and, in my opinion, more autumnal! I trimmed the panel down slightly and matted with an ever-so-slightly larger panel of Dragonfruit cardstock from Concord & 9th.

To create a shiny frame around my meticulously-colored blooms, I trimmed down a panel of Tonic Purple Rain cardstock to 5×7, then mounted the colored panel with it’s vivid pink mat in the center. I added a simple, pale celery green die cut Fancy Thinking of You, cut twice and adhered together to create a dimensional die cut greeting. A few coordinating pale celery green gems finished everything off and added some sparkle!

The second project makes use of the standalone Lisianthus that I colored with the intention of adding it to the colored panel, but decided that it would do better as a focal point on a separate project. After I had finished coloring the image and cut it out with the coordinating die, I used the RV99 marker to color around the edge of the die cut. I knew I wanted to have a deep maroon background, and taking away that white edge makes the vivid and bold color palette that much more impactful! I trimmed down an A2 panel of some more Purple Rain cardstock and ran it through my die cutting machine using Simon Says Stamp’s Leaf Tumble embossing folder. If you haven’t tried embossing folders with metallic or mirror cardstock, this is your sign to do it… the results are absolutely exceptional.

I mounted my vivid pink Lisianthus die cut floral spray on the embossed mirror card front using foam adhesive. I then die cut the Fancy Thanks die from some more of that lovely celery green cardstock that complements the jade green eucalyptus leaves so beautifully. Again, I cut the die cut sentiment twice from the pale green cardstock and adhered them together to create a bit of extra height for the greeting to allow it to stand out even more from the bold background. Finally, I added a few more green gems for sparkle!

Well, that’s all for my projects today! I am getting these last few gasps of bright, summery colors in now, because fall and winter crafting will be full of muted tones, traditional red and green, metallics, and icy pastels, and I am so ready for it! Thanks so much for stopping by today, and have a marvelous day!

Filed Under: simon says stamp Tagged With: copic markers, embossing folder, fancy thanks, fancy thinking of you, leaf tumble embossing folder, lisianthus, original illustration

Simon Says Stamp Beautiful Days Release + New Illustration-Mother’s Day Dogwood!

April 5, 2023

Hi there! Simon Says Stamp is releasing a beautiful new collection of products tonight, called the Beautiful Days! This collection features so many beautiful, unique products that are perfect for creating springy cards, and I am thrilled that I have illustrated a stamp set included in this release, called Mother’s Day Dogwood! This stamp set features two large dogwood illustrations: one dogwood heart filled with sweet filler flowers and foliage, and one more simplistic illustration of a dogwood branch, as well as lots of sentiments to be used to build meaningful greetings for your Mother’s Day cards (or even non-Mother’s Day cards!). I have two projects to share with you today using my new Mother’s Day Dogwood stamp set and lots of beautiful colored cardstock, so let’s get started with the details!

Vivid colored cardstock is one of my favorite ways to make a huge impact on a card front. Figuring out how to add all of the different elements on my card while also keeping the intense color of the cardstock true (that is, not using white cardstock!) is like a puzzle for me. I love monochromatic cards, as you’ve seen if you have looked at my blog before, and my cards today feature monochromatic jewel-toned color scheme with bright pops of pink flowers and some pretty metallic accents!

For my first project, I paired the simple Mother’s Day Dogwood branch with my colored pencils and Hero Arts Adriatic cardstock. When coloring with pencils on colored cardstock, I like to use Hero Arts Unicorn White pigment ink. I think that, because this thick ink sits on top of the cardstock rather than sinking down into it, it melds nicely with the colored pencils, which also sit atop the cardstock, preventing unsightly lines from being visible beneath the colored pencils. When using super intense colored cardstock like this deep teal cardstock, I like to lay down a base layer of my lightest colored pencil, which in this case was a cool pale blush color. I covered the entirety of each petal with that pale blush, then went back and added my darker colors, blending them together with the same pale blush color. I die cut the finished colored piece with the coordinating dies.

To accent the pink flowers, I used a blending brush to blend Pinkfresh Studio Tidal Pond ink with the Simon Says Stamp Domed Arches Stencils and Masks. I love the boldness of the dark teal ink on the intense teal cardstock. After I’d blended the arch shape, I kept my stencil in place, then placed the Simon Says Stamp Tin Tile Stencil directly over the top of the cardstock and attached dome stencil, blending with the same Tidal Pond ink. This creates a super subtle monochromatic pattern within the arch shape. I removed the patterned stencil and, while the arch stencil was still in place, splattered some handmade rose gold metallic watercolor in the background. The pale rose gold juxtaposes beautifully with the vivid teal. I finally removed the arch stencil, leaving me with a lovely patterned background that is entirely one layer! So much dimension and interest when you layer multiple stencils together.

I trimmed down the stenciled panel so that it was slightly smaller than a standard A2, then mounted it on a full size A2 panel of the same Adriatic cardstock with some foam tape. I heat embossed one of the greetings from Mother’s Day Dogwood onto some more teal cardstock using rose gold embossing powder, which contrasts beautifully with the jewel-toned cardstock, then trimmed the sentiment out with sharp scissors. I popped up the die cut with more foam tape, then added a double layer of foam tape to the sentiment, which creates a triple layer of foam tape on this card… so much dimension! But I find that with monochromatic cards like this, dimension and varying heights are important elements in keeping things interesting.

My second card features some older products, but uses a couple of the sentiment builder stamps from my new Mother’s Day Dogwood stamps. I designed the sentiments so that they would work together or you could mix and match with sentiment dies, as I’ve done here. In some “free” time that I had a few weeks ago (a unicorn if ever there was one!), I decided to do some therapeutic watercoloring with the previously-released Lisianthus stamp set that I illustrated last year. I heat embossed the main image on some Fabriano Artistico watercolor paper using more rose gold embossing powder. I used Karin Brushmarker Pro markers to watercolor some pretty pinks, hunter green, and plum to this large image. I added a dark green halo around the edge, as well, so that after die cutting, I could have a dark green cardstock background without worrying about that pesky white edge!

For the background, I trimmed down an A2 panel of Hero Arts Shamrock cardstock and stamped the Simon Says Stamp Arches Background using Pine ink. I used a blending brush to blend more Pine ink around the edge. I love the halo effect this creates! I splattered some more sparkling metallic rose gold watercolor on the background to add a bit more textural interest, but I love the subtly-patterned monochromatic look on this beautiful green cardstock!

I had originally painted this image on a 4″x6″ panel of cardstock, so the die cut was just a tiny bit too narrow to fill out the full A2 card front. To compensate for this, I die cut an A2 Thin Frames die from Simon Says Stamp using the gorgeous Rose Gold Metallic cardstock, also from Simon Says Stamp, and added my Lisianthus die cut to the back of it, creating a delicate, coordinating metallic frame around my large floral die cut.

For the greeting, I die cut the “thanks” from the Basic Trio dies, cutting it twice from plain white cardstock and once from white velvet cardstock to add some extra texture to the card front. I layered all of the die cut sentiment pieces together, creating a dimensional die cut greeting. Using some of the sentiment builder stamps included in the Mother’s Day Dogwood stamp set, I heat embossed “Mom” and “for all you do” on some scraps of Shamrock cardstock, again with the rose gold embossing powder. It stands out beautifully from the jewel-bright cardstock. I arranged them all on my card front, creating a custom sentiment for my colorful card. I love mixing and matching different products to create one cohesive project! The trick is to keep the colors cohesive so that each component looks intentional. Finally, I added a smattering of pink Rose Tinted Glasses gems for one last bit of sparkle and shine.

Well, that’s all for my projects for today! The release blog hop will be later this week, so be sure to be on the lookout for that. Thanks so much for stopping by today, and have a marvelous day!

Filed Under: simon says stamp Tagged With: A2 thin frames, arches background, basic trio, colored pencil, domed arches, karin markers, lisianthus, mother's day, mother's day dogwood, stencil, tin tile, watercolor

Simon Says Stamp Happy and Joyful Release- FOUR New Stamp Sets!

April 19, 2022

Hi friends! I am utterly thrilled tonight to share that I have not one, but four new stamp sets that I designed being released in Simon Says Stamp’s new Happy and Joyful release for April 2022! We are still pretty chilly and not terribly green here (weird for mid-April), so I’m coloring up a garden full of flowers with these new stamps: Thankful Magnolia, Just A Note Pansy, Celebrate Rose Corner, and Lisianthus!

In the video below, I share some tips on how to get incredible dimension using Thankful Magnolia. I discuss how I achieve depth and shadow using the new OLO markers, as well as how to make intentional choices with my cardmaking. You can watch below or on YouTube by clicking here.

For those who can’t watch the video, here’s a brief summary of how I created this card:

I began by stamping the huge magnolia image from Thankful Magnolia onto some white cardstock using Intens-ified Black Ink from Hero Arts. I then used the new OLO markers (which you can read more about here-the special introductory pricing is still available until 4/24!) to add lots of beautiful depth and dimension to this gigantic flower. And when I say gigantic, I mean gigantic haha-this is a 5×7 card! I designed the image so that you could use the entirety of it on an A7 card, or just have a corner peeking out on an A2 card, or you could orient it so that just the foliage and the filler flowers create a wreath around the outside of the card front. But above all, as with all of my illustrations, I wanted a large bloom that was a blast to color.

Once I had finished coloring and die cutting the Thankful Magnolia (love love love that there is a coordinating die to go with this massive bouquet!), I used the Tin Tile stencil with some Merlot ink to create a textured background for the magnolia. You can see in the video how I manipulated the stencil to be able to extend it beyond the typical 6×6 to fit almost the entirety of the 5×7 card front. I added a greeting from Thankful Magnolia stamped with black pigment ink and heat embossed with pearlescent charcoal embossing powder. A few plum gems added some more sparkle and texture.

My second card features the new Just A Note Pansy stamps. I heat embossed this pretty swag of pansies using silver embossing powder on some Fabriano Artistico watercolor paper, then used Tombow markers to add tons of vibrant pinks and purples, working from the outer edges towards the center, rather than my usual work from the center out. I die cut the finished flowers with the coordinating die.

Next, I die cut the new A2 Marquee dies from some coordinating pink cardstock, then backed the die cut with some sparkling silver glitter cardstock to help coordinate with the silver embossing powder. I love that little sparkle peeking out around the edge of the rectangular die cut!

For the greeting, I silver embossed a few of the coordinating greeting stamps from Just A Note Pansy onto some more bright pink cardstock, then die cut and trimmed them. I added the marquee die cut to a coordinating pink A2 card base using foam tape, then added the watercolored pansies and greetings with even more foam tape. (So much height on this one!) I finished it off with some pink gems for sparkle!

My next card features my new Celebrate Rose Corner stamps. I used these in a bit of a non-traditional way to create this chalkboard card. This is one of my favorite ways to use super detailed images; adding some subtle white shading to the white embossed images is relatively quick and creates a neat impact on the overall card. I white embossed the Celebrate Rose Corner onto some black cardstock using white embossing powder, then added some white highlights to the flowers only using a white pencil. Such a neat effect!

For the greeting, I embossed the new XL Stacked Greetings using white embossing powder on the same black cardstock. I used the new Paws-itively Everything T-square to add a white pencil frame around the edge of a black slimline card base. I also blended a bit of white pigment ink on the one edge and splattered it with a bit of white gouache to add some extra texture and touches of white. I popped up the sentiment and the rose bouquet die cut using foam tape, then added some white iridescent pearls for some sparkle and shine.

My final card was a labor of love, for sure. I used my new Lisianthus stamps and dies with the Caran D’Ache Luminance pencils to create this super saturated and brilliantly purple card! I began by stamping the Lisianthus image onto some pale lavender cardstock using no-line coloring ink, then used the colored pencils to add lots of intense color to the image. Colored pencils are always a bit time consuming, but I am so pleased with the result! I die cut the finished image using the coordinating die.

Next, I stamped the new Soft Plaid Background stamp using some Deep Purple ink onto some more pale lavender cardstock. I used a blending brush to lightly blend the same Deep Purple ink around the edges of the plaid card base to create a kind of vignette for the background of my flowers. I love the tone-on-tone look with all of the different layers of purple!

Once my card base was complete, I adhered the flowers to the card front using foam adhesive. I white heat embossed a greeting from Lisianthus onto some strips of the same pale lavender cardstock, then popped them up wtih some more foam tape. Finally, I added a few pale purple gems for some sparkle.

Whew! Have you made it this far? That was a long one! I am so very excited to be sharing all of these new products and the projects that I created with them… such a thrill to see my illustrations come to life! I hope you’ll take a peek at the entire Happy and Joyful release-so many fun new products!

Thanks so much for stopping by today, and have a marvelous day!

Filed Under: simon says stamp Tagged With: celebrate rose corner, colored pencil, just a note pansy, lisianthus, no line coloring, thankful magnolia, tombow markers, watercolor

Primary Sidebar

  • Facebook
  • Instagram
  • Pinterest
  • YouTube

Favorite Shops

Secondary Sidebar

Subscribe

Enter your email address to subscribe to this blog and receive notifications of new posts by email.

Instagram
Something is wrong.
Instagram token error.
Follow
Load More

Archives

Tags

3D embossing folder alcohol markers better press birthday birthday card blog hop card kit christmas christmas card christmas tag colored pencil copic copic coloring Daniel Smith die cutting embossing folder embroidery felt giveaway holiday holiday card hot foil ink blending karin brushmarker pro layered stencil masculine my monthly hero new release no line coloring no line watercolor OLO marker olo markers original illustration pawsitively saturated rainbow shaker card slimline stamping stamptember stencil thank you thinking of you valentine's day video watercolor

Popular Posts

Simon Says Stamp Sending Cheer Blog Hop- Day 2 + Freebie + Giveaway!
Altenew October 2026 Release Blog Hop + Giveaway!
Rustic Monochromatic Stars for Christmas with Rainbow Splash!
December 2018 My Monthly Hero Blog Hop + Giveaway!
March 2020 Essentials By Ellen Blog Hop+Giveaway!
The Ton Stamps Summer Release: Day 1
Hero Arts Partners Blog Hop: Lawn Fawn!
Waffleflower July Release Blog Hop!
Simon Says Stamp STAMPtember Tim Holtz Collaboration: Festive Holidays!
The Ton Anniversary Release: Day 1!

Disclosure

Some affiliate links are used in my posts. This means that, should you click on one of my links and purchase something from that company, I will receive a small portion of the sale at no extra cost to you. I use the money earned from these sales to help maintain my blog. I so appreciate you visiting and, if you do choose to use one of my affiliate links, thank you so much for your support!
Copyright © 2026 ·Brunch Pro Theme · Genesis Framework by StudioPress · WordPress · Log in
Loading Comments...