• Skip to main content
  • Skip to primary sidebar
  • Skip to secondary sidebar

Sixth Street Sundries

Emily Midgett

  • Home
  • About Me
  • Contact
  • OLO Marker Color Swatch Chart
  • Shop

monochromatic

Simon Says Stamp STAMPtember Collaboration: Gina K. Designs!

September 10, 2026

Hello friends! I am back with another absolutely gorgeous Simon Says Stamp STAMPtember Collaboration project today. We are working with one of those superstar brands today: Gina K. Designs! I’ve had the opportunity to meet and become friends with Gina over the years, and she is just as lovely, wise, and warm in person as she is on her YouTube channel. Life’s Best Moments, the absolutely stunning exclusive, limited edition STAMPtember collaboration suite, has so many fantastic options available that fit your personal brand of creativity. Here’s a sneak peek at the set and accessories:

Stamps, stencils, dies, and even Poly-Glaze sheets…. can you even ask for anything better?? I’m a girl who loves options, never knowing which direction or mediums my fingers will reach for on a given day, and this gorgeous suite of products offers so. many. options. Click HERE to see the full suite of Life’s Best Moments products as a bundle, HERE for the stamps, dies, and stencils, or click HERE to see just the stamps and dies!

I created a set of two monochromatic cards using the stamps, dies, and stencils from Life’s Best Moments today, with lots of warm pinky peach ink blending with Ballerina, Carnation, and Rhubarb Pawsitively Saturated Inks and a couple of fun techniques. Let’s get started on the details for my projects!

To begin, I used Shading Brushes to blend Ballerina, Carnation, and Rhubarb Pawsitively Saturated Inks on two A2 panels of white cardstock. I set one aside, then used Carnation ink to stamp a lovely floral pattern from Life’s Best Moments directly on top of the blended background. The lightly blended panel allows the full-strength Carnation ink to show up beautifully without overpowering the pretty blending! After I had stamped my pattern, I used colored pencils to add peachy-pink coloring to the blooms themselves, leaving the foliage untouched. I love how the variation in the blended background still peeks through the petals and adds interest and color to the flowers as well as the foliage! I lightly splattered the panel with some iridescent watercolors for a bit of sparkling texture, then I stamped one of the greetings from Life’s Best Moments onto some more white cardstock using Rhubarb ink, then again with embossing ink, and added some iridescent embossing powder over the top to add subtle shimmer. I die cut the sentiment with it’s coordinating die, then used residual ink from my brushes to add some light blending over the top. I tucked the greeting amongst the flowers with some foam adhesive and added a blush twine bow and some Bubblegum Pawsitively Dazzling Gems.

For my second project, I used the remaining blended panel, this time stamping the large floral bouquet from Life’s Best Moments in the center with more Carnation ink. I then used the coordinating layering stencils to add color to the blooms and foliage using the same ink colors that were used on the card front itself. Once I had finished blending, I used the coordinating die to die cut the finished image. I also splattered the remaining negative space panel with more iridescent watercolors for added texture and shimmer.

For the greeting, I repeated the process from the first card, stamping a sentiment from Life’s Best Moments using Rhubarb ink and covering it with iridescent embossing powder for added shimmer. After die cutting the greeting with it’s coordinating die, I again blended the residual ink from the blending brushes over the top of the embossed sentiment, so that each element would color coordinate for a striking effect. I placed the blended and splattered negative space panel on my card front, then used thin foam adhesive squares to pop the floral die cut up within the die cut opening, I used another layer of foam adhesive to add the greeting, tucking it amongst the foliage and flowers, and finally finishing everything off with some more Bubblegum Pawsitively Dazzling Gems and a twine bow.

Well, that’s all for my projects today! Gina K’s STAMPtember collaboration sets always sell out super quickly, so don’t wait to purchase… once it’s gone, it’s gone for good! Upcoming collaboration sets are all listed HERE (though the photos are not updated until the set is revealed each day!) and you can add your email address to the “notify me” box for those sets that you know you will want so you can be sure to not miss out. Thanks so much for stopping by today, and happy STAMPtember!

Filed Under: simon says stamp, Uncategorized Tagged With: colored pencil, die cutting, gina k, ink blending, layering stencil, life's best moments, monochromatic

Mother’s Day Love in Purple with New Simon Says Stamp!

March 30, 2026

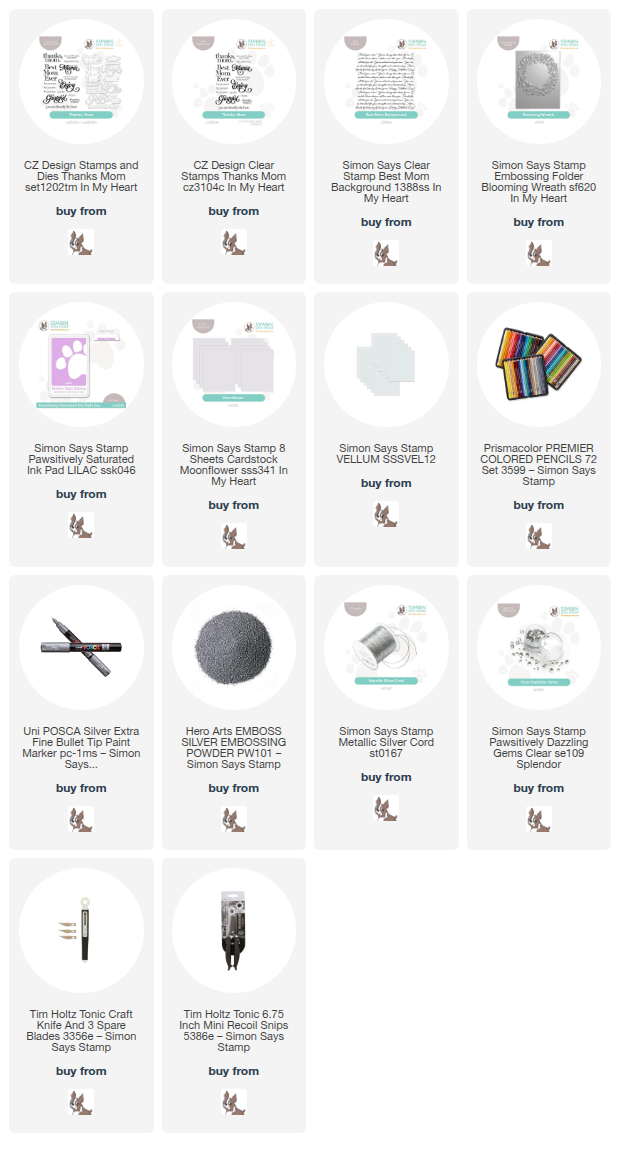
This post was sponsored by Simon Says Stamp. Thanks, Simon! *I have gathered links to all of the products used at the bottom of the post for your convenience, using affiliate links at no extra cost to you. Thank you for shopping with my links! I truly appreciate your support for my work!*

Hi friends! I just spent a weekend with some of my favorite crafty friends, and I’m back feeling refreshed and with a new creative spring in my step! I have some Easter projects planned for this week, but I wanted to share this pretty-in-purple Mother’s Day card with you using lots of new goodies from the  Simon Says Stamp n My Heart release! (Click HERE to see the entire new release!) Embossing folders are one of my absolute favorite products to use; so many incredible techniques can be applied to the magnificent textures created with these inexpensive products. They truly give you such a great bang for your buck! I chose to add some pencil coloring to the new Blooming Wreath embossing folder, adding some extra interest by starting with a colored cardstock base. Let’s get started with the details on my project!

To begin my project, I ran a panel of the new Moonflower cardstock through my die cutting machine using the Blooming Wreath embossing folder. I then used my colored pencils and a silver paint pen to add lots of delicate details to the embossed flowers, adding different shades of purple and shimmering metallics to the intricate images that had been embossed into my cardstock. Starting with the pale lavender cardstock helps enhance the monochromatic aesthetic of my project! Once I had finished coloring all of the images, I used my sharp scissors to cut the finished wreath out, as well as using a sharp craft knife to cut out the center of my wreath. I backed the finished wreath with vellum, creating the perfect circlet upon which to arrange my greeting!

After I had completed the floral wreath, I stamped the new Best Mom Background onto a full size A2 panel of the Moonflower cardstock using Lilac Pawsitively Saturated Ink. I then adhered the finished wreath over the center of the stamped panel using foam adhesive. The vellum behind the wreath helps to soften the patterned background, allowing plenty of visual space for the eye to focus on the sentiment!

After I had mounted the wreath, I heat embossed two greetings from the new Thanks Mom stamp set onto more Moonflower cardstock using silver embossing powder. I used the coordinating dies to die cut the greetings and placed them in the center of my colored wreath, again using foam adhesive, adding a bit of extra height to the sentiment so that it was easily viewed by the recipient. I tied some silver cord around the entire card base, nestling the bow beneath the greeting, then adhered my card front to my A2 card base. Finally, I added some Clear Pawsitively Dazzling Gems for an additional touch of sparkle!

Well, that’s all for my project today! I hope you’re enjoying the springtime temperatures like we are… the sun is warm and bright today, and the flowers are a-blooming. Thanks so much for stopping by today, and have a marvelous day!

Filed Under: simon says stamp Tagged With: best mom background, blooming wreath, colored pencil, die cutting, embossing, embossing folder, monochromatic, mother's day, no line coloring, thanks mom

Textured Thank You with Simon Says Stamp + SALE!

May 26, 2025

This post was sponsored by Simon Says Stamp. Thanks, Simon!

Hi friends! It’s Memorial Day here in the United States, a day in which we honor those who have fallen in service to our country. In honor of their sacrifice, I have a serene thank you project full of texture to share with you today featuring some beautiful soothing aqua tones that I’ve embellished with a bit of sparkle and shimmer. Let’s get started with the details!

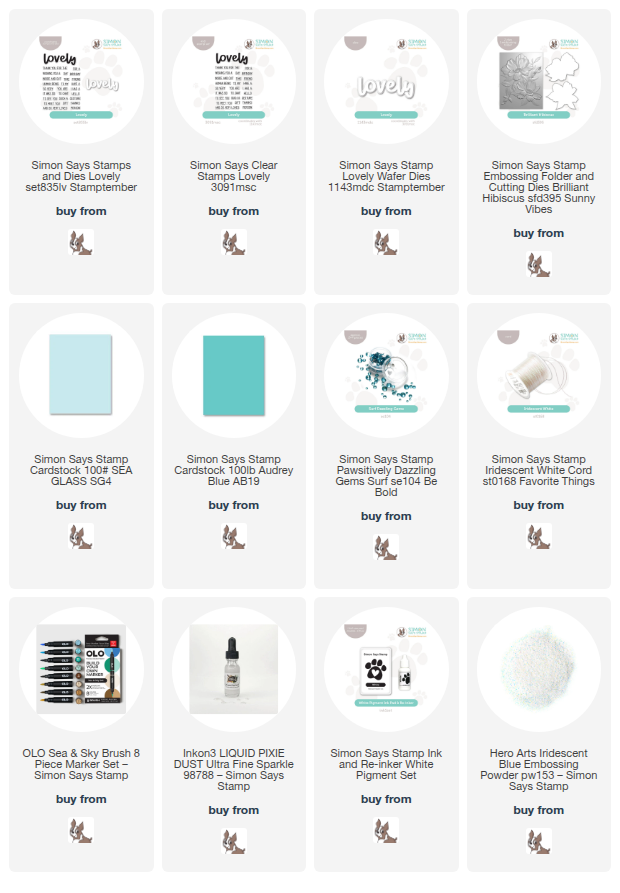
*I have gathered links to all of the products used at the bottom of the post for your convenience, using affiliate links. Thank you for shopping with my links! I truly appreciate your support for my work!*

To begin, I ran a panel of pearlescent aqua carotdstock through my die cutting machine using the Brilliant Hibiscus Embossing Folder. The pearlescent coating on the cardstock enhances the details of the embossed images beautifully. I also used the coordinating dies to die cut some Simon Says Stamp Sea Glass cardstock, then ran the die cut images through my Brilliant Hibiscus embossing folder, nestling them in the appropriate area to ensure that the details came through perfectly.

After I had embossed the die cut images, I used my OLO Markers to add some additional shading to the die cut flower. I selected markers that were the same general color as the Sea Glass cardstock, allowing the pale aqua cardstock to be the main focus of the color palette and using the OLO Markers to enhance the shadows. I used the 0 marker around the edges of the marker shading to soften the edges and create a seamless blend between the marker and the colored cardstock. I also used some glittering watercolors to add shimmer to the stamens of the flower and the edges of each petal.

For the greeting, I used Simon Says Stamp White Pigment Ink to stamp a greeting from the Lovely stamp set onto some Audrey Blue Cardstock. I also added some Iridescent Blue embossing powder over the top to add some gorgeous shimmer to my stamped sentiments. I die cut the “lovely” detail layer from some iridescent white foil cardstock and the shadow layer from some more Audrey Blue Cardstock, layering the die cut pieces together with liquid adhesive. Once I had finished the sentiment components, I used Simon Says Stamp Thin Foam Squares to adhere the die cut pieces over the deeply textured, embossed background. The deeper Audrey Blue cardstock against the pale pearlescent aqua backdrop is so gorgeous and highlights the shading on the die cut floral!

I finished the project off with a few Surf Pawsitively Dazzling Gems for added sparkle and tucked a Simon Says Stamp Iridescent White Cord bow beneath the greeting for a bit more texture and shine.

Well, that’s all for my project today. To honor our heroes and to celebrate the official start of summer, Simon Says Stamp is offering 15% off your entire purchase!

Simply enter code SPLASH at checkout to take 15% off of your purchase through the end of the day Monday, May 26!

Well, that’s all for my project today. Thanks so much for stopping by today, and if you are celebrating today, take a moment to remember the sacrifices of our soldiers and their loved ones so that we can be free. Have a marvelous day, friends!

Filed Under: simon says stamp Tagged With: 3D embossing folder, brilliant hibiscus, embossing folder, lovely, monochromatic, olo markers

Lacy White on White with New Simon Says Stamp + SALE!

May 8, 2025

This post was sponsored by Simon Says Stamp. Thanks, Simon!

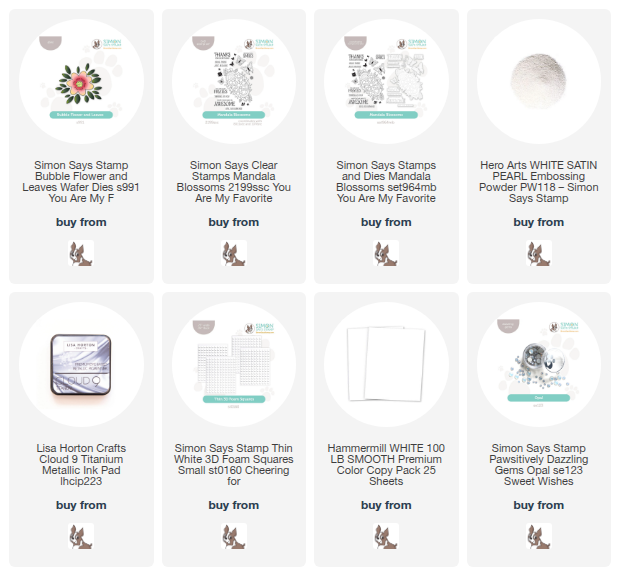
Hi friends! I am back today with a pair of fun and elegant monochromatic projects created using one of the new dies from the You Are My Favorite Release called Bubble Flowers & Leaves. I decided to take advantage of both the positive and negative die cuts to create these minimalist white-on-white cards, using lots of textures and foam adhesive to create interest and dimension. Let’s get started with the details!

*I have gathered links to all of the products used at the bottom of the post for your convenience, using affiliate links. Thank you for shopping with my links! I truly appreciate your support for my work!*

The new Bubble Flowers & Leaves die comes as one piece, featuring a large, whimsical bloom surrounded by varying sizes of foliage. My favorite part, however, is that you can use both the positive and the negative die cuts, because the die comes assembled as a single image while also die cutting individual images that can be used to create unique arrangements!

For my first project, I die cut the Bubble Flowers & Leaves several times on a solid panel of white cardstock, rotating the die each time that I die cut in order to create a continuous pattern. I reserved all of the positive die cuts and used foam adhesive squares to adhere the lacy negative die cut panel to a solid panel of white cardstock. The extra height from the foam adhesive allows the intricate pattern to be extra visible, but still maintains the subtle monochromatic color palette! I think this card would be so pretty in a rainbow of colors! I added a few butterflies and a sentiment from Mandala Blossoms, which I stamped using Lisa Horton Crafts Titanium Ink and heat embossed with some White Satin Pearl embossing powder to create a lovely pearlescent charcoal. I die cut the images and adhered them to the card front with liquid adhesive as well as some more foam adhesive. Finally, I added a few Opal Pawsitively Dazzling Gems to the centers of each flower for added sparkle!

For my second card, I created essentially the opposite card from my first. I used those leftover positive die cut pieces, this time arranging them on a blank card front and popping them up with foam adhesive to create a simplistic floral pattern. Because the flowers are a bit chunky and whimsical, this card has a much less intricate and involved aesthetic compared to the lacy background from the first card. I added another simple pearlescent charcoal greeting from the Mandala Blossoms and added a touch of sparkle with some more Opal Pawsitively Dazzling Gems.

Well, that’s all for my projects today!

To celebrate the mothers in our lives, whether that is your own mother, a friend, or just yourself, Simon Says Stamp is offering a fabulous sale:

Use code MAMA to take $15 off of your purchase of $100 or more! This offer expires at 11:59 pm on May 11, so be sure to take advantage! What a great way to treat yourself or a special momma in your life!

Thanks so much for stopping by today, and have a marvelous day!

Filed Under: simon says stamp Tagged With: bubble flower and leaves, lisa horton metallic inks, monochromatic, sympathy card, thinking of you

Monochromatic Winter Scenes with New DieCember from Simon Says Stamp!

December 4, 2024

This post was sponsored by Simon Says Stamp. Thanks, Simon!

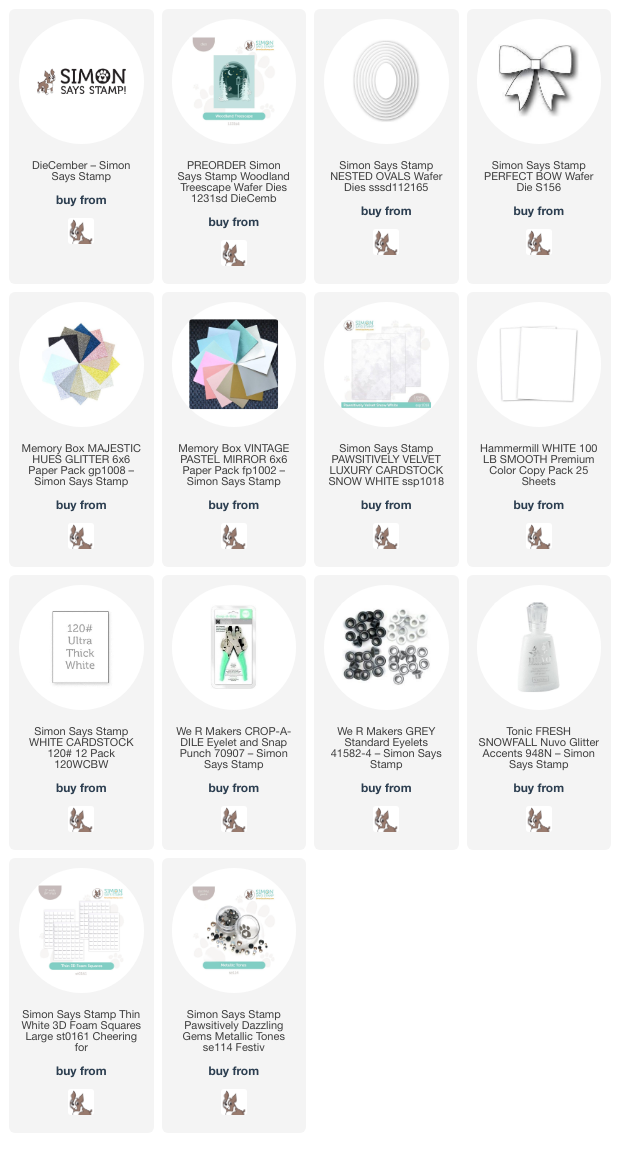
Hi friends! I am back with another project using some goodies from the ultra-fabulous DieCember release from Simon Says Stamp. If you’ve visited my blog very much, you’ll know that bold color palettes and vibrant, color-saturated projects are my bread and butter. But, I also hold monochromatic white-on-white projects very closely to my heart. White-on-white is just so ethereal, so utterly elegant, so crisp and clean… it’s such fun to try to achieve as much dimension as possible with different levels of height, different textures, different elements of shimmer and shine. For my projects today, I wanted to use the marvelous new Woodland Treescape die set, which uses three different oval-shaped apertures layered atop one another to create exquisite depth and dimension of this wintry holiday scene. I used the layered oval dies as well as the individual accessory dies to create two different, sparkling projects. Let’s get started with the details!

*I have gathered links to all of the products used at the bottom of the post for your convenience, using affiliate links. Thank you for shopping with my links! I truly appreciate your support for my work!*

The Woodland Treescape die set features three different oval aperture scenes that are intended to fit perfectly within an A2 card front, as well as individual image dies that work beautifully to enhance the winter scene! I wanted to take full advantage of all of the dies by creating a super detailed framed scene as well as a gift tag that can be turned into an ornament!

To create tons of dimension for both of my projects today, I put into practice my typical monochromatic techniques: texture, texture, and more texture! I love to use multiple types of “coated” cardstock to create dimension and add some distinction between the layers in addition to lots of foam adhesive. For these projects, I combined my typical white cardstock with white glitter cardstock, white pearlescent cardstock, and white velvet cardstock to create lots of different textures and tons of sparkle and shine!

For the tag/ornament, I began by die cutting two medium-sized ovals from the Nested Ovals die set using Simon Says Stamp White 120 lb Heavy Cardstock, layering them together with the scratched sides touching so that not only was the base of the ornament super sturdy, but the back of the ornament was nice and clean. I also die cut a frame using the same die plus the smaller nested die nestled inside it using white glitter cardstock to create a little framed vignette. Using the Woodland Treescape die set, I cut the individual tree dies from white pearl and white glitter cardstock, as well as the lamp post and snowflakes. I popped up the white glitter frame on the edge of the heavy tag stock oval base, then arranged the tree die and lamp die cuts within the frame using liquid and foam adhesive. To make sure that the tag/ornament would withstand being on a present before being added to the tree, I used my eyelet punch and a white eyelet on the punched hole. (I knew I kept that tool around for a reason! Everything comes back in fashion!) I added the snowflakes and Opal Pawsitively Dazzling Gems around the blank areas and some glittering snow using Nuvo Glitter Accents. Finally, I topped the entire thing off with an adorable Perfect Bow die cut from Pawsitively Velvet Snow Velvet cardstock.

How pretty would this be to put on a Christmas tree? I love when handmade tags serve a dual purpose, more than just decorations to be thrown away!

To create my framed scene, I reused the same basic techniques from the tag/ornament: multiple types of white texture, this time within a 5″ x 7″ canvas and lots and lots of foam adhesive! I die cut the elements of the Woodland Treescape die set using the same white glitter, pearlescent, and plain cardstock, cutting each layer from an A7 panel of cardstock. The oval aperture dies can be adapted to fit more than just an A2-sized card! I removed the glass from an inexpensive frame from my local dollar store and backed my A7 panel of white glitter cardstock with it, then arranged the oval die cuts atop it, laying down the first layer with only liquid adhesive, then the second layer with Thin Foam Adhesive Squares, finally adding the last layer with a double layer of Thin Foam Adhesive Squares to ensure many variations in height and distinction between the layers.

After I had layered the large die cuts, I used the same white glitter and pearl cardstock with the individual tree and snowflake dies to add some extra details and fill in some of the blank spots created by using the larger A7 size. I adhered all of the pieces with liquid and foam adhesive, then added some more Opal gems to create a snowy effect. Finally, I added some more white glitter “snow” with the Nuvo Glitter Accents, enhancing the snow drift layers and adding some snow to the tree branches. After the glitter glue was dried, I placed the glass-backed panel inside my frame, allowing the thick layers of foam adhesive to create tons of dimension and depth on my monochromatic winter scene. I am just so in love with this die set… it’s so incredibly elegant and can be used in so many different ways with all of the different components!!

Well, that’s all for my projects today! I know that this Woodland Treescape die set is currently being sold on preorder, so don’t be discouraged that it’s not currently in stock. It seems that I was not the only person who fell in love with this set from DieCember. When you preorder an item, you are guaranteed to be shipped one as soon as the restock arrives at the Simon warehouse. This die set would work beautifully for winter cards beyond Christmas, so don’t miss out on this one! Thanks so much for stopping by today, and happy DieCember!

Filed Under: simon says stamp Tagged With: christmas card, christmas ornament, christmas tag, die cutting, diecember, eyelet, framed scene, holiday card, monochromatic, nested ovals, perfect bow, picture frame, snow, tag, white, woodland treescape

  • Page 1
  • Page 2
  • Page 3
  • Interim pages omitted …
  • Page 5
  • Go to Next Page »

Primary Sidebar

  • Facebook
  • Instagram
  • Pinterest
  • YouTube

Favorite Shops

Secondary Sidebar

Subscribe

Enter your email address to subscribe to this blog and receive notifications of new posts by email.

Instagram
Something is wrong.
Instagram token error.
Follow
Load More

Archives

Tags

3D embossing folder alcohol markers better press birthday birthday card blog hop card kit christmas christmas card christmas tag colored pencil copic copic coloring Daniel Smith die cutting embossing folder embroidery felt giveaway holiday holiday card hot foil ink blending karin brushmarker pro layered stencil masculine my monthly hero new release no line coloring no line watercolor OLO marker olo markers original illustration pawsitively saturated rainbow shaker card slimline stamping stamptember stencil thank you thinking of you valentine's day video watercolor

Popular Posts

Simon Says Stamp Sending Cheer Blog Hop- Day 2 + Freebie + Giveaway!
Altenew October 2026 Release Blog Hop + Giveaway!
Rustic Monochromatic Stars for Christmas with Rainbow Splash!
Waffleflower July Release Blog Hop!
Hero Arts Partners Blog Hop: Lawn Fawn!
March 2020 Essentials By Ellen Blog Hop+Giveaway!
December 2018 My Monthly Hero Blog Hop + Giveaway!
The Ton Stamps Summer Release: Day 1
The Ton Anniversary Release: Day 1!
Altenew Paint A Flower: Carnation Blog Hop+Giveaway!

Disclosure

Some affiliate links are used in my posts. This means that, should you click on one of my links and purchase something from that company, I will receive a small portion of the sale at no extra cost to you. I use the money earned from these sales to help maintain my blog. I so appreciate you visiting and, if you do choose to use one of my affiliate links, thank you so much for your support!
Copyright © 2026 ·Brunch Pro Theme · Genesis Framework by StudioPress · WordPress · Log in
Loading Comments...