• Skip to main content
  • Skip to primary sidebar
  • Skip to secondary sidebar

Sixth Street Sundries

Emily Midgett

  • Home
  • About Me
  • Contact
  • OLO Marker Color Swatch Chart
  • Shop

nested domed arches

Shaped Snowflake Card Two-fer with New Simon Says Stamp!

December 12, 2024

This post was sponsored by Simon Says Stamp. Thanks, Simon!

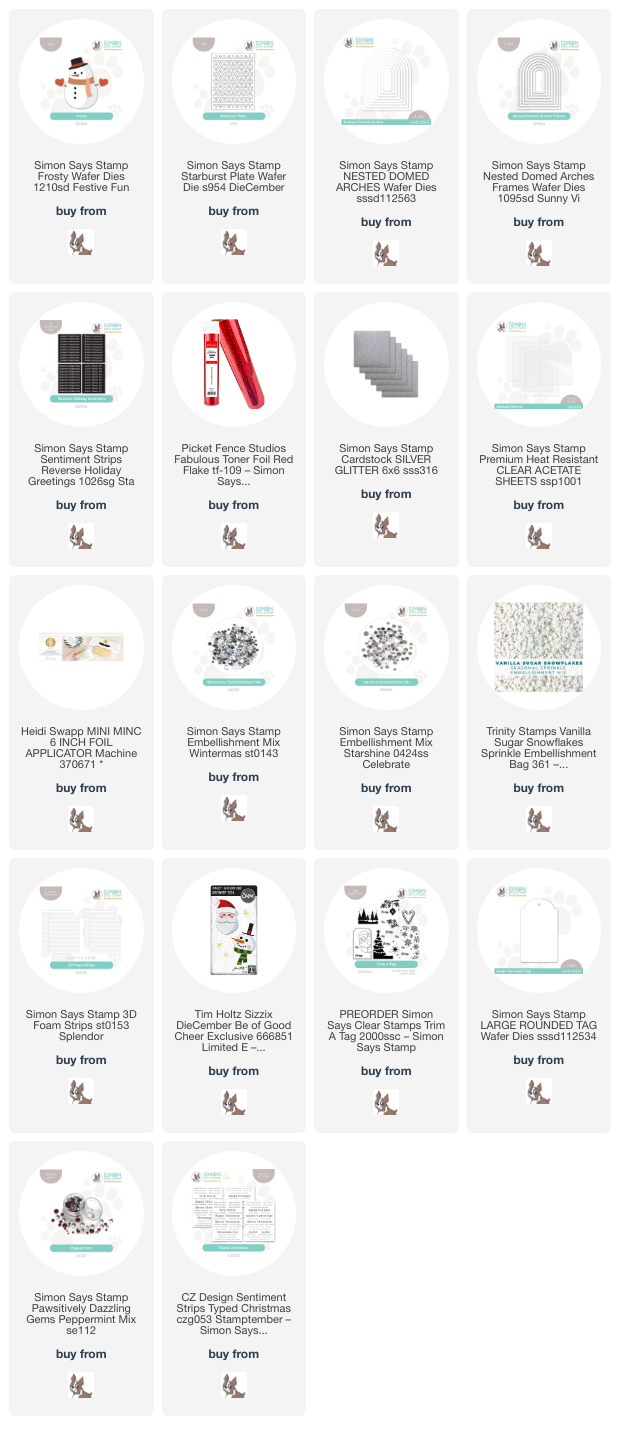
Hi friends! Do you save your scraps and die cut leftovers? I am so bad about saving so many scraps (or maybe so good…. depends on your perspective, I guess) but sometimes I find the perfect use for a leftover die cut. I created THIS card using the beautiful Starburst cover plate die from the new DieCember release to to create a patterned frame with the negative die cut for my shaker card, but I made sure to keep the die cut itself to use on a future project! Let’s get started on the details for part two of my two-fer project!

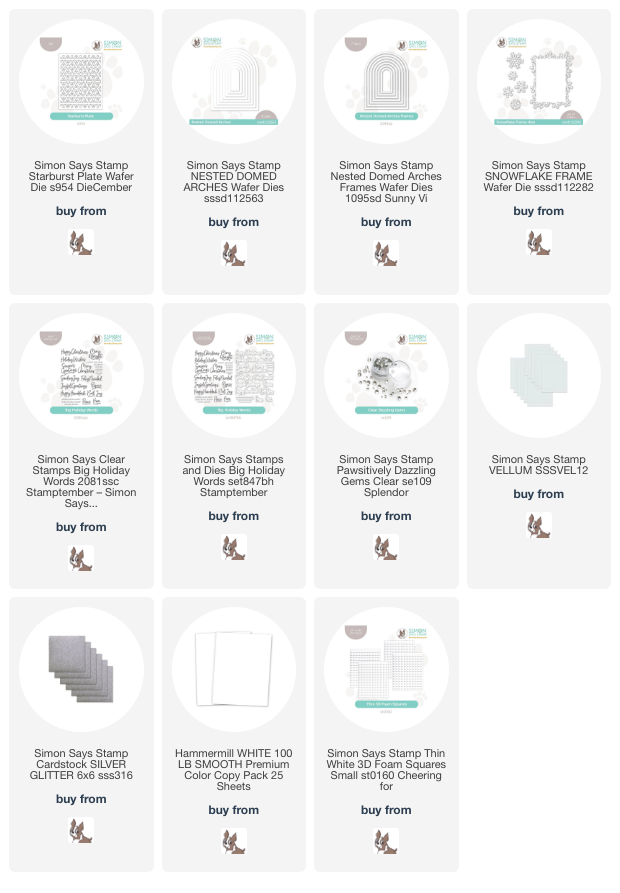
*I have gathered links to all of the products used at the bottom of the post for your convenience, using affiliate links. Thank you for shopping with my links! I truly appreciate your support for my work!*

For the part one of my two-fer, I began by die cutting the new Starburst Plate from plain white cardtsock, then used a Nested Domed Arches die to cut a window from the center of the patterned die cut panel. I used that patterned negative frame to create a decorative window around my snowman for the post linked above, but I reserved the die cut itself for this shaped card! I used the same size Nested Domed Arches die to cut a piece of Simon Says Stamp Vellum, which I layered behind the patterned arch piece with some liquid adhesive. I also used Simon Says Stamp Silver Glitter Paper to die cut one of the Nested Domed Arches Frames dies, slightly smaller than my patterned background die cut. I layered that frame over the top of my patterned piece with some more liquid adhesive. The vellum helps to add a softness behind the patterned piece, as well as adding some additional stability to the intricately detailed die cut.

To create the shaped card, I simply placed the largest size of the Nested Domed Arches dies on a folded A2 card, making sure to placed the die over the edge of the fold so that the folded card would remain intact. The I think this is such a unique look for a holiday card; it reminds me of a stained glass window at church! I layered the snowflake, vellum, and glitter piece in the center of the shaped card base, adhering it with some thin foam adhesive squares for a touch of extra dimension.

After I had created my card base and background, I used the marvelous Big Holiday Words stamp and coordinating die set to create my greeting. I heat embossed the large “Merry Christmas” and “& Happy New Year” sentiments onto more white cardstock using silver embossing powder, then die cut the finished sentiments with their coordinating dies. I popped them up in the center of the die cut panel using some more thin foam adhesive squares, creating lots of different levels of height and keeping the monochromatic card interesting! To add a touch of wintry sparkle to the somewhat plain card, I die cut some individual snowflakes using the Snowflake Frame dies and more silver glitter cardstock. I arranged them around the top of my arch in a little snowflake swag, embellishing the center of each snowflake with some Clear Pawsitively Dazzling Gems for extra holiday glitz!

Well, that’s all for today’s project. I love when you can get multiple uses from one die cut; it makes me feel better about not wanting to throw away my scraps!! (I know I’m not the only one who does that!) Thanks so much for stopping by today, and Happy DieCember!
Filed Under: simon says stamp Tagged With: big holiday words, christmas card, die cutting, diecember, holiday card, nested domed arches, snowflake frame, starburst plate

Snowflake Shaker Card with New Simon Says Stamp DieCember Goodies + FREE Gift With Purchase!

December 2, 2024

This post was sponsored by Simon Says Stamp. Thanks, Simon!

Hi friends! I am back with another project featuring some of the fabulous goodies from the new Simon Says Stamp DieCember release. I love a good shaker card; there’s something so festive and just plain fun about receiving a card that is filled with fantastic shaker bits and sequins. A shaker card always puts a smile on the recipient’s face, right? So it only makes sense to send Christmas Cheer with a super fun shaker card created with some creative die cutting and sparkling sequins. Let’s get started with the details!

*I have gathered links to all of the products used at the bottom of the post for your convenience, using affiliate links. Thank you for shopping with my links! I truly appreciate your support for my work!*

I absolutely adore cover plates; they create such an enormous impact with one piece of cardstock and one pass through your die cutting machine. The new Starburst Plate is so beautifully intricate that I wanted to stretch that easily-created die cut even further by creating a die cut window with the negative space and a second card with the positive space! (More about that in a future post.) I began my project today by die cutting an A2 panel of white cardstock using the Starburst Plate, then placing the one of the Nested Domed Arches in the center of the die cut and running it through my die cutting machine again. I made sure to reserve the patterned, arched die cut for a future project, and backed the remaining negative piece with an A2 piece of acetate, creating a large, plain window to start my shaker card! I added an appropriately-sized Nested Domed Arches Frame die cut, cut from some Simon Says Stamp Silver Glitter Cardstock, creating a border around my window opening.

After creating my background, I used the previously-released Frosty snowman die with some colored cardstock to create the focal point for my project. The finished Frosty fits perfectly inside my arched window! I used the Simon Says Stamp 3D Foam Adhesive Strips around the edges of the back of my shaker front, then filled the entire shaker with some gorgeous and fun wintry sequins, adding a few plain red sequins to coordinate with the cheerful red scarf, mittens, and hat on my Frosty. I sealed up the shaker with a panel of plain white cardstock. I love how the sparkling sequins peek through the snowflake windows from the Starburst Plate die cut!!

For the greeting, I used my Minc Machine with Picket Fence Studios Red Flake foil to make the Reverse Holiday Greetings set look super shiny and festive. I trimmed the strip down and tucked it beneath my snowman with some more thin foam adhesive. Tucking the sentiment right beneath Frosty helps to ground him a bit so that he’s not floating in midair in my window!

Well, that’s all for my project today. Simon Says Stamp DieCember celebration is in full swing, and to make things even more special and fun, Simon Says Stamp is offering an exclusive freebie: Be of Good Cheer die set

You can receive this adorable Be of Good Cheer die set set from Tim Holtz with any $25 Tim Holtz purchase! Click HERE to check out all of the goodies eligible for the promotion!

I created a fairly quick tag using the sweet Santa die from Be of Good Cheer:

Some white embossed snowflakes on a cheerful red tag created the perfect backdrop for my happy Santa!

I added a few Peppermint Pawsitively Dazzling Gems, a cherry red bow, and a jingle bell to make things extra special.

Well, that’s all for me today. This fantastic freebie (valued at $16.99!) is only available while supplies last, so don’t wait! Thanks so much for stopping by today, and Happy DieCember!

Filed Under: simon says stamp Tagged With: christmas card, christmas tag, diecember, freebie, frosty, holiday card, hot foil, minc, nested domed arches, nested domed arches frames, pawsitively dazzling, reverse holiday greetings, santa, shaker card, starburst, tag, tim holtz, toner foil

Color Drenched Ruby Red Holiday Cards with Simon Says Stamp!

September 21, 2024

This post was sponsored by Simon Says Stamp. Thanks, Simon!

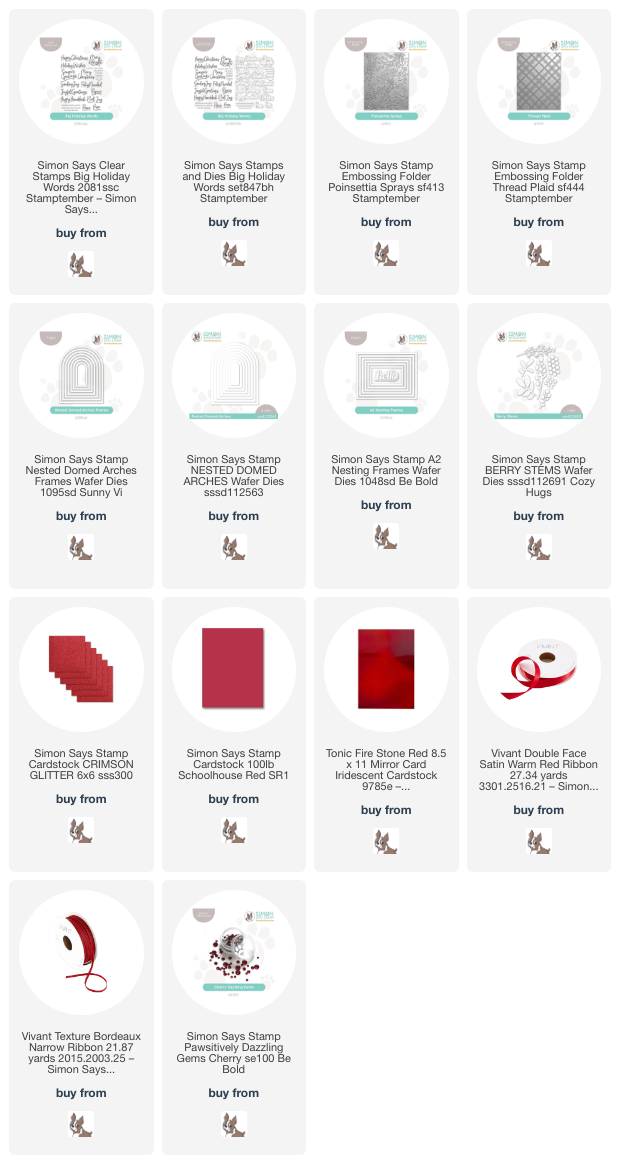
Hi friends! I have some more color-drenched projects to share with you today featuring some new and old goodies from Simon Says Stamp. The Simon-branded STAMPtember release from the beginning of the month featured some absolutely beautiful new 3D Embossing Folders. The amount of detail that you can achieve with Simon’s 3D embossing folders is absolutely spectacular, and I love pairing them with shining foil mirror cardstock. The coating on the foil cardstock helps make the details that much crisper and more intense. I created a pair of color-drenched ruby red cards today featuring the new Poinsettia Sprays Embossing Folder and the incredibly versatile Thread Plaid embossing folder (which is currently out of stock, but you can always sign up to be notified when it is back in stock!).

Whenever I am working with a color-drenched color palette, my goal is to add as many different textures to the card front as possible. To accomplish this, I went to my cardstock stash and pulled several different types of red cardstock: Crimson glitter cardstock, Schoolhouse Red cardstock, and luxurious Firestone Red mirror cardstock from Tonic. The combination of these three unique cardstocks layered together creates multiple elements of texture, the contrast of which helps keep the differentiation between the different layers.

For my first project, I die cut a large Nested Domed Arches die cut using the Firestone Red mirror cardstock, then ran it through my die cutting machine using the new Poinsettia Sprays Embossing Folder, embossing some gorgeous pattern and texture into the shining cardstock. I also die cut some Nested Domed Arches Frames from Crimson glitter cardstock and layered a glittery frame that was slightly smaller than the embossed mirror panel. The combination of the two different textures in the same vibrant red is so elegant!

I love the generously-sized sentiments in the new Big Holiday Words stamp and die set, so I decided to use that as my focal point for the card by embossing the “joyful greetings” sentiment onto some Schoolhouse Red cardstock with white embossing powder so that it would pop from the red background beautifully! The botanical embossed background lent itself beautifully to some foliage die cuts, so I accented the sentiment with some Berry Stems dies, cut from more Lipstick Red cardstock and accented with Cherry Pawsitively Dazzling Gems. I popped up the sentiment die cut with some foam adhesive and tucked the berry sprigs behind it, accenting everything with a festive bow tied using Vivant Bordeaux Narrow Ribbon. So festive and intense!

For my second project, I used the same Firestone Red mirror cardstock to emboss the Thread Plaid embossing folder, creating lovely, festive texture with the coated mirror cardstock. I repeated the framed theme by die cutting the A2 Nesting Frames dies from more Crimson glitter cardstock, adhering a slightly smaller frame to the embossed mirror panel.

I wanted to put several of the sentiments from Big Holiday Words to use, so I heat embossed “joy, hope, peace” and “sending love & light” onto more Schoolhouse Red cardstock using white embossing powder and die cut them with the coordinating dies. I arranged them from smallest to largest, creating a Christmas tree shape and accenting the images with Cherry Pawsitively Dazzling Gems for added sparkle. Finally, I created a “tree topper” with a fluffy bow tied with Vivant Warm Red Satin Ribbon. These Vivant ribbons are so luxurious!

Well, that’s all for my projects today! I am obsessed with color drenching these days. There’s something so luxurious and elegant about these monochromatic projects, especially for Christmas. I encourage you to give it a try! Thanks so much for stopping by today, and have a marvelous day!

Filed Under: simon says stamp Tagged With: 3D embossing folder, A2 Nesting Frames dies, berry stems, big holiday words, christmas card, color drenched, die cutting, embossing folder, holiday card, nested domed arches, thread plaid

Simon Says Stamp STAMPtember Collaboration: Pinkfresh Studio!

September 11, 2024

Hi friends! The new limited edition Pinkfresh Studio STAMPtember-Edged Floral stamp set is now available, and it’s a stunner! This 6×6 set features a large botanical corner stamp perfect for creating a lovely textural adornment on your background or as a corner focal piece! I used both techniques with some of Pinkfresh Studio’s vibrant, unique inks to create a pair of pretty-in-pink cards. Let’s get started with the details on my projects!

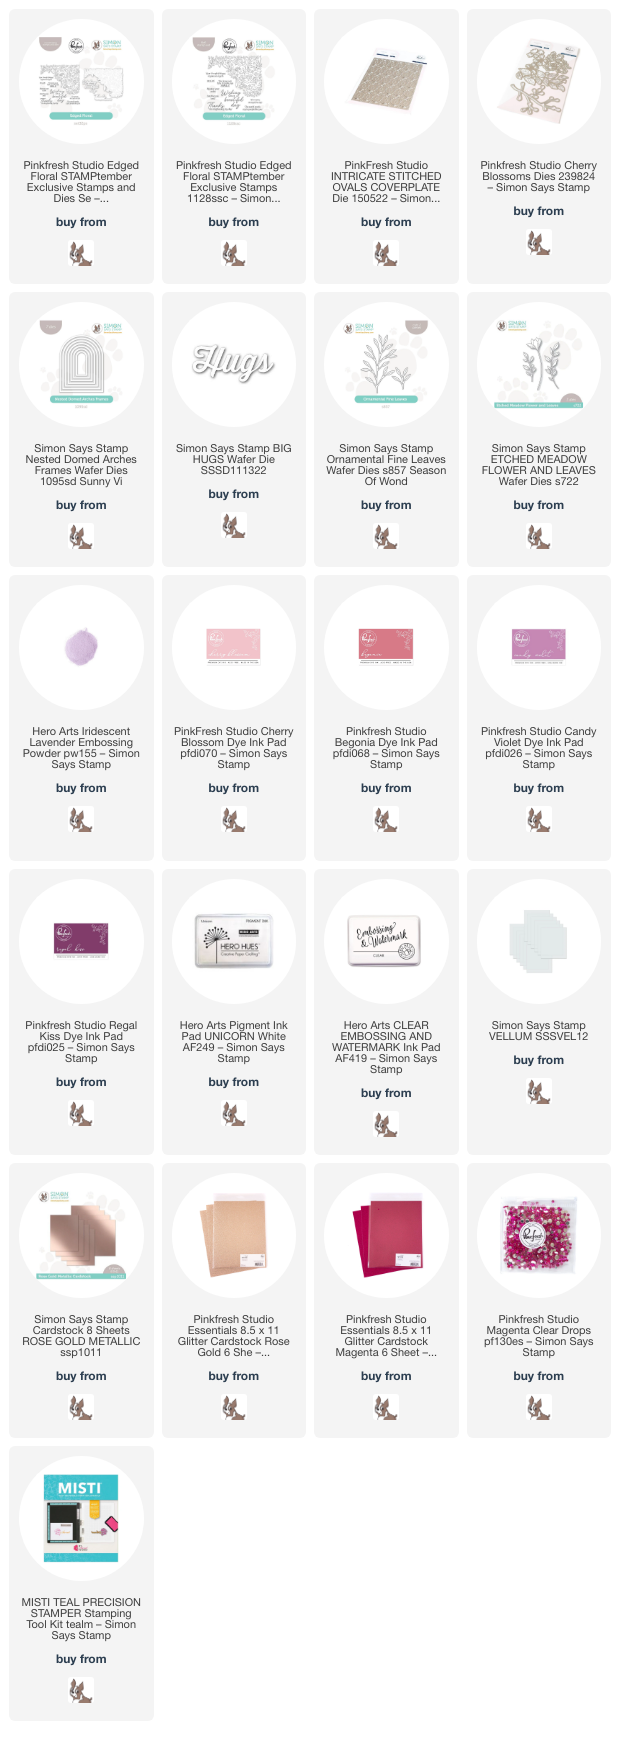
Both of my projects features the gorgeous Pinkfresh Studio STAMPtember-Edged Floral heat embossed with Iridescent Lavender embossing powder from Hero Arts; these iridescent embossing powders are so unique and versatile, and I love using them with intricate stamps like these! I pulled from the lovely shades in the iridescent embossing powder to select Cherry Blossom, Begonia, Candy Violet, and Regal Kiss Pinkfresh Studio inks to create a gorgeous sunset-inspired ombré.

For my first project, I heat embossed the main image from the Edged Floral set onto some vellumusing the Iridescent Lavender embossing powder, then used sharp scissors to fussy cut the image (but you have the option of using the coordinating dies to save your wrists and quite a bit of time!). From straight on, the embossing on the vellum looks like delicate texture, but from certain angles, the iridescent embossing powder shows off so beautifully, as you can see in the photo below. I wanted to create some contrast behind the embossed vellum piece, so I blended Cherry Blossom, Begonia, Candy Violet, and Regal Kiss Pinkfresh Studio inks on the diagonal on a panel of white cardstock, then ran the panel through my die cutting machine with Pinkfresh Studio’s Intricate Stitched Ovals die, adding pretty texture to the blended panel.

To add some interest around my sentiment, I die cut the Cherry Blossoms dies from Pinkfresh using some coordinating bubble gum cardstock, as well as Pinkfresh Studio Rose Gold glitter cardstock. I heat embossed the greeting onto some deep magenta cardstock, stamping it first with white pigment ink, then again with sticky embossing ink, finally sprinkling the Iridescent Lavender embossing powder over the top to create a unique iridescent sentiment. The initial layer of white pigment ink helps to make the iridescent embossing powder stand out a bit better on the vibrant cardstock. I fussy cut the sentiment, (again, you could use the coordinating die-they cut out the sentiments, too!) then arranged the sentiment and flowers on my fussy cut floral vellum corner, popping some of the pieces up with foam adhesive squares and adding some with liquid adhesive. I added some more foam adhesive on the back of the vellum piece behind the solid die cuts to hide them, then adhered it to the blended background. I tucked a Nested Domed Arches Frames cut from some Simon Says Stamp Rose Gold Metallic cardstock, finally adding a few Pinkfresh Studio Clear Drops: Magenta to the flower centers for a bit more shine and color!

For my second card, I set up the Edged Floral stamp in my MISTI, stamping it once using Cherry Blossom ink, then again with sticky embossing ink, finally adding some more of the Iridescent Lavender embossing powder, then rotating it 180* and repeating the process, so that I had the floral design in each corner. Stamping the pale pink ink first and adding the iridescent embossing powder creates the prettiest effect, especially when paired with some soft, tone-on-tone ink blending using Cherry Blossom, Begonia, and Candy Violet Pinkfresh Studio inks around the edges.

The somewhat simplistic nature of the individual images themselves from Edged Floral gave me some freedom when selecting botanical dies to add to my card; I selected Ornamental Fine Leaves and Etched Meadow Flower & Leaves dies, both from Simon Says Stamp, which I die cut from pearlescent blush cardstock and Magenta glitter cardstock. I also die cut the Big Hugs die from some brushed pink foil cardstock and enhanced the large sentiment die cut with another sentiment from the Edged Floral set, stamped with white pigment and embossing inks, then heat embossed with the Iridescent Lavender embossing powder. I arranged the die cuts on a small rectangle of vellum, allowing the flowers and foliage to peek out from behind the large sentiment die cut, finally adding a few shimmering gems for added sparkle!

Well, that’s all for my projects today! These STAMPtember collaboration sets are limited edition and usually sell out very quickly, so if you’re on the fence, don’t wait too long! To sweeten the deal and make it even easier for you to shop, Heidi at Simon Says Stamp has offered free shipping for purchases over $25 for a limited time!!

This limited edition stamp set is so gorgeous, and the added option to have the coordinating dies for both the image and the sentiments makes it a must-have. Thanks so much for stopping by today, and Happy STAMPtember!

Filed Under: pinkfresh studio, simon says stamp Tagged With: big hugs, cherry blossoms, Edged Floral, embossing, etched meadow flower and leaves, exclusive, heat embossing, ink blending, intricate stitched ovals, limited edition, nested domed arches, ornamental fine leaves, stamptember

Once Upon A Dream with Simon Says Stamp!

August 30, 2024

This post was sponsored by Simon Says Stamp. Thanks, Simon!

Hi friends! I am back with a pair of projects today featuring a new stamp set illustrated by my incredibly talented friend Alberto Gava for Simon Says Stamp: Once Upon A Dream. I definitely had to keep this set under lock and key from my 10 year old daughter… she immediately started squealing when it arrived in the mail! I thought I would make some customized projects for today’s post using this adorable set, including a custom notebook just for her. Let’s get started with the details!

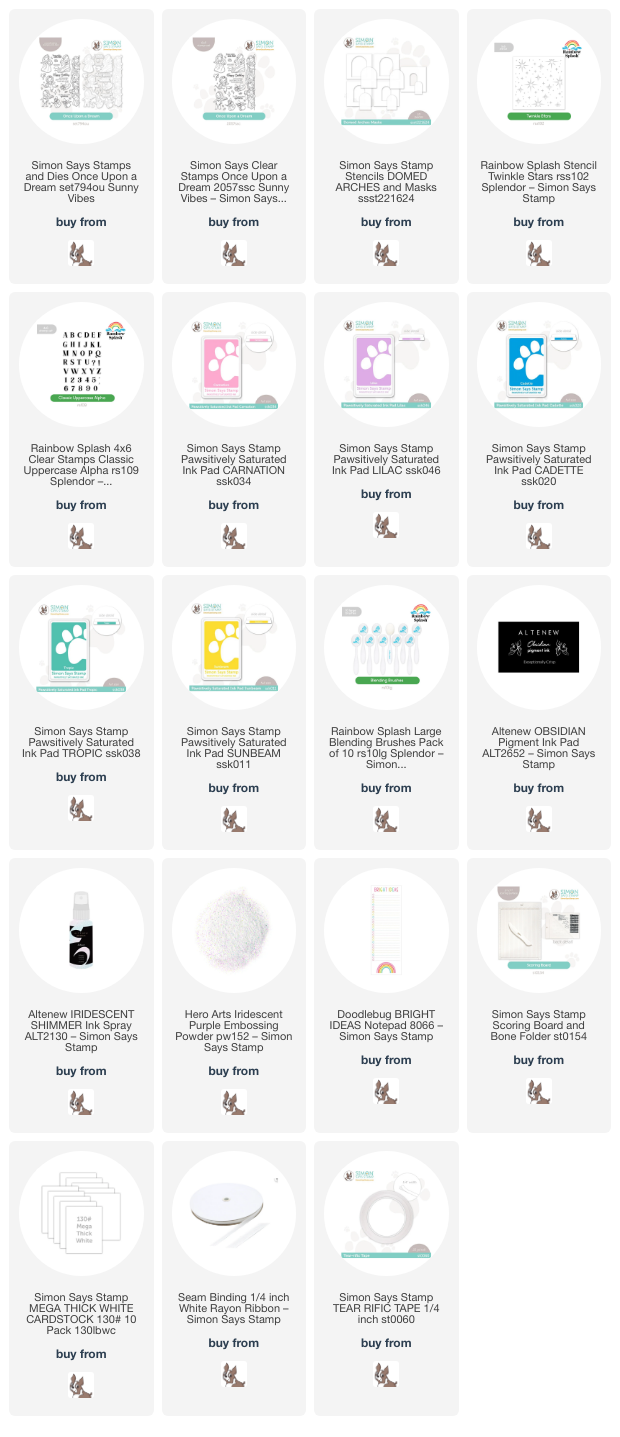
I wanted to use as many of the images in the sweet Once Upon A Dream set, so I stamped lots of them on some white cardstock using black pigment ink and embossed them with clear embossing powder. While it’s not recommended to use alcohol markers with embossed images, I occasionally will use my Copic or OLO markers with clear embossed black outline images, because the clear embossing powder seems to make those black lines so much crisper and more visible. When using cute images like these, I want to have those crisp black lines to help the images stand out even more!

For my first project, I used the Princess Aurora image with the fairies, coloring her dress with some pretty pink and adding some violet down at the bottom of her skirt, channeling the final scene in the movie when her dress is changing from pink to blue over and over! I stamped the images from Once Upon A Dream using black pigment ink and clear embossed them, then used Copic markers to add color to the images in the classic Sleeping Beauty color palette.

To create the background for my die cut images, I placed one of the Nested Domed Arches Masks + Stencils in the center of a white A2 card front, then used blending brushes to blend Pawsitively Saturated Ink in shades of Carnation, Lilac, Cadette, and Tropic inks in an ombré. With the arch stencil still in place, I added the Rainbow Splash Twinkle Stars stencil over the top of the open area and spritzed the twinkling star pattern with iridescent shimmer spray. I love this technique; it adds just the right amount of magical sparkle, which works perfectly with the sweet sentiment from Once Upon A Dream! Just for extra shimmer, I splattered some iridescent glitter watercolors on the stenciled dome, too. I trimmed down the sides (I hadn’t gotten the arch stencil centered 100% perfectly, and so needed to do some maneuvering) and added strips of holographic foil cardstock on either side. I popped up the images and greeting die cuts with foam adhesive, then added a few shimmering gems for added sparkle!

As a bonus project, I decided to create this sweet little notebook for my daughter. I have been trying to organize some of my older craft supplies, and I found a stash of skinny notepads perfect for customizing with inspirational sentiments and colorful images! (I’m not sure where exactly I purchased the notepads that I used, but these notepads from Doodlebug are similar!) The princesses from Once Upon A Dream peeking around the corner was the perfect size to adorn the front of my notebook cover, which I created using the Simon Says Stamp Score Board and some of the heavyweight 130 lb Mega Thick Cardstock from Simon, customizing the cover to the measurements of the notepad. (I will have a video on how I created this project very soon!) I closed the cover for the notebook by adding some 1/4″ white ribbon and adhering it with some Tear-rific Tape.

To decorate the cover of the notebook, I used Pawsitively Saturated Ink in shades of Carnation, Lilac, Cadette, Tropic, and Sunbeam to blend a vibrant rainbow down a panel of white cardstock that fit perfectly over the front of my notebook cover. I also splattered it with some more iridescent glitter watercolors for added shimmer and magic!

After I’d created my notebook cover, I decided to personalize it for my daughter. She’s like me and loves a pretty notebook and a good pen, and she is always on the lookout for things with her initials, so I knew that she would flip out over a completely personalized notebook with rainbows and princesses! I used the Rainbow Splash Classic Uppercase Alpha to personalize it, stamping the letters in black pigment ink and covering them with Iridescent Purple embossing powder. The combination of the black letters with the shimmery, semi-translucent purple embossing powder creates such a unique look! I added all of the die cut elements to the front of the notebook cover with some foam adhesive, finally finishing the project off with some sparkling gems! And yes, I gave it to my daughter, and yes, she did love it. 🙂

Well, that’s all for my projects today! It’s so fun to step outside of my comfort zone with cute and sweet images like these from Once Upon A Dream. Thanks so much for stopping by today, and don’t forget that Simon Says Stamp’s month-long STAMPtember celebration begins on September 1! There are so many amazing surprises in store for you… I can’t wait! Have a marvelous day, friends!

Filed Under: simon says stamp Tagged With: classic uppercase alpha, copic coloring, ink blending, nested domed arches, notebook, notepad, ombre, personalized, princess, rainbow, stencils, twinkle stars stencil

  • Page 1
  • Page 2
  • Page 3
  • Interim pages omitted …
  • Page 5
  • Go to Next Page »

Primary Sidebar

  • Facebook
  • Instagram
  • Pinterest
  • YouTube

Favorite Shops

Secondary Sidebar

Subscribe

Enter your email address to subscribe to this blog and receive notifications of new posts by email.

Instagram
Something is wrong.
Instagram token error.
Follow
Load More

Archives

Tags

3D embossing folder alcohol markers better press birthday birthday card blog hop card kit christmas christmas card christmas tag colored pencil copic copic coloring Daniel Smith die cutting embossing folder embroidery felt giveaway holiday holiday card hot foil ink blending karin brushmarker pro layered stencil masculine my monthly hero new release no line coloring no line watercolor OLO marker olo markers original illustration pawsitively saturated rainbow shaker card slimline stamping stamptember stencil thank you thinking of you valentine's day video watercolor

Popular Posts

Simon Says Stamp Sending Cheer Blog Hop- Day 2 + Freebie + Giveaway!
Altenew October 2026 Release Blog Hop + Giveaway!
Rustic Monochromatic Stars for Christmas with Rainbow Splash!
Waffleflower July Release Blog Hop!
Hero Arts Partners Blog Hop: Lawn Fawn!
March 2020 Essentials By Ellen Blog Hop+Giveaway!
December 2018 My Monthly Hero Blog Hop + Giveaway!
The Ton Stamps Summer Release: Day 1
The Ton Anniversary Release: Day 1!
Altenew Paint A Flower: Carnation Blog Hop+Giveaway!

Disclosure

Some affiliate links are used in my posts. This means that, should you click on one of my links and purchase something from that company, I will receive a small portion of the sale at no extra cost to you. I use the money earned from these sales to help maintain my blog. I so appreciate you visiting and, if you do choose to use one of my affiliate links, thank you so much for your support!
Copyright © 2026 ·Brunch Pro Theme · Genesis Framework by StudioPress · WordPress · Log in
Loading Comments...