• Skip to main content
  • Skip to primary sidebar
  • Skip to secondary sidebar

Sixth Street Sundries

Emily Midgett

  • Home
  • About Me
  • Contact
  • OLO Marker Color Swatch Chart
  • Shop

nested domed arches

Limited Edition: Simon Says Stamp Easter Kit!

February 20, 2024

This post was sponsored by Simon Says Stamp. Thanks, Simon!

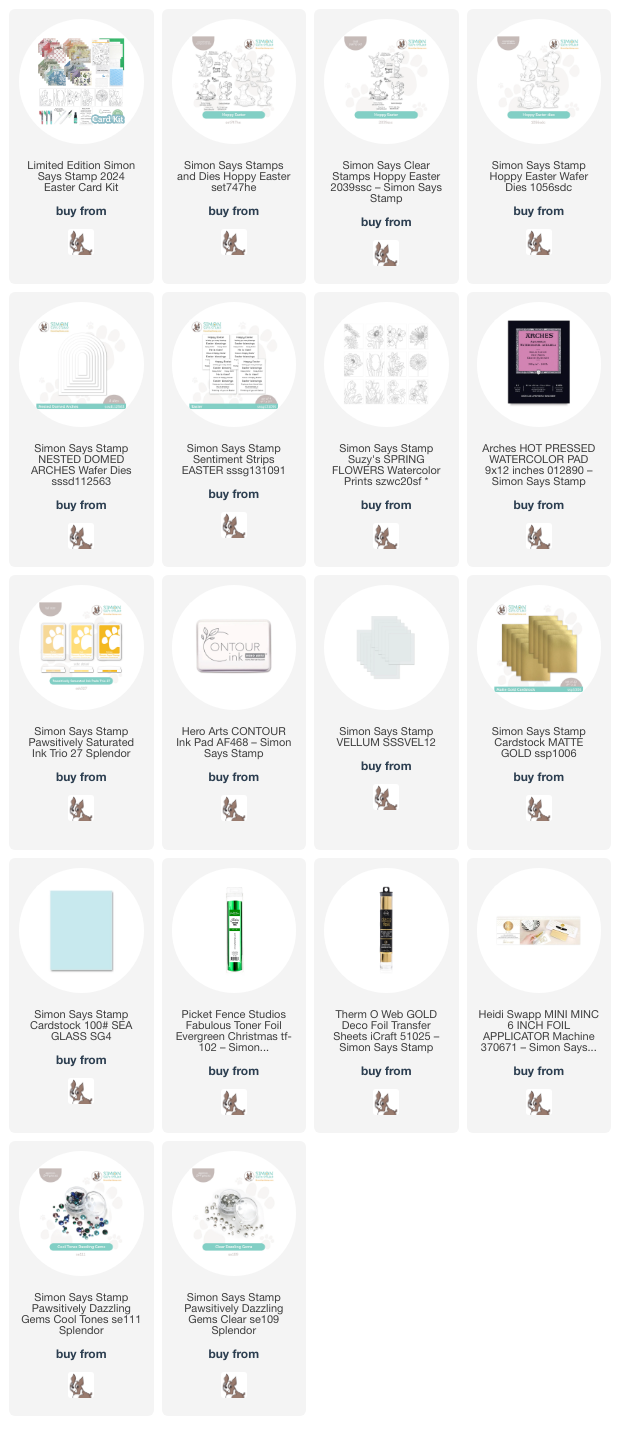
Hi friends! Simon Says Stamp released a special surprise tonight: a brand new Limited Edition Easter Kit! This kit is absolutely packed with product that is perfect for creating your Easter and springtime cards. Here’s a rundown of everything included in the kit:

NEW and EXCLUSIVE Simon Says Stamp Hoppy Easter 6×8 inch clear stamp set
NEW and EXCLUSIVE Simon Says Stamp Bunny Embossing Folder and Die 
24 double-sided 5×6 inch sheets of Tim Holtz Idea-ology Backdrops Volume 5 Assortment 
1 Simon Says Stamp Easter Sentiment Strip Sheet
5 white pom poms (bunny accents!)
Set of 6 Simon Says Stamp Suzy Watercolor Cards in a Floral Assortment
1 Detail Watercolor Brush Pen
2 A2 Scored Watercolor Notecards
1 Package of Ranger Tim Holtz Distress Holiday Pearl Crayons (including Sugary Gumdrop, Wonderland, and Frosty Mint)
1 Simon Says Stamp Exclusive 3×4 inch acrylic block
1 Ranger Pipette
1 bottle of Tim Holtz Ranger Merry Mint Mica Spray Stain
1 Sheet of 8.5 x 11 Inch Simon Says Stamp Pawsitively Velvet Cardstock in Snow White (perfect for bunnies!)
1 Sheet of 8.5 x 11 Inch 65 LB Cardstock in Gamma Green

Wowzers, such a lot of value packed into this kit for only $59.99! These kits are limited edition, meaning that they won’t be restocked, so if you’re in love with these elements, you will not want to miss out on this exceptional value! I have three cards to share with you today using lots of different components from the kit, so let’s get started with the details!

Nothing screams spring to me quite like seeing those cheerful yellow daffodils that pop up all over the place in early spring. The entire kit has tons of daffodils in the different elements, and ach of my cards features a daffodil in some form, whether it is at the feet of the sweet little Easter egg-hunting girl, the bunny hiding behind the bloom, or as the large focal point on one of Suzy Plantamura’s exceptionally lovely watercolor cards! I used Distress Inks to watercolor all of my images today, which I tapped out onto my palette and picked up with my damp paintbrush.

For my first card, I did some no-line watercoloring with some of the stamped images from the Hoppy Easter stamp set found in this Limited Edition Easter Kit. I stamped her using Contour Ink onto hot press watercolor paper, then used lots of different springy shades of Distress Inks to do some no-line watercoloring, adding some fine tipped black pen to her eyes, mouth, and tag, as well as some sparkly watercolor details and dots for added interest! I used the Hoppy Easter coordinating dies to cut the finished image out.

The Limited Edition Easter Kit also contains a wide variety of beautiful patterned papers with a beautiful vintage aesthetic. I selected three of my favorite papers in varying patterns and colors, then used my trimmer to cut down some thin strips from each paper, as well as with the white velvet paper included with the kit. I laid all of the strips down on my white A2 card base, keeping the patterns that contrasted the most next to each other to keep things from being too busy. To help ground my little watercolored Easter egg hunter, I trimmed down a block of vellum and mounted the watercolored die cut to the vellum, along with a sentiment from Hoppy Easter. To hide the foam adhesive, I flipped the vellum rectangle over and added some foam squares to the back of the solid die cuts, then adhered the entire thing to the center of the card front. Finally, I added a few Pawsitively Dazzling Clear Gems for some sparkle!

For my second card, I watercolored the precious little bunny from the Hoppy Easter stamp set using some more Distress Inks, cutting her out with the coordinating dies. Isn’t the expression on the bunny’s face so adorable? To ground the shy little bunny, I used a leftover Nested Domed Arches die cut around the edge of which I blended the new Pawsitively Saturated Trio 27. I added some strips of the papers included with the Limited Edition Easter Kit to create “grass,” as well!

For the background and the greeting, I took advantage of the fact that the Easter Sentiment Strip sheet and Suzy’s Watercolor Cards that are included with the Limited Edition Easter Kit are both toner foil-friendly! I ran both the sentiment strips and the crocus watercolor card through my Minc using some kelly green foil that coordinated perfectly with the green accents on my watercolored image, adding some beautifully shiny foil accents to the card! I splattered the crocus background with the Merry Mint Mica Spray Stain to add some more metallic green shine to the card. I popped up the arch die cut with the bunny and patterned paper strips using some foam adhesive, then popped up the sentiment strips on the arch with some more foam adhesive, finishing everything off with the Pawsitively Dazzling Clear Gems.

My last card takes advantage of the toner foil-friendly printing on Suzy’s Watercolor Cards included in the Easter Kit. I ran the gorgeous daffodil panel through my Minc using gold foil, adding some lovely shine to the crisp black lines! I used Distress Inks in shades of Scattered Straw, Wild Honey, Spiced Marmalade, Rustic Wilderness, and Speckled Egg, tapped out onto my palette and picked up with my damp paintbrush. Because these cards are printed on Distress Watercolor Paper, they work beautifully with Distress Inks! After I finished watercoloring the image, I trimmed the watercolor panel down and matted it on a slightly larger panel of Simon Says Stamp’s Matte Gold foil cardstock, framing those two pieces on a full A2 panel of Sea Glass cardstock.

For the greeting, I chose to allow the watercolored background image to be the star of the show, selecting a small Happy Easter greeting from Hoppy Easter, which I heat embossed in gold on some more Sea Glass cardstock and fussy cut with my sharp scissors. I popped the greeting up with some foam adhesive, then finished off my “rule of three” for metallic accents with a gold twine bow tucked beneath the sentiment. Finally, I added a few pale blue gems from the Pawsitively Dazzling Cool Tones gem set for even more sparkle!

Well, that’s all for my projects today! The exceptional value in this new Limited Edition Easter Kit is fantastic, so if you are loving it, don’t wait, because it won’t be restocked! Thanks so much for stopping by today, and have a marvelous day!
Filed Under: simon says stamp Tagged With: distress inks, distress watercolor, easter, hoppy easter, nested domed arches, no line watercolor, suzy's spring flowers, toner foil

Simon Says Stamp Smitten & Sweetheart Blog Hop- Day 2!

January 13, 2024

This post was sponsored by Simon Says Stamp. Thanks, Simon!

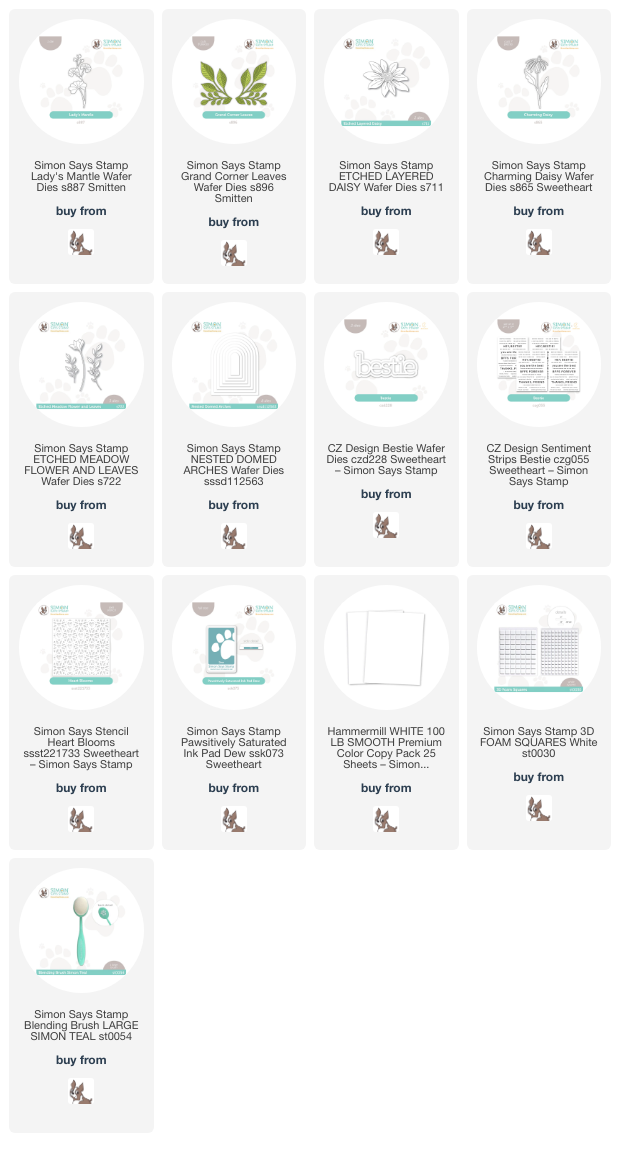
Hi friends! Welcome to Day 2 of the Simon Says Stamp Smitten & Sweetheart blog hop! You should have arrived here from Debby Hughes and your next stop is Lisa Addesa. This hop is a special one, celebrating the release for both last month’s Smitten release and this month’s Sweetheart release! For today’s hop, I’ve created two different projects using products from both releases. I love adding color to white standalone die cuts using Copic markers, and the Smitten release and this month’s Sweetheart release have some lovely new additions to that category. I created a pair of light, springy projects using lots of white cardstock, some new dies, and my Copic markers. Let’s get started with the details!

After the super intense, jewel-toned projects that I created for Christmas, I wanted to create something a bit lighter and more spring-like, so I pulled out the new Lady’s Mantle, Grand Corner Leaves, Etched Layered Daisy, and Charming Daisy dies.

For my first card, I die cut the Lady’s Mantle, Grand Corner Leaves dies, and Etched Layered Daisy die from Hammermill white cardstock. Before I assembled everything, I used Copic markers to add soft pastel colors to the different images, using the debossed lines as guides for where to add extra shading and depth. The colors that I selected for the daisy did not work as nicely with the leaves as I anticipated, so instead of redoing the entire thing, I simply selected a pale RV Copic marker and “glazed” all of the petals. Doing this allowed me to quickly change the overall look of the flower to be a bit brighter while still putting to use the shadows that I created previously.

After I had finished coloring and assembling the die cuts, I placed the new Heart Blooms stencil over a white A2 card front, then used a blending brush to lightly blend Dew Pawsitively Saturated Ink over the top. This light pool color coordinates nicely with the foliage and keeps things cohesive throughout the card. I arranged the flowers and foliage on the card front, then popped them up with foam squares. For the greeting, I trimmed down a sentiment from the new Bestie sentiment cards and popped it up with more foam adhesive, creating a double layer of foam tape for extra height. Finally, I topped everything off with some sparkling pale mint gems from my stash!

My second card features a new-to-me technique, creating an embellished window card using just die cuts! I started the project by die cutting the new Charming Daisy three times from Hammermill white cardstock, as well as the foliage sprigs from the Etched Meadow Flower die set. I used Copic markers in light shades of mauve, jade, and celadon to add color to the white die cuts.

To create the background for my die cut images, I die cut a window from the center of an A2 card front using one of the Nested Domed Arches. I wanted to arrange the flowers around the window and leave the area completely open, so I needed a wider sentiment that would span the width of the window opening. I cut the new Bestie sentiment die, cutting the background layer from vellum, then nestled both dies together on some white cardstock and ran it through my die cut machine, creating a sentiment with the negative space. I adhered this outline to the background vellum piece, which created a subtly bold die cut sentiment.

I arranged the flowers, sentiment die cut, and sentiment strip from the new Bestie sentiment cards around the opening, using the sentiment as a “bridge” between the flowers on left and right. I adhered all of the pieces using a combination of liquid and foam adhesive, adding tons of dimension and height to this interesting card! The final touch was to add a few more coordinating pale minty green gems.

Well, that’s all for my projects today! To celebrate this new release, Simon Says Stamp is offering a free gift with purchase: follow the instructions on the graphic at the top of the post, then enter code HTZ24 with your followers so that you can receive the Hearts and Stars stencil free with purchase!

Simon Says Stamp is also generously sponsoring a $25 coupon for each blog to be chosen from comments left along the hop! Simply leave a comment on each blog hop stop to be entered to win! The winners will be posted on the Simon Says Stamp blog on Wednesday the 17th of January. Winners can email Simon Says Stamp to claim his/her prize 🙂

Your next stop is Lisa Addesa, or you can start at the beginning of the hop over on the Simon Says Stamp Blog. (While you’re there, you can check out Day 1 of the hop… a veritable wealth of inspiration throughout!) Thanks so much for stopping by today, and happy hopping!

Filed Under: simon says stamp Tagged With: bestie, charming daisy, copic coloring, die cutting, etched layered daisy, etched meadow flower and leaves, grand corner leaves, heart blooms stencil, lady's mantle, nested domed arches, sentiment strips, stencil

Greenery Swag with All the Joy!

November 14, 2023

This post was sponsored by Simon Says Stamp. Thanks, Simon!

Hi friends! I have been dealing with a stomach bug (thanks kiddos for sharing those germs… not what I meant when I said I wanted you to share!!), but I wanted to pop in quickly with this project featuring some dramatic die cutting using goodies from the new Simon Says Stamp All the Joy release. This card doesn’t have a smidge of stamping on it, just lots of die cuts and textures from different cardstocks. Let’s get started with the details!

To start, I die cut the different elements using the new Greenery Swag die from some different shades of green and sparkling red glitter cardstock. I love adding botanical elements to holiday cards, and the Greenery Swag die set features some classic holiday botanical imagery in a lovely swag. I always like to customize my die cut cards by snipping them apart to create unique arrangements, and there are lots of elements in the Greenery Swag die set that can easily stand alone depending on where you snip them off!

To add some interesting texture behind my botanical arrangement, I ran a panel of Rainbow Splash Black cardstock through my die cut machine with the new Twining Berries embossing folder. I also die cut the center of another A2 panel of black cardstock using the Nested Domed Arches die, reserving the actual die cut for another project and adhering the frame from the negative space to my embossed panel using black foam adhesive. I arranged the botanical die cuts to the bottom of the frame, adding some more individual leaves off of another die cut to allow them to peek from behind the arched frame.

After I had added all of the leafy bits to my card, I die cut the detail layer of the new All the Joy die cut from black glitter paper, then die cut the background outline piece from heavyweight vellum. I added the die cut greeting to the card with more black foam tape, then added a sentiment strip trimmed down from the Reverse Christmas sentiment card set. Finally, I accented the centers of the flowers and a few other spots with some Onyx gems for a bit of extra sparkle!

Well, that’s all for my project today. Do you like to customize your die cuts by trimming them and arranging them on your project in a unique group? It’s one of my favorite ways to customize my cards! Thanks so much for stopping by today, and have a marvelous day!

Filed Under: simon says stamp Tagged With: 3D embossing folder, christmas card, greenery swag, holiday card, nested domed arches, twining berries

Fancy Ornaments in Rose Gold!

November 8, 2023

This post was sponsored by Simon Says Stamp. Thanks, Simon!

Hi friends! How do you feel about rose gold? I personally don’t really love rose gold jewelry for myself, but I absolutely adore it for crafting… especially holiday crafting. Traditional holiday color schemes are always acceptable and festive, but sometimes I like to switch it up and use something totally unique and super elegant, like this monochromatic blush and rose gold project today using goodies from the new Simon Says Stamp All the Joy release. Let’s get started on the details!

To start, I die cut a panel of pale blush cardstock using a large die from the Nested Domed Arches die set. I then ran that arched die cut through my die cutting machine using the Fancy Ornaments embossing folder. The detail on this embossing folder is absolutely scrumptious, and you can do so many marvelous techniques with it to enhance the details. I chose to keep things a little simple, though, and let the details just add some subtle texture to the backdrop by adding some Cheeky Pawsitively Saturated blending around the edges of the arched die cut. I also splattered some rose gold handmade metallic watercolors on the background to add extra shimmer!

If you haven’t tried using embossing folders with metallic cardstock, this is your signal to try it out ASAP. The details from these 3D embossing folders become even more spectacular when using metallic mirror cardstock like the Rose Gold metallic cardstock from Simon Says Stamp. I die cut each of the different ornament shapes from the Fancy Ornaments set using the Rose Gold mirror cardstock and ran them through the embossing folder to add the textured details.

For the greeting, I die cut the detail layer of the Monoline Merry Christmas die set from some coordinating blush foil cardstock in the Memory Box Vintage Pastel paper pad, then adhered it to the background layer cut from vellum. I arranged the embossed mirror ornament die cuts and die cut sentiment on the embossed arch and adhered them with some foam adhesive. I also added sparkling rose gold twine to each ornament to allow them to “hang” on the card front. I popped up the die cut arch on a panel of peachy rose gold glitter cardstock that I found in my stash. I love how the different metallic textures add interest to the monochromatic card! I added a few sparkling gems for one last touch of shimmer.

Well, that’s all for my project today! Embossing on metallic foil cardstock is such a unique way to add some incredible texture and luxury to your holiday cards without adding a bunch of extra time to your project. Thanks so much for stopping by today, and have a marvelous day!

Filed Under: simon says stamp Tagged With: christmas card, fancy ornaments, holiday card, monoline merry christmas, nested domed arches, rose gold metallic foil

One Peony Panel, Two Cards!

August 30, 2023

This post was sponsored by Simon Says Stamp. Thanks, Simon!

Hi friends! I love a good patterned background stamp; don’t you? I especially love a background stamp like the Pretty Peonies Background Stamp, which gives you enough detail as to be able to use it on its own (like I did HERE) or to put your coloring skills to use like I did for today’s card. After taking the time to paint the image, I wanted to maximize the amount of projects that I could create with it and ended up with a pair of cards! Let’s get started with the details.

I began by stamping the Pretty Peonies Background Stamp onto some Fabriano Artistico Cold Press watercolor paper using black pigment ink and heat embossed with clear embossing powder. The black pigment ink picks up the smaller details beautifully, while the clear embossing powder makes the watercoloring super easy, creating little wells for each individual image so that the colors don’t spill into each other! I taped my embossed image down to my watercolor board, then used Karin Brushmarker Pro markers to watercolor the images. I like to scribble my watercolor markers onto a glass mat or ceramic palette, then pick up the color with a damp paintbrush. I find that this method (rather than putting the marker directly to the paper) helps me control the vibrancy of the color that is added to the images, allowing me to maximize the contrast and create shadows and depth on the images.

After I had finished painting the image, I trimmed it down to A2 size, then die cut the very center of the image using the Nested Domed Arches dies, creating a window within my floral panel. I backed this window with some clear acetate and added a frame of Black Foam Adhesive around the open window. I filled the shaker with an abundance of shimmering black and charcoal gems and sequins from my stash and backed the entire panel with a piece of plain black cardstock, highlighting the crisp black embossed lines.

Once I had filled my shaker window, I white embossed a greeting from Elegantly Modern Greetings onto some more black cardstock and die cut it with the coordinating die. (Side note-I love how detailed these dies are! So intricate and beautiful!) I popped it up over the window of the card front using more Black Foam Adhesive, then added a couple of sparkling black leaf sprigs, cut using Black Glitter Paper and the Windswept Leaves dies. So many fun details going on with this card, and those dramatic pops of black against the vivid pink peonies are just so beautiful!

My second project features the “leftover” watercolored peony die cut. I die cut another Nested Domed Arches die from some more Black Glitter Paper, creating a sparkling black frame around my pink peony die cut. I also die cut the Laurel Leaves Background Plate from some more black cardstock and adhered it to an A2 panel of black cardstock. This black-on-black adds just a hint of patterned texture to the background to keep things interesting behind the peonies! Because we have two different patterns going on this card front, that solid black glitter frame around the peonies acts as a bit of a visual buffer between the two patterns!

After popping up my arches die cuts on the textured black background using foam adhesive, I heat embossed another greeting from the Elegantly Modern Greetings set and popped both pieces up on the peony panel using foam adhesive. I added a few shimmering pink gems to finish things off.

This minimal color palette card features so many different textural elements and lots of height to keep things interesting!! I love when I can get two different cards from one watercoloring session. It makes it so easy to build up a stash of cards this way. Thanks so much for stopping by today, and have a marvelous day!

Filed Under: simon says stamp Tagged With: elegantly modern greetings, karin brushmarker pro, laurel leaves, nested domed arches, pretty peonies background, shaker card, watercolor, windswept leaves

  • « Go to Previous Page
  • Page 1
  • Page 2
  • Page 3
  • Page 4
  • Page 5
  • Go to Next Page »

Primary Sidebar

  • Facebook
  • Instagram
  • Pinterest
  • YouTube

Favorite Shops

Secondary Sidebar

Subscribe

Enter your email address to subscribe to this blog and receive notifications of new posts by email.

Instagram
Something is wrong.
Instagram token error.
Follow
Load More

Archives

Tags

3D embossing folder alcohol markers better press birthday birthday card blog hop card kit christmas christmas card christmas tag colored pencil copic copic coloring Daniel Smith die cutting embossing folder embroidery felt giveaway holiday holiday card hot foil ink blending karin brushmarker pro layered stencil masculine my monthly hero new release no line coloring no line watercolor OLO marker olo markers original illustration pawsitively saturated rainbow shaker card slimline stamping stamptember stencil thank you thinking of you valentine's day video watercolor

Popular Posts

Simon Says Stamp Joy For You Blog Hop- Day 1!
Watercolor Poinsettia Card and Tag with Tim Holtz and Simon Says Stamp!
Cottagecore Christmas Framed Artwork with New Simon Says Stamp!
Fluted Frames and Tags with New Simon Says Stamp!
Simon Says Stamp Glory to the Newborn King Holiday Kit-Part II!
Warmth and Love at Christmastime with New Simon Says Stamp!
Honey Bee Stamps 4th Anniversary Celebration!
Cottagecore Canvas with New Simon Says Stamp Shine On Release!
Shaped Holiday Shaker Card with New Simon Says Stamp Jolly Season Card Kit of the Month!
Simon Says Stamp Card Kit November 2026: Jolly Season!

Disclosure

Some affiliate links are used in my posts. This means that, should you click on one of my links and purchase something from that company, I will receive a small portion of the sale at no extra cost to you. I use the money earned from these sales to help maintain my blog. I so appreciate you visiting and, if you do choose to use one of my affiliate links, thank you so much for your support!
Copyright © 2026 ·Brunch Pro Theme · Genesis Framework by StudioPress · WordPress · Log in
Loading Comments...