• Skip to main content
  • Skip to primary sidebar
  • Skip to secondary sidebar

Sixth Street Sundries

Emily Midgett

  • Home
  • About Me
  • Contact
  • OLO Marker Color Swatch Chart
  • Shop

nested rectangles

VIDEO: Air Mail Inspired Belated Birthday with Pinkfresh Studio!

May 15, 2025

Hi friends! I am up on the Pinkfresh Studio YouTube Channel today with this fun “air mail-inspired” project featuring the new Classic Correspondence product suite from Pinkfresh Studio! You can watch the full video below or HERE on YouTube!

If you can’t watch the video or prefer written instructions, I will give a brief rundown of how I created this card!

To begin, I inked up the Diagonal Plaid Press Plate with some Metallic Bronze Ink from Lisa Horton Crafts. This pigment ink works beautifully with press plates and adds a beautiful, subtle shimmer to your projects! While I had my Better Press System out, I used Warm Buff ink from Pinkfresh Studio to press the Classic Correspondence Press Plate onto some Better Press cardstock, then used the trick that I learned from Carissa Wiley to press the gorgeous Floral Square Frame Press Plate into some pearlescent pink cardstock without inking the plate, creating beautiful and intricate texture on the coated cardstock. (I demonstrate this technique in several videos on the Pinkfresh YouTube Channel if you would like to see it in action!)

After I had pressed all of the images, I used the Classic Correspondence Stencils with Cherry Blossom, Peony, Begonia, and Warm Buff inks from Pinkfresh Studio and the fabulous Pinkfresh Studio 1″ Blending Brushes to add a warm, feminine color palette to the mail images from Classic Correspondence. I used the fabulous one-pass die to die cut all of the stenciled images, then die cut the detailed Floral Square Frame image. I also die cut the large Postage Edge Dies from Pinkfresh Studio’s Glitter Champagne cardstock, then trimmed the long edges off of the die cut to use as an accent for my colored cardstock panel. I adhered the glittery postage accent strips so that they were peeking out from around my Tutu pink cardstock piece, adding another touch of sparkle and helping to break up the contrasting patterns on the card.

For the greeting, I used the same Bronze ink to stamp the sentiments from the Classic Correspondence Stamp set, then added clear embossing powder over the top to make the sentiments even more crisp, helping highlight them amongst the busy background. After trimming and die cutting the sentiment components, I used liquid and foam adhesive to adhere al of the elements to the card front, finally adding a few Ballet Slippers Jewels to help fill in some of the bare spots on my card design.

Well, that’s all for my project today! It’s always fun for me to mix and match new and old products, and the goodies from Pinkfresh work so well together even if they’re not necessarily designed to coordinate. Thanks so much for stopping by today, and have a marvelous day!

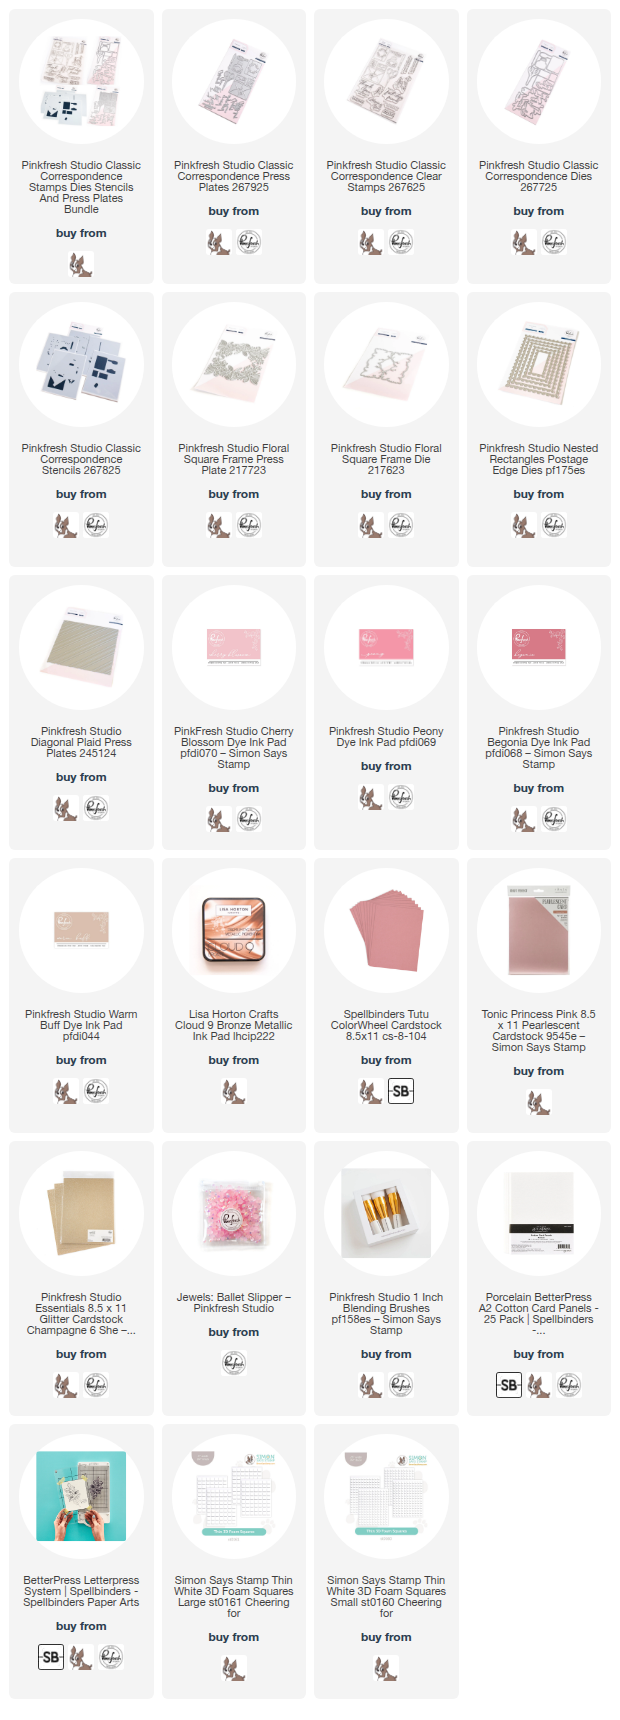
Supplies used (affiliate links used at no extra cost to you-thank you for helping to support my work!):
Filed Under: pinkfresh studio Tagged With: better press, classic correspondence, diagonal plaid press plate, floral square frame, ink blending, layered stencil, nested rectangles, postage edge dies, press plate, stencil

Pinkfresh Studio Inspiration Challenge-January 2023!

January 12, 2023

Each month, Pinkfresh Studio hosts a challenge with a different theme, which can be used as your inspiration to create a project and enter it to win a $50 shopping spree! The first challenge for 2023 is “Challenge Review,” where you can choose any of the challenge themes from the last year to use as your inspiration for your own project! I chose to use the March 2022-Frame It Up challenge as my inspiration to create this soft card, full of cool mauves and lavender, with touches of shiny metallic charcoal foil. Let’s get started with the details!

When creating projects for the new releases, I always hot foil a bunch of the new images and sentiments to save for a rainy day. I have been wanting to use my OLO Markers on the Floral Border Hot Foil image that I hot foiled last month. I had hot foiled the image on some Hammermill cardstock using matte charcoal foil from the Satin Metallics Variety Pack.

I used the coordinating die to cut out foiled image, creating a floral frame. I colored the images with my OLO Markers in a muted color palette of pale lavender, cool mauve, and some minty foliage. I am in love with how beautifully these colors worked together! Using my sharp scissors, I did some trimming to create a floral frame on just one side of my A2 card front.

For the background, I wanted a subtle pattern to accent the colors on my floral frame without adding too much to distract from the pretty flowers, so I used one of the Diamond Plaid Stencils and lightly blended Ballet Slipper and Misty Coast with blending brushes to create a dusty mauve that coordinated nicely with the large flowers in the floral frame.

I added a rectangular hot foiled frame created using the satin charcoal foil and the Nested Rectangles Hot Foil and Coordinating Dies, adhering it to the plaid background using foam adhesive. I arranged the floral die cut border around the frame, tucking a couple of the “leftovers” on the edge of the frame itself. I also added a greeting created using the Brushed Sentiments Hot Foil and Coordinating Dies, which I hot foiled onto some acetate to create a floating sentiment! (Have you tried hot foiling on acetate yet? It’s SO fun!) I added a few Blossom glitter drops for some sparkle!

Well that’s all for this project! If you haven’t checked out the challenge, I hope you will do so. There are so many fun themes and color schemes from which to choose, not to mention there’s a $50 shopping spree up for grabs! Thanks so much for stopping by today, and have a marvelous day!

Filed Under: pinkfresh studio Tagged With: brushed sentiments, challenge, diamond plaid, floral border, hot foil, nested rectangles, olo markers

Pinkfresh Studio December 2022 Release Blog Hop + Giveaways!

December 16, 2022

Hi there! Today, Pinkfresh Studio is releasing their beautiful new December Collection of stamps, dies, stencils, and hot foil plates, and we are hopping along to show you tons of different ways to use these fabulous new products! My entire family has been smacked with some unpleasant winter germs over the last few weeks, so I am still in Christmas mode in my head (there are just never enough hours in the day!), but our stamping world is definitely gearing up for springtime with these beautiful new floral products. I have two super springy projects to share with you today, so let’s get started with the details!

My first project uses the absolutely beautiful new Blooming Peony stamp set. I am a sucker for a pretty peony, and this stamp set features a gorgeous peony in all of it’s fluffy, graceful glory smack dab in the center of the pattern! I began by heat embossing the entire Blooming Peony image on a panel of watercolor paper using some glittery pinky-gold embossing powder. (This stamp set also has Pinkfresh Studio’s signature coordinating layering stencils if you’d rather not do any coloring!) I then used my Daniel Smith watercolors to watercolor a perfectly springy, bubblegum pink peony.

Once I had finished watercoloring the images themselves in bright, pretty spring colors, I wanted to add some solid color to the background to help make that pretty pink peony pop (say that 3 times fast!). Instead of creating a watercolored background like I normally would, I decided to create a flat background by simply coloring the leftover white spots with a peach Karin Brushmarker Pro marker. I love how the soft peach “watercolor” helps to make that peony pop, in my opinion, even more prettily than if it were on a white background! The peach is light enough that it doesn’t take away from the pretty pink while still adding a level of softness to the overall feel of the panel.

I trimmed the panel down to fit on a mini slimline card front, then matted the image with an ever-so-slightly larger panel of matte rose gold foil, perfectly coordinating with the glittery embossing powder. I popped both panels up on a coordinating pink mini-slimline card front, which I’d added a little extra textural interest to with the Slim Stitches slimline cover plate die, which doesn’t actually cut any shapes, instead adds beautiful texture to a solid piece of cardstock.

I popped up the watercolored, matted panel on the with some foam tape, then added a greeting from Floral Border, embossed with the same pinky gold glitter embossing powder and lightly blended with some Ballet Slipper ink to match the pink peony. A gold thread bow and some Sparkling Champagne gems finished it off!

My second project features some stenciled “coloring” using the new Mixed Blooms stamps and stencils. I began by stamping the Mixed Blooms cling stamp using Warm Buff ink. Using this ink with your stamps and stenciled images is a great way to achieve that “no line” look! I then used the Mixed Blooms layering stencils with Sparkling Rose, Ballet Slipper, Passion Fruit, Coral Reef, Mint, and Fresh Pear inks.

Pinkfresh Studio also released several new sentiment hot foil plates and coordinating dies today, including this large Thank You hot foil plate and coordinating die set. I hot foiled the greeting onto some white cardstock using Rose Gold hot foil to fit with the warm pinks that I used on the ink blended background. I die cut the finished hot foiled piece with the coordinating die (love that they come as a set!). I also hot foiled some of the new frames from the Nested Rectangles Hot Foil Plates and cut them with the coordinating Nested Rectangles dies to create this coordinating foiled frame.

Before adhering the foiled elements to my floral card front, I die cut a glittery lace border using the Slim Lacy Edgers die set from some white glitter cardstock. I also trimmed down a thin strip of warm rose cardstock to accent the lacy strip and adhered them both to my floral stenciled card front with liquid adhesive. I adhered the foiled frame to the card front with a single layer of foam tape, then added the foiled greeting with a double layer of foam tape for extra height. The final touch was to add a few Blush Glitter Drops for one last touch of sparkle!

Well, that’s all for my projects today. Now for some fun giveaway information!

Pinkfresh Studio will be giving away the full release on the Pinkfresh blog & YouTube channel. They will be giving away a total of TEN $25  gift cards along the hop. The winners will be selected from the comments. The more comments you leave along the hop, the more chances you have to win!
The winners will be selected & posted on December 27, 2022 on our GIVEAWAY PAGE. Winners must check that page & claim your prize within 2 weeks.

The full hop list is listed below. Thanks so much for stopping by today, and happy hopping!

You are invited to the Inlinkz link party!

Click here to enter

Filed Under: pinkfresh studio Tagged With: blooming peony, floral border, hot foil, karin brushmarker pro, layered stencils, mixed florals, nested rectangles, thank you hot foil, watercolor

Primary Sidebar

  • Facebook
  • Instagram
  • Pinterest
  • YouTube

Favorite Shops

Secondary Sidebar

Subscribe

Enter your email address to subscribe to this blog and receive notifications of new posts by email.

Instagram
Something is wrong.
Instagram token error.
Follow
Load More

Archives

Tags

3D embossing folder alcohol markers better press birthday birthday card blog hop card kit christmas christmas card christmas tag colored pencil copic copic coloring Daniel Smith die cutting embossing folder embroidery felt giveaway holiday holiday card hot foil ink blending karin brushmarker pro layered stencil masculine my monthly hero new release no line coloring no line watercolor OLO marker olo markers original illustration pawsitively saturated rainbow shaker card slimline stamping stamptember stencil thank you thinking of you valentine's day video watercolor

Popular Posts

Simon Says Stamp October 2026 Card Kit of the Month: Homespun Gratitude!
February 2018 My Monthly Hero Blog Hop!
Altenew Craft A Flower: Poppy Blog Hop+Giveaway!
Felted Gourd Wall Hanging with Simon Says Stamp!
Sunflower Home Decor with Simon Says Stamp!
Craft Your Life Project Kit: Feathered Lilies Blog Hop+Giveaway!
Simon Says Stamp October 2025 Card Kit of the Month!
Altenew Standalone Die Blog Hop+Giveaway!
The Ton Anniversary Release- Day 2
Honey Bee Stamps Cheerful Love Blog Hop!

Disclosure

Some affiliate links are used in my posts. This means that, should you click on one of my links and purchase something from that company, I will receive a small portion of the sale at no extra cost to you. I use the money earned from these sales to help maintain my blog. I so appreciate you visiting and, if you do choose to use one of my affiliate links, thank you so much for your support!
Copyright © 2026 ·Brunch Pro Theme · Genesis Framework by StudioPress · WordPress · Log in
Loading Comments...