• Skip to main content
  • Skip to primary sidebar
  • Skip to secondary sidebar

Sixth Street Sundries

Emily Midgett

  • Home
  • About Me
  • Contact
  • OLO Marker Color Swatch Chart
  • Shop

OLO marker

Simon Says Stamp STAMPtember Collaboration: Tim Holtz!

September 27, 2024

Hi friends! Today’s STAMPtember collaboration features a limited edition collaboration set from the perpetually creative and fabulous Tim Holtz!! Tim’s quirky designs are always such a joy to use, and the exclusive, limited edition STAMPtember stamp& die set that he designed is full of those delightfully unique images with a holiday twist. These classic icons are illustrated in Tim’s signature style, and are the perfect size to fit on the Simon Says Stamp Postage Stamp dies! I have used the images and Postage Stamp dies to create this clean collage, marrying Tim’s quirky style with my own style with a minimal color palette and stark black and white contrast. Let’s get started with the details!

*I have linked all of the products used at the bottom of the post for your convenience using affiliate links. Thank you for shopping with my links! I truly appreciate your support for my work!*

To begin, I laid out nine of the images from the Tim Holtz STAMPtember collaboration bundle on an A2 panel of Hammermill cardstock, laying them out in rows of three, then stamping them using black pigment ink and clear embossing to make those lines even more crisp. I used OLO Markers to add color to the images, selecting a minty green and cool red color palette and adding color only to some parts of the images, allowing the clean white of the cardstock to be it’s own addition to the color palette!

After I had colored all of the images, I die cut them with the coordinating dies included in the Tim Holtz STAMPtember collaboration bundle. These smaller images are so cute and are just the right size for a postage stamp! I also die cut nine white stamp die cuts from another panel of clean white cardstock. I used thin foam adhesive squares to add each of the Christmas icons to the center of the postage stamp die cuts. To give myself a little wiggle room and keep the lines nice and straight, I used liquid adhesive to adhere the postage stamps to a black A2 card front, trying to keep the rows as neat as possible!

After I had adhered all of the postage stamps to my card front, I decided to use some glitter to embellish and make the card extra festive. I added some adhesive to certain spots on the icons using the Quickie Glue Pen and sprinkled Simon Says Stamp’s Unicorn Dust glitter over the top. These little touches of glittery shimmer add just the right touch of festive sparkle to the card!

Well, that’s all for my project today! These STAMPtember collaboration sets are limited edition and usually sell out very quickly, so if you’re on the fence, don’t wait too long! To sweeten the deal and make it even easier for you to shop, Heidi at Simon Says Stamp has offered free shipping for purchases over $25 for a limited time!!

I’m sure that this Tim Holtz set will sell out super quickly, so if you’re on the fence, don’t wait too long… these limited edition sets are gone forever once they sell out!

Thanks so much for stopping by today, and happy STAMPtember!!

Filed Under: simon says stamp Tagged With: christmas card, collaboration, holiday card, OLO marker, postage stamp, stamptember, tim holtz

STAMPtember Surprise: Limited Edition Halloween Card Kit!

September 19, 2024

This post was sponsored by Simon Says Stamp. Thanks, Simon!

Hi friends! I am back today with some projects featuring a brand new, limited edition Halloween Treats Card Kit from Simon Says Stamp! This card kit is absolutely jam-packed with fantastic goodies for your fall and Halloween cardmaking. Here’s a sneak peek:

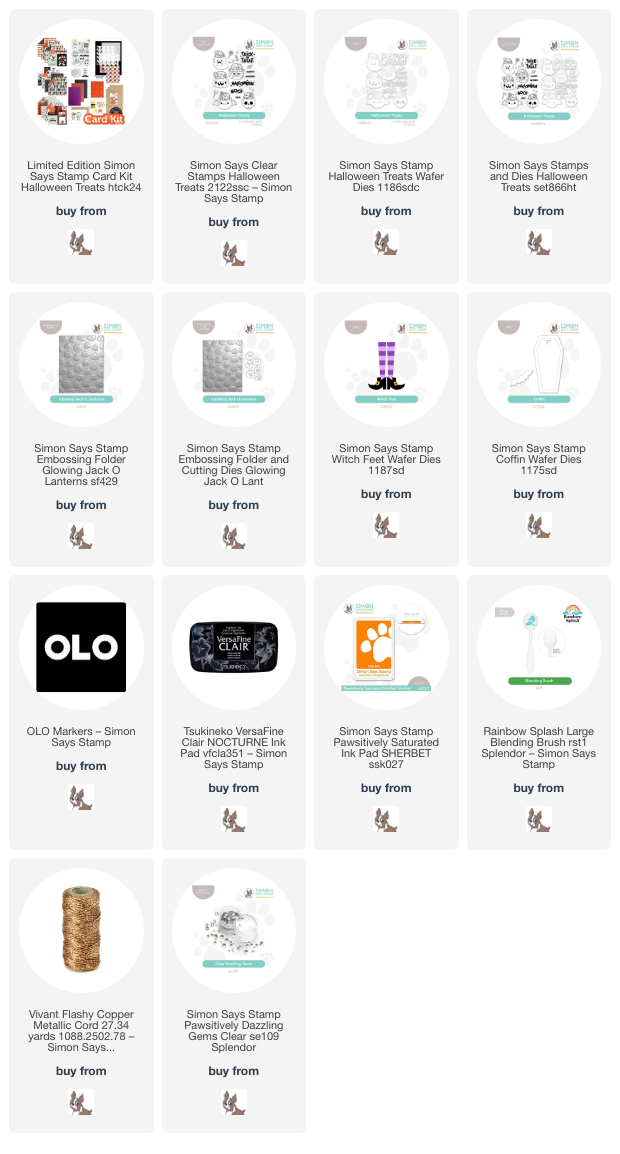
The individual elements of the Halloween Treats card kit are valued well over $100, but you can purchase all of these fantastic pieces as a bundle for only $59.99! What an amazing bargain, right? I have three projects to share with you today that use tons of the different elements included in the kit, so let’s get started with the details!

I am not normally huge on patterned paper, preferring instead to stamp my own with my selected color palette, but the Halloween Treats card kit comes with an adorable paper pad filled with super handy individual images, delicately-patterned papers, and a pretty color palette that is not too spooky! I made good use of the patterned papers, using them as accents and as focal points for all three of my projects.

*I have linked all of the products used at the bottom of the post for your convenience using affiliate links. Thank you for shopping with my links! I truly appreciate your support for my work!*

My first project features a sentiment panel that I trimmed from the paper pad included in the kit. I trimmed it down using my trimmer, then used a blending brush with Sherbet Pawsitively Saturated ink to blend a bit of interest around the edges of the printed piece. I think those little witch feet for the two letter L’s are so darn cute, so I used the Witch Feet Wafer Dies included with the Halloween Treats card kit with some black cardstock and orange glitter paper to create some of my own! I also die cut three of the little bats in the included Coffin Wafer Die set from some more black cardstock to pull more imagery from the printed panel.

For the background, I trimmed a panel of bright orange cardstock down to 3.5″ x 5.5″ and ran it through my die cutting machine using the Glowing Jack O’Lanterns embossing folder included in the Halloween Treats card kit, again blending around the edges with Sherbet ink to add some more dimension and interest. I paired this textured patterned panel with some of the delicately dotted patterned paper included in the kit, breaking up the two patterns with a thin strip of black cardstock. I popped up the sentiment panel, witch feet, and bats with some foam adhesive, creating a fun and festive Halloween card!

For my second project, I paired the patterned papers with the adorable stamp set included in the Halloween Treats card kit. I stamped the pumpkin candy bucket, sentiment, and some individual sweets from the Halloween Treats stamp set using black pigment ink, then embossed with clear embossing powder to create super crisp and detailed lines before using OLO markers to color the images. After I had finished coloring everything, I used my sharp scissors to cut the images out, but you could of course purchase the coordinating dies (not included with the kit) to make quick work of that!

I pulled another of the delicate patterned papers from the paper pad included with the kit, this time with a bolder, more graphic diamond pattern in black, white, and orange. I cut it down to A2 size, then added some strips of orange glitter paper and black glossy cardstock. I also trimmed down a panel of vellum upon which I built my Halloween candy scene, adhering everything with liquid and foam adhesive, then flipping the vellum panel over and adding my foam adhesive behind the solid die cuts and adding it to the patterned paper card front. Finally, I added a few Clear Pawsitively Dazzling Gems for added sparkle!

Finally, I created this adorable little treat bag using the patterned paper and brown paper sacks included with the Halloween Treats card kit. I cut more of the sweet polka dot patterned paper down to fit the front of the paper bag, accenting it with one of the pre-printed cards that I matted with black cardstock. I adhered the sentiment to the card front and folded over the top of the bag twice. I then used a hole punch to punch some holes through the folded area and closed it up with some sparkling coppery twine from my stash. How adorable is this? It would be so cute filled with Halloween treats for a teacher or a little one!

Well, that’s all for my projects today! The Halloween Treats card kit is limited edition, so once it sells out, it won’t be restocked as a kit. Luckily, if you miss out, you can still purchase most of the individual elements of the kit, as they will be added to the Simon store in the regular product lineup. Awesome, right? Thanks so much for stopping by today, and have a marvelous day!

Filed Under: simon says stamp Tagged With: card kit, coffin dies, die cutting, embossing folder, glowing jack o lanterns, halloween, halloween card kit, halloween treats, ink blending, OLO marker, treat bag, witch feet

Simon Says Stamp STAMPtember Collaboration: Colorado Craft Company!

September 17, 2024

Hi friends! Today’s STAMPtember collaboration spotlight company is my friends over at Colorado Craft Company! I’ve had the pleasure of guesting for this company for several years, and while their beautifully elegant floral designs initially drew me to them, their Anita Jeram designs keep inspiring me to step outside of my comfort zone with the sweet critters! The Colorado Craft Company’s STAMPtember collaboration: Work of Art features some sweet critters and pretty florals along with some really lovely, poignant sentiments. I created two cards using just the images from the Work of Art set, so let’s get started with the details!

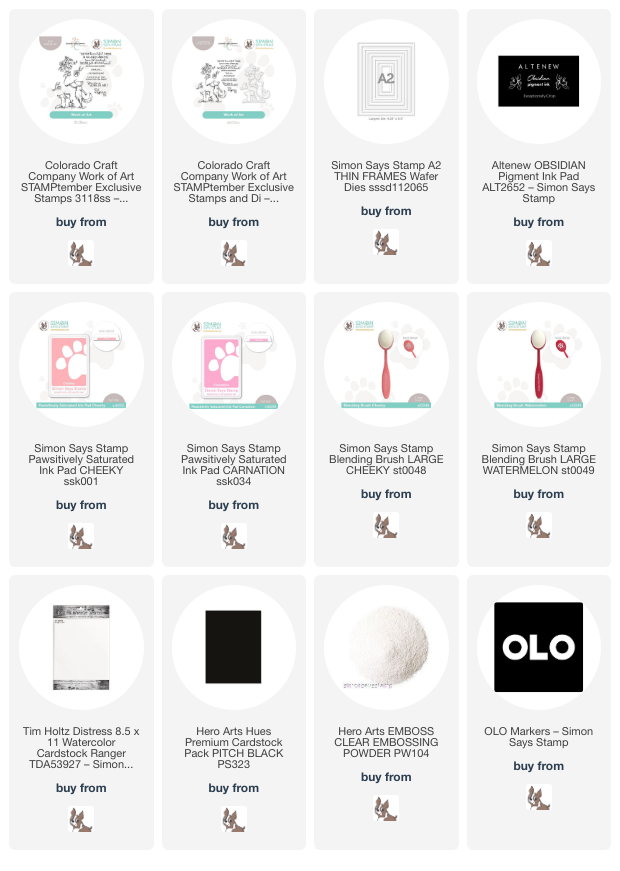
Both of my cards feature images from the Work of Art set, stamped using black pigment ink and heat embossed with clear embossing powder. I love this technique for the Anita Jeram images particularly, because it makes the lines crisp and vivid, which fits the storybook style of the images perfectly! I’ve linked all of the supplies that I used at the bottom of the post for your convenience.

For the first card, I stamped and embossed all of the images onto some Distress Watercolor cardstock, then used a paintbrush and Distress Ink cubes to add color to the images, creating sweet little foxes and delicate flowers. I used a pair of super sharp scissors to cut the finished watercolored images. After I had finished the main images, I wanted to create a little “painting” upon which my fox could be musing, so I cut a small square of Distress Watercolor cardstock and freehanded a little floral design with the same Distress Ink colors that I used for the rest of the watercolored images. I edged the painting with a champagne acrylic paint marker to create a “frame”!

After I had finished painting and cutting out all of my images, I lightly blended Pawsitively Saturated Cheeky and Carnation inks on a panel of A2 white cardstock, upon which I arranged the watercolored images. I adhered all of the images with a combination of liquid and foam adhesive for lots of dimension, finally added an embossed greeting that I fussy cut with my scissors!

My second card features the sweet little floral image used to create a custom background. I began by stamping the small rose image from Work of Art all over an A2 panel of white cardstock using Rainbow Splash Black ink, which happens to work nicely with alcohol markers! To create a cohesive pattern on the background, I rotated both the stamp and the cardstock, trying to keep the pattern looking random and continuous. After I had finished stamping the pattern, I stamped a few extra roses on a spare piece of white cardstock, then used my OLO markers to color the images in a feminine color palette of peach, bubblegum pink, and magenta. I fussy cut the individual flowers, then used a black fine tip pen to add tiny dots in the white spaces on the background. These tiny dots are so simple, but they make such an impact on your overall background!

For the greeting, I stamped the large sentiment from the Work of Art set using black pigment ink and clear embossing powder again, trimming the rectangle with my trimmer and mounting it on a slightly larger panel of black cardstock to add an elegant frame. I popped up the greeting in the center of the floral background, adding some black cardstock frames cut using the A2 Thin Frames die set. Finally, I added the individual flowers on the corners of the framed sentiment. Isn’t it fun when you can create an entire card out of just two stamps?

Well, that’s all for my projects today! These STAMPtember collaboration sets are limited edition and usually sell out very quickly, so if you’re on the fence, don’t wait too long! To sweeten the deal and make it even easier for you to shop, Heidi at Simon Says Stamp has offered free shipping for purchases over $25 for a limited time!!

These Anita Jeram sets almost always sell out quickly, so hurry if you like it… it won’t last long. Thanks so much for stopping by today, and happy STAMPtember!

Filed Under: colorado craft company, simon says stamp Tagged With: anita jeram, ink blending, OLO marker, stamptember, watercolor

Halloween Sweets with New Simon Says Stamp!

August 7, 2024

This post was sponsored by Simon Says Stamp. Thanks, Simon!

Hi friends! I am ignoring the sweltering temperatures outside (that hopefully will abate in a day or two) and playing with some of the new Halloween goodies from the new Cheering For You release from Simon Says Stamp! I paired the traditional orange and black with some vivid cobalt blue in THIS post, and loved the unique combination so much that I used it again on this card using the new Spooky Sweets product suite! I am always up for ways in which I can make Halloween a little less gory and a little more fun, and what’s more fun than cupcakes? Let’s get started with the details!

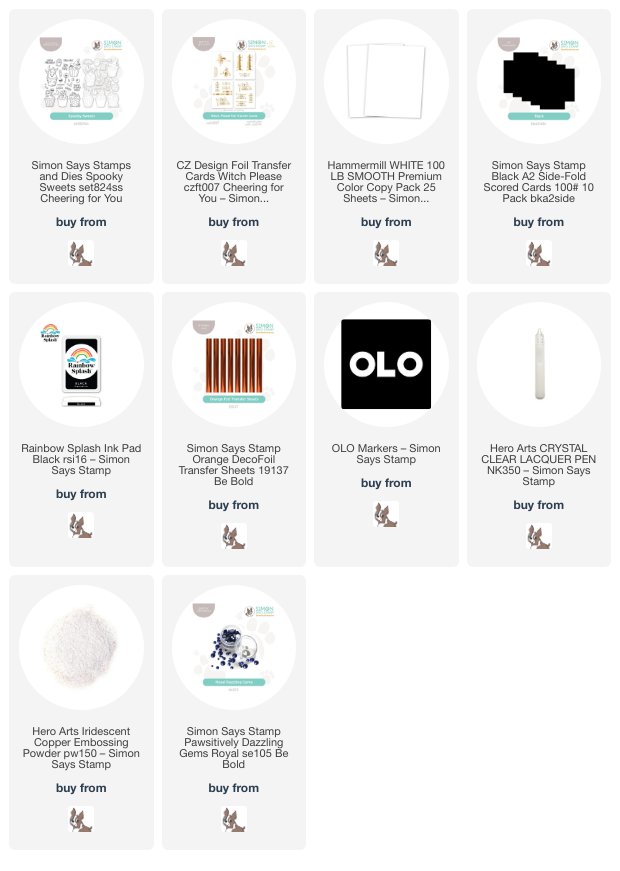
To begin my card, I stamped three of the cupcakes in the Spooky Sweets set onto some Hammermill cardstock using Rainbow Splash Black ink. The Rainbow Splash Black ink is compatible with alcohol markers, so it’s great for using with OLO Markers, as I’ve done for these vibrant cupcakes! When coloring lots of images to create a scene, I like to select a single color palette and use those same colors on all of the images to make sure that each of the elements on the card work together to create a cohesive scene. After I had colored the images, I used some sparkling handmade watercolors to add shimmering accents to the sprinkles and stars, then covered them with some Hero Arts Clear Lacquer Pen. This clear lacquer not only adds additional shine and texture, but also protects that shimmery watercolor to keep it from smearing!

After I had colored each of the images, I die cut them using their coordinating dies and used a black alcohol marker to outline the edges. I wanted to use one of the new Black Scored Card Bases and didn’t want the white outlines of the dies to detract from my vibrant and intense color palette, and quickly outlining the die cuts was a super easy way to keep my color palette consistent throughout the card. I splattered the background with some iridescent orange glitter watercolors to add some extra shimmer and texture to the background.

For the greeting, I heat embossed a sentiment from the Spooky Sweets onto some black cardstock using Iridescent Copper embossing powder and die cut it with the coordinating die. I also used a leftover greeting strip from the Witch, Please sentiment cards that I had run through my Minc Machine using the Simon Says Stamp Orange DecoFoil. I arranged all of the die cuts and greeting components on my splattered card front and adhered them using foam adhesive. Finally, I added a smattering of Royal Pawsitively Dazzling Gems to tie in the royal blue accents!

Well, that’s all for my project today! I am loving this unusual Halloween color combo… it’s always fun to switch things up and think outside the typical color palette box! Thanks so much for stopping by today, and have a marvelous day!

Filed Under: simon says stamp Tagged With: alcohol markers, foil transfer cards, halloween, OLO marker, spooky sweets

Blue for Halloween with Simon Says Stamp!

August 6, 2024

This post is sponsored by Simon Says Stamp. Thanks, Simon!

Hi friends! I got into the groove with some of the new Halloween-themed goodies from the Simon Says Stamp Cheering For You release. I don’t typically create much for Halloween, preferring instead to focus on things that are pretty and not gory or spooky, but these new items were so cute and definitely inspiring! I think my lack of interest in Halloween crafts stems from not being a huge fan of orange, but I have discovered that, when paired with certain accent colors, orange can be lovely and not too garish. I paired a few older products with the new Halloween Friends set and a unique royal blue and orange color palette to create this cute, sparkly Halloween card. Let’s get started with the details!

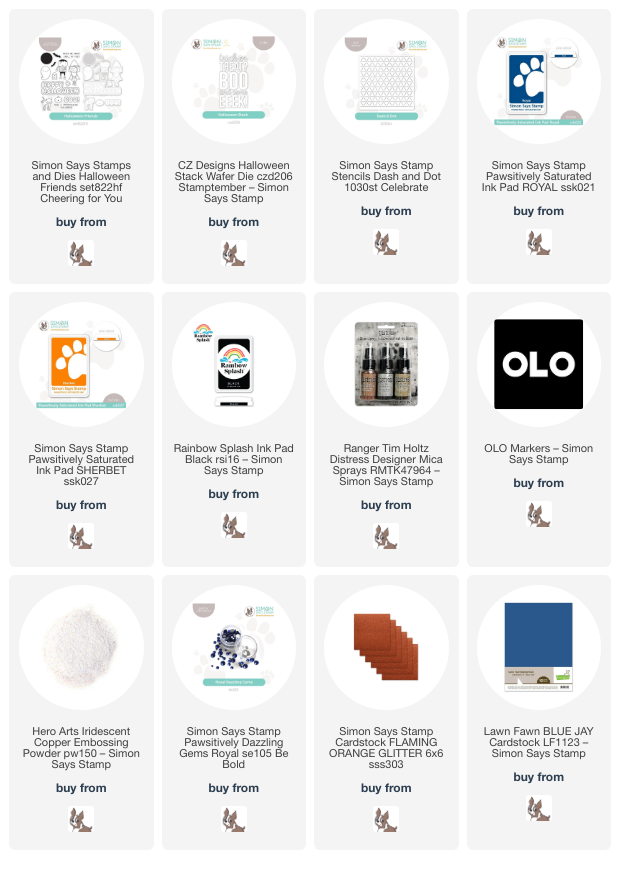
I started my project by stamping several of the images from the new Halloween Friends set onto some white cardstock using Rainbow Splash Black ink, which is alcohol marker-friendly! I colored the images using OLO markers in a palette of orange, blue, and black, then die cut the images with their coordinating dies. I also stamped a greeting from the Halloween Friends stamp set onto some royal blue cardstock and heat embossed it with Iridescent Copper embossing powder.

For the background, I used blending brushes to blend Royal and Sherbet Pawsitively Saturated Ink at the top and bottom of a white A2 card front, making sure to slacken my pressure as I got towards the center of the card front so that the two colors would not mix and create a muddy mess. After I had finished blending, I taped the panel to the Dash + Dots stencil and sprayed it with some Distress Antiqued Bronze Mica Spray, creating a subtle metallic shimmer pattern in the background.

While my background panel was drying, I die cut the Halloween Stack die from some royal blue cardstock and removed the die cut letters, reserving the centers of the letters. I trimmed down a panel of orange glitter paper that was slightly larger than the Halloween Stack die cut and mounted the blue sentiment piece in the center. I also adhered the centers of the letters (like the O and A) to create the negative image. I popped the sentiment die cut up on the blended and spritzed background using thin foam adhesive squares, then used the thicker foam adhesive squares to pop up the colored Halloween die cuts, resting them on the embossed sentiment strip. Finally, I added a few Royal Pawsitively Dazzling Gems for added sparkle.

Well, that’s all for my project today! This orange and royal blue color combination is definitely a new one for me, but I am really enjoying this tweak to the typical autumnal color palette. I hope I’ve inspired you to try tweaking things to fit them into your own personal style, too! Thanks so much for stopping by today, and have a marvelous day!

Filed Under: simon says stamp Tagged With: dash and dot stencil, halloween, halloween friends, halloween stack, ink blending, mica spray, OLO marker, stencil

  • « Go to Previous Page
  • Page 1
  • Page 2
  • Page 3
  • Page 4
  • Page 5
  • Go to Next Page »

Primary Sidebar

  • Facebook
  • Instagram
  • Pinterest
  • YouTube

Favorite Shops

Secondary Sidebar

Subscribe

Enter your email address to subscribe to this blog and receive notifications of new posts by email.

Instagram
Something is wrong.
Instagram token error.
Follow
Load More

Archives

Tags

3D embossing folder alcohol markers better press birthday birthday card blog hop card kit christmas christmas card christmas tag colored pencil copic copic coloring Daniel Smith die cutting embossing folder embroidery felt giveaway holiday holiday card hot foil ink blending karin brushmarker pro layered stencil masculine my monthly hero new release no line coloring no line watercolor OLO marker olo markers original illustration pawsitively saturated rainbow shaker card slimline stamping stamptember stencil thank you thinking of you valentine's day video watercolor

Popular Posts

Simon Says Stamp October 2026 Card Kit of the Month: Homespun Gratitude!
February 2018 My Monthly Hero Blog Hop!
Altenew Craft A Flower: Poppy Blog Hop+Giveaway!
Felted Gourd Wall Hanging with Simon Says Stamp!
Sunflower Home Decor with Simon Says Stamp!
Craft Your Life Project Kit: Feathered Lilies Blog Hop+Giveaway!
Simon Says Stamp October 2025 Card Kit of the Month!
Altenew Standalone Die Blog Hop+Giveaway!
The Ton Anniversary Release- Day 2
Honey Bee Stamps Cheerful Love Blog Hop!

Disclosure

Some affiliate links are used in my posts. This means that, should you click on one of my links and purchase something from that company, I will receive a small portion of the sale at no extra cost to you. I use the money earned from these sales to help maintain my blog. I so appreciate you visiting and, if you do choose to use one of my affiliate links, thank you so much for your support!
Copyright © 2026 ·Brunch Pro Theme · Genesis Framework by StudioPress · WordPress · Log in
Loading Comments...